Photo report
There are many reasons why you need to service any vehicle yourself. Maybe the posted photos will help someone with this. And so, we have Skoda Octavia 1.9 TDI engine code letter AGR. We change the oil and all the filters. At the same time, we try to fulfill the requirements of the service instructions known to us, and especially for cleanliness, since dirt catastrophically reduces the resource of any engine, and especially for a diesel engine, and even with a turbine ...
Injection, ignition systems
(Injector, ignition system)
Skoda Octavia since 1996 of release: Repair and maintenance (rus.) CD. 115 Mb.
General service information
Suitable for many cars VW, Skoda, SEAT, Audi
Decoding of the vehicle's original equipment
Decoding of VAG factory equipment in Russian!
Diagnostics Volkswagen, Audi, Skoda, Seat, error codes.
If you did not find information on your car, look at the cars built on the platform of your car.
With a high degree of probability, the information on repair and maintenance will be suitable for your car as well.
Typically an instruction manual Vehicle represented by a huge book containing the slightest details regarding the operation of a particular mechanism. Skoda Octavia A4 in this case also does not differ in comparison with its brothers, although sometimes it is easier to use the help of station employees Maintenance than to delve into the instructions written on 300 pages, and also go figure out what's what and how it works. In addition, the manufacturers of the Octavia sedan model have equipped the operating instructions with additional pictograms, which, on the one hand, simplify the work with the car, and on the other, complicate the process. As for me, such schemes are useful for the Pro, they are constantly faced with various irregularities in the operation of the Skoda Octavia A4. We will try to present you with a simplified manual for working with a car, which will highlight the main points that impede the normal functioning of this vehicle.
Troubleshooting instructions
So, for example, let's look at the main problems. Firstly, this is a malfunction of the air filter, due to which air masses are circulated in the passenger compartment.
This purifier filters the air from toxic impurities, dust and dirt containing pathogenic microbes and bacteria.
During the correct operation of the device, the driver and his passengers breathe fresh air. The filter is represented by a panel type design, which is installed on the Skoda Octavia injection type, and resembles a flat box containing a corrugated element.
 The inner part must be replaced after overcoming a certain mileage, which can be reproduced independently or by contacting the workshop personnel. The author of the Skoda car operating instructions recommends changing the corrugated element every 25,000 km. Its cost is presented in a democratic amount, and therefore will not cause much damage to your financial situation. True, some car owners try to independently clean or wash the inside of the filter under running water, but the quality of its work will deteriorate significantly, which will undoubtedly affect the health of the car owner in the near future.
Functioning of electrical systems
 In the Skoda Octavia operating manual, you can also familiarize yourself in detail with the operation of the windshield wipers, the operation of which is simply necessary during rainy weather or precipitation in the form of snow. If, while starting the engine, you pressed the switch, and the wipers remained stationary, then there is a malfunction in the operation of the mechanism. There are three main reasons: blown fuses, broken switch, or loose contacts. Therefore, first try to move the connectors and only then change the fuses or the button itself.
Skoda Octavia first generation general information
GENERAL INFORMATION ABOUT THE CAR
Skoda Octavia car built on the same platform as Volkswagen golf the fourth generation, was first introduced in 1996. Initially, this model was produced with a hatchback body, and two years later, sales of the station wagon began.
In 2001, the model was restyled. In 2004, with the advent of the new generation Skoda Octavia, the old one was not taken out of production, but renamed into the Skoda Octavia Tour. Since 1997, Skoda Octavia Tour cars intended for sale in Russia have been equipped with 1.6 l (75 hp), 1.6 l (101 hp), 1.8 l (150 hp) gasoline engines. .) and a 1.9 liter diesel engine (90 hp).
In 2001, a 1.6-liter, 75 hp engine was removed from the engine range. and added 1.4 L (75 HP) and 1.6 L (102 HP) engines. From 2008 to 2010, the assembly of the Skoda Octavia Tour was organized in Kaluga. In 2010, the Skoda Octavia Tour was discontinued in Ukraine, and on November 10, 2010, the last copy of the car rolled off the assembly line of the plant in the Czech city of Vrchlabi. Russian dealers currently offer a choice of cars with hatchback and station wagon bodies, with petrol engines of 1.4 liters (75 hp), 1.6 liters (102 hp) and 1.8 liters (150 hp). from.) and a diesel engine of 1.9 liters (90 hp). When restyling in 2001, the car received transparent plastic headlight diffusers instead of glass, completely painted bumpers appeared, changed taillights and a radiator grill. An innovation in the cabin is a modified instrument panel, which differs from the panel of the previous model in size and more expensive material. The five-speed manual transmission is the only option available for the 1.4L (75hp) petrol engine.
For other versions, both a five-speed manual and a four-speed automatic transmission are provided. Before restyling in 2001, cars were produced in the LX, GLX and SLX versions. Subsequently, they were given the names "Classic", "Ambient" and "Elegance", respectively. LX version ("Classic") includes three-point seat belts (5 pcs.) For front and rear seats, headlights with halogen lamps, power steering, windscreen wiper rear window(combi), black roof rails (combi), 12 V socket installed in luggage compartment(combi) full size spare wheel, immobilizer, vanity mirror in the driver's and passenger's sun visors, rear mud flaps, driver's airbag, cabin filter, audio preparation (4 speakers + antenna), ashtray and cigarette lighter, glove box with lighting, ISOFIX child seat mounts in the rear seat, folding backrest (in a ratio of 40:60) in parts rear seat, tinted glass, two rear head restraints, black moldings, adjustable in height and reach wheel, height-adjustable driver's seat, 195/65 R15 tires, 15-inch steel rims.
The GLX (Ambient) version, in addition to the LX (Classic) equipment, includes ABS, on-board computer, door open sensor, front power windows, front passenger airbag, fog lights, central locking, electrically heated and electrically adjustable exterior mirrors, body-colored door handles, heated washer jets.
The SLX (Elegance) version, in addition to the GLX (Ambient) configuration, includes a height-adjustable front passenger seat, lumbar support for the front seats, central locking with remote control, automatic system climate control, heated front seats.
Introductory information
- Content
Introduction
Actions in emergency situations
Daily checks and troubleshooting
Car operation in winter period
A trip to the service station
Operation and maintenance manual
Precautions and safety rules when working on a car
Basic tools, measuring devices and methods of working with them
Engine
Power supply and engine management systemLubrication system
Cooling system
Intake and exhaust system
Transmission
Drive shafts
Chassis
Brake system
Steering
Body
Heating, ventilation and air conditioning system
Passive safety
Electrical equipment
Wiring diagrams
Explanatory dictionary - Introduction
INTRODUCTION
The history of the Octavia began in 1959. Brutal, simple and reliable car with a sturdy body and good driving characteristics, which were appreciated and deserved many prizes at international competitions. Production lasted until 1964, when the Octavia was completely replaced by new model.
The second time Octavia appeared only in September 1996 at the Paris Motor Show. Serial production began in 1997. The Octavia was the first completely new model created after the transfer of the company under the control of the Volkswagen concern. The company thus "applied" for a seat in a higher class, where cars of Czech assembly have been absent altogether for the last half century.
Motorists greeted the car quite warmly. Hopes were justified that cars will acquire quality with coming to the management of Volkswagen German manufacturer... The second attractive factor was the price.
In the debut year, the Octavia was presented only in the hatchback body, and two years later, sales of the station wagon were launched, which has additional designation Combi.
This model boasts a very roomy trunk... Its volume is 528 liters, and with the rear sofa folded down - 1330 liters. The Combi, with the rear seat folded down, can hold 1,512 liters, while the maximum permissible load is 540 kg.
The model is presented in several trim levels. Basic - Classic (until 2000 - LX), except for the immobilizer, power steering and adjustable steering column, there is nothing else. The next level is Ambiente (GLX) - a set that is already more appropriate modern car: central locking, power windows and electrically adjustable rear-view mirrors, on-board computer, airbags, as well as an audio system and air conditioning.
The more expensive version is called Elegance (SLX), it has everything as in the previous two, in addition, it differs with "cast" wheels and full power accessories. Well, the most luxurious Laurin & Klement equipment includes everything to the maximum: leather interior, sunroof servo, 16-inch wheel rims, xenon headlights, parking sensors, rain sensor, heated front seats, aluminum and wood trim.
The ergonomics of the driver's seat are beyond praise. Adjustable steering column together with the ability to adjust the height of the driver's seat eliminates the problem of finding the optimal position behind the wheel. The seat itself is quite tenacious, with good lateral support.
Initially, the model was equipped with four-cylinder petrol and turbodiesel units. Gasoline had volumes of 1.6 liters and 1.8 liters, and turbodiesel - 1.9 liters. A little later, a 1.6-liter gasoline unit with a capacity of 102 hp appeared. In addition to these engines, the car was equipped with a 1.8-liter (125 hp) unit, and since 2000, a fundamentally new, environmentally friendly 1.4-liter unit.
It is worth noting the modification with a 1.8-liter turbocharged engine (1.8 T, 150 hp), which has gained popularity among drivers with an active driving style.
With the advent of the station wagon, the power units became one turbodiesel - 1.9 l TDI (110 hp), more.
In 1999, the all-wheel drive version of the station wagon debuted (modification of the 4x4 hatchback appeared a year later) with the system all-wheel drive 4-Motion, in which the torque between the axles is distributed using a Haldex clutch with an electronic control unit. Under normal road conditions, the entire moment is directed to the front wheels, however, as soon as they begin to slip, part of the traction will be partially transferred to rear wheels... In the same year, another gasoline engine appeared power unit a volume of 2.0 liters and a capacity of 115 hp.
In 2000, Octavia underwent a light facelift. So the car received slightly enlarged headlights, a different radiator grille and bumpers with a modified geometry of the openings. Unlike the hatchback, the station wagon has the same taillights. A minor upgrade was also carried out in the cabin - the rear seat was redesigned, resulting in an additional 40 mm for the rear passengers' legs. And in 2001 saw the light of the most "charged" all-wheel drive version of the RS with a forced 1.8-liter 20-valve engine, developing 180 hp.
Such a successful model, which appeared in 1996, continued to be produced with modifications and changes until 2010, despite the fact that in 2004 the heiress, the Octavia II, was released.
This manual provides instructions for the operation and repair of all modifications Skoda Octavia / Octavia Tour from 1996 to 2010.Skoda Octavia / Octavia Tour 1.4 8v
Years of issue: 1999 - 2001
Engine displacement: 1397 cm3Doors: 5
KP: mech. / Author.Fuel: gasoline
Consumption (city / highway): 10.5 / 5.7 l / 100 km1.4 16v
Years of issue: 2000 - 2010
Body type: hatchback / wagon
Engine displacement: 1390 cm3Doors: 5
KP: mech. / Author.Fuel: gasoline
Fuel tank capacity: 55 l
Consumption (city / highway): 9.0 / 5.4 l / 100 km1.6 8v
Years of issue: 1996 - 2000
Body type: hatchback / wagon
Engine displacement: 1598 cm3Doors: 5
KP: mech. / Author.Fuel: gasoline
Fuel tank capacity: 55 l
Consumption (city / highway): 10.8 / 5.8 l / 100 km1.6 8v
Years of issue: 2000 - 2010
Body type: hatchback / wagon
Engine displacement: 1595 cm3Doors: 5
KP: mech. / Author.Fuel: gasoline
Fuel tank capacity: 55 l
Consumption (city / highway): 10.0 / 5.5 l / 100 km1.8 20v (125 HP)
Years of issue: 1996 - 1999
Body type: hatchback / wagon
Engine displacement: 1781 cm3Doors: 5
KP: mech. / Author.Fuel: gasoline
Fuel tank capacity: 55 l
Consumption (city / highway): 13.3 / 6.8 l / 100 kmSkoda Octavia / Octavia Tour 1.8 20v (150 HP)
Years of issue: 1998 - 2010
Body type: hatchback / wagon
Engine displacement: 1781 cm3Doors: 5
KP: mech. / Author.Fuel: gasoline
Fuel tank capacity: 55 l
Consumption (city / highway): 12.8 / 6.9 l / 100 km1.8 20v (180 HP)
Years of issue: 2001 - 2006
Body type: hatchback / wagon
Engine displacement: 1781 cm3Doors: 5
KP: mech. / Author.Fuel: gasoline
Fuel tank capacity: 55 l
Consumption (city / highway): 10.8 / 6.4 l / 100 km2.0 8v
Years of issue: 1999 - 2010
Body type: hatchback / wagon
Engine displacement: 1984 cm3Doors: 5
KP: mech. / Author.Fuel: gasoline
Fuel tank capacity: 55 l
Consumption (city / highway): 12.6 / 6.8 l / 100 km1.9TDI
Years of issue: 1996 - 2010
Body type: hatchback / wagon
Engine displacement: 1896 cm3Doors: 5
KP: mech. / Author.Fuel: diesel
Fuel tank capacity: 55 l
Consumption (city / highway): 6.6 / 4.1 l / 100 km - Emergency response
- Exploitation
- Engine
Instructions for operation of Skoda Octavia / Skoda Octavia Tour 1996-2010 Operation and Skoda service Octavia / Skoda Octavia Tour 1996-2010
2. Operation and maintenance of the car
Refueling
All Skoda vehicles with petrol engines are equipped with an exhaust gas catalyst and can only be fueled with unleaded petrol. Unleaded petrol must comply with CSN (DIN) EN228.
For engines requiring the use of unleaded "Natural" gasoline from oct.h. 95, you can also use unleaded gasoline "Natural" from oct.h. 91. However, a slight decrease in engine power must be taken into account.
For engines requiring the use of unleaded "Natural" gasoline from oct.h. 98, you can also use unleaded gasoline "Natural" from oct.h. 95. A slight decrease in engine power is possible. If you do not have any unleaded "Natural" gasoline from Oct. 98 nor "Natural" from Oct. 95, in case of emergency you can also use unleaded gasoline "Natural" with oct.h. 91. Fill up with oct.h. unleaded "Natural" gasoline. 98 and, accordingly, "Natural" from Oct. 95 as soon as possible.
Gasoline with a higher octane number than that provided can be used without restrictions. However, no fundamental advantages can be expected in terms of engine power and consumption!
The behavior, power and durability of an engine are decisively influenced by the quality of the fuel. Do not add any additives to the fuel.
Use fuel that is correct.
ATTENTIONEven one single refueling with leaded petrol will render the exhaust gas catalytic converter unusable.
If a petrol with a lower octane rating than specified is used, the engine may be damaged due to increased engine speed or heavy load.
Diesel fuel
Your car can be operated using diesel fuel complying with the EN 590 standard.
Fuel additives that improve its "fluidity" (gasoline and the like) must not be added to diesel fuel.
If the quality of diesel fuel is deteriorating, the water from the fuel filter must be drained more often than indicated in the Service Book.
ATTENTIONUse fuel that meets the EN 590 standard. Even one single refueling with non-compliant fuel can cause damage. component parts engine power supply systems.
Accumulated in fuel filter water can cause poor engine running.
Your car is not adapted for the use of biofuels, therefore, you cannot fill up with this fuel and use it to move the car. Using biofuels (RME) can damage the engine or power system.
Winter operation
Petrol stations in winter offer a different type of diesel fuel than in summer. In the case of using "summer diesel fuel", there may be interruptions in operation at ambient temperatures below 0 ° C, since diesel fuel thickens due to paraffin release.
For this reason, the CSN (DIN) EN 590 standard stipulates for certain seasons of the year the diesel class that can be dispensed in a given period "Winter diesel" remains fully applicable even at temperatures of -20 ° C.
In countries with different climatic conditions, in most cases, they offer such types of diesel fuel, which differ in different temperature parameters. Local stations service maintenance Skoda and petrol stations in these countries can certainly provide you with information on the commonly used diesel fuels in a given country.
Refueling

Opening the hinged fuel filler cap
Open the fuel filler cap by hand.
Unlock the fuel filler cap by turning the key to the left.
After unscrewing the fuel filler plug to the left, slide it over the top of the hinged cap.
Closing the hinged fuel filler cap
Screw the fuel filler plug to the right side until the ratchet clicks into place.
Lock the fuel filler cap by turning the key to the right and remove the key.
Lean back the fuel filler cap.
A decal located on the inside of the fuel filler flap indicates the type of fuel required for your vehicle.
The fuel tank has a capacity of approx. 55 liters.
Engine compartment

1. Expansion tank for the cooling system 2. Expansion tank for the power steering pump 3. Tank washer fluid 4. Level dipstick engine oil 5. Oil filler neck 6. Expansion tank of the main brake cylinder 7. Battery
Engine oil
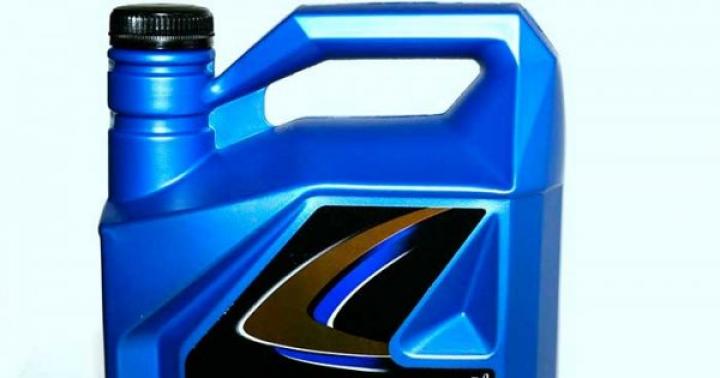
Engine oil specification
The type of oil depends on precisely defined specifications.
At the factory, the engine is filled with a special high-quality multigrade oil that can be used all year round, except for climatic zones with extremely cold climates.
When refueling, the oils can be mixed together. However, this does not apply to vehicles with variable service intervals.
The following specifications must be indicated on packages alone or in conjunction with other specifications.
* Oil filling with change oil filter... During refueling, it is necessary to check the level of the filled oil, do not overfill it. The level of the filled oil varies within the range of the marks.
ATTENTIONIn vehicles with varying service intervals, only the above oils should be used. To maintain the properties of the oil due to its specification, it is recommended to add oil only with oil of the same specification. In exceptional cases, a maximum of 0.5 liters of engine oil of specification "VW 502 00" (only gasoline engines) and according to the specification "VW505 01" (only diesel engines). Do not use other engine oils - risk of engine damage!
Checking the engine oil level

Make sure the vehicle is on a level surface.
Turn off the engine.
Open the engine hood.
After waiting a few minutes, remove the oil level indicator.
After wiping off the oil level indicator with a clean cloth, insert it again into the inspection hole until it stops. Then pull out the gauge again and read the oil level.
Oil level in area (a)
Do not add oil.
Oil level in area (b)
Oil can be topped up. It may happen that the oil level reaches the area (s).
Oil level in the area (c)
The oil must be topped up. It is enough for the oil level to reach area (b).
It is normal for the engine to consume some oil. Oil consumption can be, depending on the driving method and operating conditions, up to 0.5 l / 1000 km. During the first 5,000 kilometers, consumption may be higher.
For this reason, the engine oil level should be checked at regular intervals, ideally at every refueling or before every relatively long ride.
In case of a particularly heavy engine load, for example, when driving a long distance on the motorway in summer, traveling with a trailer or when passing mountain passes, it is recommended to maintain the oil level within section (a), but not higher.
ATTENTIONUnder no circumstances should the oil level rise above area (s). Risk of damage to the exhaust gas catalytic converter.
If, for any reason, you cannot provide a sufficient amount of engine oil, do not continue driving. Switch off the engine and call an authorized workshop for assistance.
Power steering system

Control of the working fluid in the hydraulic drive
Power steering hydraulic system is charged working fluid with the designation according to the catalog G 002 000.
Check the level of the working fluid in the hydraulic drive on a cold and switched off engine. The fluid level in the hydraulic actuator should vary between the "MIN" and "MAX" marks. If the level drops to the "MIN" mark, check the power steering at a specialized workshop. Filling with hydraulic fluid alone is not sufficient.
NoteWith the engine stopped (while towing) or a broken alternator belt, the power steering does not work. But the car remains fully controllable. More effort is needed to manage.
Cooling system
Coolant
Under normal operating conditions, the vehicle's cooling system requires almost no maintenance. The coolant is formed by water, which contains 40% antifreeze. This mixture is not only frost-resistant down to a temperature of -25 ° C, but also protects the cooling system and the heating system of the car from corrosion. It also prevents limescale deposits and raises the boiling point of the coolant.
For this reason, it is impossible to reduce the concentration of antifreeze in the coolant by adding water, even outside the summer or when operating the car in countries with hot climates. The concentration of antifreeze in the coolant must be at least 40%.
If, in a cold climate, increased frost resistance is required, then the concentration of antifreeze in the coolant can be increased, but only up to 60% (which corresponds to frost resistance up to about -40 ° C). Higher concentrations of antifreeze weaken the frost resistance and also impair the cooling effect.
At the factory, the cooling system is filled with antifreeze (purple) according to the TL-VW 774 F specification.
In case of adding another coolant or in any doubt, contact a Skoda workshop.
ATTENTIONSome refrigerants can, above all, significantly weaken the corrosion protection.
Corrosion damage can lead to coolant leakage and thus serious engine damage.
Checking the coolant level

The coolant expansion tank is located on the right-hand side of the engine compartment.
Check the coolant level in the expansion tank. The coolant level of a cold engine should be within the (b) (min) and (a) (max) marks. With a hot engine, the fluid level may be slightly above the mark (a) (max).
Adding coolant
Wait for the engine to cool down.
Place a rag on the coolant expansion tank cap and carefully remove the cap.
Add coolant.
Screw in the plug until you hear a click.
The coolant to be added must meet certain specifications. If, in case of emergency, you do not have the required antifreeze, then do not add any additive. In this case, add only water and then restore the correct proportions of water and antifreeze as soon as possible at a specialized workshop.
Use new coolant to top up.
Do not overfill with liquid beyond the “max” mark.
ATTENTIONThe cooling system is under pressure! Do not open the coolant expansion tank cap while the engine is hot - risk of burns!
Antifreeze and therefore all coolant is harmful to health. Avoid any contact with coolant. Coolant fumes are also harmful to health. Therefore, always store antifreeze in the original containers in a safe place, especially inaccessible to children - danger of poisoning!
If liquid gets into your eyes, rinse them immediately with clean water and consult a doctor immediately.
Also, if coolant enters the digestive tract, consult a doctor immediately.
Brake fluid
Level check brake fluid

The hydraulic brake reservoir is located on the left side of the engine compartment. On right-hand drive vehicles, the reservoir is located on the opposite side of the engine compartment.
Check the brake fluid level on the reservoir. The level should be within the "MIN" and "MAX" marks.
A slight decrease in the fluid level is observed during the movement of the vehicle due to wear and the automatic adjustment of the brake pads, which is quite normal.
If within a short time there is a significant drop in the liquid level or the level drops below the "MIN" mark, this may mean an existing leakage brake system... Too much low level brake fluid is indicated when the warning lamp comes on. In this case, stop immediately and do not continue driving! Seek professional help.
ATTENTIONIf the liquid level falls below the "MIN" mark, do not continue driving - risk of accident!
Seek professional help.
Brake fluid change
Brake fluid is hygroscopic - it absorbs moisture. Because of this property, the liquid absorbs atmospheric humidity from the surrounding air during its use. High water content in brake fluid can lead to corrosion of the brake system. In addition, the boiling point of the brake fluid is lowered due to the water content in the brake fluid. For these reasons, you need to change the brake fluid after two years of use.
Only new original brake fluid approved by Skoda Auto may be used. Specification: "FMVSS 116 DOT 4".
ATTENTIONIf you use too old brake fluid, then when the brakes are heavily loaded, bubbles from the evaporated water can form. This phenomenon significantly reduces the efficiency of the braking system and thus driving safety.
Brake fluid is poisonous! For this reason, you need to store it in closed original containers in places inaccessible to unauthorized persons.
Brake fluid eats away at the painted surfaces of the vehicle.
Acceleration and movement of the car
Steering wheel adjustment

The position of the steering wheel can be adjusted in height and in the longitudinal direction.
Adjust the driver's seat first.
Fold down the handle under the steering column.
Adjust the steering wheel to the desired height and longitudinal position.
Press the handle all the way up against the steering column.

The position of the steering wheel cannot be adjusted while the vehicle is moving!
It is important for the driver to maintain a distance of at least 25 cm from the steering wheel. If this minimum distance is not observed, the airbag may not be able to provide a protective effect - if activated, it could be life-threatening!
For safety reasons, you can only operate the car after the handle is securely in its original position, otherwise the steering wheel could suddenly change its position while the car is moving - danger of an accident!
Adjusting the steering wheel closer to your face will limit the protective effect of the driver's airbag. Make sure the steering wheel is pointing towards the chest.
While driving, hold the steering wheel firmly with both hands on the outer edge at the 9 o'clock and 3 o'clock position. Never hold the steering wheel in the 12 o'clock position or otherwise (eg in the middle or by the inner edge). This could result in serious injuries to the shoulders, arms and head when the airbag is deployed.
Egnition lock

Petrol engines
(1) - the ignition is off, the engine is stopped, the steering mechanism can be locked.
(2) - ignition on
(3) - starting the engine
Diesel Engines
(1) - the fuel supply is interrupted, the ignition is off, the engine is stopped, the steering mechanism can be locked.
(2) - preheating the diesel engine, ignition on. If the device for preheating is turned on, then do not turn on electrical consumers with increased take-off, so as not to overload the battery.
(3) - starting the engine.
The following applies to all vehicles:
Position (1)
The control is locked (the steering wheel shaft is locked) after removing the key from the ignition by turning the steering wheel left or right until the steering wheel shaft lock jumps into the locked position. In principle, the steering mechanism should always be locked when leaving the vehicle. This makes possible theft of your car more difficult.
Position (2)
If you cannot turn the key to this position, or if it is only possible with difficulty, then release the steering wheel shaft lock by moving the steering wheel a short distance to both sides.
Position (3)
In this key position, the engine starts. At the same time, the lighted high-beam or low-beam headlights or other electrical consumers with a large current take-off are switched off for a short time. When the key is released, the key returns to position (2).
Before any restart of the engine, the key must be returned to position (1). This eliminates the possibility of starting an already running engine.
Key protection device (automatic transmission)
The key can be removed after turning off the ignition if the selector lever is in position P.
ATTENTIONIf the car is driven with the engine off, the key must always be in the ignition switch in position (2) (ignition on). This position is signaled by the lighting up of the signaling devices. Failure to comply with this rule may suddenly lock the steering wheel shaft, danger of accident!
Remove the key from the ignition lock only after the vehicle has come to a complete stop and has been secured in place (by tightening the handbrake lever or moving the selector lever to position P). Otherwise, the steering wheel shaft lock may suddenly and unexpectedly lock the steering wheel shaft. Danger of accident!
When leaving the vehicle, even for a very short time, always remove the key from the ignition. This is especially true if children are left inside the vehicle. Children could start the engine or switch on electrical equipment (eg power windows) - risk of accident or injury!
Starting the engine
General Provisions
The engine can only be started with an original key.
Before starting the engine, shift the gear lever to neutral (on vehicles with an automatic transmission, move the lever to P or N) and firmly tighten the hand brake lever.
When starting the engine, press the clutch pedal all the way down, as a result of which the starter cranks only the engine.
As soon as the engine starts, immediately release the key in the ignition switch so as not to damage the starter.
After starting a cold engine, a short increase in engine noise may result, since during the hydraulic adjustment of the clearance in the valve drive, oil pressure must first build up. This is normal and there is no need to worry about it.
If the engine does not start:
Use another vehicle's battery as a starting aid as shown in the illustration.
It is only possible to start the engine by towing on vehicles with mechanical box gear. The distance to start the engine by towing the car must not exceed 50 m.
ATTENTIONNever leave the engine running in an unventilated or confined area.
Exhaust gases contain, among other things, poisonous gas - carbon monoxide (CO), colorless and odorless - danger to life! Carbon monoxide can cause fainting and death.
Never leave a car with a running engine unattended.ATTENTION
The starter can only be activated (key position in the ignition switch (3)) when the engine is stopped. If the starter is activated immediately after the engine has been turned off, damage to the starter or engine may occur.
Until the engine has reached operating temperature, avoid full throttle driving, high engine speed and high engine load - risk of engine damage!
On vehicles with an exhaust catalyst, do not tow the engine more than 50 m away, otherwise unburned fuel can enter the exhaust gas catalytic converter and ignite in it, causing the catalyst to overheat and render it unusable.
Gasoline engines are equipped with a multi-point fuel injection system that delivers the perfect mixture of fuel and air.
Do not add gas before and during engine start.
If the engine does not start within 10 seconds, stop trying to start and try again after about 30 seconds.
If the engine does not start even after the second start attempt, the reason for this may be a blown fuse of the electric fuel pump. Check the fuse and replace if necessary.
Contact your nearest authorized service station for assistance.
After starting a very hot engine, it is advisable to "add gas" a little.
Diesel engines are equipped with a preheating (glowing) device, the duration of which automatically adjusts to the coolant temperature and the outside temperature. After turning on the ignition, the preheating (glowing) warning light comes on
During preheating (heating), do not turn on any electrical consumers in order to avoid unnecessary loading of the battery.
Start the engine immediately after the preheating (glowing) warning lamp goes off.
When the engine is warm or at temperatures above +5 ° C, the indicator lights up for about a second. This means that the engine can be started immediately.
If the engine does not start even after the second start attempt, this may be due to a blown fuse in the preheating (glowing) device. Check the fuse and replace if necessary.
Contact your nearest specialized workshop for assistance.
Starting the engine after the fuel tank is completely empty
After emptying the fuel tank completely and refueling with diesel fuel, it may take longer than usual to start the diesel engine - up to one minute. This is due to the fact that during start-up, the power system must first be filled.
Stopping the engine
Stop the engine by turning the ignition key to position (1).
ATTENTIONNever stop the engine before the vehicle has come to a complete stop - risk of accident!
The brake booster works only when the engine is running. If you brake with the engine stopped, then you need to apply more force to the brake pedal. Since it is impossible for you to stop the vehicle in the usual way, you run the risk of a traffic accident and serious injury.ATTENTION
After a relatively prolonged increased engine load, turn off the engine not immediately after stopping the movement, but leave the engine running at revs. idle move OK. 2 minutes. In this way, prevent overheating of the stopped engine.Note:
After turning off the ignition, the cooling fan can continue to run for about 10 minutes. The fan can start up again even after a relatively long period of time if the coolant temperature has risen as a result of heat accumulation or if the engine is additionally heated by strong sunlight.
For this reason, work in the engine compartment with extreme caution.
Manual Transmission
Gear shift

Transfer reverse only switch on when the vehicle is stationary. When engaging reverse gear with the engine running, you need to wait briefly with the clutch pedal fully depressed in order to reduce the noise level of the gearbox when reverse gear is engaged. If the ignition is on, the reverse headlights will light up when the reverse gear is engaged.
ATTENTIONNever engage reverse gear while the vehicle is moving - risk of accident.
Parking brake

Tightening the hand brake lever
Pull the handbrake lever fully up.
Releasing the tightened hand brake lever
Raise the handbrake lever slightly upwards while pressing the lock button.
Keeping the lock button depressed, squeeze the handbrake lever to its original down position.
When the handbrake lever is tightened and the ignition is on, the parking brake indicator is on.
In the event that you neglect to move with the handbrake lever pulled, a buzzer (warning beep) will sound on the information display, and the driver will be prompted: HANDBRAKE ON.
The handbrake lever applied warning is activated after at least three seconds the vehicle is moving at a speed exceeding 6 km / h.
Cruise control
Cruise control is a device that allows you to maintain a set constant speed in excess of 30 km / h without the need to depress the accelerator pedal. The selected speed is maintained on condition that the engine power and its braking effect allow. Thanks to the use of this device - especially on long sections of the road - you can “lighten your foot on the accelerator pedal”.
ATTENTIONFor traffic safety reasons, the cruise control must not be operated in heavy traffic or in poor road conditions (e.g. ice, slippy road, crushed stone) - risk of accident!
To avoid unwanted activation of the cruise control, always turn it off after use.Note
Vehicles with manual transmission: if you engage idle speed with the cruise control on, always press the clutch pedal! Otherwise, the maximum permissible engine speed may be exceeded.
On steep slopes, the cruise control is unable to maintain a constant speed. The speed is increased by the weight of the curb vehicle. Therefore, you should change in time to a lower gear or brake the car by applying the brake.
On vehicles with an automatic transmission, it is not possible to engage the cruise control when the selector lever is in the P, N or R positions.

The cruise control knob is operated with a slide switch (A) and a push button (B) on the left handle of the multifunction switch.
Turn the pushbutton switch (A) to the ON position.
After reaching the required speed, press the button (B) in the SET position - the current speed will be memorized.
After pressing the button (B) in the SET position, the vehicle maintains the just loaded speed without accelerator pedal control.
The speed can be increased by pressing the accelerator pedal. After releasing the pedal, the speed will drop to the value previously loaded into memory.
However, the above does not apply to the case of exceeding the value loaded in the memory by more than 10 km / h, longer than 5 minutes.
The loaded speed is flushed from the memory contents. The speed must be remembered again.
The speed can be reduced in the standard way. Depressing the brake or clutch pedal temporarily deactivates the cruise control.
ATTENTIONThe speed loaded in memory can be resumed only if it is not too high for the current traffic situation.
Changing the speed loaded in memory
The speed can also be changed without the need for the accelerator pedal.
Acceleration:
The speed loaded in memory can be increased without the need to press the accelerator pedal by pressing the push-button switch (B) in the RES + position.
By keeping the pushbutton switch in the RES + position pressed, you will achieve a smooth increase in speed. After reaching the required speed, release the pushbutton switch. As a result of the above, this new speed is entered into memory.
Deceleration:
The speed loaded in memory can be reduced by pressing the button (b) in the SET- position.
Keeping the pushbutton switch in the SET-position pressed, you will achieve a smooth decrease in speed. After reaching the required speed, release the button. As a result of the above, the new speed is entered into memory.
When the push button is released at a speed lower than 30 km / h, the speed is not entered into the memory, but the memory contents are cleared. After increasing the speed over 30 km / h, you must memorize it again by pressing the R button in the SET- position.
Temporarily deactivating cruise control
The cruise control is temporarily deactivated by pressing the brake or clutch pedal. The loaded speed is stored in the memory.
The stored speed is restored again by pressing the button (B) in the RES + position after releasing the clutch pedal or the brake pedal.
ATTENTIONThe speed loaded in memory can be resumed only if it is not too high for the current traffic situation.
Turning off cruise control completely
Turn the push-button switch (A) to the right to the OFF position.
Instruments and signaling devices

1. Tachometer 2. Coolant temperature gauge 3. Fuel gauge 4. Speedometer 5. Digital clock, multifunction display 6. Information display 7. Clock setting button 8. Reset button 9. Total and daily mileage counter, service interval indicator
Tachometer
The beginning of the red sector of the tachometer scale indicates for all gears the maximum allowable speed for a run-in and warm-up engine. Before reaching this sector, shift to the next highest gear or dial position D of the selector lever automatic box gear. It is necessary to switch to a lower gear as soon as the car stops driving smoothly, evenly. Avoid excessive engine speed during break-in.
ATTENTIONThe tachometer needle must never fall into the red field of the tachometer scale - there is a risk of damage to the engine.
Coolant temperature gauge
Low temperature zone
While the pointer arrow is on the left side of the scale, the engine has not yet warmed up to its operating temperature. Avoid driving at high engine speeds, full throttle and do not subject the engine to heavy loads.
Working temperature zone
At the moment when the pointer arrow hits the middle section of the scale, the engine has reached its operating temperature. With increased engine load and increased outside temperatures, the pointer arrow may deviate more to the right. This deviation is not significant until a warning symbol flashes on the instrument panel.
ATTENTIONAdditional headlights and other accessories in front of the engine compartment fresh air vents reduce cooling performance.
Fuel gauge
The fuel gauge works only when the ignition is on.
The capacity of the fuel tank is about 55 liters. At the moment when the pointer arrow falls to the area of the fuel reserve, a warning symbol on the instrument panel will light up. At the moment in fuel tank there is still approx. 7 liters of fuel. This symbol reminds you to refuel.
The information display reads: Please refuel.
An audible signal is also sounded as a warning signal (1 short beep).
ATTENTIONNever use up the fuel tank completely! An irregular supply of fuel to the fuel supply system can lead to misfiring or ignition in the engine. Unburned fuel can enter the exhaust system and damage the catalytic converter.
Distance counter

Display: Daily trip counter
The distance traveled is indicated in kilometers (km). Some performances use mile as the unit of measure.
With the ignition off, the display shows the total distance traveled counter. After turning on the ignition, the display shows the daily trip counter. The counters can then be switched over with the reset button.
Reset button
By briefly pressing the reset button, it is possible to switch between the daily trip counter and the total distance traveled counter. You can find out which counter exactly is shown on the display by the fact that the daily trip counter displays trip after the indication of the distance traveled.
If you hold the button for 1 sec., The reading of the daily trip counter is reset. If you press the button with the ignition on for more than 3 s, an image of the number of kilometers or days remaining until the next service inspection appears (the display of the daily trip counter is not reset in this case).
Fault indication
If there is any malfunction in the instrument panel, then the permanently displayed display def appears on the display of the daily trip counter. Have the fault rectified as soon as possible by a specialist workshop.
Overspeed alarm
In case of exceeding the speed of 120 km / h you will be warned of this fact by an audible alarm. If the speed falls below this limit, the overspeed alarm is turned off.
ATTENTIONFor safety reasons, do not reset the daily trip counter while the vehicle is moving, but only when the vehicle is stationary!Note:
On vehicles without a multifunction display or with an information display, both counters are shown on the display at the same time.
Service interval indicator

The display may differ depending on the vehicle equipment.
Approximately 30 days before the due date of the next service inspection, a key symbol is shown on the display of the trip counter. Next to the key symbol is displayed for 10 s. indication of the remaining number of kilometers, and then for 10 s. - indication of the remaining number of days until the next service inspection.
The information display shows:
"Service in ... km or ... days"
The indication for kilometers and, accordingly, for the time remaining until the next service inspection, decreases gradually in steps of 100 km and in 1 day, respectively. As soon as the due date for the service inspection has been reached, a flashing key symbol appears on the display.
Service now
The display disappears approximately 20 seconds after the ignition is switched on. The readings of the daily trip counter can also be called up by pressing the reset button of the daily trip counter for longer than 1 sec.
Image of the number of kilometers and days remaining until the next service inspection
The number of kilometers and days remaining until the next service inspection can be displayed at any time as follows:
Switch on the ignition and press the reset button for more than 3 seconds. The key symbol appears on the trip meter display. Next to the key symbol is displayed for 10 sec. indication of the remaining number of kilometers and then for 10 seconds. - indication of the remaining number of days until the next service inspection.
Resetting the service interval indicator
Dedicated service station:
The contents of the pointer memory are reset after performing the appropriate inspection;
Make an entry in the Service Book;
Paste a sticker on the side of the dashboard on the driver's side, where the date of the next service inspection is marked.
It is also possible to reset the readings of the service interval indicator using the reset button as follows:
With the ignition off, press the reset button and keep it pressed. With the ignition on, release the reset button and turn it slightly to the right. As a result of the above, the indication is reset.
ATTENTIONIt is not recommended to reset the readings of the indicator of the frequency of service maintenance by yourself, otherwise there may be an erroneous setting of the frequency of service maintenance, as a result of which various kinds of malfunctions may appear on the car.Note:
In the interval between service inspections, do not reset the pointer, otherwise you may get distorted readings.
When the battery is disconnected, the readings of the service interval indicator are saved.
If the instrument panel was replaced as part of the repair, the service frequency indicator must be re-coded. This operation is performed at specialized service stations. After resetting the gauge with extended variable service intervals using the reset button, the data is displayed in the same way as for vehicles with precisely defined extended service intervals. For this reason, we recommend that you only reset the service intervals at a service station where a correct reset is performed using a diagnostic tool.
Digital clock
Clock setting
To set the time, use the control button located next to the speedometer, below to the left of it.
Turn the control knob to the left.
Setting minutes
Turn the control knob to the right.
ATTENTIONFor safety reasons, do not adjust the clock while the vehicle is in motion, but only when the vehicle is stationary.
Multifunctional pointer (On-board computer)
The indications of the multifunction display are shown depending on the vehicle version.
The multifunctional pointer provides a variety of useful information:
Outside air temperature page;
Power reserve;
Instant fuel consumption;
Average fuel consumption;
Vehicle movement time;
Distance traveled;
Average travel speed.
The multifunctional pointer is equipped with two automatically working memories. The accumulated memory is shown in the display field in the middle. The memory data for a single trip (memory No. 1) is displayed if No. 1 appears on the display. If No. 2 appears on the display, the memory data for the total trip (memory No. 2) is displayed. Switching the memory level is carried out with the button (B).
Note:Disconnecting the vehicle's battery resets all loaded values.

The function switch (A) and the reset button (B) are located on the wiper handle.
Memory selection
By repeated short pressing of the button (B) it is possible to recruit the required memory.
Function selection
Press the button (A) above or below. This will gradually bring up the individual functions of the multifunction pointer on the display.
1. Dial the desired memory.
2. Press button (B) for longer than 1 sec.
The button resets the following values of the accumulated memory:
Average travel speed;
Movement time. The multifunction indicator can only be serviced when the ignition is on. After turning on the ignition, the function that was dialed last before turning off the ignition will be displayed.
If the outdoor temperature drops below + 4 ° C. The outdoor temperature is displayed with a snowflake symbol (ice warning) and an audible alarm sounds for 10 seconds. The symbol warns the driver of the possibility of ice formation. The display will automatically switch to the originally dialed function after 10 seconds.
Outdoor temperature
The outside temperature is shown on the display with the ignition on.
The correct value is displayed with a delay of about 5 minutes. With the vehicle stationary or at too low a driving speed, the indicated temperature may be higher than the outside temperature due to the heat generated by the engine. If the outdoor temperature drops below +4 ° C, the outdoor temperature display with a snowflake symbol (ice warning) is displayed and an audible alarm sounds for 10 seconds.
ATTENTIONNever rely entirely on the fact that the road is free of ice, based only on the reading of the outside temperature gauge. Keep in mind that ice may form even at an outside temperature of +4 ° C - ice warning!
Power reserve
The display shows an approximate indication of the range in kilometers. This display tells you how much distance your car can still drive with the available fuel in the tank and while maintaining the same driving style. The power reserve is shown in 10 km steps.
The basis for calculating the range is the fuel consumption over the last 50 km.
If you drive the car more economically, the power reserve will increase.
If you reset the memory contents (after disconnecting the battery), you need to drive 50 km. to display the corresponding actual value.
Instant fuel consumption
The display shows the instantaneous fuel consumption in l / 100 km According to this display you can adapt the driving method to the required fuel consumption.
In a stopped or slow moving vehicle, the display is displayed in l / h.
Average fuel consumption
The display shows the average fuel consumption in l / 100 km since the last memory reset. According to this indication, you can adapt the driving method to the required consumption.
If you want to know the average flow rate for a certain period of time, you need to reset the contents of the memory with the reset button (B) at the beginning of the measurement. After resetting this reading, the first 300 m of run are shown on the display with dashes. While the vehicle is in motion, the displayed value is updated every 5 seconds.
NoteThe amount of fuel consumed is not displayed.
Vehicle movement time
The display shows the time the vehicle has been moving since the last memory reset. If you want to measure the time of movement of the car, starting from a certain moment, you need to reset the memory contents at this certain moment by pressing the button (B).
The maximum pointer value for both memories is 99 hours 59 minutes. If this value is exceeded, the contents of the memories are discarded.
Distance traveled
The display shows the distance traveled by the vehicle since the last memory reset. If you want to measure the distance traveled by the car, starting from a certain moment, you need to reset the memory contents at this certain moment by pressing the button (B).
The maximum pointer value for both memories is 9999 km. If this value is exceeded, the contents of the memories are discarded.
Vehicle self-monitoring system
Vehicle condition
The vehicle self-monitoring system checks certain functions and the status of individual vehicle systems. The monitoring takes place continuously with the ignition on, both in a stationary car and on the move.
Malfunctions, urgent repairs, service operations or other instructions are displayed on the instrument panel display. These indications are signaled according to their priority by red and yellow illuminated symbols.
Red symbols warn of serious threats (priority 1), while yellow ones signal warnings (priority 2). In addition, the symbols also display instructions for the driver.
Check the faults shown as soon as possible. If there are more messages at the same time, the corresponding symbols light up gradually after 10 s.
Messages are displayed and stored under the VEH item. STATUS.
If the menu item VEH flashes. STATUS, this means that there is at least one fault message. If there is more than one message, ex. STATUS 1/2 This means that the information displayed is the first of two messages.
By pressing the switch (A), individual messages are gradually called up.
In the event that a malfunction occurs, in addition to the image of the symbol and the text, an audible warning signal is also heard:
Priority 1 - Three warning beeps;
Priority 2 - One warning beep.
Red symbols
Signals a serious danger.
If the display shows a red symbol, proceed as follows:
Stop the car;
Turn off the engine;
Check the signaled functions;
Call professionals for help if necessary.
When the red symbol appears, three warning signals sound.
In case of simultaneous presence of several faults of priority 1 action, the symbols appear gradually, always lighting up for about 5 s.
Yellow symbols
A yellow symbol signals a warning.
When the yellow symbol appears, one warning signal sounds.
In the event that there is more than one fault of priority 2, the symbols appear gradually and always light up for about 10 s.
Check the signaled functions as soon as possible.
Signaling devices
Signaling devices indicate certain functions or malfunctions.

Direction indicators (left)
Direction indicators (right)
Washer fluid level
Headlights high beam
Fuel supply
Low beam headlights
Engine oil pressure
Rear fog lamp
Engine hood
Door opening
Oil quantity
Tire pressure
Incandescent lamps
Locking mechanism (lock) of the selector lever
Hydraulic power steering
Exhaust gas emission control system
Traction Control (ASR)
Electronic fuel control system monitoring (petrol engine)
Preheating device ( diesel engine)
Brake system
Airbag system
ATTENTIONFailure to pay attention to illuminated warning lights, related descriptions and warnings could result in serious injury or damage to the vehicle.
The engine compartment of a car is a dangerous area. Carrying out work in the engine compartment, for example, when checking and refilling working fluids, it is possible to get injured, scalded, injured in an accident or cause a fire. Therefore, it is absolutely imperative to follow the warning instructions in this manual. Note:
The location of the signaling devices depends on the model version and the type of engine.
Malfunctions are indicated on the instrument panel display as red symbols (priority 1 - serious danger) or as yellow symbols (priority 2 - warning).
High beam headlights
The indicator lights up with a constant light when the main beam of the headlights is turned on or when the warning light is applied by means of the headlights.
Low beam headlights
The indicator lights up with a constant light when the dipped headlights are on.
Direction indicators
Depending on the position of the direction indicator switch lever, the left or right indicator flashes. In the event that one of the direction indicator lamps is out of order, the flashing frequency of the indicator becomes approximately two times higher than normal. This does not apply to driving with a trailer.
Rear fog lamp
The indicator lights up with a constant light when the rear fog lamp is on.
Control of the electronic fuel supply control system EPC (petrol engine)
The EPC (Electronic Fuel Management) warning light comes on for a few seconds after the ignition is turned on. If the EPC indicator after starting the engine does not go out or lights up with a constant light or flashes while the car is moving, this means that in electronic system fuel control (engine power control) there is a malfunction. The emergency program provided by the engine control unit will allow you to travel with extreme caution to the nearest specialized workshop. Text shown in the information display: Engine fault Workshop! (Engine To the workshop!).
Anti-theft device that prevents unauthorized persons from starting the car (Immobilizer)
When the ignition is switched on, the codes of the car key and the control unit are compared. The correctness of this matching process is confirmed by illuminating the indicator for a few seconds. If an incorrect (for example, fake) ignition key is used, the warning lamp flashes continuously and the car engine cannot be started. The engine can then only be started with an original coded Skoda key.
Text shown in the information display: (Immobilizer active).
Preheating (glowing) (diesel engine)
If the engine is cold, the warning lamp comes on after turning the key in the ignition lock to a certain position. Start the engine immediately after the warning lamp goes off.
If the engine is warm or if the outside air temperature exceeds + 5 ° C, the warning lamp comes on for approx. for 1 sec. This means you can start the engine immediately. If the indicator does not light up or it remains on continuously, then this indicates a malfunction in the preheating device. Therefore, contact a specialist workshop for help. If the warning lamp starts flashing while the car is moving, this means that there is a malfunction in the electronic fuel management system (engine power control). The emergency program provided by the engine control unit will allow you to travel with extreme caution to the nearest specialized workshop. The text shown in the information display Engine fault Workshop! (Engine - To the workshop!).
Temperature, coolant level
The indicator lights up with a constant light for a few seconds after turning on the ignition.
If the warning lamp does not go out after starting the engine or lights up or flashes while the vehicle is moving, this indicates a too high coolant temperature or too low a coolant level. An audible signal is also sounded as a warning signal (3 short beeps). In this case, stop the car, turn off the engine and check the coolant level. Add fluid if necessary. If, for any reason, you cannot provide a sufficient amount of coolant, do not continue driving. Leave the engine off and seek assistance from a specialized workshop as serious engine damage is impending.
If the coolant level is within the specified limits, the increased temperature may be caused by a malfunction of the coolant fan. Check the fan fuse and replace if necessary.
On vehicles with an information display, the indicator does not light up after turning on the ignition, but only lights up if the coolant temperature is too high or the coolant level is too low.
If the warning light does not go out, although the fluid level and blower fuse are normal, then do not continue driving. Contact a specialized workshop for assistance. Text shown in the information display: STOP Check coolant! Owner's manual! (STOP Check coolant! Instruction manual).
ATTENTIONIf you have to stop for technical reasons, park your car at a safe distance from road traffic, turn off the engine and turn on the hazard warning lights.
The coolant expansion tank must be opened carefully. The cooling system of a hot engine is under pressure - risk of burns! Therefore, leave the engine to cool before unscrewing the cover.
Do not touch the fan. The fan can operate automatically even when the ignition is off.
Fuel supply
The warning light comes on continuously when the fuel level in the fuel tank drops to a level less than approx. 7 liters.
An audible signal is also sounded as a warning signal (1 short beep). Text shown in the information display: Please refuel.
Note:The text in the information display only goes out after refueling and a short mileage.
Engine oil pressure
The indicator flashes red (low oil pressure). The indicator lights up for a few seconds after turning on the ignition.
If the warning lamp does not go out after starting the engine or starts flashing while the car is moving, stop the car and turn off its engine. Check the oil level and top up if necessary.
An audible signal is also sounded as a warning signal (3 short beeps).
If, for any reason, you cannot provide sufficient oil, do not continue driving. Leave the engine switched off and seek the assistance of an authorized workshop, or serious damage to the engine may result.
If the warning light comes on even if the oil level is normal, do not continue driving. Do not leave the car engine running, not even at idle speed. Contact your nearest authorized service station for assistance.
Text shown in the information display: STOP OIL PRESS. ENGINE OFF! OWNER "S MANUAL! (STOP OIL PRESSURE OFF ENGINE OPERATING MANUAL).
The indicator lights up yellow (insufficient oil level).
If the warning light turns yellow, it is likely that the oil level is abnormal. Check the oil level as soon as possible and top up if necessary.
An audible signal (1 short beep) also sounds as a warning signal.
The text CHECK OIL LEVEL shown in the information display.
After opening the engine hood, longer than 30 s. the indicator goes out.
If the engine oil has not been topped up, the warning lamp comes on again after about 100 km.
The indicator flashes yellow (faulty engine oil level sensor)
In the event of a malfunction on the engine oil level sensor, a sound signal warns of this circumstance and the warning lamp flashes several times. Have the engine checked immediately by a specialized workshop.
Text shown in the information display: OIL SENSOR WORKSHOP! (OIL SENSOR IN THE WORKSHOP!).
Thickness (wear limit) of brake pads
In the event that the warning light comes on, contact a specialized workshop immediately to check the brake linings on all wheels. An audible signal is also sounded as a warning signal (1 short beep). Text shown in the information display: Check brake pads! (Check the brake linings!).
Door opening
The indicator lights up with a constant light if one or more doors, the engine hood or the trunk lid are open.
This indicator lights up even when the ignition is off. In the event that one or more doors, the engine hood or the trunk lid are open, the indicator goes out 5 minutes after the ignition is turned off. When all doors are closed, the indicator goes out immediately.
Liquid level in the washer reservoir
The indicator lights up after turning on the ignition with a constant light when there is a lack of liquid in the washer reservoir. An audible signal is also sounded as a warning signal (1 short beep). Text shown in the information display: Top Up Wash Fluid.
Exhaust Gas (Exhaust Gas) Emissions Monitoring System
The indicator lights up with a constant light after turning on the ignition.
If the warning lamp does not go out after starting the engine, or if it lights up or flashes while the car is moving, this means that there is a malfunction in the exhaust gas emission control system. The emergency program provided by the engine control unit will allow you to travel with extreme caution to the nearest specialized workshop. Text shown in the information display: Emission Workshop.
Tire pressure
The warning light comes on if the pressure in any of the tires drops significantly. Reduce speed and check and, if necessary, stabilize the pressure in all tires as soon as possible.
An audible signal is also sounded as a warning signal (1 short beep). If the indicator flashes, it means that there is a malfunction in the system. Contact a specialized service station and order a remedy.
ATTENTIONIf the warning light comes on, slow down immediately and avoid sudden changes in direction of travel and sudden braking. Stop the car as soon as possible and check the tires and their air pressure.
Under certain circumstances (for example, sports driving technique, driving on winter or unsecured roads), the warning lamp may light up with a delay or it may not light up at all.Note:
If was disconnected accumulator battery, then after turning on the ignition, the indicator (1) comes on. After a short run, the indicator should go out.
Selector lever lock
If the warning light comes on, press the brake pedal. This is necessary if you need to move the selector lever out of the P and N positions.
Anti-lock braking system (ABS)
The signaling device signals the operability of the system.
The indicator lights up for a few seconds after turning on the ignition or during start-up. The indicator goes out as soon as the automatic monitoring process is completed.
Malfunction in the system.
If the indicator does not go out within a few seconds after turning on the ignition, or does not light up at all, or lights up while the vehicle is moving, this means that the device is not normal and the vehicle is braking without the anti-lock braking system. In this case, only the standard braking system works on the car. Contact the nearest authorized workshop immediately, adapting the driving method to your situation, bearing in mind that you do not know the extent of the damage and the limitations of anti-lock braking action.
In the case of a malfunction of a relatively large scale, an audible signal (3 short beeps) is also triggered as a warning signal.
Malfunction in the entire brake system.
If the warning lamp comes on together with the brake system warning lamp (when the hand brake lever is released), this means that not only the ABS system is faulty, but also another part of the brake system.
ATTENTIONIf the brake warning lamp comes on together with the ABS warning lamp, stop the vehicle immediately and check the level of the brake fluid in the expansion tank of the hydraulic brake drive. If the liquid level falls below the "MIN" mark, do not continue driving the vehicle, danger of an accident! Seek professional help.
If the brake fluid level is normal, then it is possible that the ABS regulation function has failed. As a result, the rear wheels can be locked relatively quickly during braking. This can, under certain circumstances, lead to a deflection of the rear of the vehicle - danger of skidding! Travel carefully to the nearest specialized workshop and order a repair.
Traction control system
The indicator lights up with a constant light for a few seconds after turning on the ignition. When the driving control process is active, then the indicator flashes. When the ASR system is running or in the presence of a malfunction in the system, the indicator lights up constantly.
Since the system works in conjunction with ABS, if the ABS fails, the ASR indicator also lights up.
In the event that the warning lamp comes on immediately after starting the engine, the ASR system could be turned off for technical reasons. In this case, it is possible to re-enable the ASR system by switching the ignition off and then on. If the warning light goes out, it means that the ASR system is fully functional again.
Note:If the battery has been disconnected and reconnected, then after turning on the ignition, the warning lamp and will light up. After a short run, the indicator should go out.
ESP stabilization system
An integral part of the ESP program is also automatic control of the drive wheel drive for slipping ASR, electronic differential lock EDS and anti-lock braking system ABS.
When the driving control process is active, then the indicator flashes.
When the ESP system is off or in the presence of a malfunction in the system, the indicator lights up constantly. Since the ESP system works in conjunction with the ABS device, if the ABS fails, the ESP indicator also lights up.
In the event that the warning lamp lights up immediately after starting the engine, the ESP system could be turned off for technical reasons. In this case, it is possible to turn on the ESP system again by switching the ignition off and then on. If the signaling device goes out, it means that the system is fully operational again.
Brake system
The indicator flashes or lights up with a constant light when the brake fluid level is low, when there is a malfunction in the ABS device, or when the handbrake lever is pulled.
If the warning light flashes (with the hand brake lever not tightened), stop the car and check the brake fluid level. Text shown in the information display: STOP! Brake Fluid Owner's manual.
In the event of a malfunction in the ABS device, which also affects the operation of the standard braking system (for example, the distribution brake pressure) the device warning lamp comes on together with the brake system warning lamp. Assume that it is not only the ABS device that is faulty, but also another part of the braking system. An audible signal is also sounded as a warning signal (3 short beeps). When getting carefully to a specialized service station, you should take into account the need for increased effort on the pressed brake pedal, with a longer stroke of the pressed brake pedal and provide for a lengthening of the braking distance of the vehicle.
The hand brake lever is tightened. The indicator lights up when the handbrake lever is pulled. In addition, an audible alarm is triggered if the vehicle is driven for at least 3 seconds at a speed exceeding 6 km / h. Text shown in the information display: Handbrake on! (The hand brake lever is tightened!).
ATTENTIONWhen checking the brake fluid level and opening the engine hood, observe general rules safety precautions.
In the event that the brake system indicator does not go out within a few seconds after turning on the ignition or lights up while the vehicle is moving, stop the vehicle immediately and check the level of the brake fluid in the expansion tank of the hydraulic brake drive.
If the liquid level falls below the "MIN" mark, do not continue driving the vehicle, danger of an accident! Seek professional help.
Airbag system
The indicator lights up with a constant light for a few seconds after turning on the ignition. If the indicator does not go out or lights up or flashes while the car is moving, this means that a malfunction has appeared in the system. This also applies to the case when the indicator does not light up at all after turning on the ignition. Text shown in the information display: Airbag Fault.
The operational readiness of the airbag system is also monitored by the control unit if one of the airbags is deactivated.
If the front airbag, side airbag, or head airbag was deactivated using a scan tool:
The indicator comes on after switching on the ignition for approx. for 3 sec. and then flashes for approx. 12 sec at intervals of 2 sec. Text shown in the information display: Airbag belt tensioner deactivated.
If the airbag has been deactivated using the airbag switch in the glove compartment:
The indicator lights up after turning on the ignition for 3 seconds;
The deactivation of the airbag is signaled by the AIRBAG OFF warning lamp in the middle section of the dashboard.
ATTENTIONIf there is a fault, have the system checked immediately by a specialized workshop. Otherwise, there is a danger that the system will not work in the event of a traffic accident.
Particulate filter (diesel engine)
If the warning light comes on, it means that the particulate filter is clogged with soot due to frequent short journeys.
To clean the particulate filter, it is necessary as soon as possible, if this allows traffic situation, drive for about 15 minutes. or until the indicator goes off with the 4th or 5th gear engaged at a speed of at least 60 km / h at an engine speed of 1800 to 7500 rpm. However, you must always comply with the applicable speed limits.
After successful cleaning of the filter, the indicator goes out.
If the filter is not cleaned, the signaling device will not go out, but the signaling device will start flashing. ENGINE FAULT WORKSHOP! Appears on the information display. (MALFUNCTION OF THE ENGINE IN THE WORKSHOP!) Subsequently, the engine control unit switches the engine automatically to emergency mode, in which the engine power is reduced. After turning the ignition off and on, the indicator comes on. Contact the nearest authorized workshop immediately for assistance.
ATTENTIONIf you ignore the illuminated warning lamp and do not follow the corresponding descriptions and instructions, this can lead to injury or damage to the vehicle.
Always adjust the speed of your vehicle to the weather, road conditions, terrain and traffic conditions. It is impossible that the recommendations of the actions to which you are called upon by the illuminated signaling device, lead
You for non-compliance with traffic laws.
When the warning light comes on, you need to reckon with increased consumption fuel and with reduced engine power.
Fastening seat belts
The indicator comes on after turning on the ignition to remind you to fasten your seat belt. The warning light only goes out when the driver's seat belt is fastened.
If you are not wearing a seat belt and the vehicle speed has exceeded 25 km / h, the indicator flashes for approx. 90 s and at the same time an audible alarm sounds. Text shown in the information display: Please fasten seatbelt! (Fasten your seat belt!).
Recharging the battery
The indicator comes on after turning on the ignition. After starting the engine, the indicator should go out. If the warning light does not go out after starting the engine, or if it lights up while the car is moving, go to the nearest specialized service station. Since this does not charge the car's battery, turn off all absolutely unnecessary electrical consumers in the car.
ATTENTIONIn the event that, while the car is moving, in addition to the warning lamp, the warning lamp also lights up on the display (malfunction of the cooling system), you must immediately stop the car and turn off the engine - there is a risk of engine damage.
Screen wipers and washers
Wipers

The wiper switch handle has the following positions:
Single actuation of wipers
If you want to wipe the windshield for just a short time, press the handle down to the sprung position (4). As a result of holding the handle in the lower position for longer than 1 sec. the wiper starts working faster.
Intermittent operation of the wipers
Video repair manual for Skoda Octavia is an alternative to the standard instructions from the manufacturer, which is more descriptive and more informative. On the pages of the site, the site is collected best materials who will demonstrate basic repair procedures and preventive measures... After reading all the manuals, the owner of the car can easily repair the Skoda Octavia with his own hands.
To begin with, you should study only those procedures that are most often of interest to other owners of this car model. Replacing the timing belt Octavia, Skoda Octavia and Skoda Octavia can come in handy in case of severe operating conditions. Octavia is often needed - the procedure will restore the braking system to work. Some species renovation works can come in handy right on the spot. Having driven the car onto a flat surface, you can cope with malfunctions, knowing how to replace the Octavia thermostat and Skoda Octavia.
Despite a fairly large number of materials, the site may not find any instructions in the form of a video. Photo reports, accompanied by text for explanation, would be an excellent alternative. If this is not the case, you can wait, the information will probably appear soon. Want to fix a problem faster? Then it's worth ask an appropriate question to experienced motorists and mechanics who visit the portal frequently. They will surely give good advice and possibly talk about their experience in eliminating such a problem, completely describing the algorithm for the repair work.
A brief history - the first Skoda Octavia
About Skoda car The buyer first recognized the Octavia back in 1959. A car became a modified version of the predecessor Skoda 440, which won recognition abroad. It has been completely changed front axle, became more comfortable dashboard, there was an independent suspension. In 1960, the "station wagon" was added to the "sedan", and later appeared various vehicle variations with unique options including design elements. Already at that moment, maintenance and repairs did not bring difficulties to the owners of the Skoda Octavia.
Modifications to the car were made until 1971, then the model disappeared from view for more than 20 years.
A worthy continuation of the lineup
In 1996, a new model of the company was released - Skoda Octavia. After so many years the car has completely changed, ranging from design, equipment, engine and ending with others technical features... In 2000, the first generation underwent a restyling.
The second generation was released in 2004 and continued to be produced until 2013. Despite its pleasant appearance, in 2009 the car was changed and received the FL prefix.
The latest generation Skoda Octavia revealed itself in 2012. Having seen this car, you will no longer find any signs of that very model of the 60s. Modern stylish appearance, convenience and safety, as well as complete with many powerful motors- all this sets the car apart from its peers.