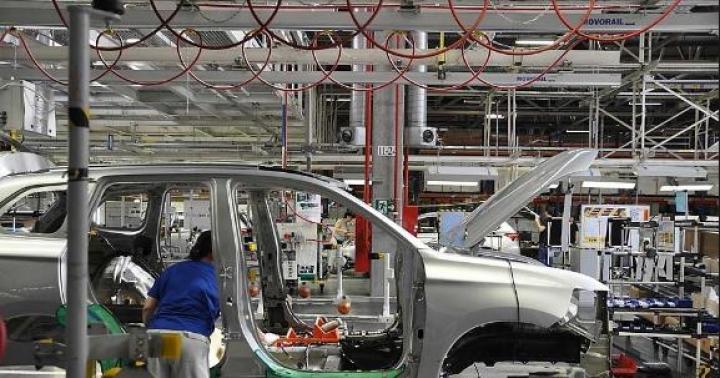
Are you planning to surprise others with your car? Unfortunately, it is unlikely that it will be possible to do this as a serial model that came off the assembly line of some factory, but vehicle hand made will surely attract the attention of the crowd on the street.
A homemade vehicle can evoke two emotions in those around you - a genuine surprise at your skill, or an open smile at the sight of an invention. If you delve into the issue of assembling your own car, then there will be nothing complicated in the process. The main thing is to learn more about the main parts and assemblies of the car, to understand the features and properties of the vehicle.

Homemade cars in history
The mass production of homemade cars began in the Soviet Union. Then only certain models were released on the market, which could not satisfy all the needs of consumers. As a result, self-taught craftsmen appeared who designed their own cars, in accordance with their desires and financial capabilities.

The assembly of a new car was carried out on the basis of failed cars, on average, three non-working ones were required for one home-made car. Craftsmen filmed everything necessary spare parts, and implemented them in new body... By the way, bodywork was popular in the villages; the old body was specially removed from the car and replaced with a more spacious one.
In addition to functional models, vehicles were created that were simply attractive from an aesthetic point of view, which could not be distinguished from well-known sports factory copies. Such cars were full-fledged road users.

It is worth noting that until the 80s there was no ban on the design and use of homemade vehicles. After the ban appeared, the inventors had to get out, many of them registered a completely different vehicle with the traffic police, and then used their invention.
How to build your own car
Before starting the assembly, it is necessary to draw up a plan for future work, in which you need to indicate what the car will be like, what features and characteristics it will have. If the car will be used in the future, it is necessary to purchase high-quality materials and parts, assemble a reliable frame and an impact-resistant body.
Important! Depending on what kind of vehicle you plan to collect, you will need certain materials. Bolts, wheels and scrap metal in this case are unlikely to be enough.
You can learn about the direct assembly process from the training videos, which are enough on the network.
Drawings of the future car
Imagination and fantasy will help to think through to the smallest detail in your head appearance and the device of the future car, however, in order to implement what was conceived in reality, it is necessary to draw up a drawing of the vehicle.

It is better to make two drawings of the car: the first one will show general form, on the second - individual units and parts of the vehicle.
Before starting to create a drawing, you should prepare a pencil, a ruler, a drawing paper and an eraser. First, sketches are made on the sheet. thin lines, which, if necessary, can be easily erased. After all the details are drawn, and the resulting image is completely satisfactory for you - the drawing is outlined with a thick line.
It is not necessary to draw a drawing on a sheet of paper, modern designers are helped by software, which greatly facilitates the process of creating a drawing.
Assembling the car
In the countries of America and Europe, in the past few years, kit-car kits have become popular, which are a set of various parts that allow you to assemble a car with my own hands... Details are universal, so how it turns out finished car, depends entirely on the imagination of the owner of the set.

Some car enthusiasts are categorically not satisfied with the cars produced official manufacturers... And then they decide to create homemade cars that will fully satisfy all the individual wishes of the owner. And today we will tell you about 10 of the most unusual such vehicles.
Black Raven - homemade SUV from Kazakhstan
The Black Raven is the perfect vehicle for the Kazakh steppe. It is fast, powerful and undemanding to use. This unusual SUV was built from scratch by an enthusiast from the city of Karaganda.
The black raven has a 5-liter engine with a capacity of 170 Horse power, thanks to which the car can accelerate to a speed of 90 kilometers per hour when driving over rough terrain and off-road.
Angkor 333 - homemade electric car from Cambodia
The Angkor 333 is the first all-electric car built in the Kingdom of Cambodia. It's amazing that this car is not the result of the development of the auto industry in the country, but a private project of one person - a humble mechanic from Phnom Penh.
Author Angkor 333 dreams of opening his own factory in the future to mass produce both electrical and petrol options this car.
Homemade Batmobile from Shanghai
Fans of Batman films from all over the world dream of the Batmobile - a delightful superhero car design with many different functions that are not available in regular production cars.
And engineer Li Weilei from Shanghai decided to realize this dream with his own hands. He created a real Batmobile, as if descended from the screens of cinemas. At the same time, the Chinese spent less than 10 thousand dollars on the construction of this machine.
The Shanghai Batmobile certainly lacks ten different kinds weapons and does not travel at a speed of 500 kilometers per hour, but in appearance it exactly repeats the Batman car shown in the latest films about this hero.
Homemade car for racing Formula 1
A real Formula 1 racing car costs a lot of money - over a million dollars. So there are no such cars in private ownership. At least their official versions. But craftsmen from all over the world create copies of racing cars with their own hands.
One such enthusiast is Bosnian engineer Miso Kuzmanovic, who spent 25,000 euros to create a Formula 1 street car. The result is an incredibly beautiful 150 horsepower car that can accelerate to 250 kilometers per hour.
Driving this red car through the streets of his city, Kuzmanovic received the nickname "Bosnian Schumacher".
Old Guo is a homemade car for $ 500
The Chinese farmer Old Guo was fond of mechanics since childhood, but he worked as a farmer all his life. However, after the fiftieth anniversary, he decided to follow his dream and began to develop a car of his own production, which was named in honor of the inventor - Old Guo.
The Old Guo is a compact Lamborghini designed for a children's audience. But this is not a toy car, but real car with electric motor, which can travel up to 60 kilometers on a single battery charge.
At the same time, the cost of one copy of Old Guo is 5,000 yuan (just under 500 US dollars).
Bizon - a homemade SUV from Kiev
Kiev resident Alexander Chupilin together with his son for a year collected from spare parts from other cars, as well as original parts their own SUV, which they called Bizon. Ukrainian enthusiasts have huge car with a 4.0-liter engine producing 137 horsepower
Bizon can accelerate to a speed of 120 kilometers per hour. Fuel consumption in mixed mode for this car is 15 liters per 100 km. The interior of the SUV has three rows of seats, which can accommodate nine people.
Also of interest is the roof of the Bizon car, which has a built-in folding tent for spending the night in the field.
Super Awesome Micro Project - a self-made air car from LEGO
The LEGO construction set is such a versatile material that even a completely working car can be constructed from it. At least two enthusiasts from Australia and Romania have succeeded in creating an initiative called the Super Awesome Micro Project.
As part of it, they built a car from the LEGO designer, which can move thanks to a 256-piston air motor, while accelerating to a speed of 28 kilometers per hour.
The cost of creating this car was just over $ 1,000, of which most of the money was spent on the purchase of more than half a million LEGO parts.
Homemade student car on hydrogen fuel
Every year Shell organizes special races among alternative fuel vehicles. And in 2012, this competition was won by a machine built by a group of students from Aston University in Birmingham.
The students built a machine out of plywood and cardboard, which is powered by a hydrogen engine that generates water vapor instead of exhaust gases.
Homemade Rolls royce Phantom from Kazakhstan
A separate area of creating homemade cars is the construction of cheap copies of expensive and famous machines... For example, 24-year-old Kazakh engineer Ruslan Mukanov built a visual copy of the legendary Rolls Royce Phantom limousine.
While prices for a real Rolls Royce Phantom start at half a million euros, Mukanov managed to build himself a car in just three thousand. Moreover, his car is visually almost indistinguishable from the original car.
True, this car looks very unusual on the streets of the provincial Kazakh Shakhtinsk.
Upside Down Camaro - car upside down
Most homemade car makers are driven by the drive to improve the visual and technical dimension of production vehicles. American racer and engineer SpeedyCop started from opposite principles. He wanted to degrade the appearance of his car, turning it into something incredibly funny. And so the car with the name Upside Down Camaro appeared.
The Upside Down Camaro is a 1999 Chevrolet Camaro with an upside-down body. The car was created for the parody 24 Hours of LeMons, in which only cars worth less than $ 500 are allowed.
There is no limit to perfection. This saying is well known to everyone and everyone. And any car owner strives to make perfection out of his car. For many drivers, factory settings are not enough. They strive to bring something of their own. Something that will distinguish them from the rest. But what if what you want cannot be purchased in the store? Only one way out suggests itself: if you can't buy - do it yourself.
They have become very popular lately. They improve the appearance of the car, change some specifications or bring nice additions to options. Among the variety of possible alterations, we suggest considering several options.
Car wash
Let's start with the look. When the car is clean, paintwork glitters and sparkles. Such a technique is pleasant to look at. Immediately there is a feeling that the owner is watching his car. But it is not always possible to go to a car wash for various reasons. In such cases, homemade products for the car will come to the rescue. You can assemble a small sink with your own hands, which can be used at any convenient time.
To make a sink, you will need the following parts:
- canister with two drains;
- hose 2 m long (suitable for connecting a washing machine);
- a watering gun with a telescopic bar;
- Union;
- spool;
- rubber pad (outer diameter 2.4 cm, inner diameter 1.5 cm);
- coupling.
Now let's get started:
- We make a hole in the lid of the canister. We smear the “spool” with sealant and insert it into the prepared hole of the cover. Let it dry.
- We make a small hole in the second cover. It is necessary for The junction of the cover and the sleeve is treated with a sealant and also allowed to dry.
- Cut off the nut with the fastener from the curved end of the inlet hose. The mount is no longer needed. Apply sealant to the nut and attach it to the back of the coupling. We connect the hose with the cut side to the nut of the quick-release fitting. Next, the main fitting is screwed on, which is also connected to the watering gun.
- On the second side of the hose, insert a rubber gasket into the nut. This will protect the system from air intrusion. After that, the nut is screwed onto the quick-detachable union.
This completes the process of making homemade products for a car with your own hands.
Seat upholstery
Homemade products can also come in handy for updating the salon. Useful gadgets and crafts for cars allow you to replace worn out parts, supplement the interior with lighting and much more. Consider how to update the seats.
This will require fabric. You can choose two colors - for the central part of the seats, for the back of the backrest, beige leather is suitable (it will take about 4 m), and everything else will be black. Black leather needs about 3.5 m. The entire fabric must be duplicated (glued) with a layer of foam rubber of 0.5 cm. The foam rubber is glued with non-woven material with an iron. Due to this, it will be easier to work with him.
With removed seats(it's more convenient) remove the covers. We number their individual parts. In order not to get confused, we transfer everything to paper. Also, on paper, you need to note the attachment points of the knitting needles (they are on the back of the covers). The needles themselves will then be inserted into the new covers.

Next, we disassemble the trim into separate parts (dissolve the seams). Patterns are obtained necessary elements... We lay them out on the seamy side of the fabric (seamy side up, so that a mirror image of the details does not turn out) on thick paper (you can on the wallpaper) and circle around the perimeter. Along the edges we leave allowances of 1 cm, which will go to the seams. Then all patterns are cut and stitched (starting from the center). On the reverse side, from any fabric we make pockets where knitting needles are inserted.
Having connected all the details, we get new covers. We do this process one by one for all the seats. Having made such interesting and useful homemade products for the car with your own hands, you can update the interior without contacting the service.
Ceiling update
You can also replace the trim on the ceiling with your own hands. Homemade products for a car in this case must be started with removing the ceiling. This can take a long time. Fastening in each case is individual. There is nothing complicated, the main thing is to carefully examine everything and check that all the details remain intact.

When the ceiling panel is removed, remove the old fabric from it. When preparing material for the ceiling, you need to remember one important point: on the seamy side, it should have a small layer of foam rubber. The fabric is glued with heat-resistant glue. When the adhesive is dry, the panel can be re-installed on the ceiling. Do it in reverse order.
"Angel Eyes"
It is quite possible to collect useful electronic homemade products for a car with your own hands. For example, "Angel Eyes" will allow you to update the headlights of any car. To make them you will need:
- transparent plastic sticks (it is possible from the blinds);
- resistors (220 Ohm);
- battery (9 V);
- LEDs (3.5 V).
The process looks like this:
- On any metal can, the same diameter as the headlights, we wind a ring made of a plastic stick with pliers. To do this, heat it up a little.
- Next, connect a pair of LED and resistor. Their performance is checked using a battery.
- Another LED is connected to it.
- We make deep cuts on a frozen ring made of a plastic stick.
- We collect the ring, attach the LEDs, connect.

Conclusion
Homemade products for a car with their own hands can be assembled by everyone. The main thing is to be confident in your abilities. A little information from our article, a little of your reasoning and thoughts, and everything will work out. And the car will only get better from this. And it is doubly pleasant that it was done by hand.
V automotive history Soviet period was alone negative point: limited the lineup... But not only this forced citizens to make cars with their own hands. The process itself was important to the enthusiasts, but the results were often decent. Some homemade products have survived to this day, and "Autocenter" was able to get to know them.
The party and the government took the auto-model movement under their wing and named it “Samavto”, rightly judging: creative leisure in the garage is much more useful than intellectual gatherings “in the kitchen”. Man, creating a car according to his own drawings, pursued two goals - to get new car cheaply and without queuing, as well as self-realization. In fact, the time and money spent on building new car were no less than the purchase of a serial one.
For those who decided to take a difficult step - to make a car with their own hands, in the country of eternal shortage, the problem of choosing components did not exist. Conceptual solutions were almost standard: for example, the body in most cases was made of fiberglass and epoxy resins. This material was easily molded and processed, allowing no additional equipment achieve the required shapes, it was strong and resistant to corrosion. And yet some super-desperate craftsmen tapped out metal body panels on wooden blanks. People who have already built home-made cars wrote books in which they shared their experiences ("I am building a car", "A car with my own hands").
In addition to the shortage of spare parts, there was another limitation of the flight of imagination for folk designers. Special Rules regulated the main parameters of the power unit, vehicle dimensions, radius of curvature of bumpers and body corners, etc. As for the engine, its power density should not exceed 24-50 hp. with. per ton of machine weight. Therefore, in terms of weight for most cars, only engines from "Zaporozhtsev" were suitable: 0.9 l (27 hp) and 1.2 l (27-40 hp) or, at most, from the VAZ-2101 - 1 , 2 L (64 HP). It is also interesting that the minimum permissible ground clearance was 150 mm. In short, the said Rules were subject only to security and did not contain any ideological connotations. So the traffic police allowed to build any type of body. And often the "home-made" people chose openly bourgeois options for the body layout - a coupe, a convertible, a minivan, less often a station wagon.
A distinctive feature of this coupe with a “2 + 2” layout (two adults and two child seats) is that it is the first mass-produced home-made car in the USSR (at least 6 pieces were made). It should be noted that in addition to complete cars, several fiberglass bodies were also manufactured. The press of those times wrote a lot about this outstanding representative of the all-Union movement "Sam-Avto". Still, the stylish rear-engined coupe was created on the basis of the 965 Zaporozhets - the most primitive and not prestigious car of its time.
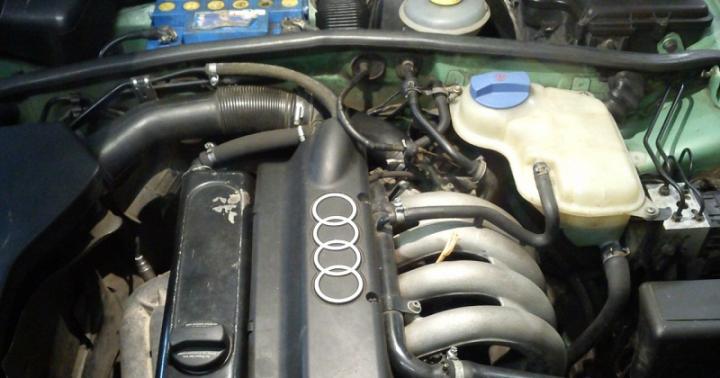
.jpg) One of the first-borns of such a once widespread phenomenon as a building homemade car... This car did not write articles in popular science magazines, it was not taken to exhibitions abroad, because it was created exclusively as a means of transportation. The car is equipped with a homemade three-cylinder gasoline engine... Such a bold step of the designer is explained by the fact that it was difficult for him to find a power unit of the permitted power, and it could take several months to wait for it to arrive at the spare parts store.
One of the first-borns of such a once widespread phenomenon as a building homemade car... This car did not write articles in popular science magazines, it was not taken to exhibitions abroad, because it was created exclusively as a means of transportation. The car is equipped with a homemade three-cylinder gasoline engine... Such a bold step of the designer is explained by the fact that it was difficult for him to find a power unit of the permitted power, and it could take several months to wait for it to arrive at the spare parts store.
.jpg) On the sports coupe "Gran Turismo Shcherbinins" in 1969, there was a motor from the GAZ-21 "Volga", which accelerated the car to 150 km / h. The heavy car was equipped with a more powerful engine, which was not allowed by law, but nevertheless, the harsh traffic police for those times, conquered by the level of home-made, issued license plates to the brothers and put the car on record. The history of the car body creation reflects the enthusiasm and "fanaticism" of the creators. The Shcherbinin brothers welded the frame of the future car in the courtyard of their high-rise building. Then she was taken to the apartment on the seventh floor with a truck crane, where a body glued from fiberglass was put on the frame. After that, already downstairs, in the yard, the assembled body got power unit, Gearbox, suspension, fittings.
On the sports coupe "Gran Turismo Shcherbinins" in 1969, there was a motor from the GAZ-21 "Volga", which accelerated the car to 150 km / h. The heavy car was equipped with a more powerful engine, which was not allowed by law, but nevertheless, the harsh traffic police for those times, conquered by the level of home-made, issued license plates to the brothers and put the car on record. The history of the car body creation reflects the enthusiasm and "fanaticism" of the creators. The Shcherbinin brothers welded the frame of the future car in the courtyard of their high-rise building. Then she was taken to the apartment on the seventh floor with a truck crane, where a body glued from fiberglass was put on the frame. After that, already downstairs, in the yard, the assembled body got power unit, Gearbox, suspension, fittings.
This homemade product was registered both in the traffic police and in the Gosins-section of small vessels. The motor from the 21st "Volga" paired with the gearbox from the "eared" "Zaporozhets" on land accelerated the car to a solid 120 km / h, and on the water - up to 50 km / h. Thanks to the excellent weight distribution along the axles (50:50), the car had an enviable ride and stability on a suburban highway. Instead of a propeller for moving along rivers and lakes, the author used a water cannon, like that of army amphibians, which allows him to move in shallow water. Made it easier for the car to storm the shores four-wheel drive... On the water, the wheels were lifted up along the sides with a cable winch, the hydraulic brake lines had quick-acting "dry" connectors.
.jpg) Another uncharacteristic for "Samavto" car - "multi-circulation". According to one drawings, five cars were built on the basis of the Togliatti "six": two in Tbilisi and three in Moscow. For the manufacture of the body, both fiberglass, which was in short supply at that time, and ordinary burlap, which was impregnated with epoxy resin, were used. The base of the body was a metal bottom from the VAZ "classics", which, in order to avoid the appearance of corrosion, was glued with fiberglass. Subsequently, one of these homemade cars was converted into an electric car.
Another uncharacteristic for "Samavto" car - "multi-circulation". According to one drawings, five cars were built on the basis of the Togliatti "six": two in Tbilisi and three in Moscow. For the manufacture of the body, both fiberglass, which was in short supply at that time, and ordinary burlap, which was impregnated with epoxy resin, were used. The base of the body was a metal bottom from the VAZ "classics", which, in order to avoid the appearance of corrosion, was glued with fiberglass. Subsequently, one of these homemade cars was converted into an electric car.
.jpg) The four-wheel drive minibus with a front engine is built using units from the VAZ-2101 sedan. It easily converts into a pickup truck thanks to its removable metal sides and roof. For this, the car was loved by the operators who filmed reports on the all-Union “Sam-Auto” runs. The body of the "one-volume" is mounted on a riveted frame from a pre-war car, transfer case the creator borrowed from Willys SUV Wartime MB. The suspension, as is customary among the "correct" off-road conquerors, is completely dependent, spring. Although the car looks like a "loaf" of UAZ-452, they have little in common. Despite the considerable roominess, the car easily fit into the size restrictions determined by the regulatory documents for homemade products. Then, in terms of the volume of transported cargo, the minibus was compared with the "Volga" -wagon GAZ-24-02.
The four-wheel drive minibus with a front engine is built using units from the VAZ-2101 sedan. It easily converts into a pickup truck thanks to its removable metal sides and roof. For this, the car was loved by the operators who filmed reports on the all-Union “Sam-Auto” runs. The body of the "one-volume" is mounted on a riveted frame from a pre-war car, transfer case the creator borrowed from Willys SUV Wartime MB. The suspension, as is customary among the "correct" off-road conquerors, is completely dependent, spring. Although the car looks like a "loaf" of UAZ-452, they have little in common. Despite the considerable roominess, the car easily fit into the size restrictions determined by the regulatory documents for homemade products. Then, in terms of the volume of transported cargo, the minibus was compared with the "Volga" -wagon GAZ-24-02.
.jpg) The Soviet "Lamborghini" was built on VAZ-2101 units in a fiberglass monocoque body. Thanks to its streamlined shape, the car accelerated to 180 km / h. He was distinguished by a number of innovations unseen for the then car industry. For example, the role of doors was played by a part of the roof, which was lifted by a pneumatic drive along with the windshield and side windows. The engine was started not with the ignition key, but by dialing a digital code on the keypad. Side mirrors were not provided in the design; instead, there was a periscope mounted near the sunroof. But in order to obtain license plates, the mirrors had to be installed. The car helped its creator, engineer Alexander Kulygin, to get a job at the AZLK design bureau.
The Soviet "Lamborghini" was built on VAZ-2101 units in a fiberglass monocoque body. Thanks to its streamlined shape, the car accelerated to 180 km / h. He was distinguished by a number of innovations unseen for the then car industry. For example, the role of doors was played by a part of the roof, which was lifted by a pneumatic drive along with the windshield and side windows. The engine was started not with the ignition key, but by dialing a digital code on the keypad. Side mirrors were not provided in the design; instead, there was a periscope mounted near the sunroof. But in order to obtain license plates, the mirrors had to be installed. The car helped its creator, engineer Alexander Kulygin, to get a job at the AZLK design bureau.
.jpg) Two front-wheel drive cars, built by fellow engineers, appeared simultaneously with the first mass front-wheel drive cars of the USSR. In 1986, at the exhibition "100 Years of the Automobile" in Prague, Nuccio Bertone himself was pleasantly surprised by the modern coupe and did not immediately believe that it was a home-made product. The engine from the VAZ-2105 was placed in front, the gearbox from the Zaporozhets was turned backwards (there were almost no other options for creating a front-wheel drive car in the Union at that time). The drive of the wheels was carried out by CV joints from the VAZ-2121 "Niva", the body was made of fiberglass.
Two front-wheel drive cars, built by fellow engineers, appeared simultaneously with the first mass front-wheel drive cars of the USSR. In 1986, at the exhibition "100 Years of the Automobile" in Prague, Nuccio Bertone himself was pleasantly surprised by the modern coupe and did not immediately believe that it was a home-made product. The engine from the VAZ-2105 was placed in front, the gearbox from the Zaporozhets was turned backwards (there were almost no other options for creating a front-wheel drive car in the Union at that time). The drive of the wheels was carried out by CV joints from the VAZ-2121 "Niva", the body was made of fiberglass.
Konstantin Shirokun
Photo by Sergey Iones
If you find an error, please select a piece of text and press Ctrl + Enter.
Various homemade products for a car have always been of interest to motorists. They are all designed to improve performance, appearance or comfort. passenger car... For example, you can make a subwoofer, a convenient organizer, eyelashes for headlights, license plate protection, etc. with your own hands. We will tell you about some useful homemade products that are available to everyone.
Every motorist strives to make his car unique. This can be done with the help of peculiar overlays on the headlights, which are called cilia and add a certain zest to the appearance of any car.
To make your own eyelashes, you will need the following:
- construction hair dryer;
- thick paper or cardboard;
- soil and paint;
- sandpaper;
- hacksaw;
- Scotch;
- plexiglass.

First you need to decide what shape you want the cilia to get. The choice depends on your preferences and imagination. Draw a template on paper or cardboard and cut it out. You can use it to cut a piece of plexiglass in the future.
Apply the created template to the headlight of your car and give it a complete look by carefully fitting all the edges. When everything is ready, attach the template to the plexiglass and circle with some sharp object. The part should be cut along the resulting contour.

In order not to damage the headlights and protect them from scattering, it is better to cover their surface with tape. Use a hair dryer to warm up the workpiece, and when it begins to bend, you can attach it to the headlight.
After that, the surface must be treated with sandpaper, wetting it with water. When everything is dry, paint the part with primer and then paint it in any suitable color. Everything is very easy, and the result can exceed all your expectations.

If on wheel rims your car has scratches or chips that spoil the appearance of the products, you can send the wheels to a specialized workshop for painting. If you don’t want to spend money on this, you can try to repair the damaged areas yourself.

To work you will need:
- Scratched discs.
- Epoxy glue of any color, as a layer of paint will be applied on top. However, if the paste is too bright, it can show through the paintwork, so it is better to prime everything thoroughly with a primer before applying paint.
- Sandpaper numbers 300-400 and 600.
- Duct tape.
- A can of paint and varnish.

First, using coarse sandpaper, you need to clean up the places of chips and scratches to such an extent that you could not feel any bumps with your hand. We recommend that you glue the rubber over with adhesive tape and cover it with newspapers so that no paint gets on it.
Mix both components of the epoxy adhesive in a one-to-one mixing ratio. Apply the compound to the cleaned up scratches so that the mixture fills them completely and forms a thin layer on top.

Dry everything thoroughly. It takes a lot of time, and to speed up the process, you can use the heat by placing a fan heater or a simple incandescent light bulb near the disks.
When the glue is dry, sand it with fine sandpaper, preparing the surface for painting. Everything should be smooth to the touch and look - this is important.
Using a spray can to paint the discs is not difficult at all. It is necessary to thoroughly shake the can and start spraying the paint from a distance of 20-30 cm. Apply the paint in layers. Avoid too obvious transitions by applying two or three coats. Each of them needs to be dried, waiting for half an hour. To protect fresh paint from dust, it is best to paint in a pre-humidified room.

After the paint is dry, apply two coats of varnish. You need to wait half an hour between layers, and the top layer should be dried longer.
When everything is thoroughly dry, you need to moisten the finest sanding paper (grain size 1000-2000) with water and gently smooth the varnished area. The surface can be polished to obtain a factory-shine finish.

The theft of license plates has become one of the illegal species earning money for intruders. Thieves need no more than 10 seconds to steal license plates from a car. In order not to fall for the bait of scammers, you need to take care of the protection of the registration number. There are several ways, each of which can be implemented independently at home.

Protecting the room with scotch tape
This method of protecting your license plate from theft may seem ridiculous to you, but it is quite effective. The back surface of the registration number should be degreased and double-sided tape should be glued to it. This simple and inexpensive way to protect your license plate creates an additional barrier for a thief to keep your registration plate.

Secrets for the car number
Instead of simple screws that fix the license plate, they are installed with a lock. The hats are designed in such a way that the locks can only be unscrewed with a special key, sold together with the fasteners. The kit costs about 500 rubles, and the installation does not take much time.