The model of the domestic automaker VAZ 2114 was literally created for tuning and improvements. A number of external changes allow you to transform the car, sparkle it with new colors. Some go further, and in addition to external tuning, they use methods to improve technical performance.
Today we'll talk about tuning the optics, or rather the rear lights.
LEDs as an impetus for development
With the advent of LEDs, the development of tuning rushed forward. More and more new and unique solutions began to appear, no other light bulbs can achieve such a visual effect as diodes.
With the help of LEDs, you can decorate the interior, doors, optics. If it is now fashionable to install the so-called angel eyes in front, then for the rear lights, special elements based on diodes are most often mounted.
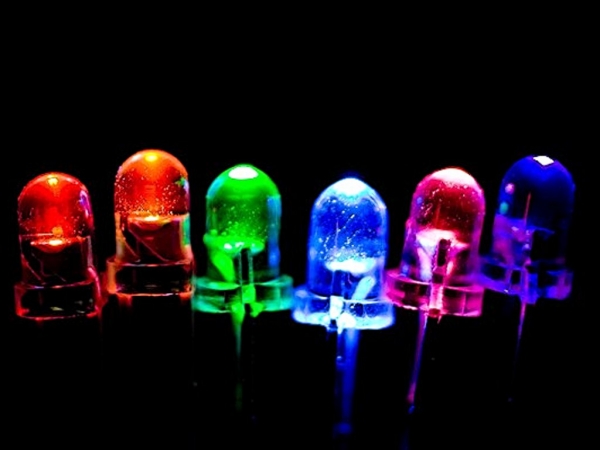
LEDs have not only decorative but also practical properties. Due to them, safety is increased, since the glow level is higher. But most importantly, such a variant of the optics refinement is allowed by the legislation of our country and not only.
Tuning types
Tuning optics is not difficult, even if you are relatively new to this matter. Here, the main thing to start is to decide which version of the rear lights you want to use for your VAZ 2114.
Several basic ideas are particularly popular today.
|
Tuning type |
Peculiarities |
|
LED strips |
Popular and affordable option. There are many ready-made linings on the market, but you can make it yourself. Use fiberglass, LEDs, and epoxy to create a patch. |
|
Diode rings |
This revision option provides full replacement rear optics on diode rings. To make them, you will need serious experience in working with electronic devices. |
|
Powerful lamps |
This type of revision also involves the use of a tint film for the headlights. The tone will help the bright light focus better. But powerful lamps have disadvantages - they increase fuel consumption, load the generator and overheat the wiring. Since the engine power of the VAZ 2114 is not high, this option is not entirely reasonable to use. |
|
Individual LED elements |
The most original version of the revision, since it allows you to maximize your own imagination. But you have to spend time and effort to create a pattern from diodes and install them. |
In terms of cost savings, buying individual LEDs will be more profitable than purchasing finished products. But in this case, you must be sure that you will be able to get the devices High Quality... Otherwise, it is better not to take risks and spend more money.
Manufacturing
Now we will tell you how you can create the above types of LED devices with your own hands, designed for installation in the rear lights of the fourteenth model from AvtoVAZ.
Overlays
Let's start by creating diode overlays. To work, you need the following set of tools and materials:
- Fiberglass;
- A set of LEDs;
- Stationery sharp knife;
- Paints and varnishes;
- Epoxy adhesive;
- Masking tape.
We suggest that you familiarize yourself with the instructions that will help you understand the nuances self-made and installation of ready-made linings. Tape or similar materials can be used to secure the elements.
- Cover the rear optics with masking tape. Then apply fiberglass to the tape.
- Saturate the glass cloth with epoxy glue to allow the overlays to be installed. The glue should be applied in two to three layers, but only the layers should be thin.
- Drying usually takes about 12 hours. But still, read the instructions for the epoxy adhesive that you purchased and use.
- Now remove the blank and mark the contours of the future decor. To do this, use tape or a marker.
- Use scissors to cut the resulting profile.
- After cutting out the forms, start to putty.
- When the surface is dry, sand it with fine sandpaper.
- Now apply a coat of primer and then a coat of paint.
- When the paint is completely dry, you can apply a protective varnish.
- Install the tail light covers, after which the tuning can be considered complete.
Such overlays are used to decorate both rear lights and turn signals, fog lights in front. Consider installing diodes in wheel disks or inside the cabin.
Installing diodes inside the headlights
The trims are mounted directly on top of the rear optics, and the next option involves inserting them inside the headlights.
- Prepare LEDs and board before installation. If everything is done correctly, you will be able to connect new LEDs to the wiring of your car without problems in the future;
- Make a stabilization circuit. This is where stabilizers come in handy. catalog number 7812. This will allow the diodes to shine more weakly when the dimensions are turned on, and when the stop signals are turned on, give out their maximum power.
For work, you will also find it useful:
- LEDs with resistors;
- Diode fasteners;
- Adhesive film;
- Silicone sealant;
- Epoxy glue, etc.
To determine the number of diodes required, study your rear lights, be sure to take into account the turn signal relay. Be sure to buy diodes with a margin, because over time they can burn out, and finding the same in a year or two may be a problem.
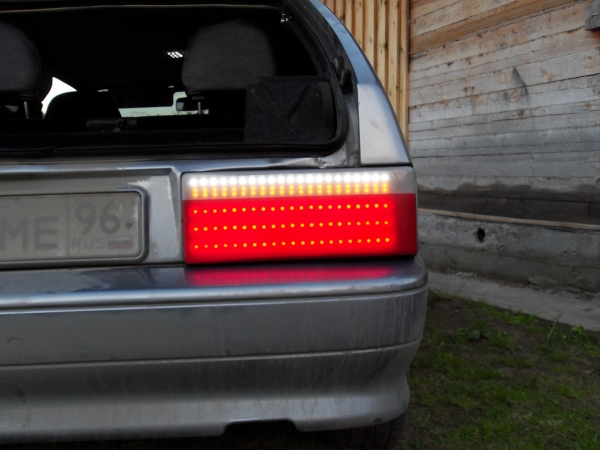
For diffusers, choose white diodes, and for turn signals - orange, brakes - red, and reverse - just transparent.
So let's get started.
- Remove the flashlight, then cut it into two pieces. For this, a quality burning tool will come in handy. Try to get the thinnest, most even seam possible.
- Remove reflectors and reflectors.
- Disassemble the rear optics completely. Use a marker to mark the position of the diodes on the outer surface.
- Cover the inner space with self-adhesive circles. Their diameter should be 15 millimeters.
- parking lights and stop the headlights with silver paint. After it is completely dry, remove the film.
- Reflectors are mounted on a thin layer of epoxy. It will not be superfluous to process all joints with a sealant.
- The LED boards are wired and placed inside the headlight housing.
- Now it is the turn of the stabilization scheme. It will regulate the diode connections.
- Assemble and connect the swivel blocks to the rear optics. The modules are seated on epoxy glue. If checking the operation of the rear lights showed that everything is working properly, glue the block and complete the tuning.
A very common option for tuning rear optics, which achieves an incredible visual effect. To a large extent, the result depends on the efforts made, the developed design and the quality of the materials used. All in your hands.

To create the elements, tapes or ready-made LED rings are used. The body is made of a reflector different sizes that are not difficult to find in the auto parts markets.
Choose the paint at your discretion. Today it is popular to use chrome or silver.
- The diode rings must be located inside the cylinders. For their manufacture, simple cans are suitable - from coffee, canning, etc.
- Cut them out carefully with a sharp knife or metal scissors to get a mini well as a result. Make two of these elements. One will be internal and the other will be external.
- Alternatively, the outer well is made of tin, and the inner one is made of plastic, which is then painted in the desired color.
- Soviet reflectors are mounted inside the inner well, which will provide a glow according to the standard scheme. Namely, the turn signals are orange, the reverse is white, the fog lights are red.
- From a large reflector, a decent amount of unnecessary elements can remain, which will perfectly complement the internal space of the module. Fill the remaining space with other LED rings of your choice.
- Now you need to mount reflectors and LED rings. Provide stiffening ribs to securely fix them. Topical use of epoxylin.
- Additional lighting is often installed on plexiglass and all this is fixed with epoxy glue.
There are a lot of options for finalizing the rear optics on the fourteenth model. You just have to choose the type of tuning that you like more than others and corresponds to the possibilities for self-production.
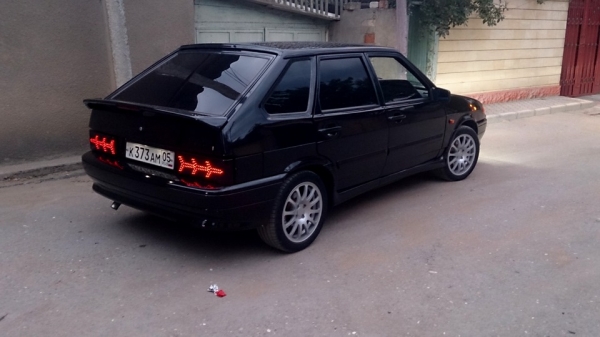
If experience is not enough, but improve appearance I still really want my VAZ 2114, we advise you to contact the appropriate tuning studio. Today there are a lot of them, so there shouldn't be any problems with finding a performer.
Probably, every car owner would like his car to look as stylish as possible, and everyone around him envied him. This result can be achieved in many different ways - the modern market offers many spectacular paints and varnishes, polishes, vinyl stickers and other materials for tuning. But many, having tidied up the glass, body, rims, often forget about They, although they are not considered the main element of the car, but with the right approach, they will attract the views of other motorists in the stream, as well as passers-by. Therefore, along with tuning the body, tinting the taillights will not be at all superfluous if you need to give the exterior a few exclusive details.
Headlight tinting and the law
Before deciding on such an operation, you need to remember that if you violate the standards (that is, darken the lights incorrectly), then the traffic police will issue a fine for this. Its amount is almost the same as for tinting, which is not done according to GOST. Therefore, many are afraid to do something with the headlights, so as not to break the law and not pay unnecessary fines.
Application methods
Refusing to decorate a car in this way just because of fines is not entirely the right decision. You just need to find out what is allowed and allowed, and what is prohibited, and then you can safely modify the car. Tinting the rear lights will not only give the car a modern look, but will also protect the glass or plastic of the headlight from various scratches and fogging. The surface will become as even as possible if the application process is carried out using a special film. 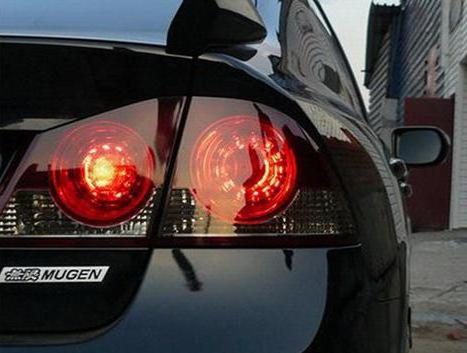
There are two methods for darkening the headlights. This is the use of paint and tinting the taillights with foil. Which of these two ways should you choose? Each driver will decide for himself. Both tuning methods have their pros and cons, differ in cost, labor input and time.
Paint tinting: features
This method of painting headlights is as economical as possible. However, it is quite time consuming. It is necessary to thoroughly clean the surface, sand the plastic or glass, and only after that you can proceed directly to painting. The darkening process takes a long time. And the results are not always the way we would like. Such tinted taillights are suitable for those who do not want to invest large sums in tuning their cars.
Vinyl wrap: features
This method will take much less time than the previous option. Also, this method is less laborious than in the case of staining. But there is one point with which there can be certain difficulties. It is necessary to stick the film so that there are no folds on the surface. Among the advantages of using this method is the ability to quickly remove the film at any time. There are many shades. There are all colors (for example, the red tinted taillights look great). The shade can be matched to a specific vehicle.
Paint tinting: how to apply varnish or paint
If a decision is made to darken using paint, the first step is to purchase a special preparation. It is best to choose tint varnishes. They are much more convenient to apply and use. The cost of these paints and varnishes can be quite high. But the result is worth it. To process two lanterns, just one can is enough. It is recommended to carry out work related to painting headlights in well-ventilated rooms. It is best to do this outdoors. It is necessary to choose a clear, but not too sunny day.  Do-it-yourself tinting of the rear lights using paints or varnishes is carried out in several stages. The first step is to dismantle the headlights. This will allow the varnish to lie on the surface as evenly as possible. Please note that then the lights will need to be installed back. To do this, you need to have skills.
 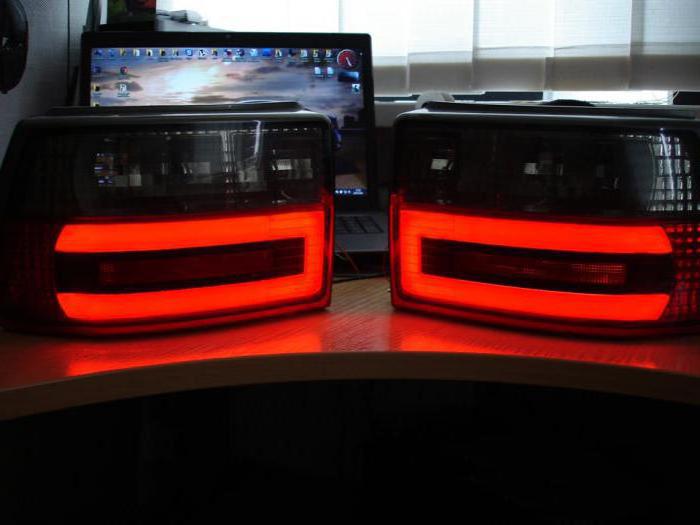 Further, the surface of the glass or plastic of the lantern must be degreased. To do this, you can use traditional alcohol or use special products. After the end of the process, the headlamp is allowed to dry. Shake the can before spraying the paint and varnish composition. Further, the paint is applied as thin and even layer as possible. Then the headlamp is allowed to dry out a little. It is necessary to lay it in such a place that small debris and dust do not fall on the painted surface. Next, another (or more) layer of paint is applied - while painting it is necessary until then, so as not to exceed the norms of light transmission of the headlight. When the lanterns are completely dry, they should be polished to a mirror finish. After that, the optics can be put back on the car and enjoy the result.
Tinting with film: instructions
The following tools will be needed for work: a building hair dryer, a fairly sharp knife, an alcohol solution and an ordinary spatula. The first step is to tint the rear lights to thoroughly clean the surface. First, the headlights are cleaned by removing moisture from them. This can be done conveniently and effectively with a microfiber cloth. Also, experts recommend using special cleaning products. Then an alcohol solution is sprayed on the surface of the film and on the headlight. This is done in order to simplify the tinting process. 
To vinyl wrap lay flat and took the shape of the rear lights, it is stretched. This is done by hand or using a hair dryer. The material needs to be heated, and then the film will become flexible. It is important not to overheat the vinyl. Otherwise, wrinkles will appear.
What's next
Now we have the most important stage work. It is necessary to stretch the material with a spatula and stick the film on the headlights. If something goes over the edges, it is cut off with a knife. Reviews say that tinting the taillights with foil with your hands should be done very carefully. It is possible to damage the flashlight and hands in the process. This completes the process, and you can enjoy the result.
Headlight tinting and fines
As all car owners know, the country has introduced a ban on too strong car glass tinting. This is to improve safety as visibility is reduced and the driver may not notice the brake light or turn signal.  In general, the taillights do not affect the view of the road situation in any way, however, if the toning is done incorrectly, then the car owner faces not only a fine, the amount of which is similar to the fine for tinted glass, but also the obstruction of the movement of other cars from behind. Feedback from drivers repeatedly confirms this.
The law allows you to drive a car with white taillights. Other yellow, red and orange light fixtures are also allowed. Tinted taillights (Priora is no exception) can significantly change the shades of the lamp's radiation. Therefore, work should be done very carefully and carefully. Otherwise, you will have to pay a fine of 500 rubles. Inspectors often interpret this tuning as a vehicle malfunction. In the worst case, you can lose your driver's license for 6-12 months under paragraph 13 of Art. 12.5 of the Code of Administrative Offenses.
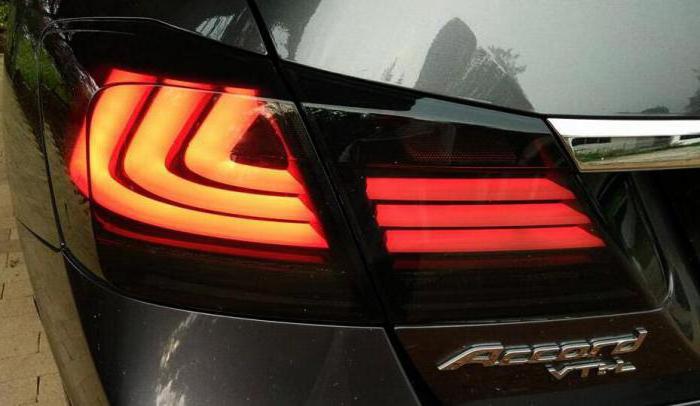 When using black taillights, an accident can occur, and in this case the driver who drives with toning will be to blame. Then you will have to pay not only the fine, but also the repair of the damaged car.
There is an option when you can protect yourself from fines and at the same time drive a beautiful and spectacular car. Reviews of car owners say that for this you need to do blackout in a specialized salon. How much does the taillight tinting cost? The price in large cities of Russia is from one and a half thousand rubles, depending on the car model and the geometry of the headlight itself. This is a relatively small amount. But by paying it, you can protect yourself from traffic police inspectors and protocols. In practice, most often no one will fine anyone, especially if the headlights are tinted correctly and skillfully. In this case, the brightness of the glow practically does not decrease. If the inspector sees a gross violation, he can ask to fix the problem on the spot. Reviews say that it is easiest to do this with film.
Conclusion
As you can see, this tuning method can be performed independently with certain skills. If you do everything correctly and follow the instructions, then this will not be considered a violation.
In most cases, the design and construction of the taillights is completely satisfactory for motorists. At the same time, it is not uncommon for the optics to undergo a certain refinement. Most often, this is done by lovers of auto-tuning, as well as the owners of domestic models, whose lights are not unique and bright enough.
Tuning of taillights
Today there are many options for improving rear optics. The simplest and most affordable of them: shiny stickers, powerful bulbs with tinted film, LEDs and overlays. Let us consider in more detail these methods of tuning a car.
- Stickers it is rather difficult to call a stylish or unique way of giving originality to taillights. Most likely - this is child's play, which no one takes seriously.
- Powerful light bulbs They are usually installed with a tinted film that darkens the diffuser. This optics upgrade is completely ineffective and fraught with bad consequences. More powerful lamps put additional load on the generator and cause overheating of the wiring. The consequence of such modernization may be the option when the taillights are completely off.
- LEDs - the most original way to give your car a stylish and presentable look. It allows you to implement various unique design solutions with minimal cost and maximum efficiency.
- Overlays - the most common and affordable tuning option for any car model. Today you can buy different kinds ready-made kits, but standard standard kits are not particularly original and do not always look spectacular on the car. More unique can be tail light covers made with your own hands on the basis of fiberglass and epoxy glue.
DIY LED installation
The advantages of tuning rear optics with LEDs are:
- Reduced energy consumption.
- Original and stylish look.
- The brightness of LED optics is several times higher than that of conventional bulbs, which eliminates the need for reflectors.
- The ability to group LEDs in any order and quantity, which is limited only by your imagination and the size of the free space available in the rear of the car.
Preparing for tuning
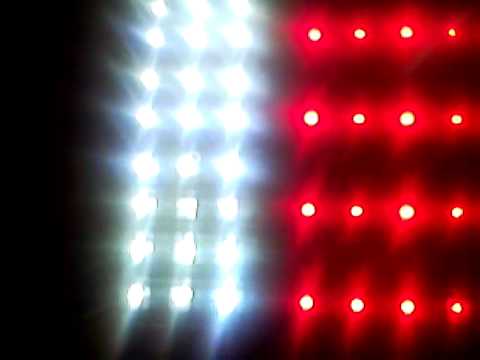 To make LED taillights with your own hands, you need to purchase a certain number of diodes. For standard diffusers the best option there can be elements of white color with a power of 12-16 volts. If you plan to install clear lenses, then you should buy red LEDs for the parking and brake lights. For turn signals, you will need orange elements, and for optics reverse- white diodes.
It is recommended to buy LEDs with a margin in case that if a certain number of elements fail during operation, you can immediately replace them, and not run around in search of the desired model in the shops.
The number of LEDs must be selected based on the specific features of the lanterns in such a way that there is enough space in each section of the optics. You should also take into account such a moment as the turn signal flashing relay. In the design of the car, each relay is selected taking into account a certain load. Therefore, it is necessary to provide such a number of LEDs that will correspond to this parameter. Otherwise, the blinking frequency of the optics will differ from the standard scheme.
In addition to LEDs, you need to stock up on thin plastic made of foil-clad getinax or dielectric. It will be needed for arranging the mounting of diodes.
If you use a getinax, you will have to etch the current-carrying tracks according to the number of installed elements. Although this method is time consuming, however, such a structure will be more compact and durable. In the case of a dielectric, power is more easily realized using a thin wire. In this case, care should be taken to securely fasten the wiring and other elements to prevent them from being damaged by strong vibration.
All LEDs are sensitive to vibration and shock, so care should be taken to ensure that they are securely attached. The elements must be inserted with an interference fit. In this case, the connection of wires with diodes should be done only by soldering.
The power supply is connected in parallel through resistors, which are designed to limit the currents passing through the diodes. In order not to select resistors yourself, it is better to buy them right away complete with LEDs.
Video - How to make a tail light tuning yourself
When arranging the power supply, special attention should be paid to fixing the resistors. They must be securely fastened in such a position that they do not touch the wires.
All connections must be carefully insulated with thin heat shrink tubing or plastic shrink sleeves. In places where the wire comes into contact with the sharp edges of the optics housing, also additionally install a protection made of dense cambric.
Mounting LEDs on taillights
The LEDs are installed on the rear lights in the following sequence:
- We dismantle the lantern and carefully cut it. The best way to do this is to use a burnout device. In this case, you will get a thin and even seam.
- We remove the reflectors of the turning lights and take out the reflectors.
- We disassemble the taillights.
- On the outer surfaces we mark the optimal position of the reflectors.
- Cut out 15 mm circles from the self-adhesive film and glue them inside.
- The inner surface of the stop lamps and dimensions is painted with silver paint. After the paint has dried, the circles can be removed.
- We mount reflectors with epoxy glue. Additionally, we coat all joints with silicone sealant.
- The LEDs pre-soldered to the boards are installed in the case and connected with wiring.
- In order for the LEDs to burn at full power in the "STOP" mode, and less brightly in the "DIMENSIONS" mode, it is necessary to first assemble and solder the stabilization circuit. The voltage stabilizers "7812" can be taken as a basis.
- We assemble the swivel blocks and install them together with the rest of the parts into the headlights. We fix the modules with epoxy glue.
- We check the work of optics. If everything works, you can start filling the lantern blocks.
Rear light covers
Stylish and custom tail lights can be made from fiberglass. To do this, you need fiberglass, epoxy glue, putty, primer, paint, varnish and masking tape.
We cover the lanterns with masking tape. Then we apply fiberglass and saturate it with epoxy glue. We smooth out irregularities well and wait for the layer to dry. Experts recommend applying fiberglass with epoxy in thin layers in several steps.
After complete drying (10-12 hours), remove the workpiece and draw the contours of the future part with a marker. After that, it cuts out the desired profile.
We putty the cut out forms, and after drying we grind with sandpaper. Then we prime and paint the overlays. On final stage we cover the details with varnish. The rear lights are attached with double-sided tape.
As a rule, the design and design of standard taillights in passenger cars quite satisfied with their owners. However, in some cases, these lighting devices require certain modifications, for example, increasing the brightness of the lamps or changing the shape and size of individual sections (brake lights, direction indicators or side lights).
This is especially true of "older" domestically produced cars, where the taillights do not initially differ in particular expressiveness and brightness, and eventually require replacement or serious revision.
Rear light tuning options
There are several options homemade tuning lanterns. In the simplest case, the standard lamps are replaced with more powerful ones, and the flashlight diffuser is darkened by pasting with a tint film. Of course, such "tuning" flatters the owner's pride, however, the electrical wiring of such a car works with overload, and the lights themselves shine too dimly and they are practically invisible in the daytime.
Gluing shiny stripes over the diffuser along the edges of the lantern sections is intended to make them look more elegant. At least, such a harmless modification does not affect the operation of the light signaling in any way and has a right to life.
Tuning taillights with LED installation
A much more competent option for tuning the taillights is to install modern LEDs in them. The advantages of this refinement are:
- Compared to traditional incandescent bulbs, LEDs consume much less power;
- The minimum response time (lighting up) of the LEDs;
- High brightness and large viewing angles make it possible to abandon the use of reflectors in the design of the lantern and, if desired, make its diffuser colorless;
- The compact size of the LEDs allows you to arrange and group them in any order, that is, as the owner wants (of course, all this must be done within technical standards and the available space on the rear of the vehicle).
To upgrade the taillights, we need to buy a certain number of LEDs with an operating voltage of 12-16 volts. In the case of using a standard rear light diffuser (with already painted signal sections), the LEDs should be white or as close to it as possible. If you plan to make a colorless (transparent) diffuser, then we need red LEDs for the brake and side lights, orange for the turn signals and white for the reversing lights.
The number of LEDs for each section is selected based on the available free space in each section. A plate made of a thin and durable dielectric or foil-clad getinax is best suited for attaching the LEDs legs. In the first case, the installation of LEDs is carried out using pieces of a thin wire, and when using a getinax, you can etch the required number of current-carrying paths on it to supply power to "+" and "-". Of course, the 2nd option is somewhat more laborious, but this design looks more accurate and is less afraid of vibrations.
In order for all LEDs to shine equally brightly, they are connected in parallel. When buying, it is best to use such LEDs that already come with a resistor (it is needed to limit the current flowing through the diode). Otherwise, you will have to select this resistor yourself. The resistors must be fastened in such a way that they do not touch adjacent wires and do not damage them.
All connections of the supply wires are carefully insulated with a plastic cambric or thin heat shrink tubing. In those places where the wire can be damaged by sharp edges, it is additionally protected with a dense cambric.
Some relays that set the flashing frequency of the turns are very sensitive to the load. That is, at the factory they are calculated to power four lamps with a power of about 50 W (21 + 21 + 4 + a control lamp in dashboard). In the case of using diodes with a lower power consumption, the flashing frequency of the lamps may change, so this fact should be borne in mind.
- Like any other part, diodes can fail over time. Therefore, it makes sense to buy them with a small margin, so that, if necessary, you do not go shopping in search of diodes with the characteristics you need;
- Diodes also do not like excessive vibration and shaking. In this regard, the diode bodies are inserted into the board body with some interference, and all connections are made by soldering.
Who is wondering how to make rear diode marker lights with their own hands, this is a guide to making this miracle. By the way, in this way you can not only make the rear lights of a car, but also on trucks garland or on the body to put up beautiful parking lights. It's a good idea, and it is much cheaper compared to purchased headlights already ready-made. So go ahead, into the hands of a belt ...
And so I decided to make this development for my car. After all, everyone knows that the diode is tanned much faster and shines much brighter than standard incandescent lamps, and its service life is ten times longer. And so we buy diodes with a diameter of 5 or 10 millimeters from the Chip and Dip store (well, or on the market). In my case, I decided to take on the principle of the larger the diameter, the better. I bought 3 grams each. for a thing (two crystals, because if it is one, it will be cheaper, but it will also shine much worse), I don’t remember exactly the quantity (about 50 pieces). And don't forget to buy resistors. Empirically (the experience of angelic eyes) I found out that 450-500 MLA resistors are ideal for 3.5 volt diodes (maximum glow and almost do not heat up). Also, do not forget that the resistors are hung on the + diode (long leg) for a total price of about 150 grams. Yes, the pleasure is not cheap, but as my good friend says, a cheap show-off is more expensive than money.
And so we proceed to the manufacture of diode blocks for their subsequent insertion into the headlight. I did not bother with the desoldering boards and took the lower part of the usual box, having previously painted it black (which hang on the walls in your office, they are wired). I took 60 mm wide. I drilled holes there with a drill for the antennae of the diodes and put them on super glue, then bent these antennae in different directions (+ and -) and soldered the whole thing together with the diodes. IMPORTANT - do not hang more than 4 diodes per resistor. it will burn out in the near future. That is, we hang 3 or 4 diodes per resistor and we combine them minus all together ...

Then, having collected the ends of the resistors, I soldered a wire to them (similarly and with a minus) and at its end I soldered the usual base of a pre-broken light bulb
(by breaking it, we get access to the antennae + and - bulbs) and filled these antennae with ordinary sealant (so that it would not punish, for example, when washing a car or rain).
This is how these same modules look at work ...

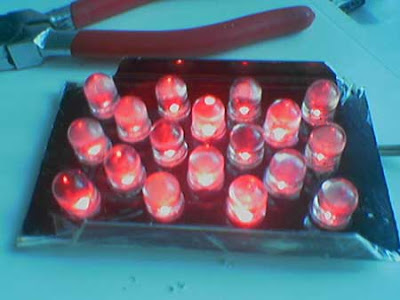
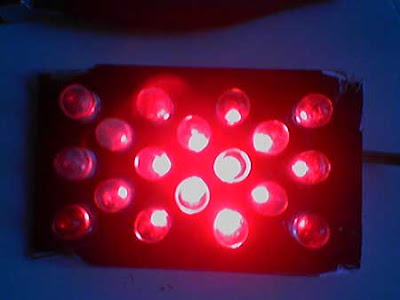
Due to the protruding corners of the box, it fits perfectly into the regular places, snuggling with the headlight itself ...
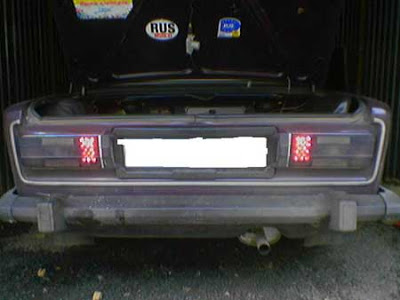
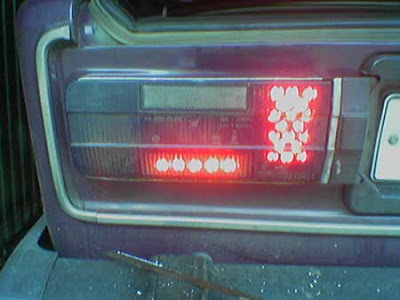
Similarly, we make parking lights, cutting out stripes from the same plastic box and placing as many diodes as you like there, we get excellent visibility in any bad weather ...

Advice - you should not make a full diode square hammered into a stitch, I did this to myself at first and almost went blind when I connected the whole thing, have pity on those who are behind !!!
Now we will tell you how to make the front Angel Eyes (Angel Eyes) like a BMW. Well, in principle, if you really want such a miracle, you can do and highlight any headlights of any car, the main thing is that it looks like!
In this case, make parking lights for the "six". Why not ... On "their" know-how, we always have pliers, wire cutters or a metal saw.
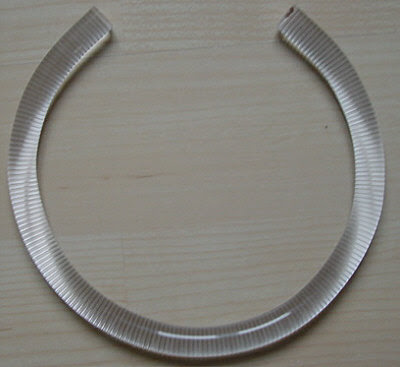
Angel Eyes - BMW know-how. Parking lights in the form of glowing white circles are not to everyone's liking, but if you really want to and you are not afraid of problems with the traffic police, "angel eyes" can be put on domestic car... Best of all - for a car with round front optics, for example, VAZ-2106 or 21213. Of course, the same can be done with a foreign car, for example, the "old woman" BME E30 - after that it will look much cooler.


