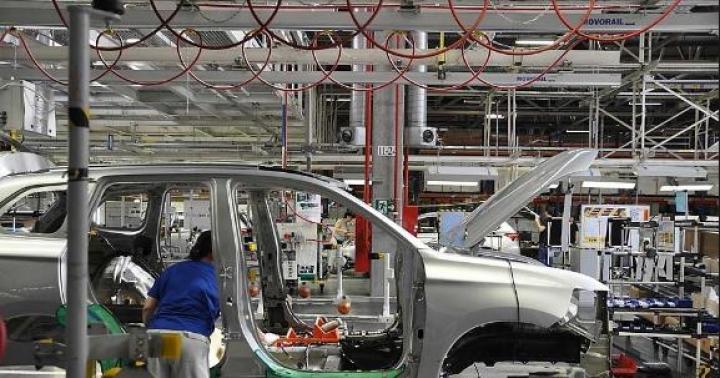
Page 1
The total labor intensity of the VAZ-2110 is 5.04 person hours.
|
Name and content of work |
Place of work |
Number of locations or service points |
Labor intensity |
Devices, tool, fixtures, model, type |
Technical requirements and guidelines |
|
|
General inspection of the car (0.43 person hours) |
||||||
|
Inspect the car, check the condition of the body, glass, plumage, license plates, paint, door mechanisms. |
Top, salon |
Visually |
License plates must be legible, doors must be tightly closed, glass must be free of cracks. |
|||
|
Check the operation of the windscreen wipers, the windscreen washer and the windscreen blower / defroster (in winter) |
Visually |
The wiper blades must fit snugly along the entire length of the edge to the surface of the windshield and move without jamming or stopping. During operation, the brushes should not touch the seal. The glass washer must be in good working order and wash the entire glass surface evenly. |
||||
|
Check the condition and operation of interior lighting devices |
Visually |
Interior lighting, must react to door opening and be switched on mechanically |
||||
|
Check the condition and operation of the door opening mechanisms, hood; if necessary, remove them to check the condition of the parts |
Visually |
Doors, hood, trunk lid should open without jamming and unnecessary noise |
||||
|
Engine (1.3 Person hours) |
||||||
|
Check the tightness of the engine cooling system and heating system by inspection. |
Motor, bottom, salon |
Visually |
Leakage of coolant in the pipes and radiator is not allowed. Coolant leakage is eliminated by tightening nuts, clamps or replacing individual parts |
|||
|
Check the fastening of the radiator and its lining |
Motor |
Key 10 to 12 |
Loosening of fasteners is not allowed |
|||
|
Check the fastening of the fan, water pump |
Motor |
Key 10 to 12 |
Loosening of the fasteners is not allowed. |
|||
|
Check the condition and tension of the drive belt. |
Motor |
Keys 17 and 13 |
Tighten loose belts, pressure force 100 N, deflection value 10-15mm |
|||
|
Check the tightness of the lubrication system by inspection. |
Motor |
Visually |
Oil leakage at the attachment points of the oil filter and crankcase is not allowed. |
|||
|
Check the fastening of the covers camshaft and timing belt tension |
See Attachment |
See Attachment. |
||||
|
Check the fastening of the pipes of the muffler. |
Visually |
Tightness of the exhaust gas system |
||||
|
Check the engine oil pan attachment |
Visually |
No smudges |
||||
|
Check the condition and attachment of the engine mounts. |
Top, Bottom |
Visually |
Supports must not be deformed and transmit vibration to the body |
|||
|
Motor, bottom |
Visually, oil dispenser |
Change of oil |
||||
|
Clutch (0.15 hour) |
||||||
|
Check the action of the recoil spring, free and full travel, pedals, operation clutch. |
Bottom and salon |
Ruler, keys 12, 13 |
Leakage of liquid is not allowed. Full pedal travel 120-130 mm, adjustable with a nut on the clutch fork. |
|||
|
Gearbox (0.14 person hour) |
||||||
|
Check the condition and tightness of the gearbox by inspection. |
Visually |
Oil leakage is not allowed |
||||
|
Check the operation and fastening of the gearshift mechanism; if necessary, fix the gearbox and its components |
Motor |
there should be no extraneous sounds, spontaneous switching off of gears is not allowed |
||||
|
Steering (0.45 person hour) |
||||||
|
Check and, if necessary, adjust the alignment angles of the front wheels; if necessary, carry out static and dynamic wheel balancing |
Stand SKO-1 |
See Attachment |
||||
|
Check the fastening of the steering gear housing, steering column |
Keys, 12,13,14 |
Tighten loose bolts |
||||
|
Check steering and steering linkage play |
Bottom and salon |
Visually, torque wrench 22 mm. |
Steering wheel play should not exceed 5 ° (18-20mm). There should be no extraneous noise. The movement and rotation should be smooth. Steering wheel nut tightening torque 31-50 N |
|||
|
Check the fastening of the ball stud nuts. |
Visually |
Splitting with wire is not allowed, tightening torque 66-82 N |
||||
|
Front wheel drives, condition of the ball joint and upper support |
See Attachment |
Replacing defective elements |
||||
|
Check the attachment of the anti-roll bar |
Visually |
Tightening if necessary or replacing defective parts |
||||
|
Brake system (0.43 hours) |
||||||
|
Check the condition and tightness of the pipe connections brake system |
Visually |
Leakage of brake fluid is not allowed. Check the tightness of the brake chamber and pipe connections, for which press the brake pedal 2-3 times. Work to be performed by two performers |
||||
|
Check the fastening of the brake valve and its drive parts |
Motor |
Visual | ||||
|
Check the condition of brake drums and discs, pads, linings, springs |
Up and down |
Visual |
The wear of the pads should not exceed 1.5-2 mm |
|||
|
Check the fastening of the rear wheel support shields |
Visual |
Facelift |
||||
|
Check the action of the brake booster, the amount of free and working brake pedal travel; if necessary, add liquid to the main brake cylinders; if air enters the hydraulic system of the drive, bleed the air from the system |
Motor, bottom and interior |
See Attachment |
See Attachment |
|||
|
Check the serviceability of the drive and the action of the parking brake |
Bottom and salon |
Key for 13 |
The number of clicks of the parking brake from 4-5 |
|||
|
Suspension, wheels (0,44 hours) |
||||||
|
Check the tightness of the shock absorbers, the condition and fastening of their bushings |
Visually |
Check condition, tighten if necessary |
||||
|
Check status wheel rims and the fastening of the wheels, the condition of the tires and the air pressure in them; remove foreign objects stuck in the tread |
Visually |
There should be no visible damage and extraneous noise and knocking |
||||
|
Body (0.24 person hour) |
||||||
|
Check the condition of the ventilation and heating systems, as well as the door seals. |
Visually |
Replace seals if damaged. |
||||
|
Check the condition of the special anti-corrosion coated and painted bodywork. If necessary, clean corroded areas and apply a protective coating |
Visually |
Eliminate damage |
||||
|
Power supply system (0.16 hour) |
||||||
|
Check fastening and tightness of fuel tanks, pipe connections |
Motor, bottom |
Visually |
Fuel leakage is not allowed, tighten loose fasteners |
|||
|
Check the action of the drive, the completeness of opening and closing of the throttle and air dampers |
Motor |
10 wrench and screwdriver |
The damper should move without jamming, fully open and close. |
|||
|
Rechargeable battery (0.3 hour) |
||||||
|
Check the condition of the battery by electrolyte density and cell voltage under load |
Motor |
Hydrometer, load fork |
Under load, the charge is from 13.5 to 14.4V, the density of the electric is 1.27-1.29 |
|||
|
Check the condition and fastening of the electrical wires connecting the battery with ground and the external circuit, as well as the fastening of the battery in the socket |
Motor |
Rags, 10% solution of ammonia or soda ash |
Leads and wire ends must be free of oxides and lubricated. Retighten loose bolts |
|||
|
Generator, starter (0.24 person hour) |
||||||
|
Inspect and, if necessary, clean the outer surface of the generator and starter from dust, dirt and oil |
Motor |
Degreaser, rags, compressed air source |
Replace worn brushes |
|||
|
Check the fastening of the alternator and starter |
Motor |
Keys. 17 and 13 |
Facelift |
|||
|
Check the fastening of the alternator pulley |
Motor |
Head 17 |
Facelift |
|||
|
Ignition devices (0.23 person hour) |
||||||
|
Check the condition and, if necessary, clean the surface of the ignition coil, low and high voltage wires from dust, oil dirt. |
Motor |
Gasoline, rags |
Replace damaged wires |
|||
|
Unscrew spark plugs and replace |
Motor |
Candle wrench by 21 mm |
New candles |
|||
|
Lighting and signaling devices (0.28 person hour) |
||||||
|
Check the fastening and operation of the rear lights and brake lights, direction indicators, instrument panel lamps and sound signal |
Top and Salon |
Visually |
Checking connectors, replacing bulbs |
|||
|
Check the installation, fastening and operation of the headlights; adjust the direction of light flux of headlights |
Top and Salon |
K310 device, visual |
Adjusting the luminous flux |
|||
|
Lubrication and cleaning work (0.48 hours) |
||||||
|
Lubricate door hinges, door keyholes, rubbing sections of the door opening limiter |
Motor and top |
Friction nodes |
Oil dispensing column, syringe |
Lubricate components and assemblies |
||
|
Change the oil in the engine crankcase and at the same time replace the filter element of the fine oil filter |
Motor |
The oil level is set between min and max. |
||||
|
Clean the breathers and add oil in the crankcases of the vehicle units |
Motor and bottom |
Rags, funnel with extension tube |
The level is set by mark max for 5th gear lubrication |
|||
|
Replace filter element air filter engine |
Motor |
crosshead screwdriver |
Change filter |
|||
Popular materials:
Industrial hazards and measures to reduce them
Working conditions are a combination of production factors that affect the health and performance of a person in the labor process. These factors are different in nature, forms of manifestation, action on a person, etc. Among them, a special group ...
Organization of release and return of rolling stock to the park
In a modern ATP, special attention should be paid to the production of cars on the line. Services, drivers, dispatchers, shift mechanics, etc. are involved in the production of cars. A clear organization and timely ...
Calculation of linear dimensions and determination of the basic dimensions of the trolley
We take the linear dimensions by analogy (trolley 18 - 578). Figure 1 - Two-axle bogie model 18 - 578 - track width: 1520 mm; - trolley base: 1850 mm; The distance from the level of the rail heads to the level of the bearing surface of the center bearing ...
Federal Agency for Education of the Russian Federation
SYKTYVKAR FOREST INSTITUTE
State educational institution
Higher professional education
"St. Petersburg State Forestry Academy
them. CM. Kirov "
Faculty of Forestry
Department of Automobiles and Automotive Economy
COURSE PROJECT
Discipline: Technical maintenance of cars
Theme: Organization of TO-1 vehicle KamAZ 53212
KP. BLTP. 190601.4 BEFORE 061219. PZ
Completed by Skorobogatykh P.A.
Checked by P.A. Malashchuk
Head Department of Miracles V.I. Ph.D.
Syktyvkar 2009
Introduction
Maintenance of machines is a set of preventive measures during the overhaul period, aimed at preventing failures in units and assemblies and reducing the intensity of wear of parts. Maintenance includes control and diagnostic, fastening, lubrication, filling, adjusting, electrical and other types of work.
Car maintenance has the goal of: ensuring the constant technical serviceability of units, units in the car as a whole; maximize overhaul runs; guarantee traffic safety; ensure the minimum consumption of operating materials.
To achieve these goals, a planned preventive maintenance system has been adopted in our country, which provides for the mandatory implementation of the established set of works at a given frequency in the process of using, storing and transporting vehicles. The technological process of servicing a car with a planned preventive system provides for a combination of mandatory work with work performed on demand, the need for which is determined as a result of checking the condition of the car. Maintenance of special equipment installed on the vehicle is carried out, if possible, simultaneously with maintenance of the chassis.
Depending on the amount of work and the frequency of their implementation, maintenance is divided into the following types: control inspection, daily maintenance, maintenance No. 1 (TO-1), maintenance No. 2 (TO-2), seasonal service(CO). The objective of this course project is to get acquainted with the system of car maintenance, draw up a technological map, determine the number and placement of workers, as well as carry out the selection of technological equipment. Carry out a drawing of the car in two projections indicating the number and place of the maintenance operation. And the technological layout of the post with the arrangement of equipment and workers.
The main technical characteristics of the car KamAZ 53212
Weight parameters and loads:
The equipped weight of the car, kg 8500
Carrying capacity, kg 11000
Gross weight, kg 19650
Full mass of the trailer, kg 14000
Full mass of the road train, kg 33650
Installed motors:
Model 740.31-240 (Euro-2)
Type: diesel with turbocharging, with intercooling of charge air
Maximum useful power, kW (hp) 165 (225)
Rated power, gross, kW (hp) 176 (240)
at crankshaft rotation speed, rpm. 2200
Max. useful torque, Nm (kgfm) 912 (93)
at a crankshaft rotation speed, rpm 1100-1500
Arrangement and number of cylinders V-shaped, 8
Working volume, l. 0.85
Diameter of the cylinder and piston stroke, mm 120/120
Compression ratio 16.5
Supply system:
Capacity fuel tank, l. 500
Electrical equipment:
Voltage, V 24
Accumulators, V / Ah 2 × 12/190
Generator, V / W 28/2000
Clutch:
Friction type, dry, double-disc
Hydraulic drive with pneumatic booster
Transmission:
Type mechanical, ten-stage
Mechanical, remote control
Gear ratios in gears:
7,82 4,03 2,5 1,53 1,000 7,38
6,38 3,29 2,04 1,25 0,815 6,02
Main gear:
Gear ratio 5.43
Pneumatic drive
Dimensions: drum diameter, mm 400
Width of brake pads, mm 140
Total area of brake pads, cm2 6300
Wheels and tires:
Wheel type: disc
Rim size 7.5-20 (190-508)
Tire size 10.00 R20 (280 R508)
Above engine type, high roof
Sleeper version
Platform:
Side platform, with metal folding sides, depending on the configuration, it is equipped with a frame and an awning
Internal dimensions, mm * 6100 × 2320 or 6114 × 2420 ("euro")
Height of the sides, mm * 500 or 725 ("euro")
Vehicle characteristics full weight 19650 kg:
Maximum speed, not less, km / h 90
Climbing angle, not less,% 25
External overall turning radius, m 9.8
The list of routine maintenance works for the KamAZ 53212 car
Maintenance of TO-1 for the KamAZ 53212 car presented below is carried out in accordance with the "Regulations on the current repair and maintenance of rolling stock". According to this regulation, the first maintenance for trucks held every 4000 km. These works include control and diagnostic, inspection, fastening and lubrication and cleaning work.
The list of works includes:
General inspection:
1. Inspect the car, check the condition of the cab, platform, glass, rear-view mirrors, tail, license plates.
2. Mechanisms of doors, locks of the sides of the platform, towing (fifth wheel) device.
3. Check the operation of the windscreen wiper and washers, the operation of the heating and glass heating system (in the cold season), ventilation systems.
Engine, including cooling systems, lubricants:
4. Check the tightness of the lubrication and cooling systems of the engine (including the starting heater) by inspection.
5. Check the operation of the valve mechanism by ear.
6. Check the fastening of the exhaust system parts (front pipe, muffler, etc.), oil sump.
7. Check the motor mount.
8. Check condition and tension drive belts.
Clutch:
9. Check the free play of the clutch pedal. Check the tightness of the clutch release hydraulic system.
10. Check the fluid level in the expansion tank of the clutch master cylinder.
Transmission:
11. Check the attachment of the transmission and its external parts.
12. Check the gear change mechanism in action when the vehicle is stationary.
Cardan transmission:
13. Check the fastening of the propeller shaft flanges. Check the backlash in the joint and spline joints of the cardan drive.
Rear axle:
14. Check the tightness of the rear (middle) axle connections.
15. Check the fastening of the gearbox housing, flanges of the axle shafts.
Steering and front axle:
16. Check the tightness of the power steering system.
17. Check the fastening of the nuts of the pivot pins levers of the ball pins of the steering rods into the cotter pins.
18. Check the backlash of the steering wheel and steering linkage joints.
Brake system:
19. Check the condition and tightness of pipelines and devices of the brake system.
20. Check the stroke of the rods of the brake chambers.
21. Change the alcohol in the anti-freeze guard.
Chassis.
22. Check the condition of the frame, components and suspension parts by inspection.
23. Check fastening of ladders and spring pins, fastening of wheels.
24. Check the condition of the tires and the air pressure in them: remove foreign objects stuck in the tread and between the paired wheels.
Cab, platform (body) and empennage.
25. Check the condition and operation of the locking mechanism, stop-limiter and safety device of the tilting cab.
26. Check the fastening of the platform to the vehicle frame,
27. Check the mountings, footrests, mudguards. Inspect the cab and platform surfaces; if necessary, clean corroded areas and apply a protective coating.
Supply system.
28. Check the condition of the power system devices by inspection, their fastening and the tightness of the connections.
Electrical equipment.
29. Check the operation of the horn, instrument panel lamps, lighting and alarms, headlights, sidelights, rear lights, brake light and light switch.
30. Check the condition and fastening of the electrical wires.
31. Check the fastening of the generator and the condition of its contact connections.
32. Clean the storage battery from dust, dirt and electrolyte traces; clean the ventilation holes, check the fastening and reliability of the contact of the wire lugs with the output pins; check the electrolyte level.
Lubrication and cleaning work:
33. Lubricate friction units and check the oil level in the crankcases of the units with a chemotological chart.
34. Clean the gearbox and axle breathers.
Car check after service:
35. After servicing, check the operation of units, assemblies and instruments of the vehicle on the move or at the diagnostic post.
Technological map of maintenance of the car KamAZ 53212
Table 1
Routing TO-1 of the car KamAZ 53212
| No. of work performed | Name and content of works | Place of service | Number of service points | Devices, tools, fixtures, model, type | Technical requirements and guidelines |
| General inspection | |||||
| 1 | Inspect the car and check the condition of the cab, platform, glass, rear-view mirrors, plumage, paint, license plates and rear-view mirrors | Top, front, back | - | - | The windows of the cab, headlights, sidelights, direction indicators must be intact. Platform boards must not have cracks or breaks. The condition of the license plates must meet the requirements of the Rules road traffic... Rearview mirrors must be intact and correctly adjusted |
| 2 | Check the serviceability of the cab door locks, platform side locks, towing device | From above, from behind | - | Mechanisms of doors, locks of the platform sides must be in good working order. The towing device must be securely attached to the frame and its swing-out shackle must be cotted | |
| 3 | Check the operation of the windscreen wipers, the windscreen washer and the windscreen blower / defroster (in winter) | In the cockpit | 3 | - | The wiper blades must fit snugly along the entire length of the edge to the surface of the windshield and move without jamming or stopping. During operation, the brushes should not touch the seal. The glass washer must be in good working order and wash the entire glass surface evenly. |
| Engine including cooling and lubrication systems | |||||
| 4 | Inspect by inspection the condition and tightness of the cooling systems, engine lubrication, cab heating system and starting heater | Up and down | 4 | - | Oil leakage at the points of attachment of the oil filter and crankcase is not allowed. Leakage of coolant in the pipes and radiator is not allowed |
| 5 | If necessary, eliminate the leakage in the pipelines of the cooling system, engine lubrication, cab heating and starting heating | Also | 4 | Leakage of oil, coolant and fuel is eliminated by tightening nuts, clamps or replacing individual parts | |
| 6 | Check the valve mechanism by ear | Above | 1 | - | Start the engine and listen to its operation, there should be no knocking in the valve mechanism if it is correctly adjusted |
| 7 | If necessary, adjust the clearances between the valves and rocker arms. | Also | 16 | Device for adjusting valves I801.14.000 (10), set of probes No. 2 (15) | Thermal clearances in the gas distribution mechanism are adjusted on a cold engine no earlier than 30 minutes after stopping. In each position, simultaneously adjust the valve clearances of the two cylinders in the order of operation: 1-5-4-2-6-3-7-8, turning crankshaft by 90 0 Adjustable thermal clearances in the following order: install the piston of the first cylinder in b. m. of the compression stroke, turn the crankshaft in the direction of rotation (counterclockwise, when viewed from the flywheel side) at an angle of 60 0 (rotation of the flywheel by the angular distance between two adjacent holes corresponds between two adjacent holes corresponds to the rotation of the crankshaft by 30 0 ), While the valves of the 1st and 5th cylinders are closed (the valve rods can be easily turned by hand), check the tightening torque of the nuts securing the rocker arm struts of the adjustable cylinders and, if necessary, tighten them, to adjust the clearance, loosen the nut of the adjusting screw, insert a feeler gauge into the gap and, turning the screw with a screwdriver, set the required clearance. While holding the screw with a screwdriver, tighten the nut and check the clearance. The clearance should be 0.25-0.3mm for inlet valves and 0.35-0.4mm for outlet valves. |
| 8 | Check the fastening of the oil sump, exhaust pipes, flanges of the exhaust pipes of the muffler to the cylinder block and, if necessary, fasten | Up and down | 3 | Auto mechanic's set (large) I-148 (11), chisel (14), hammer (13). | Tighten the nuts of the oil sump with a tightening torque of 1.5-1.7 kgf ∙ m, exhaust pipelines 4.5-5.4 kgf ∙ m, flanges of the exhaust pipes of the muffler 4.5-5.4 kgf ∙ m |
| 9 | Check the fastening and, if necessary, fasten the engine to the frame | Above | 1 | Auto mechanic's set (large) I-148 (11) | The nuts of the bolts securing the engine to the frame must be tightened and cotter-pinned. Carry out tightening with a tightening torque of 5.5 - 6 kgf ∙ m |
| 10 | Check the condition and tension of the alternator and water pump drive belts | Above | 1 | Auto mechanic's set (large) I-148 (11) | Ensure the belt tension by moving the generator, correctly tensioned belt when pressing the middle of the belt with a force of 4 kgf, the deflection should be 15-22 mm. |
| Clutch | |||||
| 11 | Check free play of the clutch pedal | In the cockpit | 1 | Ruler (16) | Free travel of the pedal should be 6-12 mm |
| 12 | If necessary, adjust the clutch pedal free play | Also | 1 | Auto mechanic's set (large) I-148 (11) | Free travel of the pedal is set by adjusting the clearance between the piston and the piston pusher of the master cylinder. Adjust the clearance between the piston and the piston pusher of the master cylinder with an eccentric pin, which connects the upper eye of the pusher with the pedal lever. Turn the eccentric pin so that the pedal movement from the upper stop to the moment the piston pusher touches the piston is 6-12 mm, then tighten and cotter the castellated nut. |
| 13 | Check the tightness of the clutch release hydraulic drive | In the cockpit and below | 1 | - | Leakage of liquid in the main cylinder, working cylinder and pipeline is not allowed |
| 14 | If necessary, eliminate the leakage of the clutch release drive lines | Also | 1 | Auto mechanic's set (large) I-148 (11) | Fluid leakage is eliminated by tightening the nuts and replacing individual elements |
| 15 | Check the fluid level in the expansion tank of the clutch master cylinder | In front | 1 | - | |
| 16 | If necessary, add fluid to the expansion tank of the clutch master cylinder | Also | 1 | - | The liquid level in the tank from the top edge should be 15-20mm |
| Transmission | |||||
| 17 | Check the fastening of the gearbox and its external parts | Up and down | - | Auto mechanic's set (large) I-148 (11) | Tighten the gearbox mounting bolts with a tightening torque of 5.5-6 kgf ∙ m |
| 18 | Check the gearshift mechanism in action when the vehicle is stationary | In the cockpit | 1 | - | Gear shifting should be done without jamming. |
| Cardan transmission | |||||
| 19 | Check the fastening and, if necessary, fix the flanges of the propeller shafts, check the play in the hinge and spline joints of the propeller shaft | From below | 16 | Auto mechanic's set (large) I-148 (11) | Backlash in hinged and spline joints is not allowed, tighten the flanges with a tightening torque of 12.5-14 kgf ∙ m |
| Rear (middle) axle | |||||
| 20 | Check the tightness of the rear (middle) axle connections, repair the leak if necessary | From below | 2 | Auto mechanic's set (large) I-148 (11) | Oil leakage is not allowed. Eliminate leakage by tightening the nuts or replacing individual elements of the unit, tightening with a tightening torque of 1.5-1.7 kgf ∙ m |
| 21 | Check the fastening and, if necessary, fasten the nuts securing the gearbox housing, flanges of the axle shafts | From below and above | - | Auto mechanic's set (large) I-148 (11) | Tighten the gearbox mounting nuts with a tightening torque of 16-18 kgf ∙ m |
| Steering and front axle | |||||
| 22 | Check the tightness of the power steering system | Above | - | - | Oil leakage in the oil line and in the pump is not allowed |
| 23 | If necessary, repair the leakage of the power steering system | Also | - | Auto mechanic's set (large) I-148 (11) | Oil leakage is eliminated by tightening the nuts and replacing individual elements |
| 24 | Check the fastening and splitting of the nuts of the pivot arms. Eliminate faults if necessary | From below | 3 | Auto mechanic's set (large) I-148 (11), pliers (12) | The nuts securing the pivot arm levers must be tightened and cotter-pinned. Tighten the levers with a tightening torque of 36-40 kgf ∙ m Levers should not have any play in the socket and on the key |
| 25 | Check the fastening and splitting of the nuts of the ball pins of the longitudinal and transverse steering rods. Eliminate faults if necessary | Also | 3 | Auto mechanic's set (large) I-148 (11), pliers (12) | The nuts securing the ball pins must be tightened and cotter-pinned. Finger play in the tapered seats is not allowed. tighten the ball pins with a tightening torque of 9-10 kgf ∙ m |
| 26 | Check steering wheel play | In the cockpit | 1 | Device model NIIAT K-402 (8) | The check is carried out on a loaded car (without load) with the engine running at a speed of 600 - 1200 min -1, with normal tire pressure, set the front wheels straight, Free wheel travel on a new car should not exceed 15 0. Maximum permissible free play 20 0 |
| 27 | Check the play in the steering rod joints | Below and in the cockpit | 3 | - | The backlash in the steering rod joints must be checked by the relative movement of the ball pins and the ends or heads of the rods with a sharp turn of the steering wheel in both directions. Backlash is not allowed in the joints of the steering rods. |
| Brake system | |||||
| 28 | By external examination and according to the indications of standard devices, check the serviceability of the brake system | Below and in the cockpit | - | - | The pressure created by the compressor should be 6.2-7.5 kgf / cm 2. When you press the brake pedal, the pressure should drop sharply by no more than 0.5 kgf / cm 2 |
| 29 | Check the condition and tightness of the pipelines and devices of the brake system and, if necessary, eliminate the malfunction | Up and down | - | Auto mechanic's set (large) I-148 (11) | Depressurization of the brake system is not permissible. Depressurization is eliminated by tightening the nuts or replacing individual elements of the system |
| 30 | Check and, if necessary, adjust the stroke of the brake chamber rods | From below | 6 | Auto mechanic's set (large) I-148 (11), pliers (12), ruler (16) | The stroke of the rods should be no more than 40mm. Carry out the check in the following order: install a ruler parallel to the rod with its end against the brake chamber housing, mark the location of the extreme point. Press the brake pedal all the way (pressure in the pneumatic drive is not less than 6.2 kgf / cm 2, drums are cold, the parking brake system is off), mark the location of the same point. The difference between the values obtained is the amount of stroke. The stroke of the rod is adjusted by turning the worm axis of the adjusting lever, having previously unscrewed the retainer by two or three turns. Rotate the axis to set the smallest stroke |
| 31 | Change the alcohol in the anti-freeze guard | Above | 1 | Auto mechanic's set (large) I-148 (11) | Drain sediment from the filter housing. To fill in alcohol and control its level, release the pull handle to the lower position and fix it by turning it 90 0, unscrew the plug with the level indicator, fill in alcohol and close the filling hole, turn on the fuse |
| Chassis | |||||
| 32 | Check the condition of the frame, components and suspension parts by inspection | From below | - | - | Looseness of riveted joints, cracks and spars and cross members should not be |
| 33 | Check the fastening of the ladders of the springs | Above | - | Auto mechanic's set (large) I-148 (11), wrench for nuts of step-ladders of springs, model I-314 (7) | tighten the ladders with the tightening torque of the front ones - 25-30 kgf ∙ m, the backdrop 95-105 kgf ∙ m |
| 34 | Check wheel attachment | Also | 30 | Wrench for wheel nuts model I-303M (6) or wheel wrench 535M (9) | Tighten the nuts with a torque of 25 - 30 kgf ∙ m evenly, in one, two or three steps, starting from the top. |
| 35 | Check the condition of the tires and the air pressure in them, remove foreign objects stuck in the tread and between the paired wheels | Also | 10 | Air dispenser model TsKB S-401 (1) or tip with manometer model 458 (2), pliers (12) | The tire should not have cracks, breaks, or bulges. The tire valve must have a cap. Air pressure 5.3-7.3 kgf / cm 2. Remaining depth tread pattern in the center of the treadmill must be at least 1.0 mm |
| Cab and platform | |||||
| 36 | Check the condition and operation of the locking mechanism, stop-limiter and insurance device | Above | - | - | The locking mechanism and insurance devices must be in good condition |
| 37 | Check the attachment of the platform to the vehicle frame and, if necessary, fasten | Also | - | Auto mechanic's set (large) I-148 (11) | tighten the platform fastening nuts with a tightening torque of 18-21 kgf ∙ m |
| 38 | Check the fastening of the footrests, mud flaps, fasten if necessary | Also | - | Auto mechanic's set (large) I-148 (11) | Tighten the footrests with a tightening torque of 1.5-2.5 kgf ∙ m, mud flaps 1-2 kgf ∙ m |
| 39 | Inspect the surface of the cab and platform, if necessary, clean the places of corrosion and apply a protective coating | Top, front, back | - | Metal brush | Rust, paint peeling, cracks not allowed |
| Supply system | |||||
| 40 | Check the condition and tightness of the power supply system by inspection: fuel pump low pressure, fuel fine filter, fuel tank, fuel sump filter, fuel line connections, high pressure fuel pump and fine filter | Above | - | - | Leakage of fuel in the instruments and fuel lines of the system is not allowed. Fuel lines must not be bent or cracked. |
| 41 | If necessary, eliminate the leakage in the devices and connections of the fuel lines of the power supply system | Also | - | Auto mechanic's set (large) I-148 (11), pliers (12) | Leakage of fuel from the devices and connections of the fuel lines of the power supply system is eliminated by tightening the individual elements of the connections. tighten with a tightening torque of 4.5-5.4 kgf ∙ m |
| Electrical equipment | |||||
| 42 | Check the operation of the sound signal, headlights, sidelights, rear light, brake light, instrument panel lamps and direction indicators | In the cockpit and above, in front, behind | - | - | All lamps should give light without flickering, and the sound signal should be sharp without rattling and wheezing |
| 43 | If necessary, replace faulty headlights, sidelights and rear light bulbs | In the front and in the back | - | Auto mechanic's set (large) I-148 (11) sanding paper (19) | When replacing lamps, it is necessary to clean the cartridge contacts. |
| 44 | Check the condition and fastening of the electrical wires | In the cab, front, top, rear | - | Auto mechanic's set (large) I-148 (11), pliers (12) | Electric wires must be in good condition and securely fastened |
| 45 | If necessary, insulate damaged areas of electrical wires (up to 200mm long) | Also | - | Pliers (12), mounting knife, electrical tape | Damaged places of electrical wires must be carefully insulated |
| 46 | Check and, if necessary, fix the generator | Above | 1 | Auto mechanic's set (large) I-148 (12) | - |
| 47 | Clean the surface of the battery from dust, dirt and electrolyte | Above | 1 | Rubber gloves (17), a rag (20), a bath with a solution of ammonia or soda ash, a brush (18) | The surface of the battery must be dry and clean. The electrolyte must be wiped off with a cloth soaked in a solution of ammonia or soda ash. |
| 48 | Clean the ventilation holes in the battery plugs | Also | 6 | Screwdriver wrench rechargeable batteries(17), wooden stick Æ 1.5mm, rags (20), rubber gloves (17) | - |
| 49 | Check the electrolyte level of the electrolyte in the battery and, if necessary, top up with distilled water | Also | 6 | Level tube (17), rubber gloves (17), rubber bulb (17) | The electrolyte level in the cells must be 10-15mm above the upper edge of the safety net |
| 50 | Check the fastening and condition of the cable lugs with the battery terminals | Also | 2 | Auto mechanic's set (large) I-148 (11) | Lug terminals must make good electrical contact |
| 51 | If necessary, clean and grease the battery terminals and cable lugs | Also | 2 | Rags (20), sandpaper (19) | Clean the oxidized battery terminals and wire ends and say their non-contact surfaces with grease Litol 24 GOST 21150-87 |
| Lubrication and cleaning work | |||||
| 52 | Check the oil level in the engine crankcase | Above | 1 | Dipstick and rags (20) | Check the oil level with the engine off in the following order: remove and wipe the oil dipstick, insert it into the socket as far as it will go and remove. The oil level must reach the upper mark |
| 53 | If necessary, top up the oil in the crankcase | Also | 1 | Oil dispenser model 367MZ (4), rags (20) | Change oil M-10G 2 k, GOST 8581-78, in winter - M-8G 2 k, GOST 8581-78, all-season - DV-ASp-10V |
| 54 | Check the oil level in the reservoir of the power steering pump | Also | 1 | - | The oil level should be between the marks on the gauge. |
| 55 | If necessary, top up the oil in the power steering reservoir | Also | 1 | Rags (20) | Add oil to normal with the engine running at the minimum crankshaft speed. Oil for the hydraulic system of the "P" car. |
| 56 | Check the oil level in the gearbox housing (GB) | From below | 1 | Auto mechanic's set (large) I-148 (11), rags (20) | Unscrew and wipe off the oil dipstick, insert it into the socket as far as it will go and remove it. The oil level must be up to the upper mark |
| 57 | Top up if necessary in the gearbox housing | Also | 1 | Auto mechanic's set (large) I-148 (20), installation for refueling car aggregates transmission oil model 3161 (3) | TSp-15k, GOST 23652 - 79 (at temperatures not lower than minus 30 0 С), TM5-12RK, TU38.101.844 - 80 (at temperatures up to minus 50 0 С). |
| 58 | Check the oil level in the rear (middle) axle crankcase | Also | 2 | Auto mechanic's set (large) I-148 (11) | Crankcase oil rear axle should be at the level of the control hole |
| 59 | If necessary, add oil to the crankcase of the rear (middle) axle to the norm | Also | 2 | Auto mechanic's set (large) I-148 (11), installation for filling car units with transmission oil 3161 (3) | TSp-15k, GOST 23652 - 79 (at temperatures not lower than minus 30 0 С), ТН5-12RK, TU38.101.844 - 80 (at temperatures up to minus 50 0 С). |
| 60 | Clean the gearbox and rear (middle) axle breathers | From below and above | 3 | Rags (20), wire diameter 1.5 mm | - |
| 61 | Lubricate pivots steering knuckles front axle | From below | 4 | Solidolon-oppressor model 390 (5) | Litol - 24 grease, GOST 21150 - 87. Substitutes: grease Zh, GOST 1033 - 79 or grease C, GOST 4366 - 76, Lubricate through grease fittings until fresh grease is squeezed out |
| 62 | Lubricate the front spring pins | In front | 2 | Also | Also |
| 63 | Steering joints | From below | 4 | Also | Also |
| 64 | Lubricate the brake adjuster levers | Also | 6 | Also | Also |
| 65 | Camshaft sleeves | Also | 6 | Also | Grease Litol - 24, GOST 21150 - 87. Substitutes: solid oil Zh, GOST 1033 - 79 or solid oil C, GOST 4366 - 76, Lubricate through grease fittings, making a syringe no more than five strokes |
| Organizational work. Paperwork and quality control of vehicle maintenance | |||||
| 66 | Place the car at a service station. | Fast | - | - | The car must be installed at the work post only after repair of great labor intensity, cleaning and washing works, in a clean and dry state. |
| 67 | Record on the maintenance sheet and maintenance vehicle data on the performance of TO1. | office table | - | - | - |
| 68 | Provide assistance and control the quality of the work of the performers. | - | - | The operation is performed by a foreman or a senior locksmith. | |
Schematic map of the arrangement of performers at the maintenance post
Table 2. Map-diagram of the arrangement of performers at the maintenance post
| Post appointment | The serial number of the performer and his qualifications | Place of execution |
The number of works and the sequence of their execution | Notes (edit) |
| Inspection works, maintenance of the engine, electrical equipment, gearbox, switchgear, clutches, lubrication work. | No. 1, Car repair mechanic of the 3rd category | Top, front, back, in the cockpit | 3, 11, 12, 13, 14, 18, 26, 27, 28, 30, 42, 44, 45, 1-5,10, 22, 23, 6, 7, 36, 38, 39, 8, 9, 17, 21, 33, 34, 35, 40, 41, 43, 46-55, 15, 16 | Operation 42 is performed by the 1st and 3rd performer together. |
| Lubrication, cleaning, refueling work, maintenance work on the chassis, transmission, cardan shafts and RU | No. 2, 2nd category car repair mechanic | From below | 13, 14, 27-30, 4, 5, 8, 17, 19, 20, 21, 24, 25, 32, 56-61, 63-65 | Operations 27 and 30 Performed by the 1st and 2nd performer together |
| Organizational work, paperwork and service quality control. | No. 3 Car repair mechanic of the 4th category (foreman) | Above | 64, 65, 66 | The tasks of the foreman include paperwork, quality control and assistance in difficult situations. |
General and additional equipment timesheet
Table 3. Table of the main and additional equipment
| P / p No. | equipment identification | Model, type, GOST | Brief technical information | Manufacturing plant |
| 1 | Automatic air dispensing column | TsKB S-401 | Stationary, automatic; supply air pressure 5. .8 kgf / cm 2; measurement limits on a scale from 1.5 to 6.5 kgf / cm 2, scale divisions 0.1 kg / cm 2 | Bezhetsk plant "Auto special equipment" |
| 2 | Pressure gauge tip for air dispensing hose | 458 | Manual, versatile; pressure measurement limit 6 kg / cm 2; the price of the scale division of the manometer is 0.2 kg / cm 2. | Also |
| 3 | Installation for filling with transmission oil | 3161 | Stationary, submersible, with automatic operation; productivity through two sleeves not less than 12 l / min | Cherepovets plant of auto-special equipment "Krasnaya Zvezda" |
| 4 | Oil dispenser with pumping unit | 376M3 | Stationary, submersible with automatic operation; productivity 8-12 l / min | Also |
| 5 | Mobile solid blower with electric drive and hopper | 390 | Mobile, with an electric drive; the maximum developed pressure is 400 kg / cm 2; productivity 150 g / min; usable hopper capacity | Kochubeevsky plant "Autospecial equipment" |
| 6 | Wrench for wheel nuts of trucks and buses | I-303M | Mobile, electromechanical, inertial shock action; tightening torque of the nut at the first position of the load 50-60 kgf ∙ m | Gremyachinsky plant "Autospecial equipment" |
| 7 | Nut runner for spring ladder nuts (ditch) | I-314 | Maximum torque 82 kgf ∙ m | Chita plant "Autospecial equipment" |
| 8 | Universal device for testing the steering of cars | NIIAT K-402 | Manual, mechanical, versatile; measurement range; on the backlash scale 25 - 0 - 25 o, on the dynamometer scales up to 2 kgf | |
| 9 | Balloon wrench | 535M | - | Kazan SEZ "Auto special equipment" |
| 10 | Engine valve adjuster | I801.06.000 | Tubular wrench combined with a screwdriver | - |
| 11 | Auto Mechanic's Kit (Large) | I-148 | Contains 44 items. Key sizes, mm - from 7 to 32 | Kazan SEZ "Auto special equipment" |
| 12 | Combined pliers | Combination pliers 7814.0161 1X9 GOST 17438 - 72 | - | - |
| 13 | Locksmith steel hammer | Hammer 7850-0053 C 12HP GOST 2310-70 |
Nominal weight 500g | - |
| 14 | Cold chisel | Chisel 2810-0189 GOST 7211-72 | - | |
| 15 | Probe set # 2 | Probes No. 2 GOST 882-75 | The thickness of the stylus plates is 0.02-0.10; 0.15-0.50mm | - |
| 16 | Measuring metal ruler | Ruler 1-150 |
- | - |
| 17 | Battery maintenance tool and tool kit | E-401 | Portable, consists of 15 items | Novgorod SEZ "Autospecial equipment" |
| 18 | Hair brush | GOST 10597-70 | - | - |
| 19 | Sanding paper | GOST 6456-75 | - | - |
| 20 | Cleaning cloth | GOST 5354-74 | - | - |
| 21 | Locksmith workbench | ORG-1468-01-060A | - | Own production |
| 22 | Chest for cleaning materials | OG.03-000 | - | Also |
| 23 | Waste bin | OG.16-000 | - | Also |
Conclusion
In the course of the work carried out, a maintenance scheme was developed at one post for the KamAZ 53212 vehicle. A list of operations performed at the first maintenance, which includes 35 points. During the maintenance, fastening, filling, adjusting, inspection work is performed. A map-diagram of the arrangement of performers has been drawn up. A timesheet of the main and additional equipment has been compiled. Completed the graphic part of the course project. The first part of which is a drawing of a car in two projections with an indication of the number and location of the maintenance operation. The second part is a diagram of the technological layout of the post with the arrangement of equipment and workers
Bibliography
1. The technology of performing routine maintenance of the first and second technical maintenance of the GAZ 53A car.
2. Central Design and Technology Bureau for the introduction of new technology and research and development in road transport (TSENTRAVTOTECH). - M. Transport, 1978. - 136s.
3. Regulation on maintenance and repair of rolling stock road transport Approved 09/20/1984 M .: Transport 1986 73 p.
4. A practical guide for maintenance and repair of KamAZ P69 vehicles of 6X4 type / E.A. Mashkov. - M .: Mechanical engineering, 1994 .-- 243p .: ill.
5. Timesheet of garage and technological equipment for motor transport companies of various capacities. S.A. Nevsky. - M .: Ed. TSENTRTRUDAVTOTRANS, 2000 .-- 93p.
Task number 1
Technical and performance characteristics car,
dimensions.
Manufacture and sale of cars Lada Largus in Russia was launched in 2012. The appearance and dimensions of the Lada Largus car are shown in Fig. 1.
Fig. 1 dimensions and appearance car Lada Largus
Currently, the car is produced in 5 modifications:
Largus station wagon (5 seats);
Largus cross(5 places);
Largus station wagon (7 seats);
Largus cross (7 seats);
Largus van.
All of the above modifications are available in 3 trim levels: "standard", "norm" and "luxury".
Cars of the "standard" version are equipped with a 1.6-liter 8 valve motor, with a capacity of 87 hp with a maximum torque of 140 Nm at 3800 rpm. The car is equipped with a mechanical, 5 stepped box gear shifting. The acceleration time from 0-100 is 15.4 s. The maximum speed is 155 km / h. Fuel consumption in urban mode is 10.6 liters. per 100 km., on the highway - 6.7 liters. per 100 km., and in the combined cycle per 100 km - 8.2 liters.
Cars of the "norm" version, as well as the "standard", are equipped with a 1.6-liter 8-valve engine with a capacity of 87 hp. with a maximum torque of 140 Nm at 3800 rpm. The car is equipped with a manual 5-speed gearbox. The acceleration time from 0-100 is 15.4 s. The maximum speed is 155 km / h. Fuel consumption in urban mode is 10.6 liters. per 100 km., on the highway - 6.7 liters. per 100 km., and in the combined cycle per 100 km - 8.2 liters. The distinguishing features of the "standard" and "norm" versions are the elements of comfort, exterior and interior.
Cars of the "luxury" version are equipped with a 1.6-liter 16-valve engine with a capacity of 102 hp. with a maximum torque of 145 Nm at 3750 rpm. The car is equipped with a manual 5-speed gearbox. The acceleration time from 0-100 is 13.5 s. The maximum speed is 165 km / h. Fuel consumption in urban mode is 10.1 liters. per 100 km., on the highway - 6.7 liters. per 100 km., and in the combined cycle per 100 km - 7.9 liters.
All versions in three versions have:
The same base at 2905 millimeters;
The track of the front and rear wheels, respectively, is 1469 and 1466 millimeters;
Ground clearance equal to 145 millimeters;
Same tires in size 185/65 / R15;
The main technical characteristics of Lada Largus cars with mechanical box gears with engines, power 87hp and 102 hp. are shown in Table 1.
Table 1. Specifications car Lada Largus.
| Specifications | 1.6 l. / 8V / 5MT / 87 hp | 1.6 l. / 16V / 5MT / 102 hp |
| Body | ||
| Wheel formula | 4 * 2 / front | 4 * 2 / front |
| Engine location | Front transverse | Front transverse |
| Body type | Station wagon | Station wagon |
| Overall dimensions (L * W * H *), mm | 4470*1750*1670 | 4470*1750*1670 |
| Base, mm | ||
| Rear / front wheel track | 1469/1466 | 1469/1466 |
| Ground clearance | ||
| Engine | ||
| engine's type | Petrol | Petrol |
| Supply system | Electronic injection | Electronic injection |
| Number of cylinders / arrangement | 4 / in-line | 4 / in-line |
| Working volume, cubic cm | ||
| Maximum power, hp / kW / rev. min | 87/64/5100 | 102/75/5750 |
| Maximum torque Nm / rev | 140/3800 | 145/3750 |
| Fuel | AI-95 | AI-95 |
| Dynamic characteristics | ||
| Maximum speed | ||
| Acceleration time 0-100 km / h | 14,5 | 13,1 |
| Fuel consumption | ||
| Urban cycle l / 100 km | 10,6 | 10,1 |
| Extra-urban l / 100 km | 6,7 | 6,7 |
| Combined cycle l / 100 km | 8,2 | 7,9 |
| Weight | ||
| Curb, kg | 1260…1345 | 1260…1345 |
| Technically permissible maximum, kg | 1705…1790 | 1705…1790 |
| Fuel tank volume, l | ||
| Transmission | ||
| Transmission type | 5 MT | 5MT |
| Ratio main gear | 4,2 | 4,2 |
| Suspension | ||
| Front | independent | Independent |
| Back | semi-dependent | semi-dependent |
| Tires | ||
| Dimension | 185/65 R15 (88/92, H) | 185/65 R15 (88/92, H) |
Task number 2
Maintenance structure, list and frequency of main works,
manufacturer's warranty conditions.
Mandatory maintenance consists of periodic maintenance according to coupons "Service Book": annual maintenance to identify defects in paintwork and anti-corrosion coating and other work provided for in the "Operation Manual.
According to the service book of the car in question, periodic maintenance of the car is carried out every 15,000 km. In the course of complex maintenance, control and inspection (diagnostic) and routine maintenance are carried out.
Inspection works include checking the body for chips, checking the level of liquids (brake cooling), checking outdoor lighting devices, battery charge, etc. TO routine maintenance includes such work as changing the oil in the engine crankcase, oil filter, as well as an air filter.
Warranty conditions.
Warranty period for new LADA cars set by the manufacturer AVTOVAZ is: - for front wheel drive vehicles- 36 months or 50 thousand kilometers (whichever comes first).
Guarantee of OJSC "Avtovaz"
1. The subject of the guarantee is the compliance of the vehicle, in the complete set supplied by the manufacturer, with the mandatory quality requirements.
2. Warranty obligations are valid with timely and mandatory performance of scheduled maintenance.
3. When contacting a company, you must provide the following documents:
Vehicle passport;
Warranty card;
Vehicle acceptance certificate;
Vehicle sale and purchase agreement.
The warranty does not cover:
1) on corrosion processes of parts of the suspension, transmission, engine and body, arising from the influence of external environmental factors;
2) for damage paintwork body, due to external influences, including natural abrasion at the points of contact of mating parts that arose during operation.
To preserve the car body from corrosion for many years, it is necessary to perform anti-corrosion treatment of the body in the very first year of operation, to carry out annually control and inspection work to identify defects in the paintwork and anti-corrosion coating.
Task number 3
Technological map of maintenance or car repair
(unit, unit, system)
The technological process of replacing the ball joint (Fig. 2) of the front suspension of the car Lada Largus.
1.Place the car on a two-post lift, brake parking brake and turn off the ignition (electro-hydraulic lift type P-3.2G with a lifting capacity of 3.2 t);
2. Remove front wheel(replaceable head 19 'knob);
3. Remove the front suspension arm;
4. Clean the front suspension arm (metal brush);
5. Remove the clamps of the ball joint cover and the cover (flat screwdriver);
6. Install the stop on the press table, install the front suspension arm on the stop, install a mandrel for pressing out on the ball joint housing and press out the ball joint from the front suspension arm (hydraulic press of the KS-124 type, stop and mandrel for pressing out);

Rice. 2. Ball joint. 1.-marking of the ball joint supplied in spare parts; 2-ball joint; 3-arm front suspension; 4-lock spring.
7. Install the stop on the press table, install the front suspension arm on the stop, install a new ball joint in the hole of the lever, install a mandrel on the ball joint housing and press the ball joint into the front suspension arm (hydraulic press of the KS-124 type, stop and mandrel for pressing);
8. Install the retaining spring into the groove of the ball joint, using the protective cover as a guide;
9. Remove the transport cover from the ball joint;
10. Install the front suspension arm;
11. Install the front wheel (replaceable head 19 '' knob);
12. Check and, if necessary, adjust the front wheel alignment angles.
List of used literature.
AVTOVAZ "Operation and Repair Manual LADA Largus"2012.
Internet resources
1.http: //avtogran.ru/index.php/ru/2009-11-11-08-02-26/1156--lada-largus-;
2.http: //www.centr-mobils.ru/autoservice/garant.html;
3.http: //www.avtovaz-lublino.ru/avtoservis/garantijnoe-obsluzhivanie-vaz.html;
4.http: //largus-mcv.ru/html/sharovaja-opora.html
2 3 ..TECHNOLOGY CARDS FOR MAINTENANCE AND REPAIR OF KAMAZ VEHICLES (1989)
Introduction
Technological maps of the current repair of units were developed by Tsentravtotekh of the Ministry of Aviation Transport of the RSFSR at the request of the production company KamAZavtocenter of the production association KamAZ.
Technological maps are developed on the basis of the following materials:
1. Regulations on the maintenance and repair of the rolling stock of road transport. Part 1 (guiding).
2. Regulations on the maintenance and repair of the rolling stock of road transport. Part 2 (normative). Cars of the KamAZ family. Po-200-RSFSR-12-0115-87.
3. Operation manual for KamAZ vehicles of 6x4 type (5320-3902002P7).
4. Operation manual for KamAZ vehicles of 6x6 type (4310-3902002RE).
5. Guidelines for the current repair of vehicles KamAZ-5320, KamAZ-5511, KamAE-4310 (shop works). RT-200-15-0066-82.
6. Catalogs and drawings of parts and assembly units of KamAZ vehicles.
When developing technological maps, equipment, instruments and tools were used, which are serially produced by the factories "Rosavtospesoborudovanie" and non-standard equipment, including those developed at KamAZ.
Technological maps contain standards for the labor intensity of work, agreed with the "Tsentro-rgtrudavtotrans" of the Ministry of Transport of the RSFSR.
Technological maps have passed experimental testing.
Technological maps are typical. In each individual case, it is necessary to link them to the specific conditions of enterprises.
The nomenclature of the repaired units, assemblies, mechanisms and devices was selected based on the typical and most common works at enterprises for the current repair of KamAZ vehicles.
The list of technological maps includes repair of: engine, fuel equipment, gas equipment, electrical equipment, pneumatic equipment of the brake system, dumping mechanism, transmission.
To facilitate the reading of technological maps, they contain diagrams, pictures.
The technological maps contain a complete list of disassembly, assembly and troubleshooting operations. Under operating conditions, the depth of disassembly and the scope of troubleshooting can be carried out until a defect is detected.
When organizing and performing work on the current repair of units, assemblies, mechanisms and devices, it is necessary to be guided by the system of occupational safety standards and the "Safety Rules for Road Transport Enterprises".
Routine repairs of units, assemblies, mechanisms and devices should be carried out in workshops or areas designated for this.
When disassembling units, assemblies, mechanisms and devices into parts, it is necessary to use pullers and devices that facilitate the work of performers and ensure the safety of work.
Workshops for the current repair of units must be equipped with the necessary lifting and transport mechanisms. Aggregates and assemblies with a significant mass should be transported, removed and installed from stands with the help of lifting and transport mechanisms equipped with devices that protect against a possible fall of aggregates and assemblies.
Devices for fixing units and assemblies on stands should exclude the possibility of displacement or falling of assemblies and assemblies. Tools and fixtures must be in good condition.
The procedure for carrying out routine repairs is set out in flow charts, which reflect the sequence of disassembly and assembly, defect detection and testing of units and assemblies, equipment, fixtures and tools, technical conditions and instructions, labor intensity of work and qualifications of performers.
The technological process of the current repair of units should include: cleaning and washing work on the car; identification of faulty units on the car; removal of faulty units from the car; transportation to the workshop; disassembly; external sink (cleaning); disassembly;
washing; cleaning, drying, blowing of parts; troubleshooting; picking; assembly; test adjustment; ■ acceptance by quality control department; transportation to the post (warehouse); setting on the car.
Only persons who have been instructed in safety precautions and trained in safe working practices in special classes organized by the administration of the enterprise are allowed to work on the repair of units, assemblies, mechanisms and devices.
In workshops or areas, there should be first aid kits, complete with medicines necessary for first aid.