The frame of the car was welded from a metal square section. The dimensions were selected empirically so that in width it did not protrude beyond the dimensions of the front (7) and rear axles (5), which were taken from the grain loader. On the frame, fasteners for a tipping swap body were welded on. Instead, if necessary, we put a 200-liter barrel for the supply of water.
A steering gear from GAZ-51 was installed on the front axle (6)
The engine (1) was borrowed from the IZH Jupiter-5 motorcycle, since it has a semi-automatic gearbox. The control of the leverage system was brought to the front panel to the steering column. To prevent the engine from overheating during operation, a 12 V electric fan (2) was used, directing the air flow to the cylinder ribs.
The air filter was taken from the T-16 self-propelled chassis (3). A reverse gear was installed on the frame, a gearbox (4)
Our mini-car in 1st gear develops a speed of 3 km / h, in 4th - 20 km / h. Speed mode can be changed by changing the sprockets - leading and on the reverse gear. Transfer from engine to rear axle chain (9)
Screwed to the engine exhaust pipe(8) Also, for greater safety, a handbrake was attached to the rear axle (10). We connected the headlights.
So a very economical car was assembled from the spare parts at hand, because a motorcycle engine does not need a lot of gasoline.
Mini car - device in the photo
by the way
Replacing the sprocket to increase speed will reduce traction.
Interesting idea
DIY mini motorcycle
FROM SUITABLE SPARE PARTS THAT WAS LOOKING IN THE GARAGE WITHOUT WORK, MIKHAIL KOROLENKO FROM THE VILLAGE OF YAMNOE, MOGILEV REGION MADE A MOTORCYCLE ON WHICH HIS SONS RIDE.
To assemble a mini-bike, Mikhail borrowed an engine from the Minsk motorcycle (photo 1), a gas tank, a seat, a headlight, a steering wheel, rear shock absorbers, exhaust pipe, chain and frame. Wheels and front fork - from the "Delta" moped.
The frame, on which all the parts are installed, was slightly altered: the back part was shortened by cutting it off with a hacksaw for metal (photo 2, p. 1)
Using a welding machine and metal tubes of suitable diameter, I welded on the stiffeners to prevent deformation of the frame (2).
In the same way, I welded a frame for the seat of a passenger carriage taken from a car. Made a footboard (photo 3)
The mini-bike runs on gasoline and travels at a speed of 40 km / h.
The children are very happy!
 Universal 17 Inch 150dB Loud Air Fairing for Car ...
RUB 1002.51
Free shipping★★ ★★ ★★ ★★ ★★ (4.80) | Orders (2654)
 FORAUTO Night Vision Driver Goggles Unisex HD Vision Sunglasses ...
Nowadays it's hard to surprise some new model car, but here vehicle hand-made has always attracted attention and excitement. A person making a car with his own hands will face two scenarios. The first is admiration for the creation, and the second is the smile of others at the sight of an invention. If you look at it, then there is nothing difficult in assembling a car with your own hands. A self-taught engineer is only required to know the design of the car and the basic properties of its parts.
Historical facts
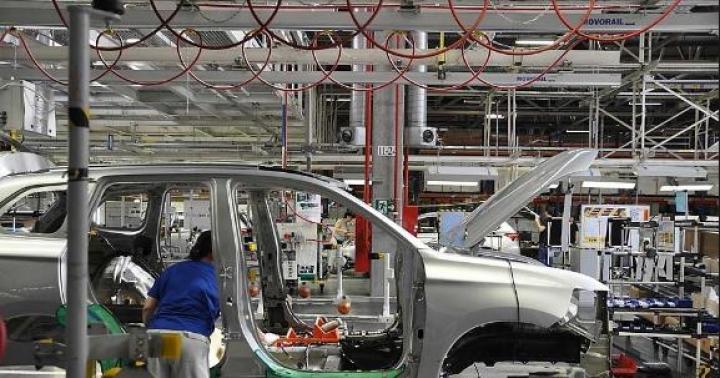
Certain historical conditions preceded the start of car construction. During the existence of the union, mass production of cars was carried out. They could not meet the individual needs of the consumer. That is why self-taught inventors began to look for ways out of this situation and did it by designing home-made cars.
In order to make one car with your own hands, three non-working ones were required, of which all were removed necessary spare parts... If we take into account the people living in remote villages, then they most often improved various bodies, thereby increasing their capacity. Cars began to appear that had high cross-country ability and could even overcome water. In short, all efforts were devoted to simplifying life.

A separate category of people attached great importance to the appearance of the car, and not just its technical properties. In addition to beautiful passenger cars, sports cars, which were not much inferior to the factory copies. All these inventions not only amazed others, but also became full-fledged participants in the road traffic.
In times Soviet Union there were no specific restrictions on homemade vehicles. Bans appeared in the 80s. They concerned only certain parameters and technical characteristics of the car. But most people could get around them by registering one vehicle with the relevant authorities under the guise of a completely different one.

What you need to assemble a car
To proceed directly to the assembly process itself, you need to think over everything in detail. You need to clearly understand how to do future car and what technical characteristics he must have. First, you need to determine for what purposes the car will be used, and then implement the idea. If you need a frank workhorse, then in order to make it yourself, you will need special materials and parts. It is also important to make the body and frame of the car as resistant to loads as possible. When a car is made only for driving, the question is only in its appearance.
How to make a car with my own hands for a child, you can learn from the following video:

How to make drawings
You should not trust your head and imagination, it would be better and more correct to think about exactly what the car should be. Then transfer all available considerations to paper. Then it is possible to correct something, and as a result, a drawn copy of the future car will appear. Sometimes, for complete confidence, two drawings are made. The first depicts appearance the car, and on the second a more detailed image of the main parts in detail. Before drawing, you need to prepare everything necessary tools, that is, a pencil, eraser, drawing paper and a ruler.

Nowadays, there is no need to draw a picture for a long time using a regular pencil. To facilitate this task, there are special programs with wide capabilities and with their help you can make any drawing.
Advice! If there are no engineering programs, then the usual Word test editor will help in this situation.
With a strong desire, you can make any car with your own hands. If there are no own considerations, then ready-made ideas and drawings can be borrowed. This is possible because most people involved in the creation of homemade cars do not hide their ideas, but, on the contrary, present them to the public.

Kit-cars
In the vastness of the countries of Europe and America, the so-called "kit-cars" have become widespread. So what is it? This is a certain number of different parts with which you can make a car with your own hands. Kit cars have become so popular that many options have appeared that allow you to fold any desired car model. The main difficulty is not in the assembly, but in the registration of the car obtained as a result of the assembly.
To fully work with the kit car, you must have a spacious garage. It also requires toolboxes and knowledge. If you do not have certain skills, then the work will not give the desired result. If the work is done with the help of assistants, the assembly process will be faster and more fruitful.

This kit includes everything from small screws and instructions to large parts. For a full-fledged work, there should be no serious difficulties. It should be noted that the instructions are not in printed form, but are presented in a video master class, where everything is considered to the smallest detail.

It is very important to assemble the vehicle correctly. This is necessary in order for the creation to comply with all the standards and norms prescribed in the regulations of the traffic police. Since the failure to comply with the points leads to problems with the installation of the vehicle on record with the relevant authorities.
Advice! If possible, then you can consult with experts in this field.
You can learn more about what kit cars are and how to make them from the following video:
Designing a car using materials at hand
To make your assembly task as easy as possible homemade car, as a basis, you can take the base of any other car that is fully functional. It is best to take the budget option, since it is never known in which direction the experiments will lead. If there are old worn parts, then they must be replaced with serviceable ones. If possible, you can make parts with your own hands on lathes, but this is if you have professional skills.

First of all, you need to start assembling the car with the body, instruments and necessary interior parts. Modern inventors use fiberglass for the bodywork, and before that there was no such material, and plywood and tin material were used.
Attention! Fiberglass is a sufficiently elastic material that allows you to implement any idea, even the most unusual and original.

The availability of materials, spare parts and other components makes it possible to design a car that, in terms of external parameters and appearance, will not be inferior to the car models of the most leading car manufacturers in the world. This requires ingenuity, good imagination and some knowledge.
DIY supercar:
Fiberglass car construction
Start assembling a car made of fiberglass from the moment you select a suitable chassis. After that, the selection of the necessary units is carried out. Then it is worth moving on to the layout of the interior and the fastening of the seats. Upon completion of this, the chassis is reinforced. The frame must be very reliable and strong, since all the main parts of the car will be mounted on it. The more accurate the dimensions of the space frame, the better the fit of the parts.

For the manufacture of the body, it is best to use fiberglass. But first you need to make a base, that is, a frame. Foam sheets can be attached to the surface of the frame, as closely as possible to the existing drawings. Then, as needed, holes are cut, and, if there is a need, the parameters are adjusted. After that, fiberglass is attached to the surface of the foam, which is putty and cleaned on top. It is not necessary to use foam, any other material with a high level of plasticity will be useful. This material can be a continuous canvas of sculptural plasticine.

It should be noted that fiberglass tends to deform during operation. The reason is exposure to high temperatures. To maintain the shape of the structure, it is necessary to strengthen the frame with pipes from the inside. All excess parts of fiberglass must be removed, but this should be done after it is completely dry. If everything is done correctly and there are no other works regarding the design, you can proceed to the interior equipment and electronics fasteners.
If in the future it is planned to re-design, then a special matrix can be made. Thanks to her, the body making process will be faster and easier. The matrix is applicable not only to make a vehicle with your own hands from scratch, but also to improve the condition of your own car. Paraffin is taken for manufacturing. To get a flat surface, you need to paint it on top. This will increase the convenience of fastening parts for the new car body.

Attention! With the help of a matrix, the entire body is made completely. But there is an exception - this is the hood and doors.
Conclusion
In order to implement the existing idea and make a car with your own hands, there are a number of suitable options. All sorts of working details will be helpful here.
You can do not only with your own hands a car but also a larger and more powerful truck. In some countries, craftsmen manage to earn decent money from this. They make cars to order. Cars with various original details body.
How to make a Porsche with your own hands:
This article is a modeler's story about making a homemade radio-controlled model. four-wheel drive vehicle Range Rover made of plastic model. It reveals the nuances of manufacturing axle drives, installing electronics and many other nuances.
So, I decided to make a car model with my own hands!
Bought a regular Range Rovera bench model from the store. The price of this model is 1500 rubles, in general it is a little expensive, but the model is worth it! Initially I thought of making a hummer, but this model is much more suitable in design.  I had electronics, well, I took some spare parts from a trophy collector called "cat" which I didn't need for a long time and was disassembled for parts!
Of course, it was possible to take other prefabricated models as a basis, but I wanted just such an off-road jeep.
It all started with bridges and differentials that I made from copper pipes and soldered with an ordinary 100w soldering iron. Differentials are ordinary here, the gear is plastic, the rods and the drive bones are made of iron from the trophy. 
These tubes can be purchased at any hardware store. 
I took the differential gear from a conventional printer. I didn't need him for a long time, and so I decided that it was time for him to retire.  Everything turned out quite reliably, but it is rather inconvenient to work with a soldering iron!

After I made the differentials, I had to close them with something, I closed them with caps from under the pills.  And painted it with ordinary auto enamel. It turned out beautifully, although the trophy drinker hardly needs beauty.
Then it was necessary to make steering rods and put the bridges on the frame, the frame was included and to my surprise it turned out to be iron, not plastic.


It was quite difficult to do this, since the scale of the parts is very small and it was not possible to solder here, I had to screw it with bolts. I took the steering rods from the same old trophy case that I disassembled.

All the parts of the differentials are on bearings. As I have been making the model for a long time.  I also ordered a gearbox with a reduction gear, the gear will be turned on by a microservice from the remote control.

Well, in general, then I installed a plastic bottom, cut out a hole in it, installed a gearbox, cardan shafts, a homemade gearbox, an ordinary collector engine for such a small model, there is no point in setting the bk, and the speed is not important to me. 
The engine is from a helicopter, but in the gearbox it is quite powerful.
 The most important thing is that the model does not go in jerks, but smoothly without delay, the gearbox was not easy to make, but the main thing is ingenuity.
The gearbox was screwed to the bottom, it held up perfectly, but to attach the bottom to the frame I had to tinker.

 Then I installed electronics, shock absorbers, and a battery. At first I put the electronics rather weak and the regulator and the receiver were a single whole, but then I put everything separately and the electronics were more powerful.

.1390645053061.prev.jpg)


And finally, painting, installing all the main units, decals, headlights and more. I painted everything with usual paint for plastic in 4 layers, then painted the wings brown and sanded the parts to give a worn and worn look. 
 The body of the model and the color are completely original, the color was found on the Internet and photos real car I did everything according to the original. This combination of colors exists on a real machine and was painted in this color at the factory.

Well, here are the final photos. I will add a video with the test a little later, and the model turned out to be very passable, the speed was 18 km / h, but I did not make it for speed. In general, I am satisfied with my work, and you will appreciate it.
 The machine is not large, scale 1k24 in size and there is the whole point of the idea, I wanted myself a mini trophy.


The model is not afraid of moisture! He sealed everything himself, he simply covered the electronics with varnish, very reliably, no moisture is terrible.
 Servomachine micro park from the plane to 3.5 kg.


The battery is enough for 25 minutes of riding, but I will put more powerful electronics and a battery, because this is not quite enough.


Even the bumpers are the same as on the original. And the mounts on them are the same. The drive on it is not 50 to 50%, but 60 to 40%.

In general, the Range Rover turned out in a rustic style, I did not even think that it would turn out to paint so high-quality because I don't really know how to paint, although there is nothing difficult! .1390645295252.prev.jpg)

I forgot to add for beauty, I also installed a roll cage and a full-fledged spare tire. The spare wheel and frame were included with the kit.

More about radio-controlled models:
Mishania comments:
Tell me how it works four-wheel drive, inside the bridge, what is there for the hand-outs? There should be rounded fist after all.
A homemade station wagon provides tremendous moral satisfaction. And the work done with your own hands, in my opinion, is the best rest from the main activity.
Vehicle layout Minimax
When creating "Minimax" (Fig. 1), I additionally solved the following tasks: transition to a completely closed body; expansion of internal dimensions without much increase in external, simplification.
Rice. I. The layout of the mini-car "Minimax" and suspension parts.
A - steering gear rocker:
I - rod of the gear rack SZA, 2 - intermediate link, 3 - threaded bushing of the rocking chair, 4 - rocking chair, 5 - ball ends, 6 - steering rods:
B - body preparation:
1 - door sliding back, 2 - frame. 3 - frontal panel, 4 - spare wheel, 5 - steering gear, b - steering post and instrument panel, 7 - windshield, 8 - opening part of the roof (aviasent), 9 - rigid part of the roof, 10 - glazing of the rear part of the cabin, 11 - body edging (dural square), 12 - side panel, 13 - SZA engine and main gear, 14 - longitudinal frame spar : 15 - the bottom of the passenger compartment, 16-door guide strip. 17 - door lock:
B - front suspension:
1 - trapezium paw. 2 - gusset plate front axle SZA, 3 - reinforced bracket for mounting the lower shock absorber, 4 - upper cup, 5 - spring, 6 - lower cup, 7 - lower shock absorber ear, 8 - figured bolt, 9 - reinforcing tube.
Design features
A flat frame (Fig. 2) is made of steel welded pipes of rectangular section 50X25 mm, with a wall thickness of 2.5 mm, forming a rectangle 3200X1500 mm, with four transverse bridges and two additional longitudinal elements. The frame is essentially the main assembly slip: all other chassis and body assemblies are bolted to it.

Rice. 2. Frame structure made of rectangular tubes.
A - general view:
1 - longitudinal bars. 2 - crossbars. 3 - spar fastening the bridge:
B - section of the pipe.
In "Minimax" the doors are sliding. With a wagon body, this is easier to accomplish. In addition, this design allows them to be made much wider, without increasing the required parking dimensions, which is inevitable with swinging doors. And wide doors for a wagon-type minicar mean additional convenience for the driver and front passenger. In this sense, "Minimax" has certain advantages over, for example, a micro-car of the "Fiat" type, and a lightening of the power circuit; expansion of doorways; modernization of the steering mechanism.
Of course, along with its great advantages, the carriage layout has its drawbacks (otherwise, cars of this type would have already gained predominant distribution). First of all, it should be noted that the driver is not in the "comfort zone" near the center of gravity of the car. Therefore, it "pumps" much more than in cars of the classical scheme. If you do more soft suspension, this will lead to an increase in "galloping" - longitudinal rocking of the machine, generally characteristic of wagon layouts with a small base and spaced masses. This is especially noticeable when driving on rough terrain, in connection with which I had to slightly increase the stiffness of the front suspension.
The front position of the driver in a car of a wagon layout is also more dangerous in the event of a collision with an obstacle. Therefore, on "Minimax" the location of the spare wheel on the front panel of the body is accepted - it can, to a certain extent, work as a shock absorber. The key decision in order to improve safety was the choice of a frame: in the form of a body that goes beyond the dimensions of a closed load-bearing frame, located at a height of 400 mm from the roadbed.
Through the wide door they get into the Minimax and the passengers in the back seat; a refrigerator or other bulky luggage can be easily accommodated in the cabin. The dimensions of the hinged rear door also contribute to this.
The carriage layout imposes a limitation on the size of the wheels: after all, the driver's seat is located above the front axle. In addition, raising the center of gravity of the machine adversely affects its stability. In addition, it is necessary to fit into the existing technical requirements limiting the height: no more than 1450 mm.
The tires of 5,00-10 SZA fully satisfy all the conditions, although they limit the total weight of the machine to the permissible load: 250 kg per wheel.
The use of these tires prompted the use of motorized sidecar bridges - the front suspension was based on the SZA suspension, mounted on two longitudinal welded box-section cross-beams fixed on the first two transverse crossbars of the frame. The required rigidity is achieved due to additional coil springs fitted to the shock absorbers. At the same time, the attachment point of the lower ear of the shock absorber is reinforced. The preloading of the springs is adjustable in the same way as it is recommended for the "Zaporozhtsev".
The layout of the engine compartment provides for the possibility of installing the power unit "Zaporozhets" ZAZ-965. However, on the first version of "Minimax" power unit SZA, with a slightly increased compression ratio (up to 7.8); at the same time, the rear part of the SZA frame with the engine, main gear and balancers is fully used rear suspension wheels.
I consider it my duty to warn followers that the use of the SZA (or SZD) undercarriage, even with the correct distribution of the load between the wheels, limits the running weight of the machine to the limit of 1000 kg. With a dry weight of "Minimax" of 640 kg, the payload, thus, does not exceed 300 kg. Therefore, on a long tourist trip, taking into account travel things, only 2 - 3 people can go in a car. The task of keeping within 640 kg is not an easy one, if in the process of creating the machine there is no strict control over the weight of the parts. After all, often built homemade products have a dry weight of about 800 kg (or even more), which leads to extremely rapid wear of rubber and suspension parts. For this reason, many home-made cars subsequently have to be almost re-made.
The steering, in addition to the units borrowed from the SZA, has a longitudinal rocker, the front end of which is connected by a rod to the steering rack. Ball joints of the steering linkage are fixed at the rear end of the rocker.
Drum brakes are installed on all four wheels. Hand brake only affects the rear wheels.
The body is assembled from several separate units. The frontal part consists of two lower longitudinal rectangular pipes 50X25 mm, to which the racks are welded, and transverse steel profiles fastened to them with bolts, sheathed from the bottom (floor of the front compartment) with getinax 7 mm thick, in front - with 4 mm textolite, behind and on the sides - sheet steel 1 mm.
The frame of the front glazing is welded from bent corners with a thickness of 1.5 mm and tubes 15X1.5 mm (upper contour and middle pillar). The windshield is made up of two halves cut from triplex.
The sides are assembled on M5 bolts from aluminum profiles and 3.5 mm getinax sheets. They are connected by the middle bulkhead (between the passenger and motorcycle compartments) and the tailgate. The sides and the middle bulkhead are attached to the frame, and the front edges of the sides are reinforced with struts made of the same rectangular pipes 50X25 mm. In the upper part, the edges of the sides in front and behind are interconnected by arcs welded from pipes 25X2.5 mm.
The longitudinal contours of the roof are formed by aluminum profiles with a rectangular section of 40X20 mm and a protruding shelf that serves as a drainage system and a guide for sliding doors. The profiles are fixed to the front glazing frame and to both arches.
The roof consists of two parts: the back one, between the arches - from sheet getinax; front - soft, on a tubular frame, removable.
The side glazing is assembled in frames of aluminum profiles. Rhombic doors run on two upper rollers, each with a lower guide. When closed, the doors fit tightly into the front groove of the frontal part and overlap with the trailing edge. Free sliding of the doors is provided by a special mechanism (see Fig. 1B). During the initial movement, the rear lower corner of the door slides in an oblique guide that takes the bottom of the door away from the body. The rear accessory door of the motorcycle compartment is suspended on two upper hinges.
The floor of the passenger compartment is made of 6 mm thick sheet of getinax and is fixed on the walls of 1 mm thick steel sheet between the middle cross members and the inner longitudinal frame elements.
The frames of the front seats are welded from steel tubes 20X1 mm, on which rubber strips from the Zaporozhets seats are stretched and leatherette covers are put on. Backseat and its back can be removed (when transporting cargo) or rearranged into the plane of the cover of the motorcycle compartment, as a result of which a common sleeping place of 1900X XI250 mm is formed. In this case, the front seats are not removed, and in the lower part of the cabin there is enough space for luggage.
The dashboard is placed on steering column... The gear controls are located next to the driver's seat. The rods and control cables run in the central tunnel below the frame level, and in the front and passenger compartments they are covered with covers.
The body is lined with plastic, imitating wood, outside and inside.

Rice. 3. Diagram of the mini-car "Minimax" in four projections and the main dimensions of the seats.
The shape of the machine was determined by the proportional composition of flat surfaces most typical for wood panels. At the same time, such planes are the most technologically advanced in relation to home production conditions. Insufficient aerodynamics of the adopted form practically does not play a role, since in urban conditions the average (and even maximum) speed is low. From the point of view of technical aesthetics, it should be noted that attempts to fit a panoramic Moskvich windshield into the Minimax body on several models (at a scale of 1:10) have shown that the car looks much better with flat glass. The design of the upper rails and the rhombic door contour also matches the selected body shape. As a result - with the length of the car less than that of the "Zaporozhets", its internal volume turned out to be larger than that of the "Volga".
As the experience of using a car in Moscow and on the roads of the Moscow region has shown (the mileage is over 30 thousand km), in general, the design of the car turned out to be successful. Winter operation has also convincingly demonstrated the great benefits two-stroke engine air cooled.
Due to the high culture of weight, even with a 350 cm engine "a car with two passengers has sufficient throttle response for movement in the Moscow "green wave", and maximum speed reaches 70 km / h. Low engine power is felt only on long climbs and when overtaking, or if two more passengers sit in the car: throttle response drops noticeably. Therefore, if distant tourist trips with the necessary luggage are expected, then it is advisable to install a more powerful engine.
P. Zak, Moscow
Not only children are now interested in toys. Many adults buy exact copies of cars famous brands or they are looking for radio-controlled models of cars. Among the offered assortment of toy stores, it is not always possible to find an option that will completely suit the client. In some cases, it is much better to make a radio-controlled model of a car yourself, your child will appreciate your efforts. A do-it-yourself gift from improvised means is much more valuable than a bright typewriter bought at an expensive toy store.
You can make your own radio-controlled car using our sequential algorithm. Modeling from one finished model of a car to another is very similar to the actions of craftsmen in a car workshop.
To create a controllable car with your own hands, you need to have the following elements:
- Electric motor;
- Frame small car;
- Robust chassis;
- Removable wheels;
- Mini screwdriver set;
- Detailed instructions for accessories.
Undoubtedly, self-assembly of the machine on the remote control has a lot of advantageous advantages, namely:
- Saving money, while you will have the model of the car that you wanted;
- You can choose the model you need from the offered assortment of spare parts and body types;
- You decide - to make a mini-typewriter on a wired remote control, or use a radio control, which will have to spend a large amount.
After you decide on the model, follow the following sequence of actions:
- We select a chassis for your model, pay attention to the quality of all small parts. No blotches and notches on the surface of the plastic should be visible, the front wheels should move smoothly;
- When choosing wheels, pay special attention to models with rubber, since all plastic models have a poor quality grip surface;
- Take the choice of motor with all seriousness, since this is the main heart of the mini-car. There are 2 types of mini-motors for cars - electric and gasoline. Electric motors are affordable and easy to use, they are powered by a battery, and it is very easy to recharge it. Gasoline options have more power, but they are more expensive and require delicate care. They need to be injected with special fuel. For beginners in the field of toy car modeling, electric motors are suitable;
- You need to decide on the type of control - wired or wireless. Wired controls are cheaper, but the car will only move within a limited radius, while the RC model will move within antenna range. The radio unit is much more efficient for mini-cars;
- The body of the future car also deserves increased attention. You can choose a ready-made case or make it according to your personal sketch.
After all the parts are purchased, you can start assembling.

We attach a motor and a radio unit to the chassis. We mount the antenna. Together with the accessory parts must go detailed instructions on the assembly of the entire machine. We are adjusting the work of the motor. After everything is working properly, fix the sturdy body of the mini-car to the chassis. Now you can decorate the created model as you like. Let's make a car with a powerful motor.
Many will find the idea of assembling a motorized car for their child very strange, since there are many ready-made options on store shelves. But if you strive to show individuality and earn credibility in the eyes of your child, then you can start assembling a machine with a motor, although it is not easy to do, but the result will justify all the efforts.

The best option is to start assembling a radio-controlled model. This will require certain skills and knowledge of small electrical engineering, because this mini-machine is a rather complex mechanism, despite its compact size. All important parts must be purchased.
We begin to study the control panel. The movement of the car, the ability to overcome obstacles, and make beautiful maneuvers directly depends on the correct assembly. Many car models use a three-channel pistol-style remote control, which you can assemble yourself.
You can follow a simple path - get a special designer, where the kit contains all the necessary parts, their detailed diagrams and final drawings of the finished models.
The motors for future RC models can be electric or internal combustion... Internal combustion engines produce gasoline or incandescent, operating on a composition of methanol, oil and nitromethane, a special gas-alcohol mixture. The approximate volumes of such engines range from 15 to 35 cm3.
Approximate volume fuel tank for such machines is 700 cm3. It provides the engine smooth operation within 45 minutes. Many gasoline models have rear drive, an independent suspension is mounted on them.
Today, there are many demountable models on the market for car builders. Among the leading manufacturers of mini-cars, it is worth highlighting ABC, Protech, FG Modelsport (Germany), HPI, HIMOTO (USA). Their main feature is the similarity of mini-models with real prototypes. After completing the assembly, according to the attached instructions, install a charged on-board battery, a battery in the transmitter, pour a small amount of gasoline into the tank. You can safely launch your iron horse let's hit the road.

Modeling cars of your own accord is a fun hobby, especially when the result exceeds all expectations. To begin with, you need to purchase a Range Rover bench model, from which we will make a jeep that can freely dissect off-road. We also need to take working electronics from an old jeep, we will fix it in an SUV.
We make bridges and differentials from copper pipes with a soldering iron. We attach it to the powerful wheels of the SUV. Care must be taken to ensure that all connections are firmly sealed. We closed the sharpening differentials with pill caps. From above we cover the entire joint of the differential with ordinary auto enamel. We put the bridges on the frame and carry out the steering rods. Steering rods can be obtained from an old disassembled machine. After installing the plastic bottom, cut out a hole there, which is necessary for installing the gearbox, cardan shafts... The gearbox contains an airplane engine, which is also quite powerful. The model does not move in jerks, but smoothly, this is the most important condition for such models. It is quite difficult to make a gearbox, but here you can show all your ingenuity. We fix the gearbox tightly to the bottom, attach the bottom to the frame. Now the electronics, shock absorbers, battery are being installed. At the end, the car body is painted, the main units are installed, the headlights and much more. We apply the paint in 4 layers for ordinary plastic. The author found the original photo of the car and made a mini-copy of it in a toy version. So that the model is not afraid of moisture, he covered the electronics with a special compound. To give the effect of antiquity, I sanded the outer surface of the car after painting. The battery in this model is enough for 25 minutes of continuous riding.

To create such a simple model, we need the following list of small details:
- Microcircuit for a radio-controlled car;
- Remote Control;
- Steering element;
- Soldering iron with solder;
- Compact electrical device;
- Battery with charger.
The procedure is as follows:
- We collect the lower part of the car, that is, the suspension;
- For this purpose, a strong plastic plate is required, it will be the basis for this model;
- A microcircuit for a radio-controlled car is attached to it, we solder a wire to it, which serves as an antenna;
- We solder the wires from the electric motor;
- We fix the battery wires to the correct points of the microcircuit;
- We fix the wheels taken from a simple children's car;
- All parts can be secured so as not to fall off during use.
We fix the steering elements, it is impossible to do this with glue alone. The front axle must be wrapped with electrical tape for a stronger fix. We attach the battery to a microcircuit. The machine is now ready for testing. It must definitely function. The control of such a machine is carried out using the remote control. By following these instructions, you can easily make a new typewriter on the controls. If you want to design with your own hands, then this guide is more useful than ever. A handmade toy pleases much more than a model bought with your own hands.

To assemble this model, we need the following components:
- A simple model of a car of any production;
- VAZ parts for opening doors, 12-volt battery;
- Radio control equipment;
- Durable batteries with chargers;
- Radiator;
- Electronic measuring equipment;
- Small soldering iron with solder;
- Locksmith tools;
- A piece of rubber to provide reinforcement for the bumper.
An approximate scheme for collecting a radio-controlled model is shown in the figure.

Let's move on to reading and collecting the diagram, to the fascinating process of creating a unique mini-typewriter. First, we collect the suspension. We take VAZ connections and gears for assembling the gearbox. The studs and housing need to be threaded in order to hang the gears and solenoids. We connect the gearbox to the power supply, check it, and then fix it on a typewriter. To effectively protect the system from overheating, we install a radiator. The plate from it can be firmly fixed with ordinary bolts. Next comes the installation of power driver and radio control microcircuits. We completely install the car body. Our mini car is ready for real challenges.

You have a radio-controlled car. Are you looking to make it more agile, but don't know how to do it?
Do not overload the model with additional systems and unnecessary small details. Sound signals, glowing headlights are all conveniences, they look great, but a do-it-yourself collection process radio-controlled cars and without this it has certain difficulties. Complicating details can negatively affect important undercarriage auto. The main point to focus on is the creation of a high-quality suspension, ensuring reliable signal transmission.
For improved agility and optimization speed parameters fine-tuning the system during test drives will do. These guidelines will help you to understand the business of car modeling. You can create a typewriter yourself, which will be a real copy of a large model. All the details will be similar, only your version will have everything in a mini-format.

Make your son happy - make a car with him on the control panel
You can start with a simple one - to assemble a construction machine on the remote control. First you need to come up with a project: how your car will look like, how it will move, view other details. To start immediate assembly, you need to prepare not only all the important components of the future iron horse, but also the necessary devices. To start an exciting joint activity with our sons, we take the following things:
- Small motor, can be borrowed from an old vein or a household fan;
- Sturdy frame;
- Mini rubber kit;
- Quality suspension for a small chassis;
- 2 sturdy axles for fixing the wheels;
- Wireless antenna;
- Thin wires for connections;
- High-quality batteries for the accumulator or special gasoline;
- Assembled signal receiver;
- An old remote control, a simple transmitter or an outdated radio unit will do.
From the devices you will need pliers, a small soldering iron, screwdrivers of various diameters.
Assembly order
During the collection process, it may turn out that some of the missing parts will have to be bought or borrowed from the old, broken machines of the little son. After all, he will sacrifice them for the sake of a cool novelty, isn't that so ?! We take the frame and body from the old samples of the son's toys. The selected motor is tested in advance for maneuverability and performance. The power of the engine should not go against the weight of the car, because a weak motor will not pull a heavy structure. Batteries must be unused. The step-by-step assembly steps are as follows:
- First, we assemble the mini-frame;
- Then we fix and adjust the serviceable motor;
- We introduce batteries or a compact battery;
- Next, the antenna is fixed;
- The wheels are mounted so that they can turn freely, spinning with the axle. If this condition is not met, the machine will only move forward and backward.
For the future iron horse, it is better to take rubber tires, since they perform best on open ground. If the assembly process was easy enough, you were able to figure out all the intricacies of the initial car modeling, then you can make several samples, you can give another copy to a neighbor's boy. They will arrange outdoor racing on the street.
Assembling a new unique car is a fascinating process for which dad and son can spend more than one evening. To turn it into a productive business, you can follow the following recommendations, they must be taken into account when assembling a modern toy:
- Sketch future model that you want to collect or use the ready-made collection instructions;
- Purchase everything quality details cars;
- Additional parts can be taken from old machines or purchased new ones;
- Before installation, thoroughly test the selected motor, this is the heart of the machine;
- Don't skimp on batteries for a new model, keep them new and unused;
- Firmly fix all the details, according to their sequence;
- Study the schemes for creating similar cars in advance to facilitate the assembly process;
- Choose a ready-made model or come up with something of your own, unique.
Following these recommendations, you and your child will easily make the chosen model of the machine. You can make and collect exact replicas of the original cars when you reach a certain skill level. Putting together a car in a family circle - that's the best way effective organization of leisure for yourself and your child.
A self-assembled machine will be a valuable present for your children, because real fatherly feelings are embedded in it. When assembled, the model will travel in the selected direction and is easy to maneuver. You can learn how to make a simple version of the typewriter by following the recommendations from the proposed video. Start your journey in the world of car modeling!