Lifting options for UAZ Loafs
The owners of the Loaf, starting the tuning of this car, first of all ask themselves the question: "How to raise a UAZ loaf?" We will try to answer this question in this article. So, first of all, we will consider the ways of the UAZ elevator. This could be:
- UAZ body lift
- Loaf suspension lift
Both options have advantages and disadvantages. So, the loaf body lift is easier to implement, and also stands out with a greater degree of safety. This is explained by the fact that this method of elevator only slightly shifts the center of gravity of the car, which contributes to ensuring the stable behavior of the Loaf on turns and other difficult sections of the track.
If we talk about a suspension lift, then there is some danger due to an increase in the center of gravity. But at the same time, this method significantly changes the cross-country performance for the better.
Choosing a kit for an UAZ loaf elevator
As we can see, there are several ways to raise the Loaf. Therefore, it is possible to determine which lift kit UAZ Loaf will be needed only by deciding on the choice of the lift method. If you plan on doing the lifting yourself, you can buy an elevator kit from the store. Such kits are different in the composition of the parts and elements included in them.
So, a Loaf lift kit can contain:
- spacers "spring - frame";
- spring-to-frame spacers
- bolts;
- nuts, etc.

Changing wheels
As you know, the passability of the car directly depends on the wheels. Considering that the wheels of the UAZ are shod with rather hard and not too large rubber, before proceeding directly to the elevator, it is necessary to mention the wheels. In addition, the tread pattern on the Loaf's tires leaves much to be desired. All this suggests that it will not be superfluous to install on the legendary car suitable wheels imported production.
As an option, when choosing new wheels for the UAZ "Loaf" car, you can use BF Goodrich 33x10.5 R15 tires, and, accordingly, discs with a diameter of 15 centimeters. As for the choice of discs for them, it depends on the wishes of the owner. It can be light-alloy or alloy wheels... Or you can leave the usual regular wheels.

However, it is not worth stopping at this stage, because such tuning makes it difficult to control, since on sharp turns the front wheels cling to the edges of the steering rods, and when the effect of crossing the axles appears, the wheels are located directly on the sides of the arches. This causes the tires to rub against the fender. Therefore, the UAZ Loaf body lift becomes an indispensable stage of tuning after the installation of the wheels.
As strange as it may seem, the UAZ Loaf's frame is attached to the body with ten furniture bolts, six of which are located in the area of the passenger seats, two behind the front wheel arches, and two more at the feet of the driver and passenger. At the bottom, the bolts are secured with second nuts.
Before proceeding with the dismantling of the bolts, it is necessary to disconnect the battery, disconnect the earth from the engine - behind the bonnet compartment and raise the car on a lift.
- Disconnect the wires from the starter;
- Disconnect the radiator mounts from below or from above;
- We detach the rods of the drive of the transmission lever and the rod of the brake booster;
- Drain all the coolant and remove the hoses that are connected to the UAZ Loaf stoves;
- Disconnect the brake pedal rod to the vacuum booster;
- Disconnect the tubing leading to the tank control valve.
The last point may not seem so important, but non-compliance with it can lead to the plate deflection under the mount, as a result of which it will have to be aligned.
When lifting the UAZ Loaf with your own hands, be careful and careful, since the fasteners on such a car are usually rusty and outdated. If the bolt turns in the body, then it cannot be held. This creates additional difficulties in welding a nut or bolt to it.
To do everything correctly, it is necessary to hold one nut with a wrench, while unscrewing the lock nut with the head, and after that the main nut.
Next, you should lower the car on the wheels, since there will be no more work to be done under it. Also detach steering column and unfasten the boot on the floor. And you can start lifting the body above the frame. The rise must be started from the back of the Loaf. The lifting height should eventually be about 10 centimeters.
It would be a good idea to hedge by placing a wide wooden bar between the frame and the body.
We unscrew the standard bolts and increase the holes for them up to 12 mm by drilling. Next, you need to do some work with the spacers. An inexpensive and suitable option as spacers are ordinary hockey pucks. The next steps will be to insert the spacers, bolts and tighten the nuts gradually, starting at the rear, continuing in the middle and ending at the front.
As a result, the body will rise by 6.5 centimeters. It remains only to fix everything and you can put big wheels.

Pros and cons of suspension lift
Now let's consider the next way to carry out the UAZ Loaf lift - a suspension lift. As already mentioned, this method has both pros and cons. There are two main advantages of the suspension lift on the UAZ:
- improving the performance of the Loaf's passability, provided that the wheels remain in place, and the other part rises up;
- the ability to install large wheels that did not fit into the arches of the UAZ before the suspension lift.
Well, the main disadvantage of this method is the inevitable increase in the angles of the universal joints. In this case, cardans are included in the work for wear.
There are several options for a suspension lift. Let's take a look at some of them.
Installing longer spring earrings
The simplest and most affordable option is to install longer spring earrings. When carrying out a suspension lift in a similar way, you should not get too carried away with this, so as not to install too long. Spring shackles that are too long can adversely affect suspension performance and affect handling. To avoid problems in handling, it is recommended to pull the earrings with a tie in the center.

Axle-spring spacer
Without violating the design of the springs, it is possible to slightly raise the Loaf's suspension by installing a spacer between the axle and the spring. At the same time, there is no need to wait for a large elevator; here it is also recommended not to get carried away with the process.
Of course, when installing such a spacer, it is necessary to decide on its fixation in the installation place, and also calculate that the length of the step-ladders of the springs is sufficient. It is also possible to restore old springs, or purchase new ones. There are also special items for such tuning on sale, but they are usually very expensive.

Springing the springs is not as difficult as it might seem at first glance. This process is useful not only for the suspension lift, but also for the purpose of making the hard UAZ suspension soft enough. However, despite the fact that there is an improvement in the quality of the suspension from this method, they are very insignificant.
If you decide to give it a try, you first need to cut, grind, or buy spacers, rubber, conveyor belt and metal. And most importantly, when lifting the suspension of the UAZ, longer-stroke shock absorbers will be required, since the rebound from the former will begin earlier.

In conclusion, I would like to note that the main thing is to know when to stop in everything. Taking up the tuning of the UAZ 452 with your own hands, remember about your safety. After all, you will not have a guarantee with your own hand execution of the Loaf elevator.
The car factories were originally intended for military and national economic needs, therefore chassis, the frame and chassis are made of high strength materials. After the collapse of the Union, a lot of cars from state property migrated to the private sector, continuing to serve faithfully. True, it requires some attention, layer and removal of corrosion.
UAZs are quite maintainable and durable cars
We solve cosmetic problems of the body
Determine the extent of the damage before starting. Sometimes corrosion starts from the inside of the body, although the outer paint coat appears to be intact.
Wash and dry your vehicle thoroughly before scheduling repairs. Inspect the body for damage. Depending on the amount and size of corrosion, you decide whether it will be a DIY repair or send the car to a car service. To be done overhaul, or average.
So you've decided on your own.
- You clean up problem areas to a metallic sheen.
- If rust has eaten through the metal through and through, you will have to put patches, weld them on the inside. align with an emery disc;
- First, smooth out any dents on the metal;
- Before wipe off dust, dry particles of old paint and then degrease.
- Treat the car body with phosphating primer. This measure localizes the centers of corrosion, even if there are rust spots, and protects the metal from further oxidation. The protective primer is diluted with a solvent and applied in a thin layer from a spray gun .
 The body of the UAZ has to be patched up with metal, you can't do without a welding machine
 After the phosphating primer, so that the phosphate does not chemically react with the putty.
- Now proceed to puttying. Apply the filler in thin layers, smoothing out the unevenness of the metal left after mechanical repair... The putty is applied at least three times with intermediate drying and sanding of each layer.
- The putty surface is primed in one or two layers before painting. Use a spray gun for priming. The dried primer layer is sanded to form a flat surface, to remove possible streaks.
- Then 2-3 layers of autoenamel of the corresponding color are applied on the surface to be treated. Each layer is aged according to the time indicated on the can. Keep in mind that can dry times are for room temperature. If the temperature in the room is lower, the drying time of the paint will increase. Air humidity also affects paint drying no less than temperature. Sand each dried layer and wipe off dust with a sticky cloth.
Repair without welding machine
 Instead of welding, UAZ uses tin for patches.
 In this chapter, you will learn an interesting way how to repair a UAZ with your own hands. , without using a welding machine. There will not be a word about fiberglass and epoxy - we will leave them for plastic, and for those would-be craftsmen who do not work conscientiously, but only to close the eyes of the customer. Respecting himself and his car, the owner, will not stick fiberglass with epoxy on the body damaged by rust. Because corrosion under such a patch will continue its destructive effect, and as a result, in a couple of months you will get an enlarged hole in this place.
On a metal body, especially if it is a UAZ loaf body, the patches should be made of metal. Find scraps of sheet steel close to the thickness of the body. Using a grinder, or a metal hacksaw, cut out patches from it to size, overlapping the holes on the machine body. Turn the cut out parts so that they do not stick out along the edges of the cuts, try on and grind to the attachment points. Use a strong soldering iron to tinkle the joints. Warm up the patch and put it on the tinned place, solder, while leveling the molten tin so that no protrusions form. Tighten gently with a hammer.
Let the patch cool. Check for strength. If done correctly, strength and durability are guaranteed. Sand your patch. So, using a soldering iron and tin, you can solder small patches on the body, on the door, and process the rest of the body parts. Tin, in addition to connecting it, also protects the metal from corrosion.
This method is no more expensive than fiberglass patches, but more reliable. This method allows you to perform small any Ulyanovsk machine.
Lifting
Increasingly, the owners of the UAZ 452 model, popularly nicknamed the loaf, come to the need to modernize this machine. The body of the UAZ loaf is lifted, raised to increase cross-country ability. There are 2 lifting methods.
Body lifting.
This option is easier to perform, and it provides greater stability to the machine in off-road conditions and on corners, due to the fact that the center of gravity does not shift. The lifting of the body is carried out thanks to spacers that are inserted between the frame and the body and provide a rigid connection of these elements. The spacers raise the body by 8 cm, and if large wheels are installed, the car will become 15 cm higher. In this case, it is necessary to trim the wheel arches and fenders so that the wheels do not cling to them when cornering, and be sure to hang mud flaps.
Suspension lift
 Suspension lift will bring the car back to our roads
 Increases the UAZ's ability to pass obstacles. However, in this case, there is a risk of a shift in the center of gravity, the car will lose controllability and stability. The situation can only be saved by a comprehensive repair of the UAZ loaf body.
- To begin with, we determine the optimal suspension height;
- Note that lifting is limited by cardan shafts;
- You can reduce the likelihood of the machine overturning by expanding the wheel distance.
To do this, take wide wheels, disks bigger size. Rear axles change to "Bars" or "Spacer". Replacing disc brakes will help to increase the inter-wheel distance. Disc brakes with no fit.
Body reinforcement
During the operation of the loaf, the rear doors are skewed, which begin to open spontaneously.
 Frame reinforcement of the body - a medicine against deformations and joint divergence
 We start strengthening the UAZ body with our own hands from the floor. For this purpose, we raise the floor and inspect the condition of the underbody. The body is reinforced with a 20x40 profile pipe. The bottom profile is welded to the bottom waves. The first pipe is laid along the edge of the body so that the tailgate rests against it. The second is parallel, at a distance of half a meter. Stiffeners from the same profile are also welded along the side wall of the body. Profiles are installed along the ceiling, parallel to the floor pipes. Thus, the shaped tubes form a frame towards the body wall. Spacers are installed between the upper and lower pipes at a distance of 50 cm. The resulting frame by welding attracts sagging corners of the body, due to which rear doors align. If you weld a sheet of steel to the profiles welded to the side walls of the body and spacers, you get a convenient cabinet for fishing rods and guns. A shelf for various little things is also formed on top. In the same way, by installing stiffeners, the side wall and the doorway of the side door are strengthened.
Strengthening the body, increasing the rigidity, and provide "kerchiefs", welded at the junction of the body sheets. Only the kerchiefs must be welded at a distance not exceeding 15 cm from each other.
 After repair, the UAZ looks very attractive
 Before closing the floor, inspect the bottom for rust, sand it, if necessary patch up with welding and treat it with rust mastic. While the mastic is drying, cut out the floor parts from the plywood, cover them with linseed oil 2-3 times, let the linseed oil dry and lay the plywood on the floor. Then roll out the expanded polyethylene foam. On top is another layer of plywood coated with linseed oil. Lay the upper floor on top of the drying oil. It can be linoleum, or sheet steel, depending on what is planned to be transported in the UAZ.
The side walls inside also need renovation. Peel off the old panels, clean the side walls of the body from corrosion, treat with mastic. When the mastic is dry, roll out glass wool for thermal insulation, glue the foam polyethylene on it and sheathe the panels with the selected material on top. It can be plywood, and hardboard, and hardboard with dermantine. You decide.
Tuning
There are two requirements for a car bumper:
- Reliability and safety;
- External appeal, aesthetics.
Ulyanovsk cars are no exception. Car owners of these cars install bumpers with kangarins on the UAZ 469 or "loaves" body, which, on the one hand, add solidity to the car, and on the other, protect the headlights and radiator from damage.
VIEW VIDEO INSTRUCTIONS
Requirements are made to bumpers and kangarins that they must comply with safety standards, therefore, in order to avoid problems with a valiant car inspection, we purchase suspensions from a trusted manufacturer.
Loaf preparation (UAZ 452,2206,3741) , body lift - smirnoffroad style construction stages.
What we had in the source - a 2005 UAZ, in an average condition, that is, corrosion is everywhere, but there is no rotten iron.
First of all, the passenger compartment was dismantled, since the floor was covered with plywood and otherwise it is impossible to get close to the bolts of the frame to the body. Council, for the owners of Loafs - if you want to keep the body, then treat it inside with anti-corrosion mastic and make a couple, three holes for drain-ventilation in the floor. We removed the plywood and raked out 7-10 kg! wet sand and earth. The condition of the sex is sad, but this is a topic for another conversation.
So let's get started. The body is attached to the frame with ten "furniture bolts" and this is no joke. Six of them are in the passenger compartment, two behind the front wheel arches, two at the feet of the driver and passenger. From below, the bolts are locked with second nuts.
Before starting to dismantle the bolts, disconnect the battery, disconnect the mass from the engine - behind the hood compartment and lift the car on a lift.

Next, we disconnect - the radiator mounts from the bottom or from the top (we disconnected from the bottom, but then during installation we left the standard lower fastener, and the upper one was slightly modified in place)

Disconnect - the rods of the gear lever drive and the brake booster rod.


Then, we drain the coolant (do not forget to open the radiator cap), and remove the hose from the heater.


We unscrew the support for fastening the transfer case levers and the filter fastener for the sump of the pumping line between the tanks.


After that, completely unscrew the nuts from the six rear body bolts and loosen the front nuts. At the same time, since the fasteners are old and rusty, and I will remind the bolts of "furniture" with a square under the hat, then you need to act carefully, if the bolt turns in the body, then there will be nothing to hold it, and this is extra work to weld a nut or bolt to it etc. Therefore, holding one nut with a wrench, unscrew the lock nut with the head, and only then the main nut.
There is nothing else to do under the car, we lower the car on the wheels and disconnect the steering column and unscrew the boot on the floor.

Actually, when all this is done, you can start lifting the body over the frame. We do the operation by placing stops under the wheels so that the car does not move. We start lifting from the rear of the car, keep in mind that when removing the load from the frame, it rises on springs and if, if you raise the body with jacks, then you need a good headroom. We lifted with a lift and we did not have this problem.
So, we tear off the body from the frame by about ten cm and be sure to put a safety wide wooden bar between the frame and the body. Next, we take out the standard bolts and drill holes with a diameter of 12 mm. Standard bolts 10mm.
Some refinement of the spacers will be required. In our case, these were welded barrels 6.5 cm in height. On the last and middle spacers, you need to cut a small sector at an angle of 45 degrees, because there are protrusions on the frame. And the rear "kegs" should be 1 cm higher than all the others, but we all had the same, so we had to put 5 wide washers.
Next, insert the four rear spacers, insert the bolts and screw the nuts on two bolts closer to the middle of the body. We also raise the body and insert the middle spacers. At the same time, we increase the size of the stitching lining with the help of boards up to about 150 mm. Remove the nuts from the front bolts. We remove the insurance, lower the body.
We roll the car, fix it, remove the standard bolts and start lifting the body in front. First we insert the spacers and the front bolts, we attach the nuts to them. The front bolts should be 180-200 mm. The rest is 150 mm.
Next, raise the body and insert the second pair of spacers and bolts. We lower the body. We tighten all the fasteners from the center to the stern and then in front. We used wide washers and self-locking nuts, but you can also use spring washers and regular nuts as you like. Bolts with a strength of at least 8.8, and preferably more. And preferably with fine carvings.
Now the most interesting thing, we need to fix everything that we unscrewed, but the body has risen by 6.5 cm.
We do the following, lengthen the rods by welding inserts (do not forget to paint them or treat them with anticorrosive)


Put the rods in place and secure them with cotter pins.
Next, we make a support for attaching the razdatka control lever


We put it in place and fasten it with long (90mm) M8 bolts


We make the filter support and put it in place too


Now the most difficult thing, after lifting the body, the steering wheel began to lie on the egg ... oh, sorry on the stomach. It is necessary to make an adapter bracket for the steering gear, like this.

Trying on ...


Please note that the heads of the lower bolts must be cut so that the rod does not touch them. After that, the steering column and its boot were fixed.
We put on a new, longer hose for the heater, tighten the clamps, fill in anifreeze.

Well, in fact, it remains to fasten a new elongated ground wire and a radiator, connect the battery, put big wheels (in fact, for the sake of them, everything was started) and you can be free - IN PAMPAS.
Finally, photos of spacers, between the body and the frame. They were fastened rigidly, without any rubber bands, since both the frame and the body of the loaf are not too strong, and this is how some reinforcement appeared. Although, if in mind, then it is better to strengthen the frame with additional spacers and kerchiefs.


The famous loaf quite often undergoes various upgrades, since it has significant potential for this, and also costs the owner not so much. Tuning the UAZ 452 with your own hands is quite possible if you approach this responsibly and competently. This is exactly what we’ll talk about: we’ll learn a few tips to help you do the right lifting.
The basics of the basics
Before telling how to raise an UAZ loaf, let us understand that there are only two types of car lifting (depending on how exactly the intervention in the car's structure is carried out):- body lifting;
- suspension lift.
As for the suspension lift, there is a certain risk due to the increase in the center of gravity, but this method significantly improves the cross-country performance.
Let's talk about each of these methods in more detail.
Body lift
The body lift of the UAZ loaf is carried out using spacers that are located between the car frame and its body. When choosing specific spacers, keep in mind that aluminum spacers are the most appropriate for the price-performance ratio. They are durable and provide a rigid attachment of the body to the frame; moreover, they are presented on the market in a fairly rich assortment. Note:The vast majority of spacers that are produced by foreign companies are perfect for the UAZ 452.
When installing spacers, the owner of the loaf will have to cut the arches and wings anyway. Once this is done, it is recommended that you install side mudguards to keep the glass from getting dirty.
There is different kinds spacers, thanks to some of which the UAZ loaf frame moves away from the body at a distance of up to 80 mm. And together with big wheels this increases the ground clearance by as much as 15 cm. 
Suspension lift
The UAZ loaf lift, carried out by raising the suspension, as already mentioned, significantly increases the center of gravity of the car. Therefore, when choosing which height to raise the suspension, you need to consider:- a reasonable balance between increased flotation and serious danger of overturning;
- limiting slope cardan shafts, upon exceeding which they will lose their working capacity.
- initially, the track should be widened by wheel spacers;
- then you need to install wide tires and wheels with negative departure;
- it will also not be superfluous to replace bridges on the Bars or Spicer models.
Suspension lifting methods
There are several specific ways to raise the harness. Each method depends on the final lift height:1. Light lift
If the preferred height is small, then the UAZ loaf lift kit will consist of only additional sheets for the springs. Alternative springs can be fitted instead, with a larger number of sheets, or a longer spring earring can be fitted.
2. Medium lift and high lift
When there is a need for lifting by 30 millimeters, then you just need to install a gasket between the spring and the bridge, this is very effective. If this option does not suit you, then you can make spacers in the spring mounting brackets. These methods are good because they save everything original parts, and also allow you to independently lift to different heights.
Important: lifting must be done correctly, otherwise the suspension may become significantly stiffer.

Outcomes
As you can see, it is quite possible to make a UAZ loaf lifting: with your own hands or not, but still it is possible. You just need to be able to correctly combine the body lift and the suspension lift. It is very good if the separate elements of these two options are combined. As a result, it will be possible to achieve a significant change in indicators.
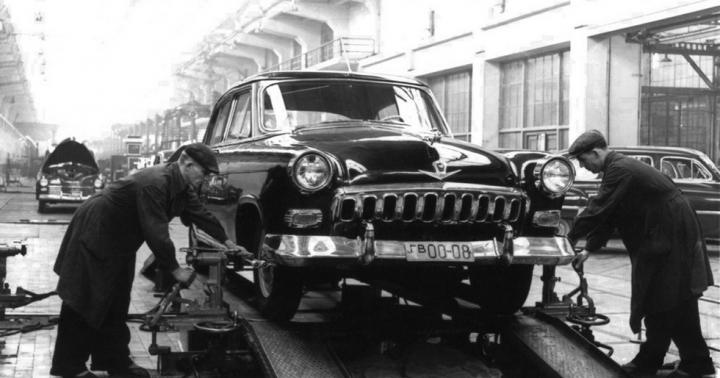
How long can one model last on the assembly line? Five, ten, fifteen years?
Domestic all-wheel drive minibus UAZ-452, being the oldest produced domestic car. Fifty-two years on the assembly line is no joke. Of course, during this time, a number of car modifications were carried out - the model received a more powerful engine, a new braking system, optics and a number of other improvements. But, by and large, these changes did not greatly affect the appearance and characteristics of the car, which is popularly called a "loaf".
UAZ-452 and its later modifications are a rather tempting object for serious modifications. Tuning UAZ loaf is usually carried out in the direction that allows you to create an excellent roomy off-road car. This refinement is going on in several main areas:
- Engine upgrade or replacement
- Suspension refinement
- "Cultivation" of the salon
Appearance improvements, installation additional equipment, painting and other "decorations" are also quite often practiced, and it is they that stand out on the photos representing the tuning of the UAZ. However, only those improvements will be considered here that really affect the cross-country ability and usability of the car.
The main advantage of the "Tablet" is its high cross-country ability, which is ensured by high ground clearance, constant four-wheel drive and a good body design with minimal overhangs. According to this parameter, UAZ leaves far behind modern SUVs and even some cars, proudly called SUVs.
Another important advantage is the reliability and relative simplicity of the design.
The car, as they say, is strong, but Maintenance old modifications of UAZ can be carried out in any garage. As for the updated versions, everything is not so simple here. More modern engine, of course, significantly surpasses the hopelessly outdated ZMZ-402 in many respects, but the presence of an injector in the power supply system makes it impossible to perform many works without special equipment.
However, the carburetor version is still much more common. In any case, if we talk about the private owners of "Loaf". So, where to start when tuning your UAZ loaf with your own hands?

As with most domestic cars, especially to improve the performance characteristic of the native UAZ engine, most likely it will not work. The most effective method of tuning it is replacing the native carburetor with a more modern, fuel-saving unit. These are produced, for example, by DAAZ.
Installing a new carburetor will help reduce consumption, which even according to the passport for this relatively small car is up to 18 liters per hundred kilometers, by 10-20%.
It is also worth trying to solve the problem of engine overheating in hot weather. The simplest option is to replace the standard fan with an option with an increased number of blades.
It is also worth changing the radiator by installing a more powerful version.
If big savings are needed, a significant amount of money will have to be spent. If you look at some videos representing the tuning of the UAZ loaf with your own hands, you can pay attention to the sound of the engine, which is completely different from the non-melodic howl of a native gasoline engine... Indeed, many owners, preparing the car for fishing or hunting trips, chose to replace the factory unit with a diesel engine.
In this sense, perfectly fits power point of the Andoria company. Assembled on the basis of the modernized Perkins diesel engine, this power plant provides real savings, an increase in traction and power reserve in comparison with gasoline versions - both carburetor and modern injection. For UAZ, a modification of the engine is suitable, which develops 102 l / s and has a torque of 205 N / m already at 2000 rpm. In addition, the fuel consumption of such an engine is 40-45% less than that of the gasoline version.
The installation of such an engine should not be associated with great difficulties, because it is structurally designed specifically for the UAZ - 452 and its modifications. The only drawback of this type of tuning is the rather high cost of the unit. And it is quite difficult to buy such a motor from your hands at a much lower price.
The behavior of the UAZ on the road changes even more noticeably if standard engine replaced with a powerful 3.1 liter diesel from ISUZU. This turbine-powered unit delivers 130 hp and an enormous 310 Nm of torque. However, the installation of such an engine entails the modernization of the gearbox. The native box does not interact particularly well with such an engine, so it will be necessary to replace it with a more modern five-speed one.

Suspension tuning goes in two main directions. Strengthening of some of its parts is being carried out, as well as changes are being made to increase off-road qualities car.
Gain rear suspension consists in replacing the standard springs with more powerful ones, making the car more stable. Replacing the springs also entails the installation of more powerful arms and bushings. Standard shock absorbers also change to modern gas-oil. This allows not only to achieve a noticeably smoother ride, but also has a positive effect on the car's handling.
Too weak front springs must be reinforced. The frame is also reinforced - glasses are welded in. It will not be superfluous to install additional springs, choosing inexpensive and reliable from the VAZ "four".
In addition, a very common type of suspension tuning is to increase ground clearance by 10-15 cm. Carrying out this operation allows you to install off-road thirty-third tires on the "Loaf". In order to achieve such an increase in ground clearance, add 4 hockey pucks under each of the supports, and place a 12 cm liner between the bridge and the spring. The final step in increasing the clearance is to weld the extension under the arm base.
Brake system
The native brakes of the UAZ are rather weak. This is especially true for cars manufactured before 2011.
Therefore, it is worth thinking about a complete replacement brake system car, especially if it is planned or has already been carried out to replace the engine with a more powerful one. A good option should be recognized the installation of brakes from the "Volga" GAZ-24.
Main brake cylinder the new brake system must be fixed to the frame, having previously connected to the brake actuator using a rocker arm and a rod. The vacuum cylinder is located near the transfer axle levers. Such modernization will significantly improve the response of the "Loaf" to pressing the brake pedal, shorten the braking distance and improve safety performance.

The UAZ-452 salon is an example of the Spartan environment typical for military equipment. This is not surprising, given that the "Loaf" was designed to accompany a tank column. Therefore, work in terms of improving the ergonomics and comfort in the cabin of this car is endless.
Start by replacing the standard seats and steering wheel. They were developed taking into account the anthropometric data of the soldiers of the tank forces, and most of the tankers of that time were not very tall. Therefore, the standard chair must be dismantled together with the fastening, and instead of it installed in a more modern way, characterized by large dimensions and unspeakably better comfort. If you choose a swivel model, you can immediately eliminate one more ergonomic problem of the UAZ - mixing the driver's seat to the left relative to the steering column axis. This arrangement, chosen for easy access to the engine, is very tiring for the driver. Well, changing the steering wheel is all the more necessary, because a thin rim, cold in winter and sliding in the summer, absolutely does not meet modern requirements for control ergonomics.
Staff design dashboard Soviet UAZ- a phenomenon that is absent as such. The view of the bare metal of the dashboard, devoid of even a hint of noise and heat insulation, implies the obligatory tuning of this element of the interior interior. Fortunately, there shouldn't be any problems with this today.
Various enterprises produce dozens of dashboard options, differing in the quality of materials, design, number of devices and cost. The most inexpensive option is to purchase a new type of panel that has been installed on UAZ vehicles since last year. All the necessary indicators of devices in it are displayed on a display shifted to the right, the panel provides a certain amount of noise insulation and looks much better than the bare metal characteristic of the "Loafs". More expensive options offer fairly good ergonomics and an abundance of instrument scales.
There is an even simpler and more inexpensive option - installing a plastic trim over a metal dashboard. This step will save you money, but it will provide a fairly good appearance car instrument boards.
Whichever option of tuning the tidy is chosen, it is imperative to stick the soundproofing material before installing the panel. Do not forget that in classic "UAZ" cars there is no interior soundproofing.
Insulation material should not be spared at all. The bare metal of the body not only perfectly conducts sounds - it also contributes to the fact that the car is cool enough even with the heater on.
By the way, about heating. Comfortable accommodation in the cabin for an overnight stay, or even just moving around winter conditions require installation additional heater... It is best to choose a standalone liquid fuel option. This will allow not to use a regular stove at all - it is ineffective and takes a lot of heat from the engine.
A folding or folding table is often installed, more comfortable passenger seats, and even reclining to the sides and used as a backrest passenger seats sleeping bags.

In general, the improvements to this model are multifaceted and varied, and include a wide range of work. The main thing for the owner before starting work is to determine for what purposes the car will be used and what changes are most needed. In order to determine the type of tuning, it is also advisable to look at the photos illustrating the UAZ loaf of tuning the salon with your own hands, which are widely presented on thematic sites. It is not necessary to follow them with accuracy, but such photos will give a general idea of the direction of the work.