Many novice motorists are interested in the question of what are the differences between the front and rear suspensions of the car. Agree, the question is interesting, but along with it another question arises: what features of work do the shock absorbers of the rear and front suspension have. A knowledgeable motorist will be able to discuss this topic for hours, but if we speak briefly and concisely, the front shock absorbers fail much faster due to their low resistance to uneven road surfaces, because, as a rule, the first blow when hitting even small pits falls on the front rack.
Based on this, the service life of the front struts is usually measured by the number of kilometers traveled on roads with various kinds of irregularities. In this article, we will not focus your attention on the rear shock absorbers, but will try to figure out when and how to properly replace the front shock absorbers.
1. When you need to replace the front shock absorbers
As a rule, many novice motorists think that the main task that shock absorbers perform is to create comfortable conditions while driving a car, so they often make the wrong choice when purchasing one or another shock absorber. This idea is extremely erroneous, because, be that as it may, the main function of shock absorbers is manifested in damping vibrations, shocks and shocks created during movement, which fall on the body.
 Today it is difficult to imagine any car that does not use front or rear shock absorbers. And no wonder, because at modern speeds, the operational life of any vehicle would not even hold up to one year. As perfect dampeners of destructive vibrations, shock absorbers work in tandem with other suspension elements: springs, airbags, torsion bars, springs, and so on. But they often need to be given special attention, as they are subject to significant damage and wear out quickly.
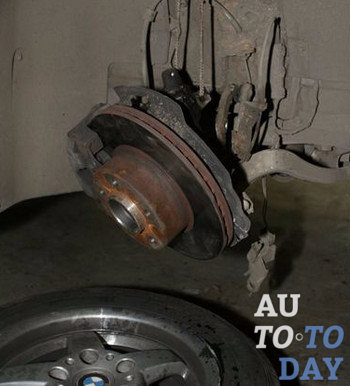
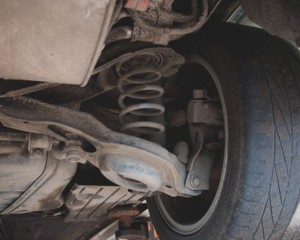
The question immediately arises: in what cases do you need to replace the shock absorber? As a rule, there are several external signs by which one can judge that the shock absorber is out of order, and the procedure for replacing it is simply inevitable. Take a closer look at the shock absorber: repairs cannot be avoided if you notice obvious corrosion marks on the shock absorber spring support. Do not try to ignore them, because otherwise, very soon the spring plate can simply come off and lead to quite unpleasant consequences.
Also Leakage and oil leakage from the device can become an "alarm bell" for you. As a rule, many motorists do not attach much importance to this seemingly "trifle". But this is also a mistake: in the absence of a certain pressure in the device, its work on damping oscillations simply will not be performed, and in some cases its natural oscillations can fall into sharp resonance with body oscillations during movement. All this leads to uncomfortable driving and difficult car handling.
![]() Another sign by which you can determine that you seriously need to think about replacing the shock absorber is the visible deformation of the body of the latter. It can block the operation of the piston of the device. If you notice one of these shock absorber faults in your car, do not hesitate to replace it, because, as they say, an attentive and efficient motorist drives further and spends less nerves, the same can be said about his wallet.
Another sign by which you can determine that you seriously need to think about replacing the shock absorber is the visible deformation of the body of the latter. It can block the operation of the piston of the device. If you notice one of these shock absorber faults in your car, do not hesitate to replace it, because, as they say, an attentive and efficient motorist drives further and spends less nerves, the same can be said about his wallet.
2. Tools for replacing the front shock absorbers
Basically, replacing front and rear shock absorbers follows the same principle. But still, there are some peculiarities that usually arise depending on the specific car model. , in contrast to the rear, is considered to be a more complex design. Therefore, based on this fact, the operation to replace the front shock absorber will require more time and effort than replacing rear shock absorber.
Having decided on an independent replacement of the front shock absorber, you should first stock up on the necessary tools that will help you get the job done as quickly and accurately as possible. No special adaptations are required here; to properly replace the shock absorber, you need to stock up on standard tools:
- spanners;
A pair of jacks (you can use "frog" and "trapeze");
Screwdriver;
Balloon wrench;
Puller for suspension springs;
Recoil shoes.
 Oh yes, and don't forget about the excellent WD - 40 fluid for processing bolts and fastening nuts. Prepare in advance stops (the so-called goats) that will secure you (do not rely on jacks) and get to work!
3. The sequence of replacing the front shock absorbers
If we take into account the condition of the roadway in our country, we can say that shock absorbers today have moved into a row Supplies... As a rule, motorists very often resort to replacing this device, and the services of specialists are not so little. Therefore, many, even novice motorists, resort to self-replacement shock absorbers.
Replace defective shock absorbers with my own hands at home is pretty simple. Of course, this procedure, which is performed for the first time by an inexperienced car enthusiast, will take him longer than an experienced specialist. But still, if you use the guidance given in this article, it will be quite possible to do the work yourself.
While your vehicle is on the ground, you will need to engage the hub bolts and slide them off. After that, you can start removing the wiper arms. We take out the plastic plug and unscrew the nuts under it. In order to remove the leash itself, you need to use at least some kind of puller. After that, we pull on the sealing gum, then we begin to remove the plastic cover, while pulling it up so that it does not interfere. Then we remove the insulation. We find the clips - two of them are clearly visible, the two that remained below can be easily felt with your fingers: they can be unscrewed like nuts.
 After that, we start unscrewing the flap that separates the engine compartment from the wiper mechanism. It is usually attached with five bolts. Thanks to the extraordinary actions described above, you can open access to the heads of the upper bolts of the uprights. Each of them will be able to move, but we will not unscrew them yet.
1. We lift the car and remove the wheels. According to experts, the motorist should pay attention to the fact that the replacement of the shock absorbers of the front or rear suspension occurs in pairs. Based on this, in order to comply with safety measures for yourself, you can remove the wheels from both sides.
2. We clean up all the bolts and nuts that you need to unscrew.
3. We undertake the dismantling of the hoses, which, in turn, are responsible for the supply brake fluid... Do not forget that if you have the opportunity to refuse to disconnect the latter from the calipers, use it, because, otherwise, you will need to pump brake system The main task is that you need to get to the upper bolts of the struts to the body. They are usually completely exposed to dirt, and if you leave it as it is, it threatens you with difficulties when unscrewing.
4. After everything is cleaned, water everything abundantly with a "liquid key".
5. We start removing connectors from the pad wear indicator and ABS sensors.
 6.
Remove the caliper. To do this, simply pry out the plugs of the guides. We take the caliper to the side and, so that it does not interfere and does not dangle on the hose, it can be tied with an elastic band to the lever.
6.
Remove the caliper. To do this, simply pry out the plugs of the guides. We take the caliper to the side and, so that it does not interfere and does not dangle on the hose, it can be tied with an elastic band to the lever.
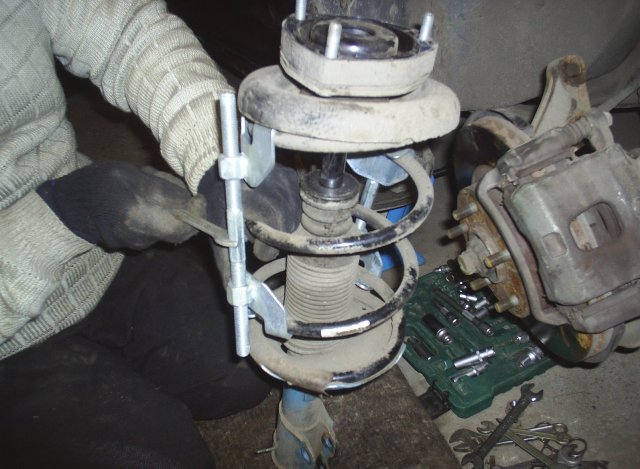
7. Using a special puller, we remove the spring. Here you need to be especially careful so as not to distort the spring.
8. We begin to dismantle the mountings of the struts from above, as a rule, a 15 key is used for this. According to the theory, the struts can be removed together with the brake discs.
9. We take on the steering tip and stabilizer bar. We hold the "finger" with a torx of 8 and unscrew the central bolt. Then we unscrew the nut securing the ball joint to the lever. The lever, as a rule, can be lowered, but you should not rush to move the rack to the side.
Experts advise to pay special attention to this moment. The thing is that the nuts into which the bolts are screwed are a kind of part of the upper supports. But, as a rule, they are plug-in and are not a single whole. When a bolt for some time driving on domestic roads becomes almost twice thicker, during unscrewing it can easily rip off this cage nut.
 The problem also lies in the fact that the nuts in the original supports of the faces, as such, do not, and you will not be able to insure yourself by putting on the head from below. If the bolt can be unscrewed at least 5 mm, the head of the bolt can be cut off from above with a “grinder”, after using masking tape and pasting everything around. If the bolt turns right away, you will have to unscrew the central nut of the strut, disassembling it right in the car, and then you can cut out the remnants of the bolts from the bottom.
12. After you have unscrewed and removed the bolt, we push the clamp with a wide chisel.
13. We clean the protruding part of the shock absorber and move the steering knuckle off the shock absorber. Often, during this operation, the chisel strives to fall out all the time, but if it is installed, the work is much easier.
14. We reinstall the rack vertically, after that we put on the spring ties and unscrew the upper nut, holding the stem with a hexagon. It happens that rust gets in the way here. An ordinary small gas burner will help get rid of it.
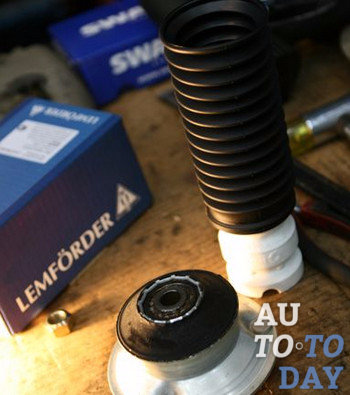
 After everything is disassembled, you can start installing a new shock absorber. But do not forget that along with the shock absorber, experts advise replacing the upper bearings, swivel bearings and a set of anthers with bumpers.
After the new shock absorber has been installed, you can start reassembling all the parts. But even here you need to know some subtleties. For example, if you leave the old spring, you will not have a problem, but when you install a new one, you need to pay attention to the fact that the turns may be different. The bottom one may simply not fit into the slewing bearing cup. Also it is very important to pay attention to the fastening of the boot to the upper support.
We put on the upper support together with the bearing and the boot on the shock absorber rod. After that, we bait the central nut and tighten it. Before unwinding the spring braces, you must first make sure that the lower coil is in the desired position. At this stage, you can prepare the steering knuckle for assembly. It will not be difficult to do this. First, we clean the tie bolt hole, then we clean the inner surface of the docking station. We clean or replace (in case of damaged threads) the fastening bolt.
After that, we put the chisel into action, lightly grease the inner surface with thick grease and do the docking, and you need to move it until the bolt hole is free. And the last thing - before installing the rack in place, you need to pay attention to the two arrows, which are cast on the surface of the supports, and make sure that they will be parallel to the movement of road transport.
 Congratulations! You are done with replacing your old front shock absorber! As a rule, replacement is not a very difficult job, even for amateurs, and by following the above instructions, you will be able to handle the job yourself. Never underestimate a front shock or overestimate its lifespan. It is necessary to detect damage to the shock absorber in a timely manner in order, first of all, to take care of your safety.
Subscribe to our feeds in
It's just that the front shock absorbers are more likely to fail than the rear ones. The front shock absorbers are much more susceptible to stress and therefore have to be changed more often. And because of this, people feel that rear shock absorbers are more reliable.
The shock absorbers themselves are part of the car's suspension system and perform the function of absorbing vibrations and shocks on the car body, in order to evenly distribute physical forces while driving. And if in simple terms, the shock absorbers provide a comfortable movement of passengers in the car.
When do you need to replace the shock absorbers?
Replacement of shock absorbers is carried out with the following faults:
- Oil dripping from the shock absorber;
- Clear traces of corrosion of the shock absorber spring mounts. Do not notice how the spring plate comes off;
- If the piston rod of the shock absorber is corroded. Corrosion of the stem is a direct cause of the failure of the stuffing box, and, accordingly, oil leakage;
- Apparent deformation of the shock absorber body either slows down or blocks the movement of the shock absorber piston.
If your car has these symptoms, then the defective shock absorbers need to be replaced immediately. Because if the shock absorbers are malfunctioning, there is an increased load on the parts of the car's suspension, the brake system, and, of course, the vehicle's handling deteriorates. It must be remembered that if a situation has arisen in which only one shock absorber has failed, then a pair of shock absorbers must be replaced, be it rear or front.
How to change shock absorbers?
Replacing the front shock absorbers from replacing the rear shock absorbers is practically the same. Replacement differences may occur depending on the vehicle model. Replacing the front shock absorbers takes a little longer than replacing the rear ones because the car's front suspension system is much more complex than the car's rear suspension system.
To replace the front and rear shock absorbers, you will need a standard set of wrenches, a jack, wheel rests and preferably WD-40 fluid for loosening bolts and nuts.
When replacing shock absorbers, you need to do the following:
- Remove the wheel;
- We remove the brake hoses, but it is advisable not to disconnect them from the calipers. Because you have to bleed the brake system;
- We dismantle the upper mountings of the shock absorbers;
- We unscrew all the shock absorber mounts from below;
- We remove the spring with special pullers and try to do everything so that it does not warp;
- We replace the old shock absorber with a new one;
- We do everything in reverse order to put everything in place.
All these actions, which are described above, are taken from the example of replacing rear shock absorbers on a Lanos, but they apply and are suitable for almost all brands passenger cars... But when replacing the front or rear shock absorbers with your own hands, you need to do everything according to the instruction manual of your vehicle. If you are not sure that you will succeed, then you need to take some more money and head to the nearest station Maintenance where the professionals will replace your shock absorbers.
And lastly, if you want to feel comfortable on the road while riding your iron horse, then keep an eye on the condition of the shock absorbers, which are directly related to the comfort of the car's movement.
Rear shock absorbers on the VAZ 2110 are the most important part and an integral part of a full-fledged car suspension. They provide stabilization of the car, reducing the vertical swing that occurs while driving.
Changing the shock absorber rear VAZ 2110 is not so difficult. You can do this with your own hands.
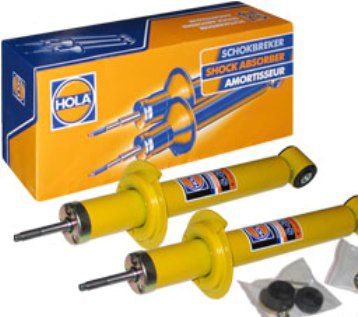
Types of shock absorbers

Shock absorbers also have different technical capabilities, and differ in the type of design:
- gas-hydraulic
- hydraulic
- gas (see).
The hydraulic, twin-tube shock absorbers are simple. These are two cylinders placed inside each other.
The inside of the piston is filled with oil. Liquid is displaced into the external one.
Oscillations are reduced by the friction of the oil that flows into the calibrated holes in the inner cylinder and piston.
Its advantages are:
- Cheapness;
- Reliability;
- Durability.
But there are also disadvantages - overheating due to constant friction.
Gas / hydraulic combo shock absorbers are a compromise used when reluctant to install twin-tube or single-tube shock absorbers. They have increased efficiency, which is provided by the gas part of the part, and they inherited reliability from the two-pipe ones.
And although the design is identical to the latter, instead of air, it contains gas under a pressure of about 3 atm. This avoids foaming of the liquid.
A gas shock absorber is a single-tube shock absorber, the difference being that the compensation chamber is filled with pressurized gas. This is precisely the significant advantage.
The pressure keeps the piston compressed at all times.
The gas itself does not come into contact with oil, which is still present, and its design differs from others:
- a body that serves as a working chamber;
- stock;
- piston (has 2 valves and is connected to the rod);
- piston - float (acts as a separator between oil and gas).
Advantages of shock absorbers with gas pressure of the liquid column:
- efficient cooling;
- liquid foaming elimination;
- lack of cavitation;
- maximum elimination of high-frequency vibrations;
- installation of the part in the required position for the layout (vertically, horizontally).
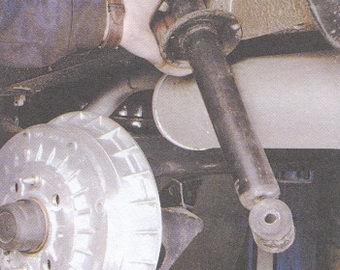
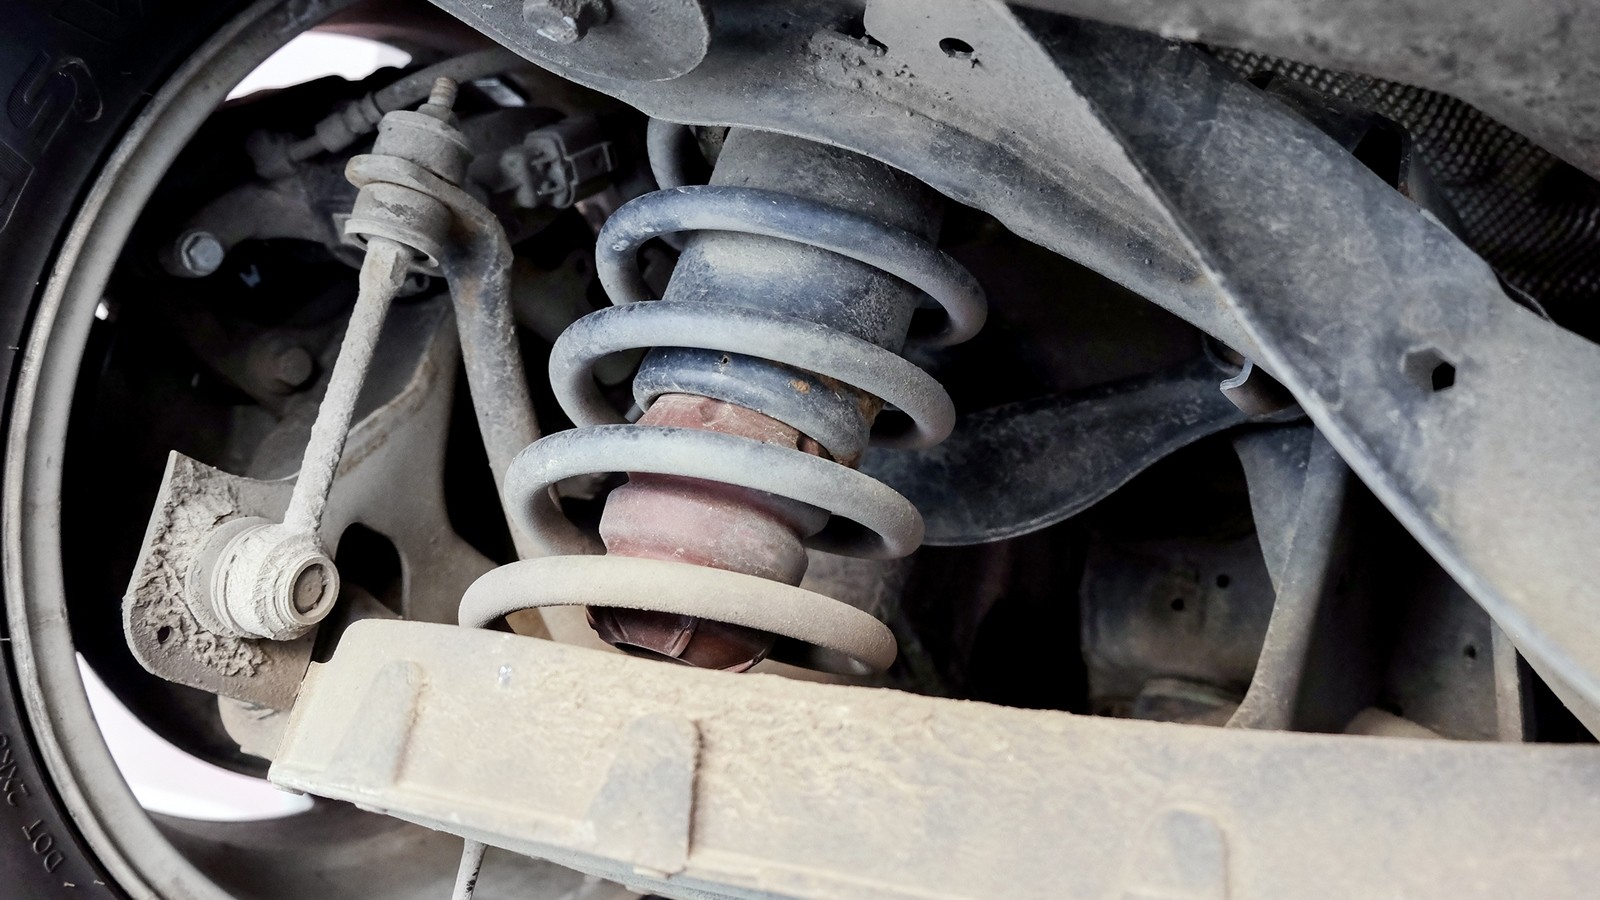
The shock absorber of the rear suspension is telescopic, double-acting. It is attached to the trailing arm, or rather to its bracket.
Its upper part has a pin mount - using rubber pads and a support washer, the stem is attached to the upper support. The angular contact bearing is in and has a transitional fit.
Shock absorbers are responsible for increasing active safety. Quality details provide fast leveling of vibrations, better traction with the road, constant contact with it and shortening the braking distance
The characteristics of shock absorbers must necessarily comply with the declared standards of the car manufacturer, otherwise problems cannot be avoided.
Common troubles of shock absorbers
Among them are:
- reduced traction (wheel bouncing);
- decrease in stability when entering a turn;
- long braking distance;
Malfunction signals are:
- any extraneous noises and knocks;
- fluid leakage.
Note.
Looseness of fasteners or wear of bushings may also be the reason. It is necessary to tighten the nuts and bolts, replace those parts that are necessary.
To have an idea of the safety of the car - the performance of the shock absorbers - you need to carry out some actions that test their condition.
Replacing shock absorbers
In order to check and replace the rear shock absorbers, the rear of the machine must be raised. For this, 1st gear is shifted and stops are installed under the front wheels.
Note. After raising the rear part, you need to install supports next to the jack, because placing them under the rear suspension beam load on it.
Repair and replacement of the rear suspension is carried out sequentially, in order to get to all the necessary parts, you need:
- Take keys 6 ″, 17 ″, 19 ″;
- Dismantle the back of the car seat (of course, the rear one);
- Raise the edge of the upholstery;
- Unscrew the upper nut from the upper mounting of the shock absorber;
- Remove the lower part of the shock absorber from the bracket and dismantle it with a spring;
- Remove the insulating spring gasket, which is located in the wheel well;
- Remove the support washer located inside the passenger compartment;
- Remove the upper cushion from the hole in the support;
- Take off ;
- Remove the bushing, as well as the lower cushion from the stem;
- After removing the shroud, remove the compression stroke buffer from the shroud.
To check the draft, it is necessary to perform several (full) strokes of extension - compression along the axis in a vertical position (pointing the stem up). If it is serviceable, its movement after that will take place without jamming and failures.
During stretching, the load should be higher than during compression. If the spring is deformed or cracked, replace it.
After replacing the necessary parts, the shock absorber is installed in the reverse order:
- When installing the shock absorber, it is necessary to monitor the position of the part - the lower part of the spring should be directed towards the wheel.
- An emphasis is placed under the beam from the side of the shock absorber. Lowering the car, the rod must be inserted into a special hole in the body.
- When a washer and a rubber cushion are installed on the stem, the nut is attached.
- All mounting nuts - top and bottom - are tightened while the vehicle is on its wheels.
- The pressure regulator is being adjusted.
When assembling the shock absorber, follow the manufacturer's instructions. If you miss even one nuance, you can create problems for yourself on the road.
In order to repair or replace the rear shock absorber of the VAZ 2110, there is no need to contact expensive service stations. Everything can be done by hand.
The article provides instructions on how to do this quite realistically, and this video will be useful to study.
Will also help detailed photos understand everything in more detail with a visual example. The price of car repairs is growing every month, so learning to do everything yourself is profitable.
The planned replacement of the stabilizer struts, as a rule, occurs after a clearly audible knock when driving over bumps and other irregularities. Steering properties also deteriorate. The car becomes more difficult to drive, and this is already dangerous for the life of the driver and his passengers.
If the above symptoms are found, it is necessary to change the stabilizer struts. lateral stability... First you need to determine what types of this part you need to buy? It is best to stop in your choice on spare parts from a quality company, which you have no doubt about.
How to replace the stabilizer struts yourself
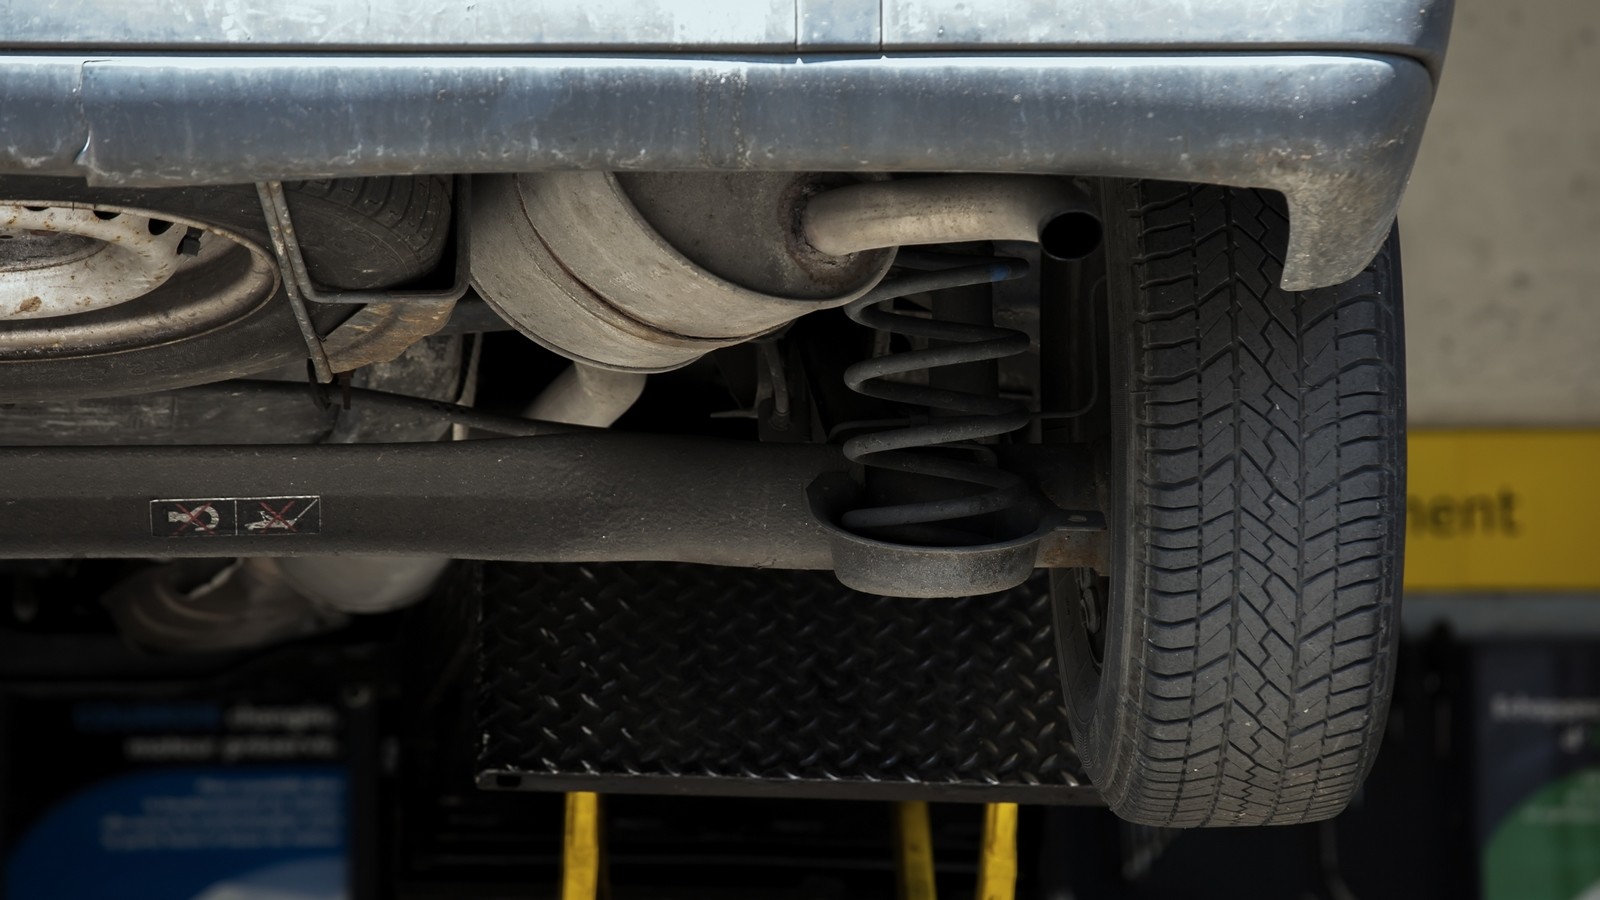
Changing the racks is pretty straightforward. It is advisable to have a pit or overpass available in order to remove this part in the unloaded state of the stabilizer. But some experienced craftsmen change them using a conventional jack. And in this case, it is better to use two lifts in order to be able to hang the wheels on both sides and relieve the anti-roll bar.
Tools and materials
Rear pillar
Replacing shock absorber struts, despite the apparent simplicity, is not an easy task. And first you need to correctly remove the old shock absorbers, disassemble them and check the condition of all parts.
It is recommended to purchase in advance together with shock absorbers and rubber covers, protecting well from dust, as well as rubber supports, thrust cups, thrust bearings and self-locking fixing nuts. It is necessary to pay attention to the springs, which should be replaced if necessary.
Replacement rear pillars carried out from the side of the trunk. First, we remove the wheels on the raised car and dismantle the brake hoses. It is recommended not to disconnect the hoses from the calipers, so as not to further pump air from the brake system. Although, if the brake fluid level has dropped, the measures can be combined.
We dismantle the shock absorber mountings from above, after which we spin up all the shock absorber fixing mountings from below. We take a special puller and squeeze the spring, but so as not to overdo it. This is important as the spring can be tilted if you press too hard.
We replace the faulty shock absorber with a new one and in reverse order.
Front pillar
Replacing the front shock absorber struts is carried out in the same way. First, we put the car on parking brake and install wheel chocks or simple bricks under the wheels.
After that we remove thrust washer called a cup. Go ahead and take the spanner key to "27", with which we loosen the stem nut by a few turns. It is recommended to loosen by only one and a half turns.
Raise the front end on both sides, and then install the metal supports. Spray nuts and bolts generously. We unscrew the upper caliper mounting bolt, after which we loosen the lower one. Then we move the caliper to the side.
Move on. We take a spanner wrench on "18", with which we loosen the lower nuts, holding the fastening bolt on the other side with a wrench. We take out the bolts, lightly tapping with a hammer. Thus, we carefully take out the front pillar of the car.
Replacing the strut support is carried out in cases where the driver is noticed by quiet knocks at low speed while driving. It is imperative to free the brake hoses from the bracket. In the process of work, there is also a handlebar tip puller.
Before installing a new support, it is necessary to bleed the rack and constantly hold it in an upright position until it is installed in place.
Video demonstrating the replacement of stabilizer struts:
That's all. We hope that these tips will help both a novice motorist and an experienced one.
Everyone knows that the shock absorber softens the shock when driving over bumps. In fact, its role in the car suspension is somewhat more specific - it is a damper, it prevents the car from swaying when hitting obstacles. Today we will study its typical design, and at the same time we will change the front pair of "amorts" to Chevrolet lanos... Now you will know why they take relatively large sums of money for such a seemingly simple manipulation.
What is a shock absorber for?
To begin with, "let's separate the flies from the cutlets", that is, we will understand the roles of different suspension elements. In most modern passenger cars, the main resilient elements are springs. 30-40 years ago, this role was mainly performed by springs, working "in combination" and dampers. Oscillations were successfully damped by friction between the leaf springs. To deal in detail with the shortcomings of the springs and their typical problems we will not, we will devote a separate material to them, but now we will simply remember their existence and return to the springs.
They are installed between the suspension and the vehicle body and are designed to absorb shocks to the body from the road. When the wheel rolls over an obstacle, the spring is compressed, and the body only moves up slightly and smoothly, the wheel rolls off the obstacle - the spring is straightened.
There is, however, one unpleasant moment. Take, for example, a bouncing toy - a rubber ball, which can also be attributed to elastic elements. Hit him on the ground and time the time until he completely stops jumping. Your car will also jump approximately if the structure of its suspension contains only levers and springs. And, depending on the stiffness of the springs, the suspension will be either stone or soft, like cotton wool, but in either case, you don't even have to remember about the car's handling. The most terrible thing for such a suspension is resonance, when entering into which vibrations can destroy individual elements of the suspension and its fasteners.
The problem was solved by the introduction of a shock absorber into the suspension design - an element that allowed the wheel to move relative to the body, but excluded the buildup of the car. Initially, these were lever-type shock absorbers, which, like springs, performed their function due to friction. But let's not dwell on anachronisms, we will consider only modern designs. At the moment, the mainstream for passenger cars is telescopic hydraulic shock absorbers. Pneumatic and hydropneumatic systems, as well as shock absorbers of variable stiffness, this time we will not take - these are topics for separate articles.
Telescopic shock absorber operation
If to simplify as much as possible, then the operation of the shock absorber can be described as follows: there is a cylinder filled with oil, a rod with a piston moves inside the cylinder. This piston has valves that only open in one direction.
When the piston moves down, some valves open and fluid is passed into the cavity above the piston; if the piston moves up, other valves open and fluid flows into the cavity under the piston. Damping of vibrations occurs due to the fact that the oil is not compressed and has a certain viscosity.
By the way, why do we need valves at all? Maybe the holes would be enough? In fact, not enough. One of important characteristics shock absorber - its value for rebound and compression. In other words, it is the resistance on the shock absorber rod when it is pushed in or pulled out of the housing. Valves are needed to regulate this stiffness.
Due to the different flow characteristics of the valves, pushing in the shock absorber rod is slightly easier than pulling it out of the shock absorber. This was done with the expectation that when hitting an obstacle, it is necessary not to prevent the wheel from moving upwards in order to exclude the transmission of impact from the wheel to the body. The valves in this case pass more oil... But if there is a big hole on the way, then the wheel should be kept in a "pressed" state, why rush to fall into it? That is why the valves to "dissolve" the shock absorber let less oil pass.
Once again: valves are needed to set a certain stiffness of the shock absorber in different directions of its operation.
Types of structures
Structurally, shock absorbers can be divided into three main types: two-pipe, two-pipe with gas back-up and one-pipe with gas back-up. Two-tube hydraulic shock absorbers were the first to appear on cars. In them, as the name suggests, there are two pipes - cavities, in one of them (internal) there is a piston with the above-mentioned valves, the other (external) is necessary to compensate for the volume of oil - it is only partially filled with oil, the rest is air.
During the operation of the shock absorber, the oil inside heats up to high temperatures, from this it expands, and so that the stem seals do not squeeze out, the liquid flows into the outer cavity.
The advantages of this type of shock absorbers are few: low cost and little effect on their work from dents on the body. It is also worth mentioning the good smoothness of the car and the relatively low stiffness of such shock absorbers.
The disadvantages include overheating of the working fluid, since the body is double, and cooling with atmospheric air is difficult. Due to overheating, there is a high probability of oil foaming and, as a result, an instant loss of operating efficiency - the shock absorber ceases to perform its function, and the car becomes poorly controlled due to buildup.

Articles / History
Suspension softness and stiffness - what is more important for comfort?
Suspension specialists can tell many interesting examples from practice, but I will have to limit myself to just a short story about why harder is not always tenacious, and softer is not always ...
56939 0 37 05.03.2015
The next disadvantage is the large weight of the two-tube shock absorber, as well as a strictly defined location during installation - if you turn it over, it will flow out working fluid... The weight of the shock absorber affects the amount of unsprung mass (we will tell you about what it is separately). The greater the unsprung mass, the worse the ride and handling of the vehicle.
A small improvement in the twin-tube shock absorbers was the filling of the outer cavity with gas with a slight excess pressure. Thus, the likelihood of foaming was reduced, since the oil in this case "rests" on the gas cushion.
A completely different matter - hydraulic monotube gas-filled shock absorbers. One cylinder filled with oil, piston with one-way valves and a small cavity filled with gas and covered by the piston.
A single-tube shock absorber is devoid of all the disadvantages of a two-tube shock absorber. During intensive work, the liquid does not overheat, since it is separated from the environment by only one wall of the cylinder and is perfectly cooled. It is also lighter and can be installed either up or down with the body.
But the laws of nature cannot be avoided: somewhere you win, somewhere you lose. Therefore, the advantages of twin-tube shock absorbers became the disadvantages of single-tube shock absorbers. The latter are much more expensive and very sensitive to mechanical damage to the body, therefore, the operation of a car with them, if not so much, is more expensive.
Installation of shock absorbers
The installation methods for shock absorbers have not changed since their introduction into automobiles. So, always their upper part is attached to the car body or frame, and the lower to the suspension element, be it a lever or a beam of a continuous bridge. Because of this, the replacement of this element in the overwhelming majority of cases did not cause difficulties: he unscrewed the lower mounting bolt, unscrewed the upper mounting bolt, and that's it, the shock absorber is in his hands.
With shock absorbers rear suspension so everything remained, but with the front ones, everything is a little more complicated. With the advent of front wheel drive vehicles the question arose of what to do with the shock absorber, which was mainly attached to the lower arm of the front suspension and interfered with the installation of the drive shaft.
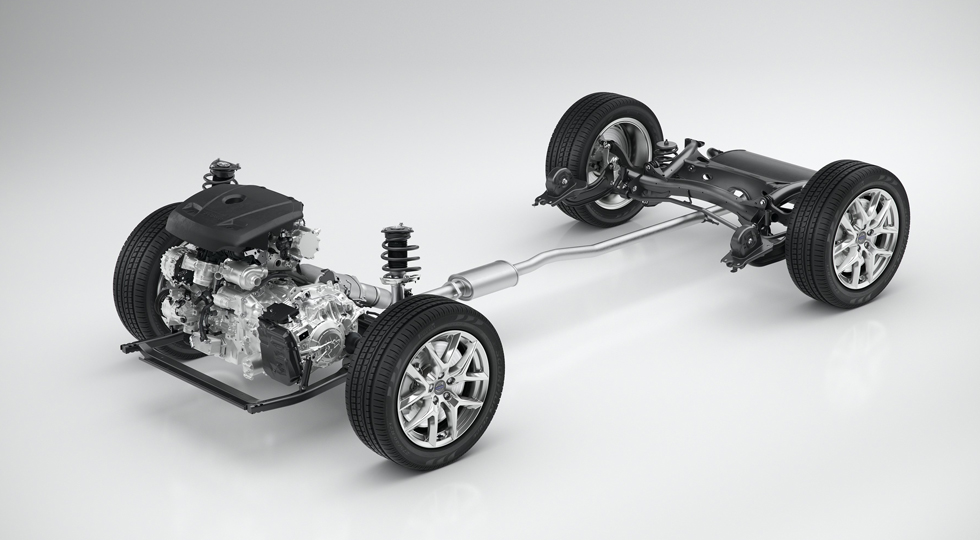
There are two main solutions to this problem. The first option is to install the lower part of the shock absorber on the lever through a U-shaped bracket, inside which the drive shaft passed. The second option is to transfer the shock absorber together with the spring to the space above the upper suspension arm. In this case, the lower part of the shock absorber is attached to the upper suspension arm, and this whole structure is called the name of the American engineer Earl Styles MacPherson.
Articles / Practice
Car suspension silent blocks: how they work and how to change them
About the role in the suspension As with any hinge, the rubber-to-metal connection has two main functions. First, it gives a certain (in our case, very strongly limited) freedom of movement of parts relatively ...
53547 1 0 18.08.2016
McPherson developed this revolutionary suspension for the ultra-budget Chevrolet Cadet concept car in the 1930s. In practice, it was only possible to apply it after the war, already on the 1948 Ford Vedette for the French market. Now that you know this short fascinating story and can, on occasion, show off your erudition, let's move on to the features of this still popular design.
McPherson combined the shock and spring into a single shock strut. In this strut, the upper part has a hinge with a bearing and rests on a body element - a glass. Thanks to the support bearing, the column can rotate around its own axis. And if you install the shock absorber at a certain angle, then you can set the trajectory of the wheel and the angles of its installation, such as camber, the angle of the longitudinal and lateral slope the axis of rotation (which is, we will definitely consider in future publications).
It turned out that with such an installation of the rack, you can get rid of the directing upper suspension arm, thereby making it cheaper. The steering knuckle in the suspension is attached to the ball joint of the lower arm and to the shock absorber strut, and rotates with it. The anti-roll bar in this case can be attached either to the lower arm or directly to the shock absorber strut.
If we consider the ways of attaching the rack to the steering knuckle, then there are several of them. The knuckle can be attached to a bracket on the rack body. Often - with two eccentric bolts with nuts, and they are also camber adjustment elements. If the camber is structurally incorporated, then adjustment is not needed, which means that you can fix the rack in the bracket steering knuckle... The mounting bracket in this version is a slotted eyelet that is pulled together with one bolt. The most simple option is the pressing of the strut body into the steering knuckle (as in our experimental Chevrolet Lanos). All this is often supplied as one piece - assembled with a fist.
The list of disadvantages of a MacPherson strut includes relatively small suspension travels and, as a result, such a design is a rarity, if not an exception, on real SUVs (however, there are almost no such cars left). And the reason is that with maximum compression of the strut springs, the wheel alignment angles begin to change very much, which entails a serious deterioration in the car's handling and leads to excessive tire wear.
Articles / Practice
Disc brakes: typical breakdowns and repairs
Just in case, let's briefly note the main thing concerning the brakes in the car. On most modern machines use disc brakes that are controlled hydraulic drive... We'll tell you about drums in ...
51271 2 26 10.08.2016
The shock absorber struts can be with or without the possibility of replacing the shock absorber. In the first version, the strut housing with a spring support is made separately from the shock absorber. In the second, the shock absorber housing is at the same time the strut housing, and the lower spring support is mounted directly on it. The upper spring support is attached to the shock absorber rod. The spring from above and below acts on the supports through rubber cushions. An elastic bump is installed on the shock absorber rod - a rubber or polyurethane bushing, which prevents the shock of the suspension parts when the spring is fully compressed.
The spring in the shock absorber strut is always under interference. Initially, compression is necessary to eliminate backlash and gaps in the assembly. Replacing a rack on a car is always a small joy for a mechanic, since it is quite expensive in terms of the cost of work.
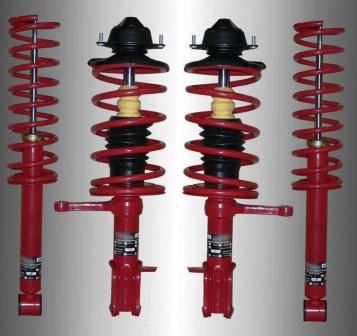
Example of replacing shock absorbers
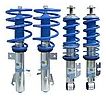
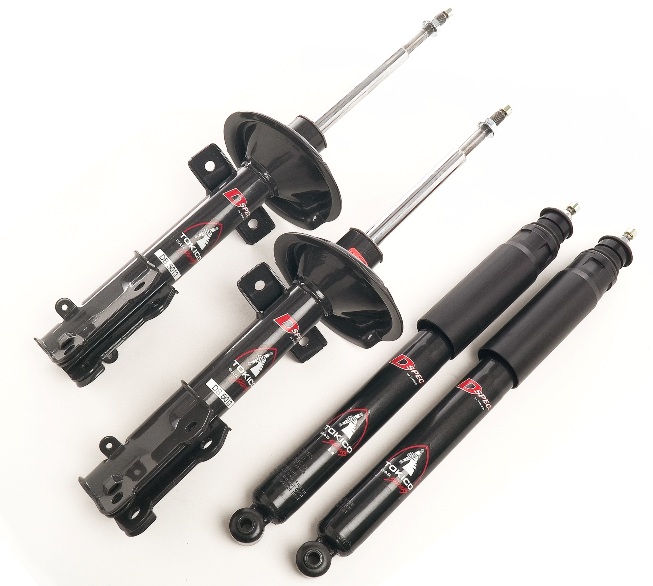
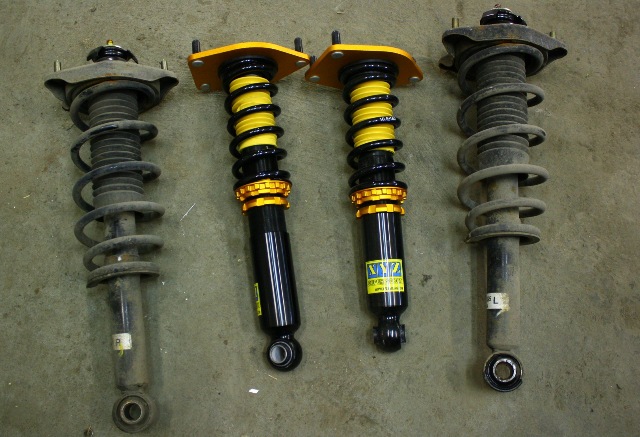
So, let's move on to the workshop, where the Chevrolet Lanos with its front collapsible shock absorbers is waiting for us. We keep the old springs, but we change the shock absorbers. The owner of the car decided that the standard twin-tube front suspension shocks were too soft and lacked handling. The solution was to install the front single-tube gas-filled shock absorbers.
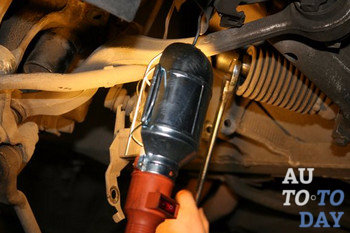
Let's get started. Unscrewing the nut securing the drive shaft to the wheel hub, then unscrew the mounting bolts and remove front wheel... Further, to facilitate unscrewing the fastening elements, we spray the salvage WD40 onto the joints of the ball joint of the lever and the hinge of the steering rod end.
1 / 4
2 / 4
3 / 4
4 / 4
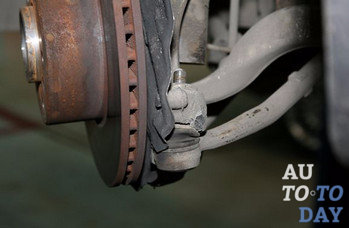
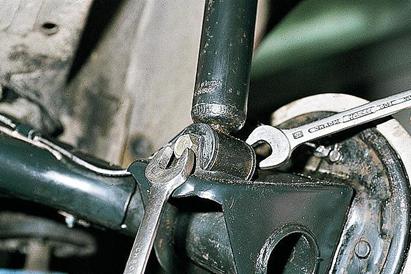
They removed the cotter pin and unscrewed the nut securing the ball joint to the steering knuckle. They let go, but did not completely unscrew the nut that secures the anti-roll bar to the stabilizer bar (which is on the lever). After the connection was slightly acidified under the influence of WD40, the nut that secures the tie rod end to the eye on the shock absorber strut was unscrewed.
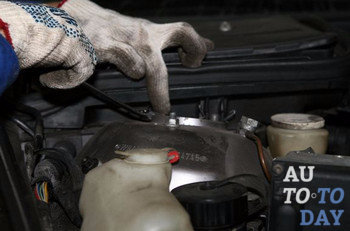
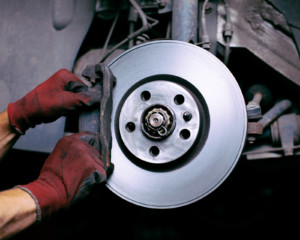
In no case should you hit the hinge finger with a hammer, so here you need a universal puller - with it we disconnect the tip hinge. Since it is necessary to remove the shock absorber assembly with a steering knuckle and a brake disc, it is necessary to remove the brake caliper. The operation is simple: we unscrewed the upper and lower guide bolts and dismantled the caliper. At the same time, the condition of the brake pads was inspected (everything is in order with them). By the way, there is no need to even disconnect the brake hose from the caliper.
1 / 6
2 / 6
3 / 6
4 / 6
5 / 6
6 / 6
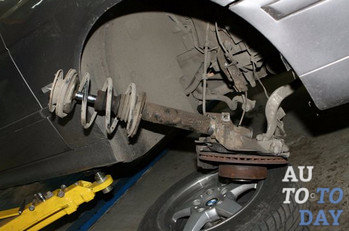
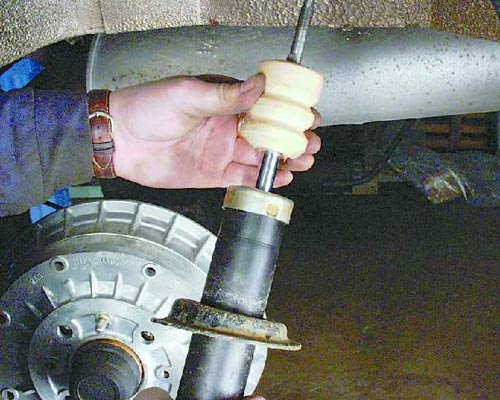
Next, disconnect the lower suspension arm from the steering knuckle. We had no problems with this, but in case of acidification of the connection, it is recommended to use a universal puller. Pulling the rack slightly towards itself (its upper fastening allows this to be done), we remove the drive shaft from the wheel hub. In this case, you must be very careful not to damage the boot of the SHRUS shaft.
We move from the wheel housing to the engine compartment. Here we unscrew the nuts securing the rack to the body glass. Also no problems. The only edification: hold the strut, as by unscrewing these nuts, you remove the last mount that connects the strut support to the car.
1 / 3


