The tuning of the VAZ 2109 speedometer is often carried out today, due to its unattractiveness and lack of awareness. On the VAZ 2109 speedometer, tuning is carried out simultaneously with the alteration of the instrument panel. All dials change at once, put original backlight etc.
A little about the speedometer

This improvement will have a great effect on the comfort of working with the speedometer. We note right away that there is no standard digital speedometer for the "nine" and everything will have to be done on our own.
Note. Of course, you can immediately replace dashboard to a more modern one (this will be discussed in detail below), but not everyone wants it.
The principle of operation of a digital speedometer is as follows:
- If its counterpart, the mechanical version of the speedometer, is activated and shows data thanks to the gearbox and a flexible shaft that transmit information through a special cable (see), then in his case a speed sensor is sufficient;
- If the readings of the mechanical speedometer directly depend on the error of the device, the measurement of tires and gear ratio gearbox, then digital has no such problems. Its sensor is combined with a gearbox, and it does not have a cable in its design;
- V domestic auto industry digital or electronic speedometers were first installed on the top ten and GAZ-3110. The IZH-Oda car was equipped with the same speedometer;
- By outward appearance digital and mechanical speedometers are difficult to distinguish, but in the design and principle of operation, it is simply impossible not to notice their difference.

Note. The above is clearly seen on the example of the speedometer needle. It is the same on both the mechanical and the electric speedometer, but in the second case, it changes the number of pulses from the speed sensor. You can determine how many impulses have passed per unit of time by how much the arrow turns.
- The advantages of digital speedometers over mechanical ones are undeniable. They also have, of course, errors, but those do not exceed 5 percent. In addition, it has long been known that devices consisting of electronics are much more advanced.
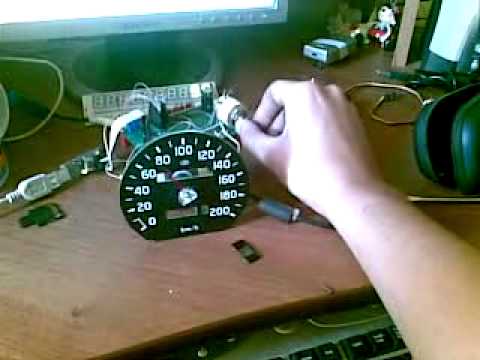
Replacement process
We do the following:
- Dismantle the instrument panel from the "nine";
- In the garage, remove the metal bezel, glass and back cover from the digital speedometer, otherwise it will not enter with them;
- In a radio store, we buy narrow terminals, stranded wire and heat shrinkable material, if we could not find the rear connector block;
- We dismantle the factory speedometer by removing all partitions and cutting out the holes for the rear connector.
Note. If the upper illumination lamp interferes, then it is dismantled. The trigger for resetting the daily mileage can also be a problem and then you will have to drill a hole.
- We insert a new device into the panel;
- We leave the clamps the same, except that we bend them with pliers;
- We solder the wires of the new speedometer to the printed circuit board, based on the plus and minus signed on the tachometer solder.
- It remains to forward a wire to the speed sensor. The speed regulator itself is in the gearbox - it must be screwed in there normally. We see three wires on it and connect to the middle one.
Note. As for the permanent plus from the battery, we do not connect this wire in order to protect the speedometer from dropping the daily mileage every time the ignition is turned off.
- If our "nine" with injection system, you will have to supply power to the sensor. In other words, you need to supply it from the battery to the 12 V contact on the speedometer.

So:
- During the replacement process, the protrusion of a large battery malfunction lamp in the instrument panel can also be difficult. It can be slightly shifted to the right relative to the vertical axis, and the old place can be tinted with a black marker. You can, of course, file this ledge with a file;
- During the soldering process, the only problem can be the backlight track, which is difficult to find. But, as a rule, it is below the minus;
- To reset the daily mileage, you can prepare not a lever, but a paper clip, which is inserted by drilling a hole under it. It is removable, which is very convenient compared to the lever.
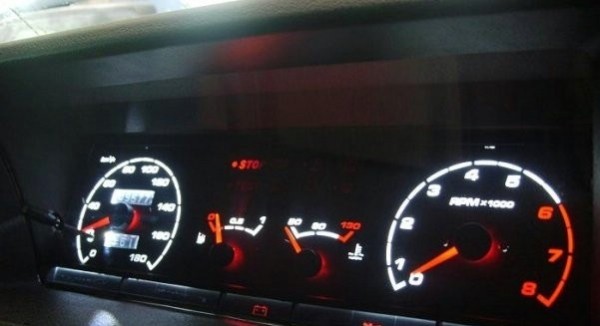
You can also tune the speedometer by general replacement. As a rule, an electronic speedometer is located on the instrument panel "tens".
Changing it with our own hands, we get a new speedometer and a lot of other useful bells and whistles.

Everything is done as follows:
- Three self-tapping screws located on the side cover of the console are unscrewed from the driver's side;
- We find the other five self-tapping screws already on the right and turn them out too;
- We remove the overlay.
Note. To avoid an accidental short circuit, it is imperative to disconnect the ground from the battery.
- We remove the radio tape recorder, if there is one, disconnect the wires;
- We pull out the chips on the cigarette lighter and on the ashtray lighting;
- Remove the handle for turning on the stove fan and other elements that interfere with dismantling;
- Unscrew the self-tapping screws of the instrument panel from above and below with a Phillips screwdriver;

- Near the button for turning on the heating rear window there is another self-tapping screw, which must also be turned out;
- We release the steering column from the fastening;
- We turn out all the screws that connect the dashboard to the floor;
- We pull out the panel towards ourselves;
- Installing a new one.
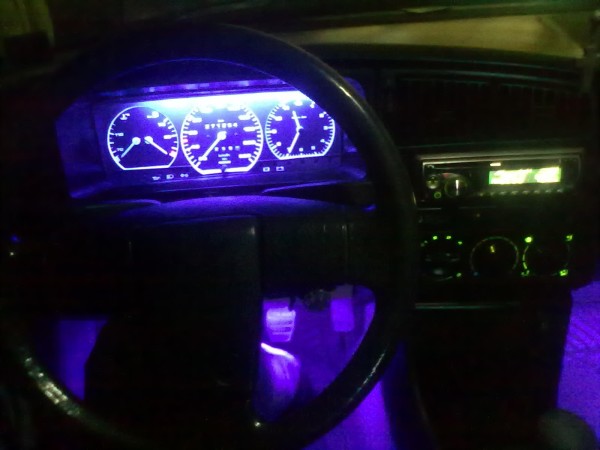
Inserting beautiful lighting
Tuning also implies the completion of the instrument panel. If the owner of the "nine" wants to see a bright and original speedometer on the dashboard, then it is enough for him to modify the appearance.
In this case, a bright backlight and its installation will be what you need.
Everything is done like this:
- We take out the lamp panel from the device;
- We change them to LEDs of the required color.
Note. If you replace only the speedometer backlight, then this will not be in harmony with the general instrument panel. For this reason, many owners of the VAZ 2109 decide to change the illumination of the entire panel as a whole.
Several ways to implement
There are several ways to insert backlighting:
- Replace all lamps with diodes, but this will be conspicuous and not very beautiful to look at. The fact is that the LED is designed in such a way that the light flux emitted by it has a narrow directivity pattern.
Note. In other words, it is easier to explain it if you direct light at the wall in the dark and see a circle, the diagram of which is its area. If the diagram is narrow, then by placing the diodes at a great distance from each other, you can achieve the appearance of zones where the circles of light will not intersect.
- Inserting special uncased SMD diodes, on the contrary, will have a greater effect than installing conventional LEDs, since such components have a wider directional diagram. In addition, it will be possible to obtain a relatively uniform illumination of the entire instrument panel.
Note. However, this backlighting option also has its drawbacks. In particular, this is insufficient uniformity of light and the impossibility of changing the color of the backlight.
- A more advanced version of the backlight insert implies, again, the analysis of the dashboard. The arrows must be removed very carefully, by twisting or lightly pulling towards yourself. The light guide is removed, the dusting of the filter is erased and the color is achieved as we would like.
Note. This method of inserting the backlight may imply the use of a whole diode tape, glued behind all scales.
Scheme
Again, there is not one, but two schemes that will allow everything to be implemented:
- Scheme number one implies a smooth inclusion of the backlight of the speedometer and other dials and the same smooth shutdown;
- Scheme number two implies that the backlight turns on instantly and everything else glows smoothly. When turned off, the arrows go out first, and then the rest of the device.
The second scheme looks more attractive. Do not think that you need to have specific knowledge to implement it. It is enough to be able to work with a soldering iron and be creative.
Most in a simple way soldering the circuit becomes fixing it on a piece of plastic or a piece of cardboard. Here the required holes are made, and the elements are installed inward.
You can do it differently. Purchase an empty breadboard from the store and start soldering the circuit in it.
Tuning the speedometer "nine" is a whole world where creativity and ingenuity, art and desire are intertwined more comfort... In the process of work, it is recommended to study video materials, see photos on the topic, use drawings and diagrams. The price of such an operation will be minimal if you do everything yourself, as required by the instructions.
It will be about an electronic odometer, which will be corrected forward. Generally, there are two ways to set the odometer reading.
- Program. The odometer programmer allows you to twist the mileage using a special program and a programmer. To do this, you need to disassemble the instrument panel. Advantages: it is possible to set any odometer readings (decrease / wind up the odometer, or increase), the whole process does not require much time.
- Simulation of the speed sensor. In this case, you do not need to disassemble the dashboard. The point is in sequential winding of the mileage, by means of a generator (simulating a speed sensor). Disadvantages: you need to wait for the mileage to wind up, and the main thing is the "odometer corrector" only upwards. How to do it further:
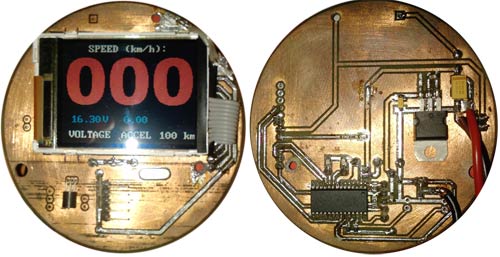
Method 1: Program-generator of impulses of the computer sound card.
Would need:- A program-generator of rectangular pulses (for example, this one).
- Computer with sound card.
- Powered speakers or amplifier to adjust the signal level.
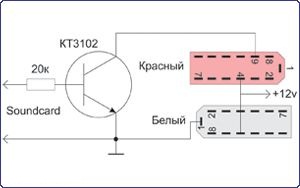
Speed sensor with impulses with a frequency of 200Hz = 120km / h. By adjusting the frequency and signal level, we get a stable rise in odometer readings (frequency = 2500Hz). The winding speed of the odometer was approximately 1130 km / h, while the needle was at the 205 km / h mark. As a result, in 21 hours. continuous work, the tidy has gained an additional 23830 km.
Method 2: Cooler (fan) from the computer.
You will need a PC cooler with three wires. He has one + 12V wire, the second is minus, but from the third one comes out exactly the same pulses as from the speed sensor on the box.
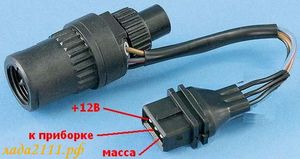
To wind up the odometer, connect the wire with the signal from the cooler to the middle wire on. Apply power to the cooler and turn on the ignition. With this method, the dashboard odometer winding up will occur at a speed of 80-90 km / h.
By the way, you can
Mechanical speedometer.
This type The speedometer has only mechanical parts and was used en masse until 1990, although some cars until 2008 had one in their composition. The speedometer is driven by a flexible cable from the transmission. The odometer in the speedometer is made in the form of wheels with numbers mechanically connected to each other.
Correction, winding and winding of the mileage is realized: We disassemble the instrument panel, take out the speedometer and adjust the mileage using a screwdriver or tweezers. The main thing here is not to damage the mechanical parts. Since in case of damage and improper assembly, there may be a discrepancy between the numbers in height, or the speedometer stops winding the mileage.
You can wind up the mileage on the speedometer within a small range without disassembling the speedometer. As a rule, drivers use it. company cars who are placed in difficult working conditions. The principle of the mileage twist is to disconnect the speedometer cable from the gearbox, and by connecting a small electric motor to twist the car's mileage. Unfortunately, in the opposite direction, it will not be possible to change the mileage, the design will block the winding of the mileage.
Mechanical speedometer with electric drive.
Further, in the process of evolution, the most unreliable knot, the speedometer cable, disappeared. For the first time, car manufacturers have installed a speed sensor on a gearbox. The speed sensors were of two types. The first is inductive and the second is hall effect. The one and the other issues a voltage pulse at a certain distance, and they differ only in the shape of the pulse. Sinusoidal and rectangular. The speedometer used a mileage counter, also mechanical and was driven by a small stepper motor controlled by a small controller. The analog speedometer needle was controlled by PWM modulation. This type of speedometer existed in 1990-1999, and on some cars to this day.
For correcting the mileage of speedometers with this type. You can use the method described earlier for fully mechanical speedometers. But the winding or twisting here needs an imitator (emulator) of the speed sensor. The emulator is a pulse generator with a sensor type matching. For hall effect sensors, this is an open collector output. For inductive sensor RC circuit. By changing the frequency of the generator, you can change the speed of the mileage boost in the speedometer.
Despite its small size, the speedometer is a very important part of any car. Thanks to the speedometer, the driver can monitor and control the speed of his vehicle... A malfunction of the speedometer is a big danger for any motorist, which can cause serious problems and all kinds of emergencies.
Speedometer modifications
There are a huge number of all kinds of modifications of speedometers in the world, and each of them has its pros and cons, and is intended for a certain type of transport. Modern car models in almost all cases are equipped with electronic speedometers, which are a special sensor capable of receiving electrical impulses with each spindle revolution. Then the impulses are analyzed using electronic circuit, then displayed on the dashboard as a speed indicator.

Several years or decades ago, cars were used mechanical principle actions, which consisted in the fact that their design consisted of a special disk, during the rotation of which a magnetic field appeared.
However, today we will not delve into history and talk about how to independently install an electronic and mechanical model of a speedometer on a car.
So, in order to install the speedometer, you must first take into account the car model and the type of installed speedometer. I note right away that the installation of the electronic model of the speedometer is slightly different from the installation of the mechanical model, in a more complex process and duration.
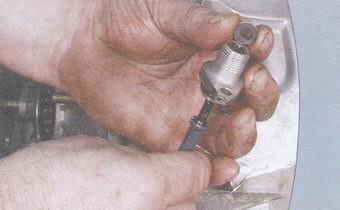
1. First of all, you should lubricate the O-ring, for this, for example, is suitable.
3. The third step is to fit the gear into the saddle. It is necessary to rotate the gear a little in order to make sure that its teeth properly engage with the drive gear, which is located inside the transmission.
4. Then install the special locking ring into the groove in the transmission housing.
5. All that remains is to push the drive cable into the slot on the top of the pinion.
6. And the last thing. After installation is complete, tighten the knurled nut.


Installation of the mechanical model of the speedometer.
The mechanical speedometer has a slightly different type of design, therefore, its installation is much easier. In order to produce self-installation mechanical speedometer, you will need to get to the vehicle speed sensor. It is located at the rear of the transmission case, on the casing