Symptoms: the engine stalled and does not start any more, knocking when the engine is running.
Possible reason: the timing chain is damaged.
Instruments: a set of heads, a set of wrenches, a set of screwdrivers, pliers, an emphasis under the engine crankcase, a rubber spacer.
1. Remove the cable lug from the negative battery terminal.
5. Remove engine oil from engine.
6. Place a secure and sturdy stop under the crankcase through a spacer made of wood or rubber.
7. Remove the bolt and two nuts securing the engine-mounted powertrain right mount bracket.
8. Unscrew and remove the stud nut that secures the power unit RH support to its bracket.

9. Dismantle the right support mounting bracket.
10. Use a wrench to turn the accessory drive belt tensioner pulley counterclockwise until the belt tension is released.

11. Remove the accessory drive belt from the tensioner pulley.

12. Remove the accessory drive belt from the vehicle.
13. Loosen and remove the upper retaining bolt of the hydraulic power steering pump.

14. Move the hydraulic power steering pump to the side.
15. Unscrew and remove the securing bolt of the accessory drive belt tensioner (note that the bolt has a reverse thread).

16. Remove the accessory drive belt tensioner from the vehicle.
17. Unscrew and remove the four securing bolts of the lower bracket of the right power unit suspension support to the engine.

18. Remove the lower bracket of the right support from the car.

19. Unscrew and remove the securing bolt of the auxiliary roller of the accessory drive belt, and then remove the roller from the car.

20. Remove fluid from the cooling system.
21. Loosen and remove the four coolant pump pulley retaining bolts, keeping the pulley from turning.

22. Remove the coolant pump pulley.
23. Unscrew and remove the five retaining bolts of the coolant pump to the engine block.

24. Dismantle the coolant pump by prying its housing with a screwdriver. Remove the gasket under the pump.
25. Unscrew and remove the crankshaft pulley fixing bolt, fixing the pulley from turning with a special tool.

26. Separate the pulley from the crankshaft.
27. Press out the locking element of the wire harness block.

28. Remove the wire harness connector from the alternator.

29. Separate the harness holder with the harness from the generator.

30. Open the cap protecting the generator terminal.

31. Unscrew and remove the alternator power cord lug retaining nut.

32. Disconnect the power lead from the generator lead.
33. Loosen and remove the bottom alternator retaining bolt.

34. Loosen and remove the upper alternator retaining bolt to the bracket.

35. Remove the generator from the vehicle.
36. Loosen and remove the two alternator bracket retaining bolts.

37. Remove the generator bracket from the vehicle.
38. Unscrew and remove the fourteen timing cover retaining bolts.

39. Dismantle the timing case cover.
40. Depress the timing chain tensioner shoe using a special tool or a screwdriver, and then fix the tensioner using a pin.

41. Unscrew and remove the two timing chain tensioner mounting bolts.

42. Remove the chain tensioner.
43. Turn the intake camshaft slightly clockwise.
44. Remove the timing chain from the camshaft gears and crankshaft gear, and then remove the chain from the engine compartment.

45. Reinstall the timing chain in reverse order according to the marks on the camshaft gears and on the chain, making sure that the locating pin on the crankshaft is at the top.

Note. Painted links act as a label on the timing chain.
46. Clean the old sealant from the mating surfaces of the timing chain tensioner and the engine block.

47. Apply sealant to the mating surfaces of the timing chain cover with a 3–5 millimeter roller.

48. Install the timing chain tensioner and then remove the locking pin from it.

49. Check if the marks on the camshaft gears and on the timing chain match.
50. Check the position of the crankshaft. The crankshaft dowel pin must be up.

51. Apply sealant to the mating surfaces of the timing chain cover with a 3–5 millimeter roller.
52. Install the timing chain cover.
53. Screw in and tighten the fastening bolts evenly in several steps: tighten the ten-millimeter bolts to a torque of 9.8–11.8 N ∙ m, and the twelve-millimeter bolts to a torque of 18.6–23.5 N ∙ m.
54. Install the dismantled parts in reverse order.
Note. Each time the timing chain cover is removed, the crankshaft oil seal must be replaced.
Pavel Kurakin Motorist
Replacing the Solaris timing belt should be carried out taking into account the condition of the spare part and the entire system. In the process of replacing, the timing mechanism itself and the tension roller change. The procedure can be performed in a specialized car service, but it is cheaper and more reliable to replace it yourself.
Block: 1/3 | Number of characters: 288
The timing system is the most important component of a modern car. She is responsible for the stable and synchronized operation of the engine and its main units. Therefore, it is important to monitor the state of the Solaris timing belt, timely identify any changes in the appearance of the device and in the operation of the system, and eliminate them as soon as possible.
Regarding the drive of the car, it is not entirely correct to say "Hyundai Solaris timing belt". The machine is produced with two types of engine, which have a similar structure and are equipped with a chain drive of the valve timing mechanism. This means that in any Solaris modifications a chain is installed, not a belt. Although sometimes conventionally (rather out of habit) the timing chain is called the word "belt".
Timing belt replacement Hyundai Solaris - mileage
The manufacturer does not indicate at what mileage it is necessary to replace the timing for the Hyundai Solaris - it is believed that the chain drive is capable of departing the entire period of operation of the car and should only change in the event of a major overhaul of the power unit.
In fact, many experienced motorists and service employees can accurately answer the question of how much to change the timing belt to Hyundai Solaris. As a rule, the chain runs on average 250 thousand kilometers. After the specified period, there is a high probability that the chain stretching will reach the permissible limit - in this case, experts recommend unambiguously changing the timing.
Block: 2/3 | Number of characters: 1384
Source: https://modtop.ru/zamena-remnya-grm-solyaris
Replacement signs
Fortunately, the need to replace the chain can be heard in advance by the sound of the motor. Also, when changing the timing chain on a Hyundai Solaris can be indicated by an unstable engine operation - it becomes more noisy. Dips can occur, especially at low rpm. You can more accurately find out about the need for replacement by measuring the distance between the links.
Timing chain replacement is usually planned in advance. It can be combined with maintenance of the cooling system and complete replacement of the coolant. It is allowed to simultaneously install a new water pump, as well as replace the crankshaft oil seal.
Before replacing the chain, you need to remove the old one. To do this, you need to carry out preparatory measures. Disconnect the negative terminal of the battery and place the car securely on a horizontal surface. Block the rear wheels. The further order of work is as follows.
Perform further assembly of parts in reverse order. Tighten all bolts and nuts to the torque specified in the workshop manual. To do this, use a special torque wrench.
How long the timing chain runs on Solaris after installing a new one also depends on the choice of the manufacturer. Buy only original spare parts. In this case, you will be sure of the quality and reliable operation of the motor.
If the material was interesting or useful to you, post it on your page on the social network:
Block: 2/2 | Number of characters: 3223
Source: https://jrepair.ru/to-hyundai/zamena-tsepi-grm-v-hyundai-solaris
Timing Replacement Solaris
Replacing the timing belt of a car is a rather complicated and time-consuming process that not everyone can perform on their own. Nevertheless, if you have free time, desire, and, ideally, experience, you can try to carry out the work on your own.
Where is the timing in Solaris?
As in any other car, the Solaris timing belt is located at the front of the car under the hood. Consider how you can replace the belt using the example of a 2011 car with a 1.4 liter engine. On the Solaris 1.6 engine, the replacement is performed in the same way.
Tools for work:
- head keys;
- spanners;
- screwdrivers;
- pliers.
Instructions for Hyundai Solaris - timing belt replacement:
- Disconnect the battery terminals.
- Remove the head cover.
- Remove the motor protection, and then bring the piston of the 1st cylinder to TDC.
- Drain the power pack oil.
- Support the engine with a jack or any suitable object.
- Unscrew the screws holding the right motor mount and remove the mountings.
- Using a wrench, rotate the tension roller to loosen the accessory drive belt.
- Remove the slack poly V-belt from the machine.
- Disconnect the power steering pump fasteners and slide it to the side.
- Unscrew the tensioner screw by turning the pin clockwise.
- Dismantle the tensioning mechanism.
- Remove the screws on the lower cushion bracket on the right and remove it.
- Remove the belt roller screw and remove the roller.
- Completely remove antifreeze from the cooling system (the process takes about 20-25 minutes).
- Remove the 4 screws for the coolant pump while holding the pulley.
- Remove the pump shaft, then remove the screws holding it to the engine block.
- Remove the complete pump.
- Remove the crankshaft pulley.
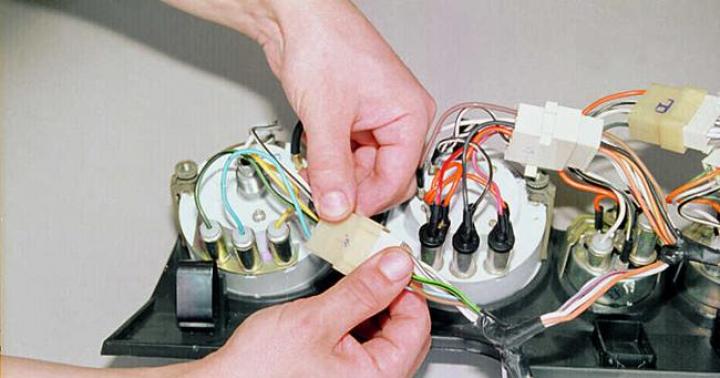
- Disconnect the wiring block from the generator.
- Unscrew the nut and pull out the generator.
- Remove the valve timing bolt.
- Remove the cover, then remove the pins and chain tensioner.
- Turn the camshaft pulley clockwise.
- Then dismantle the chain and put a new one in its place, proceeding in the reverse order. During installation, the crankshaft adjusting bolt must be up.
- Remove the used sealant from each of the contacting devices and apply a new layer of the substance.
- Install the Solaris timing belt tensioner. In this case, the marks on the camshaft gears and on the chain must match.
- Install all previously removed units in reverse order.
On this, the replacement of the timing belt Hyundai Solaris is considered complete. In the process of work, it is important to correctly set the Solaris timing marks.
The price of the timing belt Solaris
We found out that a chain is always installed on the Hyundai Solaris, and its cost, as you know, is higher. Today, you can buy a timing chain for Solaris of the original production for 5.5-6 thousand rubles. An analogue of the original origin is also suitable for replacement, which are already cheaper - from 3600 rubles. You can immediately purchase kits from the manufacturer Bga - their price starts from 13.5 thousand rubles.
Part catalog numbers:
- 243212B000 - timing chain original;
- 244202B000 - chain (analog from Hyundai-KIA), guide, camshaft gear;
- HY2403212B000 - analogs from DOMINANT;
- TC2720FK - chain kits from Bga.
Now you know when to change the Hyundai Solaris timing belt and how you can perform this procedure yourself, without the help of service station specialists. Every motorist should know that in addition to the replacement, which is made if necessary, it is also necessary to periodically check the chain, measure the level of its tension (it should not be more than 5 mm). Carelessness can lead to an open circuit and damage to the internal combustion engine.
Block: 3/3 | Number of characters: 3750
Source: https://modtop.ru/zamena-remnya-grm-solyaris
Timing chain Hyundai Solaris (Kia Rio)
How to find whether it is necessary change chain. Changing the chain. For example, Hyundai solaris with mileage of 180,000 km.
Changing the chain The timing is usually planned well in advance. It is of course to cooperate which radiators work and (a working replacement of antifreeze. It is allowed to immediately install the newest water pump, and additionally replace the crankshaft oil seal.
Before replacing the chain, you must remove the old one. For this purpose, you need to complete the preliminary activities. Disconnect the negative terminal of the battery and firmly install the car on a horizontal surface. Block the rear wheels. The upcoming work order is the next one.
- Drain the coolant.
- Dismantle the generator.
- Remove the valve cover.
- Set the 1st cylinder to top dead center.
Align the marks on the crankshaft pulley and camshaft sprockets. Look at additional marks at the same time. If they are in a strictly horizontal position, then this is a sign that the chain is not stretched.
- Remove the right wheel.
Before removing the upper motor mount, you need to jack up the motor.
- Remove the power steering expansion tank from its original place and take it to the side.
After removing the side cover, in which the chain is required, access to the timing mechanisms will appear. They need to be dismantled. These include: two dampers, a hydraulic tensioner. Then troubleshoot the drive gears, dampers and timing chain.
The installation of the chain is done in serious agreement with the marks that are found on the crankshaft pulley, the camshaft sprocket on one of the gears.
Reassemble the parts in reverse order. Our client is left with bolts and nuts, tighten them to the torque indicated in the repair manual. For this purpose, use a special torque wrench.
How much the timing chain walks on Solaris after installing the newest, also depends on the choice of the manufacturer. Buy only original spare parts. In this case, you will have to be convinced for the reliable and reliable operation of the motor.
If the material was interesting to you, as it is also called useful, post it on your own page on the social network:
Block: 3/3 | Number of characters: 2743
Many car owners are familiar with such a malfunction as an open chain or timing belt. But not everyone knows how to pull it back on. Some even have a special tensioner in the car, but have no idea how to use it if suddenly such a need arises. So, how is the Hyundai Solaris timing chain replaced?
When is replacement needed?
Pulling on a new chain is not a very difficult task, and in case of a breakdown somewhere far from home, any car enthusiast will be able to independently restore the performance of the Hyundai Solaris. Do not just forget that the chain breaks once and for all, therefore, in addition to the tensioner, a new chain is also needed.
However, so that such a problem does not happen and the timing belt does not have to be changed, the condition of the chain should be monitored. When the chain is stretched, then it begins to dangle and this can be seen when inspecting this node. It is then that replacement is required. It is better to do this in advance than in an emergency. Moreover, the replacement is quite easy.
It is important to understand that if the chain is still holding, then its replacement is possible in car services, where professionals with experience in such work will undertake this. However, you need to remember how much money it will cost to replace only one part.
On a Hyundai Solaris car, the camshafts are driven by a chain. It is more reliable than timing belts, which break and require frequent attention and maintenance.
Step-by-step instruction
The replacement intervals by the manufacturer for the Hyundai Solaris are not regulated by the manufacturer.
The main malfunction of the chain is its stretching, which leads to a shift in valve timing, noise. Eliminated by replacing it with a new one. Replacement work is quite laborious. It is necessary to make a thorough diagnosis; a diagnostician who has an oscilloscope in his arsenal can help you with this, which will take an oscillogram from your engine and compare it with a reference one. The angles of the valve timing will be exactly visible on it. After that, he will give you recommendations for replacing the timing chain.

24410-25001 article. Chain tensioner.
Required tools and accessories:
- Oil container
- Set of heads
- Open-end wrench set
- Rags
- Hammer
- Screwdriver
- Pasatizh
- Jack
We open the hood, remove the minus terminal from the battery. We unscrew the protection, drain the oil from the engine.
We drain the antifreeze from the cooling system into a container.
We unscrew the Hyundai Solaris valve cover and remove it.
We support the Hyundai Solaris engine under the jack through the plate. We unscrew the engine mount bracket from the timing side and dismantle it.

Remove the alternator drive belt by loosening the tensioner with a wrench.

It is necessary to move the power steering pump to the side by unscrewing the pump fasteners.
Unscrew the belt tensioner (bolt with reverse thread). Let's dismantle it from the block.

Using a socket wrench, unscrew the 4 bolts of the right bracket for the engine mount, remove it.

Using a key, unscrew the bolt of the support roller, remove it.
The pulley of the liquid pump is held on four bolts, keeping it from turning, you must unscrew them and remove the pulley.
We unscrew the bolts securing the water pump to the engine block (5 pieces). We remove it by prying it with a slotted screwdriver.
With a socket wrench, unscrew the belt pulley bolt (if you have a manual transmission, ask your partner to turn on the fifth gear and press the brake pedal; if an automatic transmission, use a special holding tool).
We remove the pulley from the end of the crankshaft by prying it with mounting from different sides.
It is necessary to dismantle the generator, having previously disconnected the block, pressing the latch, then unscrew the power wires from the contact bolt of the Hyundai Solaris engine generator with an open-end wrench.
We unscrew the upper and lower bolts securing the generator to the bracket - remove the generator.
Remove the bracket from the motor by unscrewing two bolts.
The timing cover is held on to the block by fourteen bolts, which must be unscrewed, after which we remove the timing cover.

It is necessary to set the top dead center of the piston of the first cylinder, guided by the marks on the shafts.
Fix the shoe tensioner with the pin by pressing the shoe with a screwdriver. We unscrew the two tensioner bolts and remove it.

Remove the timing chain from the camshafts, crankshaft sprockets. We take it out of the engine compartment.

We inspect for damage and wear of the teeth of the camshaft sprocket and crankshaft.
We clean all the adjacent surfaces on the lid and block. We clean the surface of the tensioner and its seat on the block.
We install the timing chain on the stars, aligning them according to the marks (on the new chain, for convenience, the marks are marked with paint).

We install the tensioner by applying sealant to the back.
As you know, the balanced operation of the gas distribution mechanism directly affects the performance of the engine. Accordingly, all its elements, in particular the belt, must always be in working order. In this article, you will find out what is best for the Hyundai Solaris timing chain: chain or belt and you can watch a video of replacing components.
[Hide]
When is it time to change?
Two types of motors are installed on Hyundai Solaris cars: G4FA and G4FC. The volume of the first is 1.4 liters, the second - 1.6 liters. They are arranged in the same way, do not carry any constructive differences and belong to the "Gamma" class.
Unlike other types of motors, on the Gamma, the timing mechanism is equipped with a chain, not a belt. For Solaris owners, this is a significant advantage, since the drive belt must be replaced every 60 thousand kilometers. The replacement of the chain, in turn, is not regulated by the Solaris manufacturer. As a rule, it changes in the event of an engine overhaul or in the event of a break.
In practice, the failure of the chain is recorded not earlier than after 250-300 thousand kilometers.
Step-by-step instruction
This replacement process requires some knowledge and experience. If this is the first time you are faced with the need to change the chain, then it is better not to do it yourself, but to give your car for repair at a service station. For those car owners who want to replace an element on their own, we suggest using this material.
What to cook?
You will need:
- head keys;
- spanners;
- flat and Phillips screwdrivers;
- pliers.
Instructions
- First, disconnect the battery and remove the cylinder head cover. You will also need to dismantle the internal combustion engine protection, and then set the piston of the first cylinder to the TDC position.
- Drain the engine fluid from the internal combustion engine.
- Place a secure stop under the motor, and then unscrew the screws that secure the right support of the unit. Then you need to unscrew the corresponding screws to remove the right motor support mount.
- With the wrench, you should turn the tensioner pulley to loosen the belt. Then remove the accessory drive belt from the shafts.
- After that, it is necessary to dismantle the fastening screw of the power steering pump, move the device aside and unscrew the fastening screw of the tensioner. This is done by turning the pin clockwise since it has a reverse thread. Remove the tensioner.
- Next, unscrew the fixing screws of the lower bracket of the right support and remove it. After that, remove the screw that secures the belt roller and remove the roller itself.
- Then you need to drain all the antifreeze that is in the system. The draining procedure may take more than 20 minutes. Further, holding the antifreeze pump pulley, you should pull out the four screws of its fastening. Remove the pump shaft, and then unscrew and remove the screws that secure it to the BC of the motor. The pump together with the sealing rubber can be removed.
- Unscrew the screw securing the crankshaft pulley, remove the pulley itself. Then you need to disconnect the block with wires from the generator. Unscrew the nut, then remove the generator itself.
- Now remove all screws. Remove the cover, and then dismantle the tension pins and the tensioner of the mechanism chain itself. Turn the timing pulley clockwise.
- After that, the chain itself can be removed. Install the chain in the reverse order. When installing, make sure that the set bolt on the crankshaft is at the top. All contacting elements of the tensioner must be cleaned of the remnants of the old sealant. Then these components should be coated with new sealant.
- Install the timing chain tensioner. Make sure that the marks on the camshaft gears and on the chain match. Carry out all further actions in the reverse order. You can learn more about changing a component in the video.
Video "Do-it-yourself timing chain replacement"
You can watch a video of replacing the timing chain using the example of a Hyundai Getz car, the procedure is generally similar to the Hyundai Solaris model.
Lucky. On engines 1.4 and 1.6 gasoline, a timing chain mechanism is installed. On the one hand, this means greater reliability (cases of chain breakage are quite rare). On the other hand, it saves car owners from frequent timing belt replacement.
In our Moscow network, we carry out all types of work on diagnostics, repair and replacement of timing elements
Periodicity
The manufacturer does not regulate the time for replacing the chain on Solaris. This means that the car can be driven until a major overhaul or a cliff. The chain's reliability is high enough. We have already accumulated a wealth of experience in servicing Korean brand cars that have driven 200-300 thousand kilometers.
But the absence of the need to replace the timing chain of the Hyundai Solaris does not negate the complex of works associated with checking the performance of the entire gas distribution mechanism, tensioner, tension pins and auxiliary rollers.
First of all, you need to monitor the correct chain tension. And in case of its subsidence, pull it up. Another problematic part is the hydraulic chain tensioner. If it fails, a break may occur, so it is necessary to check it regularly and, if necessary, replace it.
Work order
The replacement of the chain itself is a rather complicated process that requires experience and especially a special tool that helps to carry out the work quite quickly.
A guarantee is provided for all types of timing repairs in our network of car services. We have a large warehouse of original and non-original Hyundai spare parts. Excellent value for money.
Prices for replacing the chain, timing belt Hyundai Solaris
Replacing the timing belt with rollers