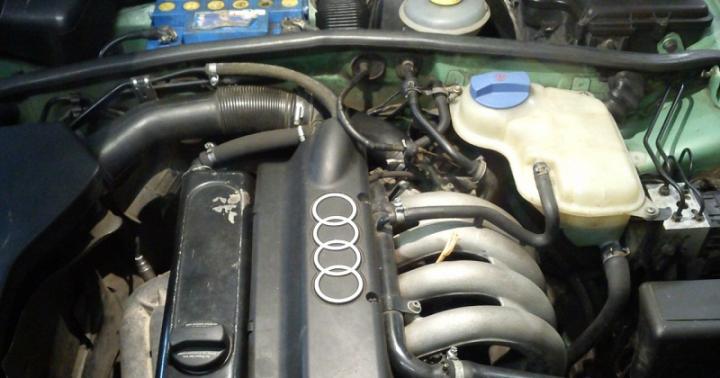
Every year people are looking for alternative sources. A home-made power plant from an old car generator will come in handy in remote areas where there is no connection to the mains. It will be able to freely charge rechargeable batteries, as well as provide the operation of several household appliances and lighting. Where to use the energy, what will be generated, you decide, as well as assemble it yourself or purchase it from manufacturers, which are abundant on the market. In this article, we will help you figure out the do-it-yourself wind generator assembly diagram from those materials that any owner always has.
Consider the principle of operation of a wind power plant. Under a fast wind flow, the rotor and propellers are activated, after which the main shaft comes into motion, rotating the gearbox, and then generation occurs. We get electricity at the exit. Therefore, the higher the rotational speed of the mechanism, the greater the productivity. Accordingly, when placing structures, take into account the terrain, relief, and know the areas of territories where the speed of the vortex is high.


Assembly instructions from a car generator
To do this, you will need to prepare all the components in advance. The most important element is the generator. It is best to take a tractor or bus, it is capable of generating much more energy. But if this is not possible, then it is more likely to do with weaker units. To assemble the device you will need:
voltmeter
battery charging relay
blade steel
12 volt battery
box for wires
4 bolts with nuts and washers
clamps for fastening
Assembling a device for a 220v home
When everything you need is ready, proceed to the assembly. Each of the options may have additional details, but they are clearly specified directly in the manual.
First of all, assemble the wind wheel - the main structural element, because it is this part that will transform the wind energy into mechanical. It is best if it has 4 blades. Remember that the smaller the number, the more mechanical vibration and the more difficult it will be to balance it. They are made from sheet steel or an iron barrel. They should not wear the same shape as you saw in the old mills, but resemble the wing type. Their aerodynamic drag is much lower, and the efficiency is higher. After you, with the help of a grinder, cut out a windmill with blades with a diameter of 1.2-1.8 meters, it, together with the rotor, must be attached to the axis of the generator by drilling holes and connecting with bolts.


Assembling the electrical circuit
We fix the wires and connect them directly to the battery and voltage converter. It is required to use everything that at school in physics lessons you were taught to tinker when assembling electrical circuit... Before starting development, think about what kW you need. It is important to note that without the subsequent alteration and rewinding of the stator, they are not at all suitable, the operating speed is 1.2 thousand -6 thousand rpm, and this is not enough for energy production. It is for this reason that it is required to get rid of the excitation coil. To raise the voltage level, rewind the stator with a thin wire. Typically, the resulting power will be 150-300 watts at 10 m / s. After assembly, the rotor will magnetise well, as if power was connected to it.


Rotary self-made wind generators are very reliable in operation and economically profitable, their only imperfection is the fear of strong gusts of wind. The principle of operation is simple - a vortex through the blades makes the mechanism spin. In the process of these intense rotations, the energy is generated, the voltage you need. Such a power plant is a very successful way to provide electricity to a small house, of course, in order to pump water from a well, its capacity will not be enough, but it is possible to watch TV or turn on the lights in all rooms with its help.
From a home fan
The fan itself may be inoperative, but only a few parts are required from it - this is the stand and the screw itself. For the design, you need a small stepper motor soldered by a diode bridge in order for it to give out constant voltage, a shampoo bottle, a plastic water pipe about 50 cm long, a plug for it and a plastic bucket lid.


A sleeve is made on the machine and fixed in the connector from the wings of the disassembled fan. This bushing will hold the generator. After fixing, you need to start making the case. Cut off the bottom of the shampoo bottle using a machine or manually. During cutting, it is also required to leave a hole of 10 in order to insert an axle, turned from an aluminum rod, into it. Attach it with a bolt and nut to the bottle. After all the wires have been soldered, another hole is made in the bottle body to output these same wires. We stretch them and fix them in a bottle on top of the generator. They must match in shape and the body of the bottle must reliably hide all of its parts.
Shank for our device
In order for it to catch wind streams from different directions in the future, assemble the liner using a pre-prepared tube. The tail section will be secured with a twist-off shampoo cap. A hole is also made in it and, after putting a plug on one end of the tube, they stretch it and fix it to the main body of the bottle. On the other hand, the pipe is cut with a hacksaw and the wing of the shank is cut out of the lid of the plastic bucket with scissors, it should have a round shape. All you need to do is simply trim off the edges of the bucket that secured it to the main container.


We attach to the back of the stand USB output and put all the received parts into one. It will be possible to mount the radio or recharge the phone through this built-in USB port. Of course, it does not have a strong power from a household fan, but still it can provide lighting for one light bulb.
DIY wind generator from a stepper motor
A device made from a stepper motor generates about 3 watts even at low rotational speeds. The voltage can rise above 12 V, which allows charging a small battery. A stepper motor from a printer can be inserted as a generator. In this mode, the stepper motor generates alternating current, and it can be easily converted to a constant, using several diode bridges and capacitors. You can assemble the scheme with your own hands. The stabilizer is installed behind the bridges, as a result, we get a constant output voltage. An LED can be installed to monitor eye tension. In order to reduce the loss of 220 V, Schottky diodes are used to rectify it.


The blades will be PVC pipe. The workpiece is drawn on the pipe and then cut out with a cutting disc. The span of the screw should be about 50 cm, and the width should be 10 cm. It is necessary to grind a sleeve with a flange to the size of the SM shaft. It is pushed onto the motor shaft and secured with screws; plastic “screws” will be attached directly to the flanges. Also carry out balancing - pieces of plastic are cut from the ends of the wings, the angle of inclination is changed by heating and bending. A piece of pipe is inserted into the device itself, to which it is also bolted. As for the electrical board, it is better to place it at the bottom, and bring the power out to it. Up to 6 wires come out of the stepper motor, which correspond to the two coils. They will require slip rings to transfer electricity from the moving part. Having connected all the parts together, we proceed to testing the structure, which will start revolutions at 1 m / s.
Wind turbine made of motor-wheel and magnets
Not everyone knows that a wind generator from a motor-wheel can be assembled with your own hands in a short time, the main thing is to stock up in advance the right materials... The Savonius rotor is best suited for it, it can be purchased ready-made or independently. It consists of two semi-cylindrical blades and an overlap, from which the rotor rotation axes are obtained. Choose the material for their product yourself: wood, fiberglass or pvc pipe, which is the simplest and the best option... We make the junction of the parts, where you need to make holes for fastening in accordance with the number of blades. You will need a steel swivel mechanism to withstand any weather.


From ferrite magnets
A wind generator with magnets will be difficult for inexperienced craftsmen to master, but you can still try. So, there should be four poles, each will contain two ferrite magnets. They will be covered with metal pads with a thickness of a little less than a millimeter to distribute a more even flow. There should be 6 main coils, rewound with a thick wire and should be placed through each magnet, occupying a space corresponding to the length of the field. The fastening of the winding circuits can be on the hub from the grinder, in the middle of which a pre-machined bolt is installed.
The flow of energy supply is regulated by the height of the stator fixing above the rotor, the higher it is, the less sticking, respectively, the power decreases. For the windmill, you need to weld a support-stand, and fix 4 large blades on the stator disk, which you can cut out of an old metal barrel or a lid from a plastic bucket. At an average speed of rotation, it produces about 20 watts.


Wind turbine design on neodymium magnets
If you want to learn about the creation, you need to make the basis of the car hub with brake discs, this choice is quite justified, because it is powerful, reliable and well balanced. After you clean the hub of paint and dirt, proceed to the arrangement of the neodymium magnets. They will need 20 pieces per disc, the size should be 25x8 millimeters.
The magnets should be placed taking into account the alternation of the poles; before gluing it is better to create a paper template or draw lines dividing the disk into sectors so as not to confuse the poles. It is very important that they, facing each other, have different poles, that is, they are attracted. Glue them with super glue. Lift the curbs around the edges of the discs, and wrap tape or plasticine in the center to prevent spreading. In order for the product to operate at maximum efficiency, the stator coils must be sized correctly. An increase in the number of poles leads to an increase in the frequency of the current in the coils, due to this, the device, even at a low frequency of rotation, gives more power. The coils are wound with thicker wires in order to reduce the resistance in them.
When the main part is ready, the blades are made, as in the previous case, and they are fixed to the mast, which can be made from an ordinary plastic pipe with a diameter of 160 mm. In the end, our generator, operating on the principle of magnetic levitation, with a diameter of one and a half meters and six wings, 8m / s, is capable of providing up to 300 watts.
The price of disappointment or an expensive weather vane
Today there are many options for how to make a device for converting wind energy, each method is effective in its own way. If you are familiar with the method of manufacturing equipment that generates energy, it will not matter on the basis of what to make it, the main thing is that it meets the conceived scheme, and gives good power at the output.
A simple, obvious, but brilliant idea came to mind. After all, considering that a stepper motor is not only a motor that provides mechanical work completely different devices (ranging from printers, scanners and other office equipment, ending with various units used in more serious devices). A stepper motor can also be a great generator of electricity!
And its most important plus in everything is that it does not require high revs at all, it can work properly even at low loads. That is, even with the minimum action of the force directed at it, the stepper motor generates energy perfectly. Most importantly, this energy is quite enough for various needs, such as lighting the road for a cyclist using a flashlight connected to a stepper motor.
Unfortunately, with a conventional generator, a standard bike will still need some initial RPM before the flashlight starts to emit bright enough light to illuminate the path clearly. But when using a stepper motor, this drawback is removed by itself, that is, the lighting will be supplied as soon as the wheel begins to rotate.
But the truth is, this miracle of design will still have a number of shortcomings. For example, the most obvious of these is large magnetic sticking. But it's actually not that scary for a cyclist.
That, when starting to work, we will need to find some details:
1) Actually the stepper motor itself.
2) a couple of large capacitors.
3) LED lights
4) voltage stabilizer 5-6 volts.
Finding a stepper motor is quite easy due to the fact that it is very common in all office devices. The only thing to understand is that the larger the stepper motor, the better for us.
Several models of stepper motors and various options for their attachment to an iron horse will be described and presented here.
To begin with, let's take the largest engine that the author managed to get hold of. He dismantled it from an ordinary office plotter for printing (in fact, it is a printer, only a few times bigger size).
Outwardly, the engine is quite large.
But before starting to study the stabilization circuit as well as the power circuit, you should pay attention to the method of attaching this unit to the bike.
If you look at the picture, you will understand that the generator is located closer to the wheel axis and the rotation is transmitted from the additional circle.
And yet, since everyone has their own bike model and someone does not want to damage the frame with self-tapping screws, you will need to develop the mount yourself as well as the circle of rotation, there are really a lot of options here.
If you have no idea how to screw a large stepper motor to a structure, there is a smaller option:


You just have to choose a generator option suitable for the size of your vehicle.
Well, when you figured out the stepper motors, you can start with the lights and power circuits.

You need to take LED lights. the rectification circuit will look like this: a block of rectifier diodes, several large capacitors and, of course, a voltage stabilizer. In principle, this is a standard power supply scheme.
The stepper motor has four leads as standard, which correspond to two coils. for this reason, there are also two rectifier units in the image. This home-made electricity generator may well produce up to 50 volts of voltage at high speeds, so it is better to take capacitors appropriately (voltage above 50). Well, the stabilizer for a voltage of 5-6 volts.
And so what is the essence of homemade products, and why was it needed?
It's all about its advantage, even just after moving off - your path will already be brightly illuminated by a lantern powered by our stepper motor - it is also a generator.
I would also like to note that during the movement the lantern will not blink or go out - the lighting will be smooth and even.
While riding a bicycle past the summer cottages, I saw a working wind generator. Large blades slowly but surely rotated, the weather vane oriented the device in the direction of the wind.
I wanted to implement a similar design, albeit not capable of producing enough power to supply "serious" consumers, but still working and, for example, charging batteries or supplying LEDs.
One of the most effective options for a small homemade wind turbine is to use stepper motor(ШД) (eng. stepping (stepper, step) motor) - in such a motor, the rotation of the shaft consists of small steps. The stepper motor windings are in phase. When current is applied to one of the phases, the shaft moves one step.
These engines are low-speed and a generator with such an engine may be gearedlessly connected to a wind turbine, Stirling engine, or other low-speed power source. When used as a generator of a conventional (collector) engine direct current to achieve the same results, a 10-15 times higher speed would be required.
A feature of the shagik is a fairly high starting torque (even without an electrical load connected to the generator), reaching 40 grams of force per centimeter.
The efficiency of the generator with stepper motor reaches 40%.
To check the functionality of the stepper motor, for example, a red LED can be connected. By rotating the motor shaft, you can observe the glow of the LED. The polarity of the LED connection does not matter, as the motor generates alternating current.
A treasure trove of such powerful enough motors are five-inch floppy drives, as well as old printers and scanners.
For example, I have a stepper motor from an old 5.25 ″ drive, which was still in operation ZX Spectrum- compatible computer “Byte”.
Such a drive contains two windings, from the ends and the middle of which conclusions are drawn - total is removed from the engine six wires:
first winding (eng. coil 1) - blue (eng. blue) and yellow (eng. yellow);
second winding (eng. coil 2) - red (eng. red) and white (eng. white);
brown (rus. brown) wires - leads from the midpoints of each winding (eng. center taps).

disassembled stepper motor
On the left you can see the rotor of the motor, on which you can see the "striped" magnetic poles - north and south. To the right is the stator winding, which consists of eight coils.
Half winding resistance is
I used this engine in the original design of my wind turbine.
Less powerful stepper motor in my possession T1319635 firms Epoch Electronics Corp. from scanner HP Scanjet 2400 It has five conclusions (unipolar motor):

first winding (eng. coil 1) - orange (eng. orange) and black (eng. black);
second winding (eng. coil 2) - brown (eng. brown) and yellow (eng. yellow);
red (eng. red) wire - pins connected together from the midpoint of each winding (eng. center taps).
The resistance of the half winding is 58 ohms, which is indicated on the motor housing.
In the improved version of the wind turbine, I used a stepper motor Robotron SPA 42 / 100-558 produced in the German Democratic Republic and designed for a voltage of 12 V:

There are two options for the location of the impeller (turbine) axis of the wind generator - horizontal and vertical.
The advantage horizontal(most popular) location the axis, located in the direction of the wind, is a more efficient use of wind energy, the disadvantage is the complexity of the design.
I chose vertical arrangement axes - VAWT (vertical axis wind turbine), which greatly simplifies the design and does not require wind orientation ... This option is more suitable for roof mounting, it is much more effective in conditions of rapid and frequent changes in wind direction.
I used a type of wind turbine called the Savonius wind turbine. Savonius wind turbine). It was invented in 1922 Sigurd Johannes Savonius) from Finland.

Sigurd Johannes Savonius
The operation of the Savonius wind turbine is based on the fact that the resistance (eng. drag) to the incident air flow - the wind of the concave surface of the cylinder (blade) is larger than the convex one.
Aerodynamic drag coefficients ( English drag coefficients) $ C_D $

concave half of the cylinder (1) - 2.30
convex half of the cylinder (2) - 1.20
flat square plate - 1.17
concave hollow hemisphere (3) - 1.42
convex hollow hemisphere (4) - 0.38
These values are given for Reynolds numbers (eng. Reynolds numbers) in the range $ 10 ^ 4 - 10 ^ 6 $. The Reynolds number characterizes the behavior of a body in a medium.
Resistance force of the body to the air flow $ =<<1 \over 2>S \ rho
Such a wind turbine rotates in the same direction, regardless of the direction of the wind:

A similar operating principle is used in the cup anemometer (eng. cup anemometer)- a device for measuring wind speed:

Such an anemometer was invented in 1846 by the Irish astronomer John Thomas Romney Robinson ( John Thomas Romney Robinson):

Robinson believed that the cups in his four-cup anemometer moved at a speed equal to one third of the wind speed. In reality, this value ranges from two to a little more than three.
Currently, three-cup anemometers are used to measure wind speed, developed by Canadian meteorologist John Patterson ( John Patterson) in 1926:

Generators on DC brushed motors with vertical microturbine are sold at eBay for about $ 5:

Such a turbine contains four blades located along two perpendicular axes, with an impeller diameter of 100 mm, a blade height of 60 mm, a chord length of 30 mm and a segment height of 11 mm. The impeller is mounted on the shaft of a DC micromotor with the marking JQ24-125p70... The rated supply voltage of such a motor is 3. 12 B.
The energy generated by such a generator is enough for the glow of the "white" LED.
Rotational speed of the Savonius wind turbine cannot exceed wind speed , but at the same time such a construction is characterized by high torque (eng. torque).
The efficiency of a wind turbine can be estimated by comparing the power generated by the wind turbine with the power contained in the wind blowing through the turbine:
$ P =<1\over 2>\ rho S
Initially, the impeller of my generator used four blades in the form of segments (halves) of cylinders cut from plastic pipes:

segment length - 14 cm;
segment height - 2 cm;
the length of the chord of the segment is 4 cm;
I installed the assembled structure on a fairly high (6 m 70 cm) wooden mast from a bar, attached with self-tapping screws to a metal frame:

The disadvantage of the generator was the rather high wind speed required to spin the blades. To increase the surface area, I used blades cut from plastic bottles:

segment length - 18 cm;
segment height - 5 cm;
segment chord length - 7 cm;
the distance from the beginning of the segment to the center of the axis of rotation is 3 cm.
The strength of the blade holders proved to be an issue. At first I used 1mm perforated aluminum strips from a Soviet children's designer. After several days of operation, strong gusts of wind led to the break of the planks (1). After this failure, I decided to cut out the blade holders from foil-coated PCB (2) 1.8 mm thick:

The flexural strength of the PCB perpendicular to the plate is 204 MPa and is comparable to the flexural strength of aluminum - 275 MPa. But the modulus of elasticity of aluminum $ E $ (70,000 MPa) is much higher than that of textolite (10,000 MPa), i.e. texolite is much more elastic than aluminum. This, in my opinion, taking into account the greater thickness of the textolite holders, will provide a much greater reliability of fastening the blades of the wind generator.
The wind generator is mounted on a mast:

The trial operation of the new version of the wind turbine has shown its reliability even under strong gusts of wind.
The disadvantage of the Savonius turbine is low efficiency - only about 15% of wind energy is converted into shaft rotation energy (this is much less than can be achieved with wind turbine Daria(eng. Darrieus wind turbine)), using lift (eng. lift). This type of wind turbine was invented by the French aircraft designer Georges Darier. (Georges Jean Marie Darrieus) - US patent of 1931 No. 1,835,018 .


The disadvantage of the Darrieus turbine is that it has a very poor self-start (to generate torque from the wind, the turbine must already be spun).
Conversion of electricity generated by a stepper motor
The stepper motor leads can be connected to two bridge rectifiers, assembled from Schottky diodes to reduce the voltage drop across the diodes.
Popular Schottky diodes can be used 1N5817 with a maximum reverse voltage of 20 V, 1N5819- 40 V and a maximum forward average rectified current of 1 A. I connected the outputs of the rectifiers in series in order to increase the output voltage.
It is also possible to use two midpoint rectifiers. Such a rectifier requires half as many diodes, but at the same time the output voltage is reduced by half.
Then the ripple voltage is smoothed using a capacitive filter - a 1000 μF 25 V capacitor. To protect against an increased generated voltage, a 25 V zener diode is connected in parallel to the capacitor.

diagram of my wind turbine

electronic unit of my wind generator
In windy weather, the tension idle move at the output of the electronic unit of the wind generator reaches 10 V, and the short-circuit current is 10 mA.
CONNECTING TO JOULE THIEF
Then the smoothed voltage from the capacitor can be applied to Joule thief- low voltage DC-DC converter. I assembled such a converter based on germanium pnp-transistor GT308V ( VT) and a pulse transformer MIT-4V (coil L1- conclusions 2-3, L2- conclusions 5-6):

Resistor value R is selected experimentally (depending on the type of transistor) - it is advisable to use a variable resistor of 4.7 kOhm and gradually reduce its resistance, achieving stable operation of the converter.

my converter Joule thief
CHARGE OF IONISTORS (SUPERCONDENSERS)
Supercapacitor (supercapacitor) supercapacitor) is a hybrid of a capacitor and a chemical current source.
Supercapacitor - non-polar cell, but one of the terminals may be marked with an “arrow” to indicate the polarity of the residual voltage after it has been charged at the factory.
For the initial research, I used a supercapacitor 5R5D11F22H with a capacity of 0.22 F for a voltage of 5.5 V (diameter 11.5 mm, height 3.5 mm):
I connected it through a diode to the output Joule thief through the germanium diode D310.
To limit the maximum charging voltage of the supercapacitor, you can use a zener diode or a chain of LEDs - I use a chain of two red LEDs:

To prevent the discharge of an already charged supercapacitor through the limiting LEDs HL1 and HL2 I added another diode - VD2.
My homemade wind turbine on stepper motor.My Fascinating and Dangerous Experiments
My self-made wind turbine with a stepper motor While cycling past summer cottages, I saw a working wind generator. The big blades were spinning slowly but surely, the weather vane
A stepper motor as a generator?
I had a stepper motor lying around and I decided to try to use it as a generator. The motor was removed from an old dot matrix printer, the inscriptions on it are as follows: EPM-142 EPM-4260 7410. The motor is unipolar, which means that this motor has 2 windings with a tap from the middle, the resistance of the windings was 2x6 ohms.
The test requires another motor to spin the stepper. The construction and mounting of the motors are shown in the figures below:
 We smoothly start the engine so that the rubber band does not fly off. I must say that on high revs it still flies, so it did not raise the voltage above 6 volts.
 We connect a voltmeter and start testing, first we measure the voltage.
 I don't need to explain anything and everything is clear from the photo below. The voltage was 16 volts, the speed of the spinning engine is not large, I think if you spin it harder, you can squeeze out all 20 volts.


We set the voltage to a little less than 5 volts, so that the stepper motor after the bridge gives out about 12 volts.
 Shines! At the same time, the voltage dropped from 12 volts to 8 and the engine began to spin a little more slowly. Short-circuit current without led strip was 0.08A - let me remind you that the unwinding motor did NOT work at full power, and do not forget about the second winding of the stepper motor, you just cannot parallel them, and I did not want to assemble the circuit.
 I think you can make a good generator from a stepper motor, attach it to a bicycle, or make a wind generator based on it.
A stepper motor as a generator? Meander - entertaining electronics
A stepper motor as a generator? I had a stepper motor lying around and I decided to try to use it as a generator. The engine was removed from an old dot matrix printer, lettering
A wind generator at home can become an additional source of electricity. It will be especially useful in those cases when the light was turned off, and you need to charge any device. You can connect such a wind generator to a street light in the yard, while saving on electricity. In general, this device can always be used in the household. Moreover, it can be made practically from scrap materials.
In this article, we will show you how to make a simple wind turbine from a stepper motor.
What is needed to assemble a wind turbine?
In order to assemble a wind generator from a stepper motor, you will need the following parts:
- the motor itself;
- sheet metal;
- aluminum tube;
- flange (1/4 ");
- square tube;
- saw blade;
- pin;
- clamps (can be used from the car);
- PVC pipes different sizes(for example, 8x4, 30x8);
- washers, bolts, etc. for fastening parts;
- diodes.
From tools, a hacksaw, an adjustable and gas wrench, sandpaper, tape measure, drill, protractor and tape measure are useful.
The principle of operation of a wind turbine
It is not necessary to dwell in detail on how a wind generator from a stepper motor works. After all, all such generators have the same principle of operation: the wind forces the blades of the windmill to rotate, as a result of which the generator begins to work, which generates electricity.
Wind turbine manufacturing
The first thing to start with is to cut out the blades. For this we will use PVC pipes.
What to consider when cutting out the blades?
- The length of each blade - the larger it is, the easier they will spin in a weak wind, but at the same time they will have quite low speed rotation.
- The rotation will be greater at the ends of the generator blades - this moment must be taken into account in advance and the ratio of the wind speed to the rotation speed of the blades must be calculated.
- Remember that the power drawn from the wind will equal the wind speed to the third power. However, don't forget about Betz's Law, which says that approximately 59.3 percent of the energy can be obtained from wind power.
- The higher the wind turbine is raised from the ground, the more efficient it will be (more energy will be generated).

Making blades will not be a big problem. To do this, you will need to cut the PVC pipe into three parts: two 150 degrees and one 60, as shown in the figures.
Note that two pipe lengths (150 0) are suitable for wide blades. If you wish, you can trim them to the desired width.

The next task is to make a hub - a blade attachment unit. A saw blade with sharpened teeth is suitable for these purposes. Six holes will need to be made in it (three groups of 2 in each). The holes are made with an offset of 120 0, and the distance between them in one group should be about an inch. The location of the holes on the disc is shown in the figure:

In this case, we use three blades, although six can be installed: then the groups of holes will be displaced by 60 0. We fasten the blades to the prepared disc with holes - we fasten them with bolts and nuts.

The next stage of work is a hinge for turning and a weather vane. You will also need a turntable, on which we will fix the generator. It will all look like this:

This structure requires a square PVC pipe, a piece of sheet metal and a flange. Cut out the "tail" of the wind generator from iron. In a square pipe, we make a cut 20-25 centimeters long and insert our weather vane there - we fasten this structure with bolts.

By the way, it would not hurt to think over the protection of the generator from precipitation. For example, it can be made from a pipe as shown in the photo:

Then we paint all the details of our windmill and let them dry. After that, we put everything together, attach the engine, the cover to the pipe by means of car clamps. It is also necessary to install the flange (it is located closer to the engine) using self-tapping screws.
Now all that remains is to make a match for the wind generator. For these purposes, a PVC pipe and fittings that are used with plastic pipes are suitable. You can make a mast like this:

The last step will be to directly attach the wind turbine to the mast and install it. Before that, we put a previously made hub with blades on the motor shaft. That's all.
In conclusion, a few words about the wind turbine battery compartment. It can use two batteries (for example, car). Diodes will need to be soldered between the generator and the batteries so that the current flows into the batteries, and does not go into the generator.
Such a home wind generator is suitable for charging batteries and other purposes. You can also experiment and make a more powerful wind turbine: for example, add blades, change their size, etc.
Listed on the site, has been manufactured and is currently in use, a wind generator based on a DC motor (24v / 0.7A) at permanent magnets... The wind generator, under average weather conditions, depending on the wind speed, provides an output voltage of 0.8 to 6.0 volts and a current of up to 200 mA. Subsequently, a stabilized voltage converter converts this DC output voltage from the wind generator into the required DC voltage sufficient to charge battery or supply the required load.
The proposed wind generator is easy to manufacture, does not require precise calculations and the manufacture of complex parts, the purchase of expensive components. Such a wind generator, in addition to the option considered in the above article, can be used in other ways. We use it where a small amount of electricity may be needed to power a low-power device. For example, for the operation of a compact weather station, control of the water level in the tank, for emergency lighting and control of the greenhouse automation. During the day, in the presence of wind, the battery of the device with a reserve receives the free energy of the wind, and at the right time gives it to the consumer as needed. Of course, the wind energy that gets to us is not great, but it comes to us almost constantly. And if you make a device for its accumulation and use with your own hands, from improvised materials, then this energy is free, and the device, moreover, will be economical, compact, mobile and non-volatile.
This article suggests making a wind turbine from a DC motor.
Manufacturing of a wind generator.
1. The choice of an electric generator.
For use as a low-power generator for the device, you can use a ready-made stepper motor without alterations. For maximum efficiency, if possible, it is advisable to use an engine with the least possible sticking of the shaft and with the largest number of steps per revolution. The option of converting the electric motor or starter into a generator is possible. Various modifications are described on the Internet.
In our case, the simplest option was chosen. As an electric generator, we use a DC motor (24v / 0.7A) with permanent magnets, which does not require modifications. It has the property of reversibility - when its shaft rotates, voltage appears on the motor contacts. This electric motor was removed from an obsolete calculating machine.
2. The choice of the propeller design.
In the first version of the design of the wind generator, to simplify manufacturing, a plastic propeller with a suitable landing diameter from an industrial fan was taken as the basis of the propeller. To increase the torque on the generator shaft, the length of its blades was added with thin-walled metal plates with a profile close to the original.
However, this design of the propeller failed. In strong winds, due to the low rigidity of the plastic propeller, the metal blades of the blades deflected back and hit the rack of the structure, which eventually ended in breakage.

When developing the first option, I decided on the design of the technological profile of the blades and their length. These parameters of the propeller affect its sensitivity to light wind, and it prevails. It is necessary that with a slight wind, the propeller can overcome the sticking of the shaft (attraction of the stator magnets) and start rotating.
3. Manufacturing of the propeller. We select or manufacture a hub for installing and attaching the propeller blades.
In our case, it is an aluminum flange (4 mm thick, outer diameter 50 mm) with an axial hole along the diameter of the engine output shaft (8 mm - a toothed gear is pressed onto the shaft, 10 mm long) and four evenly spaced M4 holes for attaching the blades. To fix the hub on the shaft, install one or two M4 screws in it (see photo).


4. Manufacturing of propeller blades.
We cut 4 blanks in the shape of an isosceles trapezoid from a galvanized sheet with a thickness of 0.4-0.5 mm: height 250 mm, base 50 mm, top side 20 mm. Along the height of the trapezoid, we bend the blades in half (creating a stiffener) at an angle of 45 degrees (see photo). We blunt sharp edges and corners (for our safety).

5. Installation and fastening of the propeller blades.
Place the blade on the hub so that the bend point on the base is above the axis of the hub, and the adjacent half of the base is above the hub mounting hole (see photo). We mark and drill a hole in the blade for the adjacent fastening screw, 4.2 mm in diameter. We fix the propeller blades one by one with the screws.


6. Balancing the propeller.
We carry out static balancing of the propeller. For this we install and fix the propeller on a calibrated (polished) bar with a diameter equal to the diameter of the engine output shaft. We lay the bar with the propeller on two rulers (curved surfaces) horizontally aligned to the level, located at the ends of the bar. This will turn the propeller and one of the blades will go down. We turn the propeller a quarter of a turn and if the same blade has dropped down again, it must be lightened by cutting off a narrow strip of metal from the side of the blade. We repeat a similar operation until the bar with the propeller stops turning after being installed in any arbitrary position.
7. Manufacturing of the wind vane part.
Cut off an aluminum square 20 x 20 mm to a length of 250 mm. On one side of the square, on one or two screws (rivets), we install a vertical stabilizer for the direction to the wind.
On the other side of the square, we install and fix the clamp on two screws for attaching the engine-generator. The clamp and the stabilizer are also made of galvanized sheet with a thickness of 0.4-0.5 mm (variants of the used anti-corrosion material are possible). The length of the clamp is equal to the length of the motor. The length of the stabilizer is about 200 mm, the shape is according to the manufacturer's taste.
On the lower shelf of the square, in the middle of the clamp location, rigidly fix the rod (it is desirable to provide for its anti-corrosion protection) to install the structure in the wind turbine stand pipe. The best option determination of the point of location of this rod, this is the determination of the center of gravity of a previously and completely assembled structure, followed by drilling holes there for fastening the rod.

8. Assembling the wind turbine.
We install the engine - generator in place and secure it with a clamp. We fasten the propeller to the output shaft of the engine. To protect the generator from atmospheric precipitation, we cut out and install a protective fence from a plastic bottle of a suitable size. We fix it with a screw.