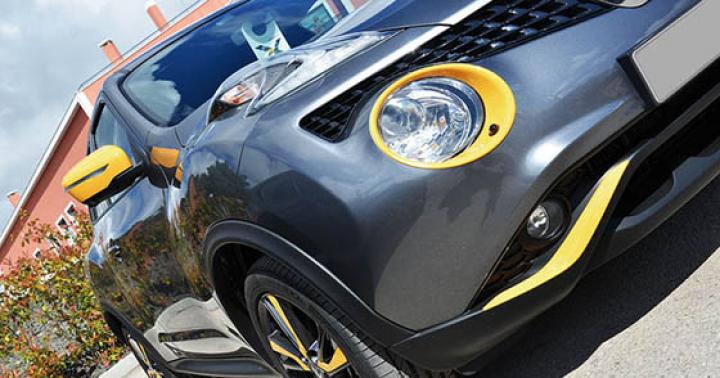
The trunk lock and the button to open it - in general, it would seem, one of the most uncomplicated elements of car security. However, troubles often happen to them. Especially often the trunk button "jams". At the same time, it is definitely not worth delaying its repair, since a situation may arise when you urgently need to get something out of the trunk, and access to it is closed - the button does not respond to your actions. Of course, you can try to open the trunk with improvised means, but then a counter question will arise - how to close it after that? Meanwhile, thieves are not asleep and will be able to quickly figure out a car in which the trunk does not close. To prevent this, you must immediately eliminate the malfunction. And how to do it - read in our article.
1. Trunk release button does not work - what to do and how to open the lock?
The first step is to figure out how the trunk opening mechanism works. When you press the button, a special signal is transmitted to the GEM module via the ground wire (that is, by the "minus"), due to which the relay is triggered. At this point, you will hear a click.
After that, a positive charge is transmitted along the white-green wire that goes to the trunk lock, which acts on the lock, removing a special latch and thereby opening the trunk. As you can see, the system consists of several elements, the breakdown of which can lead to the fact that the trunk release button will no longer work properly.

In such a situation, it is very important to accurately determine the cause of the malfunction in order to quickly and efficiently eliminate it. There can be many options, so we recommend that you consider each of them in turn:
1. We carry out a check of the trunk opening button itself. Our main goal is to determine if the signal reaches the GEM module from the button. For this you need:
- press the button and listen carefully if the relay clicked (the sound should be heard from under the dashboard at the passenger's feet);
If you heard the desired click, it means that the signal passes from the button to the relay normally (but if you press the button very often, due to thermal protection, the sound may disappear, so pause at least 5 seconds between presses);
If there was no click, you need to remove the plastic cover on the instrument panel, which is attached with several self-tapping screws, pull it towards you, but you do not need to completely remove it; put your hand under the panel and push the button towards you;
We remove the button for opening the trunk and try to short-circuit it - if the required click of the relay occurs, then the problem is directly in the button itself, which will need to be disassembled and repaired (more on this later);
If the short circuit did not work, then we continue to search for the cause of the malfunction.
2. We check why the relay does not work and whether the signal from the button reaches the trunk wire. To check, you need to do the following:
 - at the passenger's feet on the right side, remove the plastic pad, which is attached with a pair of plastic bolts;
Remove the "waffle" under the glove compartment, the fastening of which consists of several clips, possibly with internal plastic bolts;
We completely remove the glove compartment, which is attached with self-tapping screws;
We are looking for a GEM-module (it looks like a black plastic box, and it must have connectors for connecting wires);
We take out the GEM-module, pry up the yellow retainer, which is located on the green connector (if you count from the left side, it will be the second);
Now you need to connect the contact of the white-green wire (the one that goes from the GEM module to the trunk lock, it is the second in contact group relay) with battery "plus";
If you hear that as a result of these actions the trunk lock has opened, it means that the signal is transmitted to it, but the GEM module itself does not transmit a "positive" impulse;
We try to clear the contacts and again repeat the opening of the trunk lock using the button; if it failed, the reason is in the GEM module;
If it was not possible to open the trunk even with the help of the battery, we continue the search.
3. We carry out a check of the operability of the drive. For this you need:
Open the trunk - we hope you have access to it with a key;
Remove the trim, which is located around the trunk lock itself (it is attached with self-tapping screws and plastic clips);
Again, remove the "plus" from the battery and touch it to the white-green wire directly next to the trunk lock;
 - if at this moment the usual murmur occurred, which indicates the opening of the lock, - the malfunction is hidden in the wire, which is not capable of transmitting a signal from the GEM module (most likely the reason may be hidden in the corrugation, which is located on the left side of the car trunk lid);
If, in this case, the lock does not show any signs of life, then its drive is broken, and the lock will have to be changed (fortunately, such a nuisance happens less often).
As you can see, there can be a lot of reasons, and we will not be able to tell you how to fix them all in one article. Therefore, today we will focus specifically on how the repair and replacement of the trunk opening button is carried out.
2. How to repair a trunk release button that does not send a signal to the GEM module?
The whole process of repairing the trunk release button consists of five main stages:
1. Removing the instrument panel.
2. Removing the button itself, which does not work.
3. Removing the wires from the button.
4. Disassembly of the button and its repair.
5. Reinstalling the trunk release button.
What do we need to repair a faulty trunk release button?
 - black car sealant to fix the button after exercise renovation works;
Special grease for electrical contacts;
Adhesive for plastic;
- a soldering iron for connecting contacts, as well as solder and rosin (where without them);
Knife, not necessarily sharp;
Regular screwdriver;
Tester (needed to determine the functionality of the repaired button).
We have already described how to access the button itself and get it for the possibility of a more detailed study and further manipulations. The main thing is not to forget to immediately disconnect the power from the battery, so that you do not inadvertently get shocked. After the button is in your hands, feel free to cut off all the wires that fit to it.
 By the way: the button can be fastened with latches, so it will not work the first time. To still achieve this, you need to very carefully move the latches using a regular screwdriver, after which you will have no difficulty in removing the button. However, some car models sometimes have blue buttons, which are even more difficult to remove. In this case, the button will literally have to be picked out with a knife and cut off the sealant with which it was fixed.
We move to a place more convenient for carrying out repair work and proceed to the most important stage: we disassemble the button and try to understand why it refuses to work. In order to disassemble it, you must again use either a screwdriver or a knife, with which you can pry the cover until it completely comes out of its latches.
Next, you need a new trunk opening button, or rather its inner part. After all, even a specialist will hardly be able to figure out which contact has burned out on the board of the old button. Fortunately, the new button costs just ridiculous money, and you can easily find it both in online stores and in the usual car market. It is very important to choose the right size for the new button so that the structure of the old one is neither too big nor too small for it (in this case, it will have to be fixed with glue). You will need one of the pairs of side contacts for soldering. The main thing is that even before installation, you need to check how the new button works. For this, you can use a conventional tester. After that, we perform the following actions:
1. We insert a new button into the body of the old one, leaving the "antennae" ready for soldering.
2. We solder the contacts to the antennae (but not those that come from the GEM module, but specially cut off the short wires).
3. We fill the housing cover with a special grease, which is intended for electrical contacts.
4. Installing the button cover.
 Surely you are interested in why we do not solder the "antennae" directly to the native wiring? This is done in order to simplify the installation of the button itself: you can easily install the button from the outside, after which you will connect the wires to each other, remembering to reliably isolate all connections with electrical tape. Also, if the button suddenly fails again, it will be easier to remove it, since you simply remove the insulation, disconnect the wires and push out the faulty button.
In general, the replacement of the trunk opening button is carried out in the same way. The only difference will be that you will be using the new button completely, not just its "stuffing". In this case, the purchase of a new button will need to be treated more responsibly, it is even desirable to pick up a copy that is completely identical to the old one. This way, you don't have to figure out how to insert a button that is too large, or close the space that was left free after installing a button that is too small.
3. Installing the trunk release button on a car where it was not there before.
Unfortunately, there are also cars in which the trunk is opened not with an internal button in the passenger compartment, but only with a key. Installing the button in the car as a whole is not difficult, but this task involves full replacement the old trunk lock to a new one that can be opened from the supply of an electric charge. It does not cost so much, considering the benefits it will bring. In addition to the castle, you need to purchase in advance:
- a button for opening the trunk together with a relay;
A single-core wire for connecting the button (you need to take about 2.5 meters so that you don't have to finish off later);
Two terminals, one from which will go to "plus", and the second to "minus" (for the mass, you need to purchase a wiring with a ring);
Block "dad-mom";
A wire with a fuse block (it is better to take a fuse for 5 A);
Consumables: sealant, electrical tape (or heat shrink tubing).
 From the tools, you need to prepare a drill for wood in advance, it is best to use number 23. You will need it in order to make a hole in the dashboard for installing a new button. Also, in the process, a drill, a soldering iron is useful (not always needed, since the wires can not be soldered, but simply twisted), wrenches and pliers. First of all, we start preparing the wiring for connecting the button, for which we lay out everything in front of us necessary tools and materials. Let's immediately pay attention to two important points:
- if instead of electrical tape you are going to use heat shrinkage, do not forget to put pieces of heat shrinkage on them before twisting the wires;
If you are going to use a soldering iron, immediately purchase soldering acid, which will help you complete the soldering process more efficiently.
We collect our wiring directly for the trunk release button:
1. The red wire, which departs from the male-female block, must be connected to the terminal and the connection must be fixed first with pliers, and then by soldering. We isolate in a way available to you.
2. The black wire, which also departs from the male-female block, is similarly connected to the second terminal and do not forget about the insulation.
3. We fasten the black wire of the second block to a single-core wire and solder it for reliability, do not forget to insulate. We measure about 35 cm from the entire length of the wire, cut it off and twist it with a wire, at the end of which there is a terminal with a ring (if you just used a terminal with a ring, then insert a single-core wire into it and fix it).
4. The red wire of the second block must also be connected to a single-core wire, but we are not in a hurry to cut the last one, since its length will need to be measured already in the process of connecting to the lock.
5. We drill a hole for the button on the panel or in another place convenient for you. Check immediately to see if it fits into it, but the most important thing is not to overdo it and not make the hole too wide.
 6.
We insert the button into the hole and click it. We connect the contacts to it: turn the button so that two identical vertical contacts are located parallel to each other and are located below, and one horizontal contact is located on top. Further, the red terminal should be connected to the lower contact on the right side, and the black terminal to the upper horizontal one.
6.
We insert the button into the hole and click it. We connect the contacts to it: turn the button so that two identical vertical contacts are located parallel to each other and are located below, and one horizontal contact is located on top. Further, the red terminal should be connected to the lower contact on the right side, and the black terminal to the upper horizontal one.
7. While connecting all other elements, you can disconnect the "mom-dad" block.
One of the most important milestones you have completed the work. Next, you should start connecting the entire system to the car. To do this, follow the instructions:
1. We remove the terminals from the car battery.
2. We remove the side trim of the car console, which is located on the driver's side.
3. The side panel of the console can also be removed from the passenger side.
4. The wires with the connector disconnected from the button must be screwed to the "minus". You can find it under the left threshold, next to the front pillar - you need terminals tightened with a nut, which represent the "mass". Using a wrench, unscrew the nut and fit the terminal with the ring, after which the nut must be screwed back.
5. We pull the remaining wire that leaves the block under the threshold of the car, under the carpet, under the pedals and aim at the center console. We pull it out completely from the passenger side.
6. There is a connector with wires next to the motor panel behind. If you go from the shield, then you need to select the second connector, which is colored pink, and pull it out of the socket.
7. In the connector, you need to find a wire with yellow and blue stripes. We cut off the insulation from it (you don't need much, about 0.5 cm).
 8.
We take the wire and put a fuse on it. One end of it must be connected to a wire with yellow and blue stripes, and the other to the wire that we pulled under the console, having previously cut off the length you need from it. Let's not forget about isolation.
8.
We take the wire and put a fuse on it. One end of it must be connected to a wire with yellow and blue stripes, and the other to the wire that we pulled under the console, having previously cut off the length you need from it. Let's not forget about isolation.
9. We return the pink connector to its place, inserting it with the latch up.
10. We connect the block to each other, check how accurately and correctly the terminals are connected, whether they are not disconnected.
11. We stretch the remaining end of the wire from the GEM module to the trunk lock and also connect it, not forgetting about the insulation.
12. We return the terminal to the battery.
13. We check how the system connected by us works: we press the button and wait for the relay to click and the lock response. We hope that the boot lock lid opened the first time.
That's all. It remains only to put all the removed panels in place and remove all the debris. We hope that the trunk opening button installed with our own hands will work for a long time and without interruption, so that it does not have to be repaired or changed again later.
Install in any salon budget car the trunk release button is much easier than it might seem at first glance.
The whole task consists in a slight modification of the lock, namely, in complementing its mechanism with a special electric drive (activator).
When the button is pressed, it will operate on the principle of a retract / ejector device, opening the lock.
At the same time, the springs will lift the boot lid, providing quick and convenient access to the luggage compartment of the car. If the alarm key fob has a separate trunk opening button, then it will also fulfill its functions.
You can do everything yourself, without contacting specialized offices, and without significant material investments.
All you need to buy is:
- electric drive of the boot lid lock (activator);
- universal four-contact relay;
- fuse block (for safety reasons, it will be installed on the positive wire);
- the fuse itself (suitable for 10 amperes);
- wire (practice shows that 5 meters is enough, but it is better to take with a margin);
- set of female terminals;
- standard button for opening the trunk from the "dozen" (this is the most reliable and inexpensive option);
- heat shrink tubing or electrical tape, plastic clamps.
You can buy a button for opening the trunk of a VAZ 2110, an activator and everything else without any problems at the nearest car market. The cost of the entire set does not exceed 700-800 rubles.
Installing the trunk release button - step-by-step instructions
The process itself connecting the trunk opening button it is better to start by studying the instructions for the alarm. In the wiring diagram, you should see what color wire from the "signaling" goes to open the trunk lid. In most cases, this is a yellow-red wire.
If so, the button connection diagram will look like this:


Consider the procedure for performing work on the example of a VAZ-2107 car:
- Install a relay in the engine compartment... This place will be optimal, since it will not be necessary to pull the positive wire very far to the button, and the place under dashboard find harder. You can attach the relay, for example, to the windscreen washer reservoir mount. It is very important to ensure reliable tightness and isolation of contacts when installing all elements;
- Further through the standard hole of all wires laying two new wires- on the button and directly on the activator itself;
- We carry out the wiring to the luggage compartment in the cabin... The easiest way to do this is under the carpet, where the standard wires pass;
- On the trunk, the wires going to the activator are also connected to the main bundle of wires, we fasten the bundle with electrical tape or clamps;
- Install the activator on the trunk lid lock... It should be borne in mind that the electric drive can work both for retraction and for pushing. To change the performed action, it is enough to change the polarity of the connection.
- To connect the activator, it is necessary to remove the lock by unscrewing two nuts, and drill a hole in the side of the lock to start the rod and connect it to the lock tongue. It will not be superfluous to close the activator and the lock with a casing - this will protect the mechanism from dust, dirt and mechanical damage;
- Then looking for the most suitable place to install the button... In the "seven VAZ" a good option would be a place on a plastic pad to the left of the driver's seat - so the button will always be at hand;
- The installation of the button is very simple: a hole is drilled in the cover plate, the button is inserted, the terminals are put on. The negative wire can be connected right there, onto the lining mounting bolt - the job is done! Testing can be done.
VIDEO INSTRUCTION
Before starting work with an electrician, you should determine for yourself whether the trunk lid will open from the button on the alarm key fob. If yes, then you need to establish that it gives out to the corresponding wire - "plus" or "minus", since the electric drive can work both in pulling and pushing (depending on the polarity of the connection).
The choice of an activator should also be approached responsibly. You should not buy cheap Chinese counterparts, it is better to opt for the factory VAZ electric drive.
Car owners are accustomed to the constant comfort and ease of use of the devices. " iron horse". Indeed, it is very convenient when the devices are triggered at the touch of a button, without any further effort. An example of such a device is an electric drive that sets the trunk lid in motion.
Luxury or necessity?
Automatic opening of the trunk of a car is a function to which most motorists who have moved to new cars are just beginning to get used to it. When you press a button in the passenger compartment, an electric drive is triggered, which activates the lock, as a result of which the trunk lid opens.
It would seem a trifle, but in the cold season, the electric drive greatly simplifies the life of car owners... In models with a conventional mechanical lock, many often faced a problem when, after washing the car, the lock freezes and cannot be opened. Someone is watering, someone is simply heating the key, in a word, everyone invents what they can. This will not happen with an electric drive.
The electric drive is compatible with a standard lock, and you can use two ways at the same time when opening the boot lid, increasing burglary resistance. The device is installed mainly on imported cars. In the assembly of domestic cars, an electric drive in the trunk appeared quite recently. Car owners who lack this convenience can easily install such a mechanism.
Electric drive device - we understand the details
The electric trunk drive is a mechanism consisting of only a few parts: an electric motor, two 4-pin relays, a push rod, a fuse and a button. There are two types of actuators that drive the stem to open. The more famous is the mechanism with an electric motor, it is more practical and durable. Less common is a magnetic platter drive.
The device of such a drive is extremely complex, and there are also many problems in its use. The principle of its operation is the interaction of the relay with magnetic plates. When electric power is applied, the relay pulls back the rod, at this moment the trunk lid is opened. It is not recommended to install such a device on VAZ cars of old production models, because it is not practical to use. The modernization that needs to be done with the trunk lock is very difficult and in some cases not rational, since it requires significant changes in the car body itself.
The selection of an electric boot lid lock should be taken seriously. There is no need to buy cheap Chinese locks, which are so common in our market. Such an electric drive will not serve you for a long time, and in the process of operation, incorrect operation is possible. It is best to choose an electric lock from a domestic or foreign manufacturer. By the way, the installation of such a device also increases the cost of the car as a whole, which is important if you intend to sell a car in the future.
Features of the choice - what does the driver need to know about?
When buying a lock, it is worth considering how exactly it will be controlled. If it will only serve to open it with a button from the passenger compartment, then the standard one will do - you just need to do its installation yourself. In order for the electric lock to work from the alarm panel, a more complex electrical mechanism is needed, the connection of which should only be entrusted to an experienced electrician.
Several models of electric locks are sold on the domestic market. By their type, they are standard with side mounts and reinforced (a little more expensive) - they are made of better quality, and are more reliable in use. When purchasing an electric drive cover, it is best to choose a set with an inertia mechanism. Such a mechanism does not allow the engine to experience a constant load - if its rod rests against something, it turns off.
The principle of operation of the inertial mechanism is that such a mechanism, when the button is pressed, first spins up, increasing its tractive effort, and transfers it further to the pushing rod. A drive with a conventional type of engine at this time continues to work further, being under load - it can quickly fail from overheating.
Installing an electric drive - remember and reproduce!
To install the electric trunk drive, you will also need fuse mounts, terminals, 1 mm electrical wires, electrical tape and a set of tools. Have all of these materials ready in advance to avoid distractions during the installation process. First, remove the plastic lining of the trunk; this must be done carefully so as not to damage it. It is fastened with several bolts and plastic latches. Next, remove your lock, you need to bend one tooth in it so that when you open it it works with one click.
When selling an electric drive, some car dealerships also recommend buying a lock that does not need to be modified - such an offer is quite reasonable and will save you a lot of time. After manipulating the lock, proceed with the wiring. Before carrying out work on the wiring, it is necessary to remove the terminals from. Take power from your car's cigarette lighter as this is the least involved and doesn't consume a lot of load.
To do this, disassemble the central shaft. Install a protective fuse between the cigarette lighter and the electric drive button. This should be done in a convenient place - in case of failure, it will be easy to replace. You can install the trunk release button wherever you like. Further, according to the scheme that comes with the electric drive, use the electrical blocks to make the power harness. The best way to route and wire the electric lock is on the sills of your car. The length of the cable that you need is 3.5 meters, cut off the excess.
After that, you can proceed to the final stage of mounting the trunk lid electric drive mechanism. There are several ways to install the drive, the best option for us is the one in which you do not need to drill additional holes in the rack mount. If in your case you need to make several holes, then choose a more convenient place. Take the mounting plate and screw it in an easily accessible place and place the drive on it. Installation of the drive rail must be done taking into account the length of the mechanism stem.
It is best to do the installation parallel to the main pull of the lock. Next, bite off the extra piece of the rod, after placing it in its initial position on the electric drive.
Then proceed to connect the wires to the drive. It is especially important at this stage to observe the polarity of the power supply. To do this, connect the wires according to the instructions for the diagram. If connected incorrectly, the mechanism motor will run in the opposite direction and your lock will not open. Install a fuse in front of the electric drive lock, this will protect you from damage to the mechanism. Carefully rewind all electrical wiring connections with insulating tape or use a special heat shrink.
After that, put the terminals on the battery and check the performance of your mechanism as a whole. There are times when it is necessary to more accurately set the electric drive mechanism, for this, adjust its stem. If everything is fine, and your trunk lid opens and closes, then complete the wiring to the end. When reassembling the plastic trunk lid, if possible, stick a noise reduction piece on it, this will save you from the noise that occurs during the operation of the electric trunk drive.
Many owners of domestically produced cars from AvtoVAZ would like to change their cars for more comfortable and convenient foreign cars. The reason for this is mainly the various automation systems that significantly improve the usability of the vehicle. If it is not possible to purchase better auto, then you can at least improve what is available. This is probably what the author of this homemade product thought, and the first thing that came to his mind was the automated opening of the trunk on his VAZ 2107. Agree to press the button while sitting in the cabin, it is much more convenient than getting out of the car and opening the trunk with the key.
Materials:
Relay 90.3747-10
- fuse 10 A
- button 2822.3710
- electric lock
- furniture gas stop
- wires
Description of device creation.
In order to understand how it is possible to make such a decision on a VAZ 2107, the author began to search for information on the Internet. As it turned out, he was not the only one who thought about such decisions, and different schemes There are a lot of automatic trunk opening systems on the Internet.
To analyze them, it was decided to develop our own system, which would be quite easy to implement, reliable and inexpensive in terms of components.
Therefore, collecting everything necessary materials and freeing up some time to work in the garage, the author began to implement his ideas on the basis of his car VAZ 2107.
To begin with, the upper part of the trunk lock, or rather its plastic case, was cut off. This was necessary in order to release the lock mechanism and be able to work with it directly.

Further, the "pistol" was placed deeper into the trunk body, for this it was necessary to enlarge the slot.


The general diagram of the device for automatically opening the trunk for the VAZ 2107 is as follows:


It was important for the author that the trunk lid not only opened slightly from the remote opening of the lock, but also rose to the end. For this, it was decided to use gas stops.
Since gas stops for cars differ depending on the model, they have a different operating mode. You need to choose a gas stop that is suitable for your trunk, otherwise there is a possibility of warping, crushing or breaking off the trunk lid due to the difference in travel between the stop and the lid. As a result, the author decided to choose the 120N furniture gas stop. which costs within 100 rubles.
Below is a snapshot of such a stop, which was dismantled from the kitchen furniture:


The style of fastening the stop, the author spied on one of the models of a foreign car. Following the principle seen and personal ingenuity, the fasteners were installed as follows:

Moreover, it is important to note that the old stops also remained in the trunk. The author did not dismantle them, instead only weakened them by division. This approach made it possible to soften the opening of the trunk with the help of an automatic mechanism and made it smoother.


If you are interested in the device used by the author for automatically opening the trunk of a car VAZ 2107 or you have any questions regarding the installation of the device, then you can familiarize yourself with the video below, as well as with the original article indicated by the link "Source", which is also given at the end of the article.
You won't surprise anyone by opening the trunk of a car from a button in the cabin. Today, such an option on a car can greatly facilitate human labor. Domestic cars have only recently begun to be equipped with such useful options from the factory. But this does not mean at all that this option is not suitable for owners of VAZ-2107 cars with injection and carburetor versions. If desired from any domestic car you can make a semblance of a foreign car and vice versa. In this material, we will pay attention to the question of how to open the trunk from the VAZ 2107 button. This procedure is not particularly difficult, especially if there is such a goal.
Convenient button location
Many do not find anything special in this option, but if you just try the electric drive of the trunk, you immediately begin to appreciate all the advantages. The positive aspects of the option for automatically opening the trunk on the VAZ-2107 include:
- Convenience. While the driver leaves the passenger compartment, the trunk will already be open.
- Practicality. There is no need to remove the keys from the ignition to open the luggage compartment with the key, especially if you have just started the engine and warm it up.
- Fashion. Almost all modern cars equipped with such an interesting option, so the "seven" with this function will look more interesting against their background, especially if there is tuning.
What is required to carry out the work
Before starting the work process, you should purchase the necessary equipment. To carry out the work you will need:

- The button, when pressed, the electric drive will be triggered. The best option- this is a button from a VAZ-2110 car, the cost of which is about 50-80 rubles.
- The relay is four-pin and has a special terminal for it.
- Activator.
- Wires.
- Connectors "mom" and "dad", as well as electrical tape and heat shrink.
You can easily find any of the components in any car shop, and then independently install and connect on your car.
Installing the activator
Initially, it is necessary to install an activator, which is an electric drive that works for retracting or repulsion, depending on the connection. The first step is to remove the lock and install the activator rod. To remove the lock, you will need to unscrew two nuts.
After that, you need to drill a hole in the side of the lock in order to start the rod and connect it to the lock tongue. The traction will need to be bent (secured), it should look something like the one shown in the photo below.
After fixing the pull to the lock, the latter can be installed in place. It is advisable to remember the tilt level of the lock and set it as well so that you do not have to adjust it during installation. Now you can attach the activator to the trunk. This will require 2 self-tapping screws and a special plate that comes with the product. After that, you can manually try whether the lock will work on opening. When the activator is installed on your VAZ 2107 car, you can proceed to the next stage - connection.

Connecting the product
Before carrying out work with the connection, be sure to unscrew the "minus" terminal with the battery. To begin with, we present the scheme according to which the product will function.

12V power will be supplied to the electric lock directly from the battery, although you can also use the wire from the cigarette lighter. To begin with, connect the wire to the "+" terminal of the battery.
The battery supplies power to the relay, which can be located both in the passenger compartment and in the engine compartment, which will be much more rational. From terminal "86" the wire is fed to the trunk opening button, which can be positioned in any convenient place of the torpedo. To install a button through which the trunk lid will be opened, you will need to drill a hole of the corresponding diameter in the torpedo.
The wire from the relay terminal "30" is routed through the passenger compartment to the activator. Its length must be at least 5 meters. The wire can be laid together with the standard wiring. This wire must be connected to the green wire of the activator using female-to-male connectors. The blue wire must be short-circuited to the vehicle ground. Now you can check how the electric drive of the VAZ 2107 trunk lock is functioning. It is enough to spend 2-3 hours of time to eventually open the trunk from the VAZ 2107 button. After completing the work, do not forget to put the “minus” terminal on the battery.