Finalization of the front suspension photo, tuning the suspension VAZ 2114, VAZ 2115, VAZ 2113 do it yourself
Tuning is about improving factory performance. Despite the fact that Lada Samara 2 cars are successful, these cars still have drawbacks, so car owners very often resort to tuning vases with their own hands. In our sections, you can familiarize yourself with some of the improvements on your own. All materials are divided into categories and contain detailed instructions for finalizing the main components of a VAZ 2115 car: engine tuning, body tuning, interior tuning, gearbox tuning, suspension and brake tuning, and you will also find sections on tuning VAZ with photos. Welcome to the sections of tuning and modifications of the VAZ 2113.Replacing shock absorbers and front suspension springs VAZ 2114, VAZ 2115, VAZ 2113, Lada Samara 2
Replace the springs (and fret 2115 shock absorbers) only in pairs (on the front and / or rear axle).
We carry out the work on a viewing ditch or overpass, but it is also possible on a flat horizontal platform.
To replace the springs and shock absorbers of the front suspension, remove and disassemble the spring strut guide.
There are two options for removing the spring strut guide VAZ 2113. In the first option, it can be dismantled assembled with a steering knuckle and a brake disc without loosening the nuts of the lower and upper (adjusting) bolts securing the rack to the steering knuckle. This option is convenient if, after completing the work, you do not plan to adjust the angles of the front wheels.
But since after replacing the shock absorbers and springs, it is necessary to adjust the wheel alignment angles, we will consider the second option.
We hang out and remove the wheel from the side of the removable rack. Turning wheel in the opposite direction until it stops.
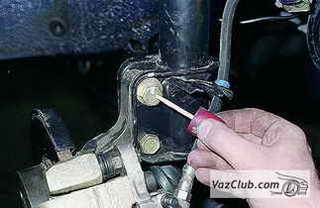
We take out the cotter pin ...
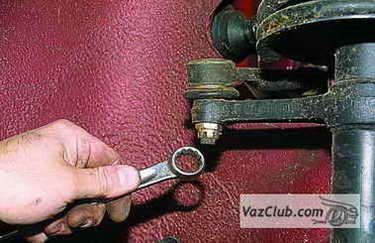
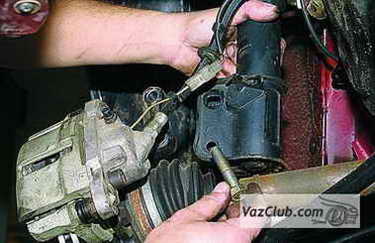
... and with a 19 spanner wrench, unscrew the nut that secures the finger of the tie rod end to the strut arm.
With a puller we press out the finger from the lever.
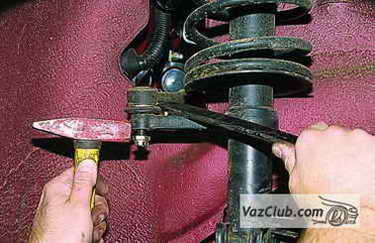
In the absence of a puller, we do not turn off the nut completely, insert the mounting blade into the spacer between the steering rod and the rack arm and hit the end of the rack arm with a hammer.

We remove the front brake hose coupling from the rack holder.
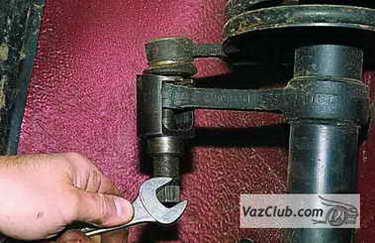
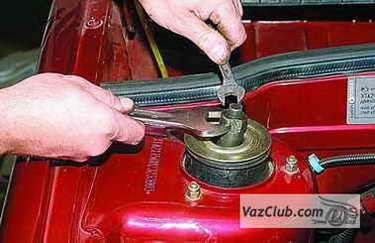
To loosen the nut of the shock absorber rod, we use a special wrench to keep the rod from turning.
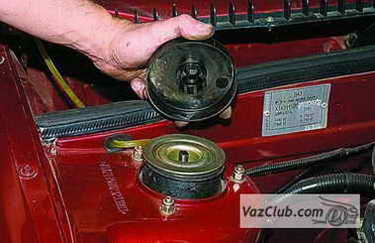
Remove the plastic cap of the upper support of the rack guide.
We loosen the tightening of the shock absorber rod nut VAZ 2114.
Before unscrewing the upper bolt securing the strut to the steering knuckle ...
… Paint the alignment marks on the bolt and the rack bracket.
ATTENTION
With the subsequent installation of the spring strut guide, the alignment of the marks does not guarantee the exact setting of the specified camber angle, but allows a slight deviation from the initial value to be achieved.

Using the "19" head, unscrew the nut of the upper bolt, keeping the bolt from turning with a wrench of the same
dimension.
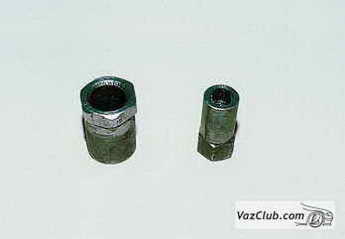
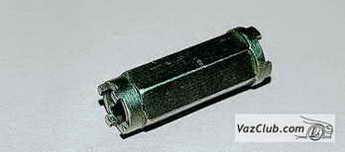
Having removed the washer from the bolt for adjusting the camber angle, we knock out the bolt with a punch from soft metal.
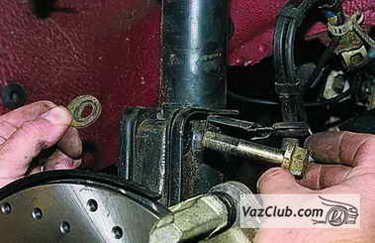
Camber adjustment bolt and washer.
Similarly, we unscrew the nut of the lower bolt securing the strut to the steering knuckle and knock out the bolt.
Take away rounded fist from the rack without pulling on the brake hose.
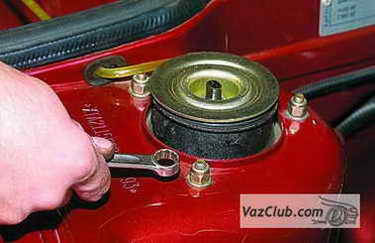
Using the "13" key, unscrew the three nuts securing the upper support of the spring strut guide to the body ...

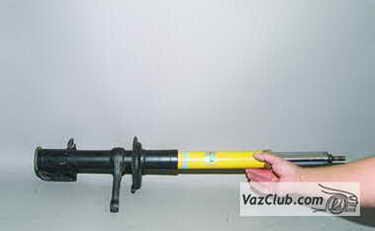
... and remove the rack.
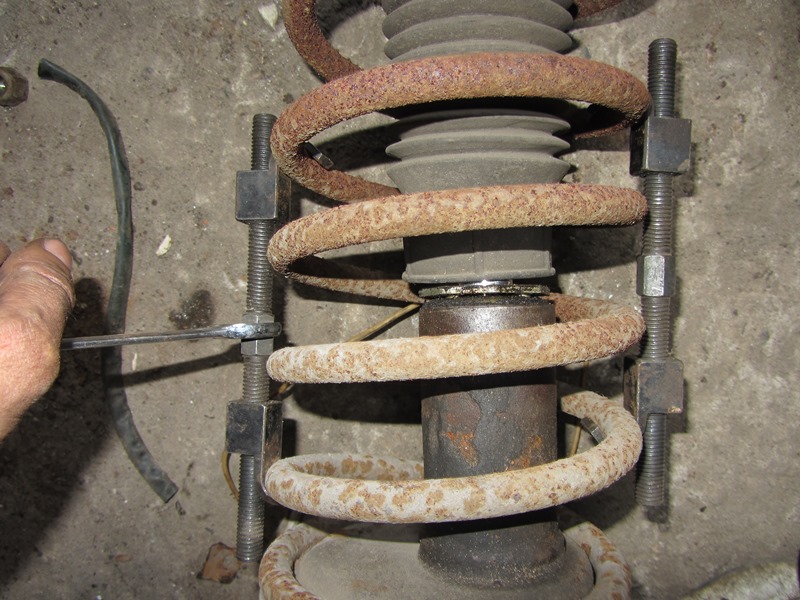
We install two spring ties diametrically opposite each other so that they capture five turns of the spring.
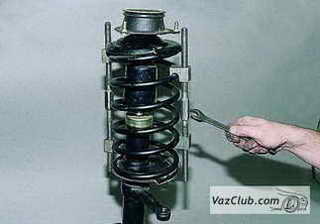
Rotating the screws of the tie rods alternately, compress the spring.
After the spring pressure on the support cups weakened, unscrew the stem nut.
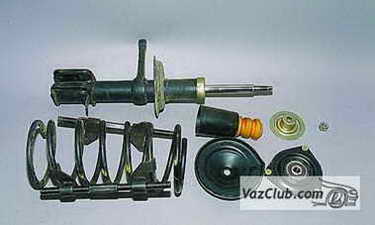
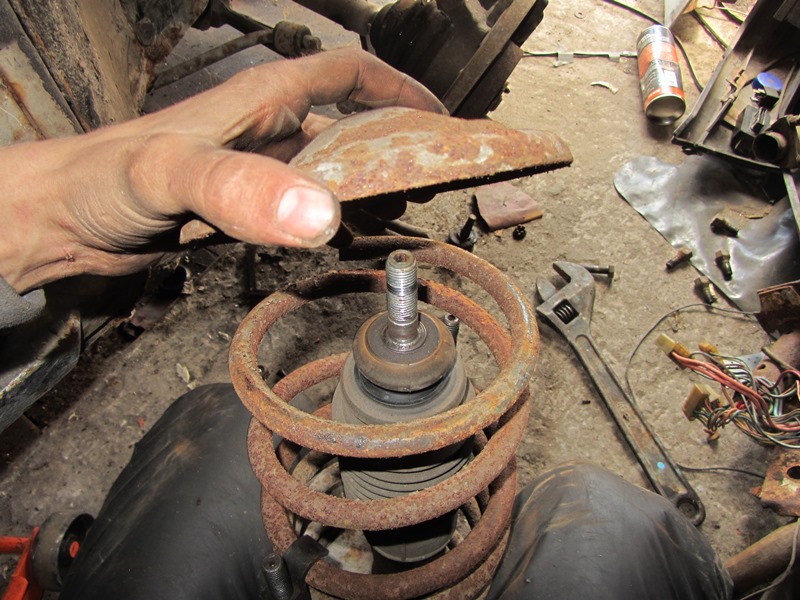
We remove from the rack the upper support of the VAZ 2115, the upper support cup, the spring with ties, the compression stroke buffer and the protective cover.
We knock down the support of the compression buffer with a chisel ...
... and shoot it.
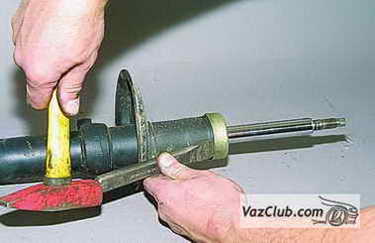
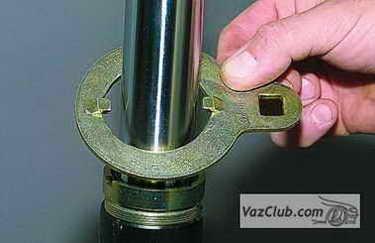
With a special key ...

… Unscrew the rack housing nut.
In the absence of a special wrench, the nut can be unscrewed with a chisel without fear of damaging it, since a new nut is included in the shock absorber installation kit.

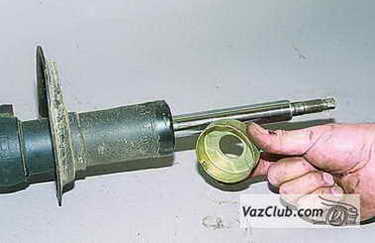
Remove the nut.
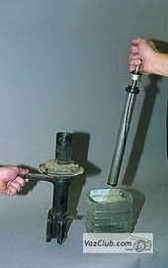
We take out the rod with the working cylinder from the strut housing and drain the shock absorber fluid into the container.
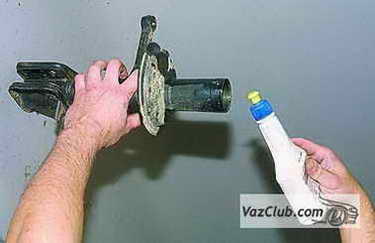
We wash the cavity of the rack body with white spirit.
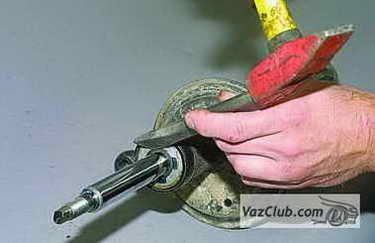
We install the cartridge (cartridge) into the rack housing.
A set of shock absorbers from well-known manufacturers, as a rule, includes a special wrench for tightening the strut housing nut.
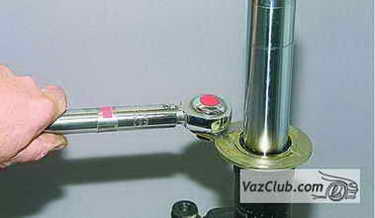
Rotating a special wrench with a torque wrench, tighten the nut to the torque specified by the manufacturer of the fret 2113 shock absorber.
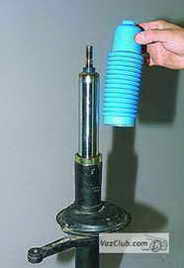
We put a protective cover on the stem.
Install the ties on the new spring.
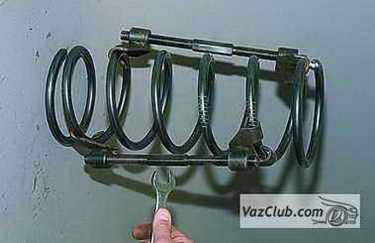
Compress the spring by alternately rotating the tie screws.
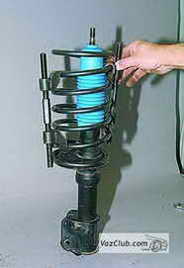
We install the spring with ties on the lower support cup of the rack.
We install the upper support spring cup, the upper support, bait and tighten the stem nut with a special wrench. Remove the spring ties.
Install the fret 2114 spring strut guide on the car in reverse order.
Similarly, we replace the shock absorber and the spring of another suspension strut.
We recommend that you adjust the steering wheel alignment angles at a service station.
Note: on rear-wheel drive, the cardan sometimes knocks, and the knock is often heard from the rear suspension - to their owners here - cardan shafts repair.
When choosing springs, pay attention to the color coding - it indicates the stiffness. Stiffness of the front and rear springs should be the same.
In addition to the shock absorber and the spring, it is advisable to buy rubber and plastic parts (shock absorber cushions, spring gasket, shock absorber cover, and compression damper), as well as fasteners.
But you don't have to buy everything at once, but only what you need, after disassembly and inspection.
Jack up one side and support the machine. Do not work with a car standing on a jack, especially do not climb under it. When loosening the nuts, you will need to apply force, and the jack is not a stable support.
Remove the wheel. Clean the shock absorber mounting bolt and nut from dirt. Water threaded connection grease wd40 or other penetrating grease. While the nut is soaking, unscrew the top nut.
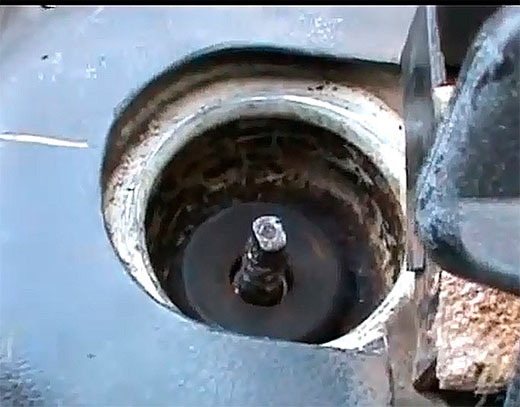
To do this, take out the rear shelf and fold it backseat... We find and take out the plug. Before us is the end of the piston rod with 6 flats.
The stem is secured with an M10 nut. Despite the fact that the nut is protected from dust, you can spray with wd40 grease before unscrewing it - it certainly won't be worse.
Repair manual VAZ 2114 recommends holding the stem with a special key. Most likely, you do not have it. Use carob.
To loosen the nut, use a union nut (moreover, with a long overhang, for working in a niche). If there is no such key, do not even try, do not spoil the edges of the nut in vain.

A special key can be bought at a car dealership, it is inexpensive.
Let's move on to the bottom eye of the shock absorber. Use two keys for 19.
Hold the bolt (or nut) with one. Twist others.
The key can be taken with a cap or a head. Use a pipe to increase the torque. Having unscrewed the nut, we take out the bolt, and then the shock absorber with the spring. A stuck spring gasket remains high in the body niche.
Tear it off. Take out and inspect. If the gasket is deformed, it is best to replace it.
Inspect the shock absorber cover carefully. It should be free of cracks, frayed holes and other damage. If you find any, but you did not buy the casing, you will have to go to the store again.
It is not worth putting a leaky casing, but the steel casing cover can be left. Also inspect the rest of the parts that were not going to be changed. The deformed and crushed ones will have to be replaced.
Before installing, check if the nut is easily screwed onto the rod of the new shock absorber. Is it possible to insert a bolt by hand and screw a nut onto it by hand. If necessary, replace the nuts, and additionally calibrate the shock absorber bushing with a reamer.
There should not be a large gap, but if the bolt immediately during installation has to be hammered in with a hammer, then the next time it is replaced, it can only be knocked out.
On a new shock absorber, pull the stem out to its full length. Place the compression stroke buffer on the stem. Connect the shock absorber casing with the cover and also put on the shock absorber.
Then one pillow and a spacer sleeve. Check that the stem is extended as far as possible.
Place a new gasket on the upper edge of the spring, orient it and secure with tape or thin wire. Place the spring on the shock absorber and now orient it on the shock absorber cup.
To get the shock absorber in place with an uncompressed spring, bend the cross-member arm as low as possible using a crowbar.
And now the upper edge of the spring rests against the body (through the gasket), and a bolt is inserted into the lower bushing of the shock absorber. Tighten the nut, but take your time to tighten. Now it is necessary, by the weight of the machine, to compress the spring, and release the shock absorber rod through the hole in the body.
To do this, you can use two methods: screw the wheel and put the car on the ground, or raise the crossbeam lever with a jack without removing the car from the support. Choose what is more convenient for you.
Take your time when raising the lever (or lowering the car). Command an assistant and guide the stem, but do not compress it. Use a piece of hose or metal tube to guide the stem. Try the straw key as well.
When the rod came out into the hole in the body, put on the top pillow, support washer and tighten the nut (enough by hand). And only after lowering the car on the wheels, we stretch the nuts properly.
Both top and bottom. Change the spring and shock absorber on the other side of the vehicle in the same way.
After driving 50 ... 100 kilometers, inspect and stretch the suspension.
The front struts on VAZ 2114-2115 cars wear out much faster than the rear ones and this is due to the fact that the front of the car has a large load, since the main units are located there. If the shock absorbers have flowed, or have begun to punch heavily in the pits, then in this case it would be best to use them. complete replacement... Many are accustomed to dealing with such problems in the service station, although if you try a little, you can do it all on your own. The main thing is that everyone is at hand necessary tools and fixtures. Below is a detailed list of everything:
- spring ties
- ball joint or steering tip puller
- pliers
- hammer
- keys for 13 and 19 and similar heads
- crank and ratchet handle
- breakdown
Video on replacing the front struts on Lada Samara cars - VAZ 2114, 2113 and 2115
If the video could not be watched for any reason, then you can familiarize yourself with step by step instructions with photo materials. There, too, everything is clearly described and understandable, so that even a beginner can figure it out.
Manual for self-replacement of front suspension struts on VAZ 2114 - 2115
The first step is to put the car on hand brake, rip off the fastening bolts front wheel and jack up the car. Then finally remove the wheel and you can start performing this repair of the chassis on the VAZ 2114-2115.
First you need to free the rack from the attachment with the steering tip. Read about this in more detail in the article about. After we have coped with this task, we unscrew the two nuts securing the rack to the lever from the bottom, as is clearly shown in the photo below:

And we try to pull out the bolts from the back side with our hands. If this cannot be done due to rusted joints, then you can use a breakdown or a wooden block, knocking out the bolts with a hammer:

When the bolts have jumped out, then the rack can be taken to the side, thereby disconnecting it from the lever:

Now we open the hood and unscrew the three nuts securing the front support to the glass of the VAZ 2114-2115 body. This is clearly shown in the picture below:
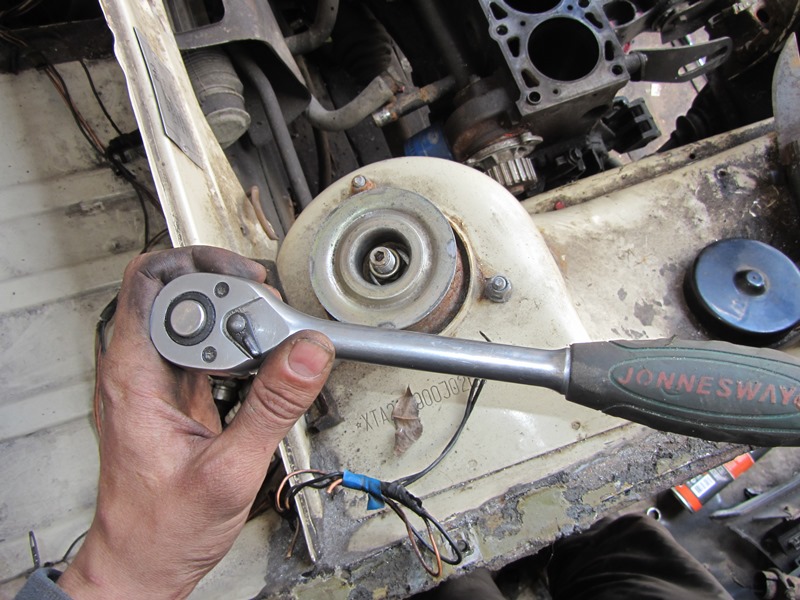
When unscrewing the last nut, hold the post underneath to prevent it from falling. Then you can take it out without any problems:
So the entire front suspension module has been removed. To disassemble it, we need spring ties and a special wrench to unscrew the central nut on top of the support. The first step is to loosen the top nut, keeping the stem from turning:
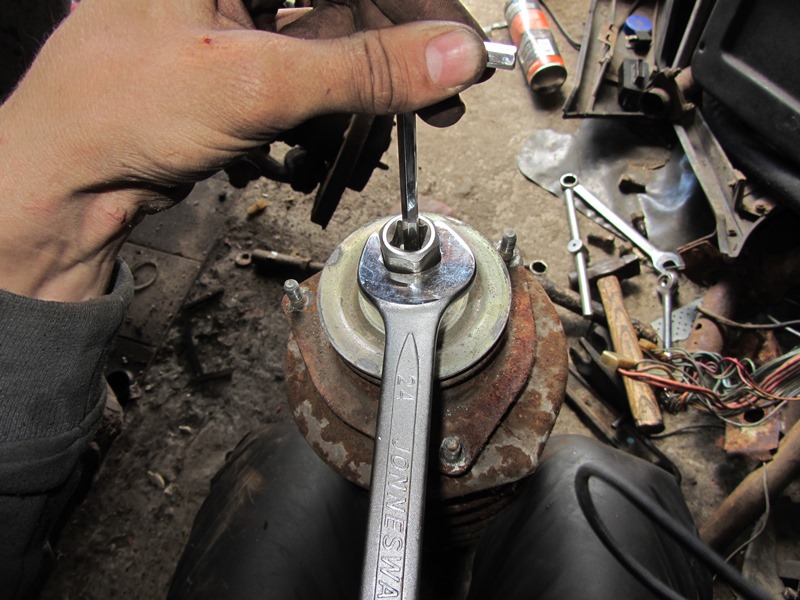
Do not let go to the end, otherwise you can get a spring on your forehead, or something else. Tighten the springs using special tools
And only then unscrew the nut to the end, and remove the upper support cup:
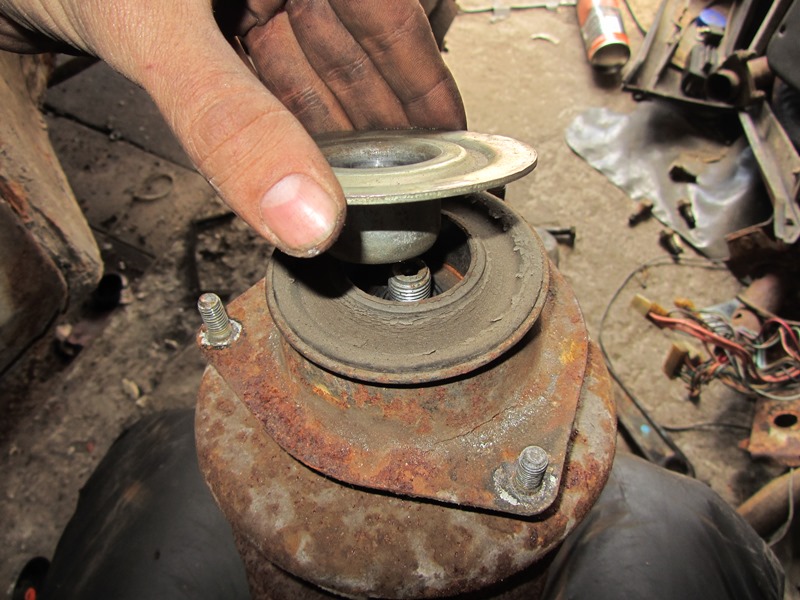
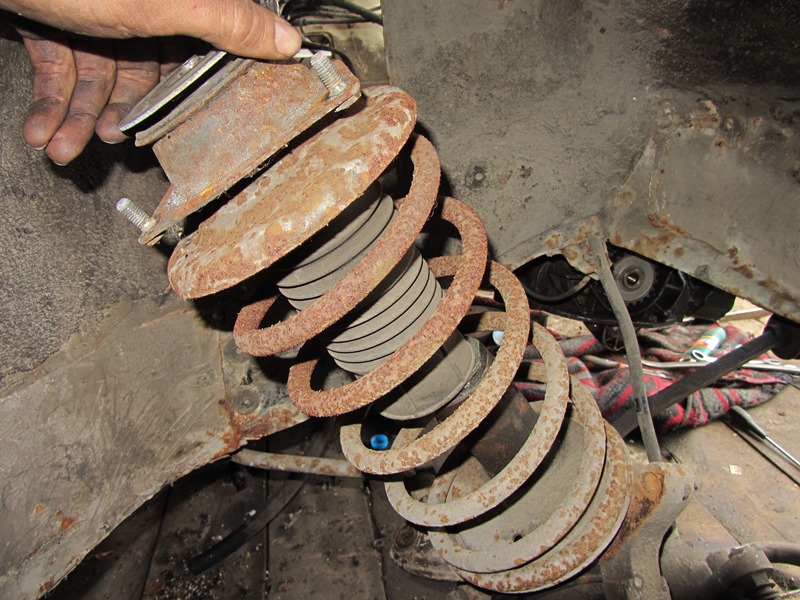
Then you can start removing the support itself:
And then the springs:
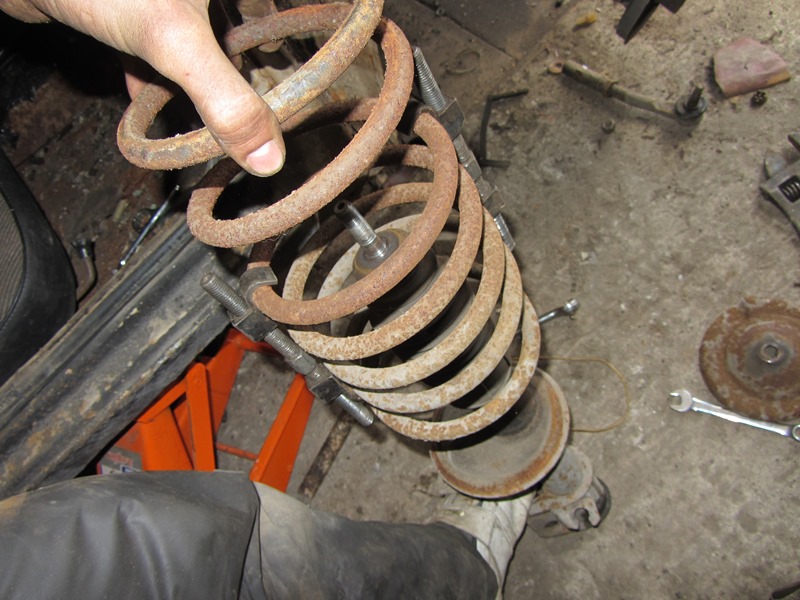
Now it remains to remove rubber boot, compression buffers and you can start replacing all the necessary front suspension parts: support bearings, supports, struts or springs. The entire assembly process is performed in a strictly reverse order and does not take much time. When installing the module on a car, it is possible that you will have to tinker a little so that the holes in the stand body and the lever coincide from below. But if you have a mount, you can do it yourself!
The prices of components are approximately as follows (for example, I will name from the manufacturer SS20):
- Supports are sold at a price of 2,000 rubles per pair
- A-pillars can be purchased at around 4500 for two
- Springs can be purchased at a price of 2,000 rubles
As for the rest of the details, such as compression buffers and anthers, then in total spend about 1,000 more rubles. Of course, the effect after installing a non-factory suspension is simply pleasing. In general, I will somehow accomplish my goal in the following articles about this.


