Burst rear springs on a VAZ 2101 car? With an insignificant load of the interior or trunk of the car ground clearance decreased significantly? If so, then it's time to replace the rear springs. Is it difficult to do it yourself? No. We read this article further and find out how to do this on a VAZ 2101.
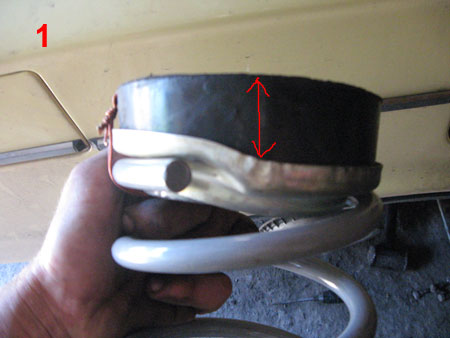
First point. What you need to replace the rear springs. Of course, these are the springs themselves. In addition to the springs, you need to buy rubber spacers with metal clips. There are three types of spacers on sale: standard, medium and high.
This article describes how to install standard springs with medium spacers.
Replacing springs on a VAZ 2101 with your own hands

You can also experiment with the option - springs with high spacers, but only if you put simple springs 2101, and not reinforced 2102. Since the springs of 2102 are already much higher than the standard ones, then together with high and even medium rubber spacers, they can lift the car very much. As a result, the stroke of standard VAZ shock absorbers will not be enough, which will require replacing the shock absorbers themselves (for example, with longer Moskvichevsky ones) or you will have to visit the nearest welder in order for him to weld additional rings on the shock absorber.
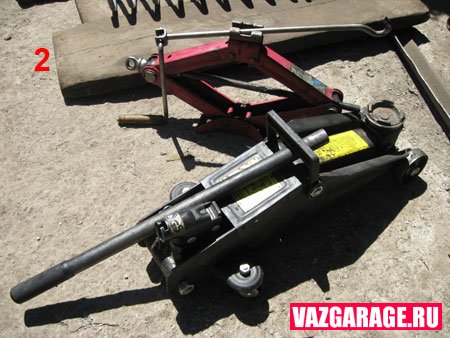
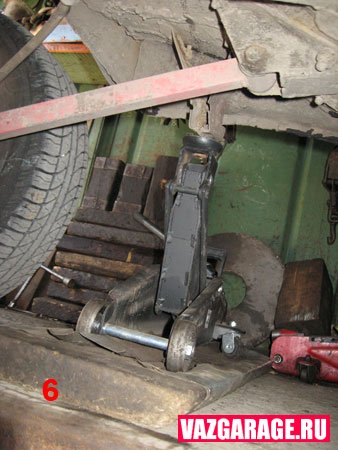
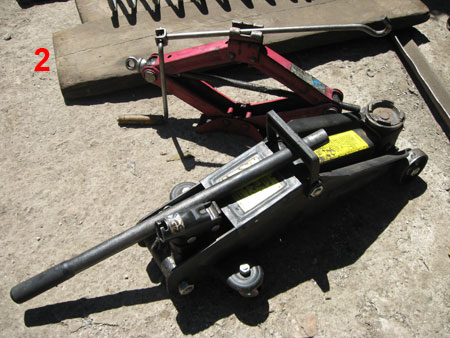
Now, let's talk about the tool that we need while working. Requires two jacks (for example, a trolley frog jack paired with a trapezium jack), a pair of 19 keys, a wheel wrench and a large screwdriver. It is better to carry out the work in the inspection pit, since it will be very inconvenient to replace the springs from the ground.
The procedure for replacing the rear springs on VAZ 2101 cars
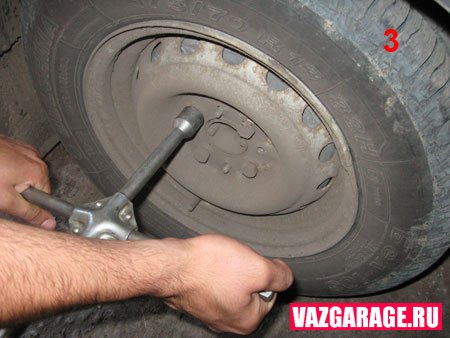
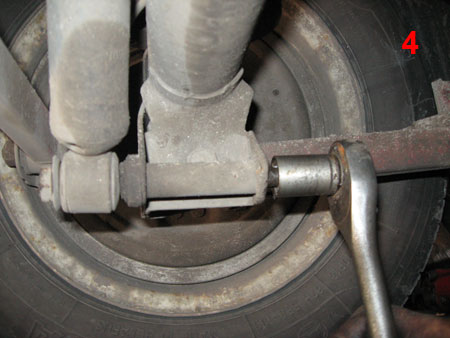
1. Letting go wheel bolts and unscrew from the bottom.
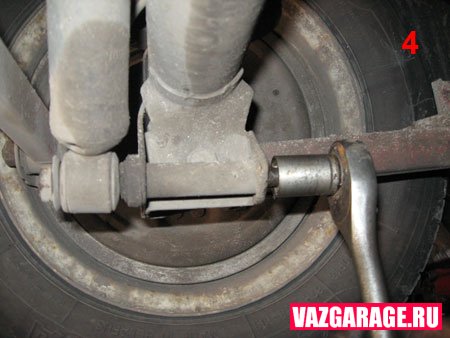
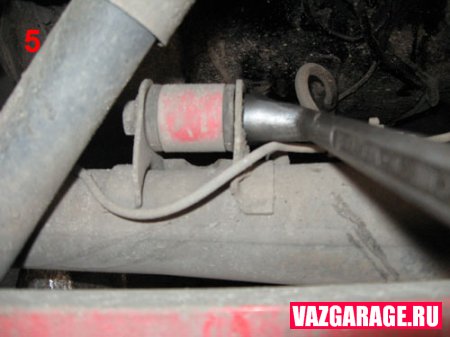
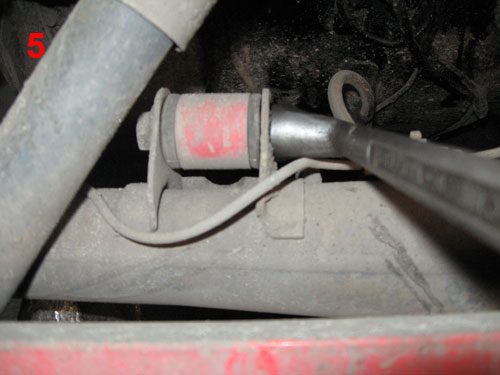
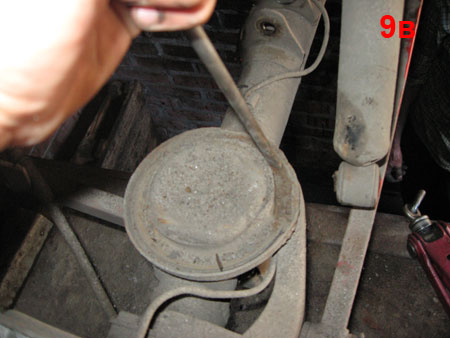
2. Take out the bottom bolt of the rear shock absorber.
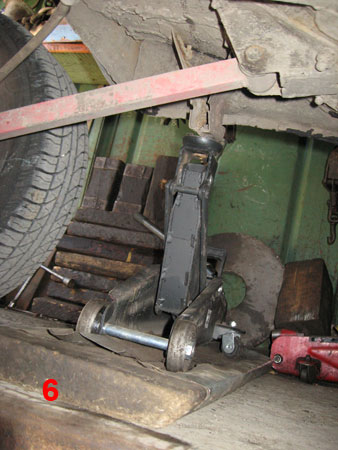
4. After that, raise the car body with a jack (the wheel will remain on the ground, since the shock absorber is taken away).
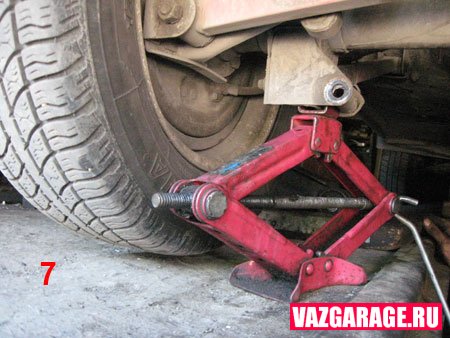
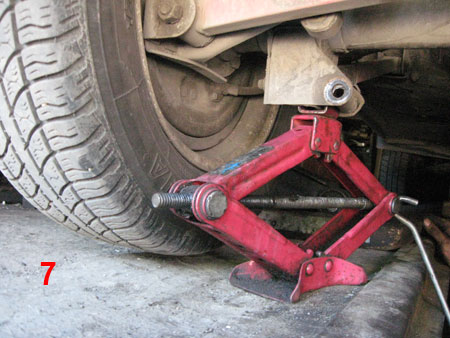
6. When the wheel is removed, we begin to lower the rear axle "trapezium" jack with a jack, carefully observing the state of the spring (it will be visible when it weakens and leaves the seat) and behind the brake hose, since it can be torn.
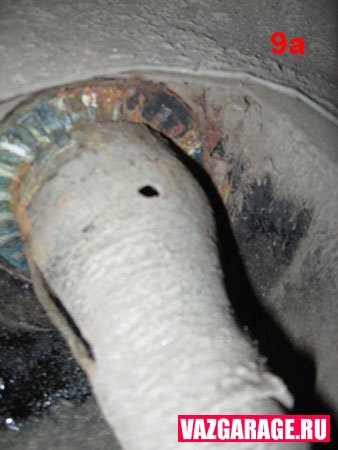
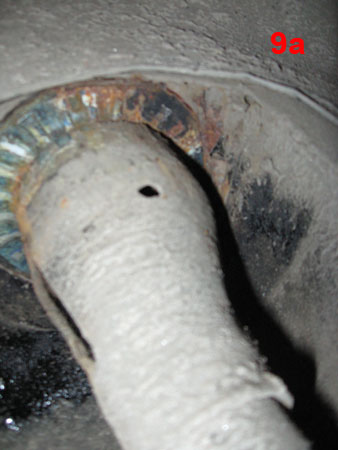
7. Remove the spring and take out the old spacers or what is left of them. We check the condition of the rear spring seats.

8. Before installing the springs, it is advisable to tie the rubber spacers to the springs using electrical tape, tape or wire.
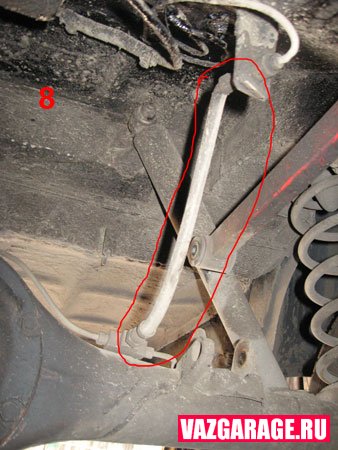
9. Installing the spring, direct its lower end strictly into the recess in the cup on the rear axle.

10. When the spring is in place, you can lift the edge rear axle jack "trapezium" and install the wheel. Then the car can be lowered to the ground and secured rear shock absorber and short jet thrust.
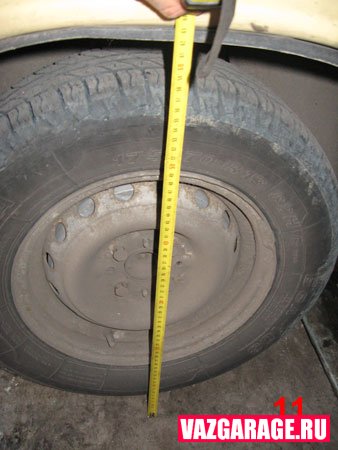
Everything! Now we can enjoy the result of our work. So as not to guess whether the car has risen or not, and how much. Before starting the replacement, you can measure the distance between the ground and the wing of the car with a tape measure. And at the end of the work, check how much the readings have changed. In my case: +4 cm. That day I solved with detailed guidance with photos.
Rear springs burst on your favorite "classic"? With a slight load of the passenger compartment or trunk of the car, the ground clearance has significantly decreased? If so, then it's time to replace the rear springs. Is it difficult to do it yourself? No. We read this article further and find out how to do this on the VAZ-2101, VAZ-2104, VAZ-2105, VAZ-2106, VAZ-2107 or simply on the "Classic".
First point. What you need to replace the rear springs. Of course, these are the springs themselves. In addition to the springs, you need to buy rubber spacers with metal clips. There are three types of spacers on sale: standard, medium and high.
This article describes how to install standard springs with medium spacers.
You can also experiment with the option - springs with high spacers, but only if you put simple springs (2101), and not reinforced 2102. Since the springs of 2102 are already much higher than the standard ones, then together with high and even medium rubber spacers, they can lift the car very much. As a result, the stroke of standard VAZ shock absorbers will not be enough, which will require replacing the shock absorbers themselves (for example, with longer Moskvichevsky ones) or you will have to visit the nearest welder in order for him to weld additional rings on the shock absorber. But the installation of the cargo version of the springs on the VAZ 2101, VAZ 2105, VAZ 2106, VAZ 2107 models is necessary only in extreme cases, well, unless your "penny" or "seven" serves you every day as a little Gazelle.
Now, let's talk about the tool that we need while working. Requires two jacks (for example, a trolley frog jack paired with a trapezium jack), a pair of 19 keys, a wheel wrench and a large screwdriver. It is better to carry out the work in the inspection pit, since it will be very inconvenient to replace the springs from the ground.
The procedure for replacing the rear springs on cars VAZ-2101, VAZ-2104, VAZ-2105, VAZ-2106, VAZ-2107, Classic:
1. Release the wheel bolts and unscrew the bottom.

2. After that, raise the car body with a jack (the wheel will remain on the ground, since the shock absorber is taken away),
3. When the wheel is removed, we begin to lower the rear axle with a jack "trapezium", carefully observing the state of the spring (it will be visible when it weakens and leaves the seat) and behind the brake hose, since it can be torn.

4. Remove the spring and take out the old spacers or what is left of them. We check the condition of the rear spring seats.
5. Before installing the springs, it is advisable to tie the rubber spacers to the springs using electrical tape, tape or wire.
7. When the spring is in place, you can raise the edge of the rear axle with a trapezoid jack and install the wheel. The vehicle can then be lowered to the ground and the rear shock absorber and short jet thrust secured.
Everything! Now we can enjoy the result of our work. So as not to guess whether the car has risen or not, and how much. Before starting the replacement, you can measure the distance between the ground and the wing of the car with a tape measure. And at the end of the work, check how much the readings have changed. In my case: +4 cm.

The need for such an event as replacing the rear springs of the VAZ 2106 is caused by their wear or destruction. Wear is expressed in the subsidence of the car during operation, destruction occurs with constant overload or driving on country roads. Some car enthusiasts remove the springs in order to replace worn rubber spacers, which can also cause the car body to settle.
Replacing the springs of the VAZ 06 can be done on an open flat area, having good anti-rollback means, since the car will have to be raised and lowered several times. The process itself is simple, almost every owner of a VAZ 2106 can do it. To do this, you will need:
- jack and wheel wrench;
- recoil shoes or comfortable stones;
- a set of spanner or open-end wrenches;
- 2 ties for springs;
- low wooden block or cinder block;
- powerful flat screwdriver;
- hammer;
- fabric gloves.
For such repairs, cloth gloves are worn so as not to injure your hands during work on the protruding parts of the suspension and the car body. Ties for springs can be found at someone from familiar motorists, this device is available in the arsenal of many VAZ 2106 drivers. In extreme cases, it can be purchased at an automotive store. Replacing the springs also provides for the replacement of rubber spacers, which serve as a gasket between the upper turn of the product and the glass in the car body.
Instructions for working with rear springs
Before proceeding with the replacement, place 2 shoes under the wheel located diagonally from the wheel to be removed. Replacing the rear springs begins with unscrewing and removing the wheel, after which a block must be substituted at the end of the rear axle beam and the jack must be lowered. The whole mass of the machine will lie on the block and compress the spring. The pad should be positioned so as not to interfere with the unscrewing of the lower shock absorber mount. Further according to the instructions.
- Loosen the shock absorber mounting nut, unscrew it and pull out the long bolt. The shock absorber must be unscrewed so that the spring can then be removed.
- Apply 2 ties on the coils of the spring from opposite sides and fix securely by pressing the pins with a key.
- Raise the car body with a jack until it is possible to pull out the spring together with the ties.
- As a rule, the rubber spacer sticks to the metal of the body and remains in the glass, only the iron ring falls out. Therefore, you need to pry the rubber with a long flat screwdriver and remove it from the socket.
- Loosen the grips of the ties by alternately unscrewing the studs with a wrench. Reposition the ties to the new spring and tighten it to the approximate dimensions of the old one.
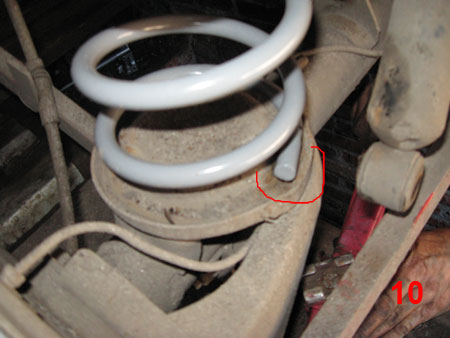
- Put a new rubber spacer with an iron washer on the upper coil of the spring. Its configuration is such that it should match the shape of the upper loop.
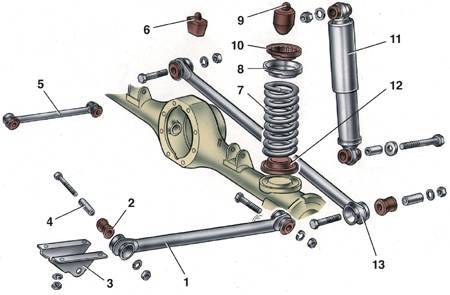
1 - lower longitudinal bar;
2 - rubber bushing;
3 - bracket for attaching the lower longitudinal rod to the body;
4 - spacer sleeve;
5 - upper longitudinal bar;
6 - additional buffer of the compression stroke;
7 - spring;
8 - upper spring cup;
9 - compression stroke buffer;
10 - upper insulating spring gasket;
11 - shock absorber;
12 - bottom insulating spring gasket;
13 - transverse bar.
- Install the part into the slot together with the ties and, supporting it with one hand, lower the jack with the other until the tie grippers relax.
- Remove the ties, screw on the shock absorber and reassemble in the reverse order.