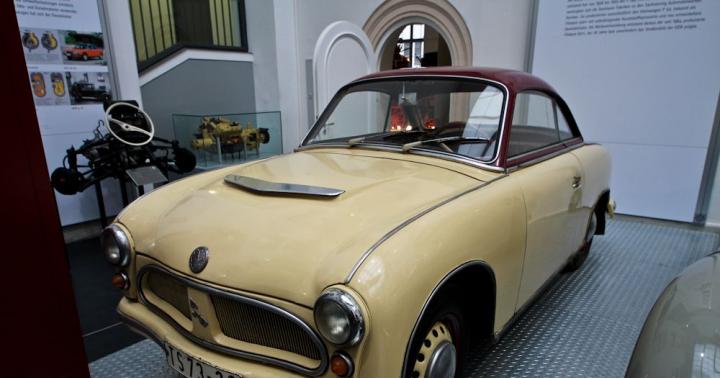
An important part of any car is the gearbox, with the help of which the ability to change the speed of movement is carried out vehicle... Cars that come from the Ulyanovsk conveyor and are called UAZ-3163 are also equipped with a Dymos or Daimos gearbox. This element is a mechanical five-speed box gear made in Korea.
This unit on any car does not require frequent repairs and preventive maintenance. All that is needed to service this undemanding mechanism on an UAZ Patriot SUV is a periodic check and oil change. Over time, the gearbox shows the first signs of malfunctions, as a result of the detection of which repairs should be carried out immediately, otherwise the entire mechanism will need to be replaced, which is an expensive element. Today we will consider the procedure for disassembling the Daimos gearbox on the UAZ Patriot SUV and find out in which cases it is necessary to repair this unit.
Design and features of the device
On the UAZ Patriot SUV, the Dymos gearbox is a mechanism inside which there is a set of gears of various diameters. The drive mechanism, presented in the form of a lever and brought out into the interior of the car, allows changing gears while driving, which actually makes it possible to develop a high speed of the car. The gearbox structure diagram is shown below.
During the operation of the UAZ Patriot car, it is important to periodically diagnose the gearbox, or rather, to check the presence of a certain oil level. The oil is lubricant in which the device operates. The oil level can be lowered as a result of defective oil seals and gaskets, which must be replaced before refilling with new oil. The period for replacing the oil with a new one is 60 thousand kilometers, as the manufacturer recommends.

The gearbox is not a demanding mechanism and does not need to be adjusted. Periodically it is necessary to check the fastening of the device, since constant vibrations can provoke self-loosening of the bolted connections. In case of detection of such malfunctions as:
- spontaneous knocking out of the gear;
- problematic inclusion;
- extraneous noise during the operation of the device;
- impossibility of switching on one or another transmission.
All these signs are important reasons that in the future the gearbox may fail altogether. Therefore, if one of these reasons is found, the device should be disassembled and the appropriate repair should be carried out (replacement of gears or wings). Consider what is the disassembly of the Dymos gearbox on the UAZ Patriot SUV.
Disassembly of the checkpoint
Before proceeding with the disassembly of the checkpoint, this mechanism together with the transfer case should be removed from the vehicle. How this is done can be found in the corresponding material. Let's start examining the process of disassembling the checkpoint on the UAZ Patriot SUV.

- Initially, the fork of the bearing 5 and the bearing 6 itself (indicated in the diagram above) located on the box shaft are to be dismantled.
- Next stage provides for the dismantling of the cover of the mechanism responsible for gear shifting. The cover is removed together with the shift lever.

- A sensor for turning off the light alarm when reversing is installed on the gearbox structure, which must also be dismantled. It must be unscrewed with a wrench.
- The stem head pin is removed using a hammer test. You should also unscrew the bolt numbered 1 (photo below), which is the axis of the intermediate gear reverse.

- Unscrew the flange bolt connections, then using a large magnet, remove the springs and plungers inside.
- We proceed to the process of dismantling the input shaft bearing cover, having previously unscrewed the bolted connections.
- Before removing the bearing from the input shaft, it is necessary to remove the circlip number 2.

- The front case of the manual transmission Daimos of the UAZ Patriot SUV is removed. To do this, it is necessary to unscrew the bolted connections indicated by the arrows.

- From the side of the output shaft, the following elements should be dismantled:

- retaining ring 1;
- protective ring 2;
- two retaining half rings 3;
- large circlip 4.
- The bolt number 1 is unscrewed, which is the axis of the intermediate reverse gear. After unscrewing it, dismantle the axle.

- With the help of a thin breakdown, it is necessary to press out the locking pins, and then remove the gear shift rods. Locking pins must be replaced with new ones after removal.
- To carry out the separation of the rear housing from the output shaft, it is necessary to hang the device by the output shaft. After that, the rear wall of the crankcase should be heated until it is disconnected.
- The heating time should be about 5 minutes at a temperature of 400 degrees. After warming up the cover, the shafts should be disconnected using a hammer.

Today we are raising a necessary and difficult topic - the disassembly of the checkpoint. Each of us knows that disassembling a checkpoint is another task that requires a serious approach, time and a track method of disassembly. UAZ is equipped with a 5-speed manual gearbox of Korean origin Daimos... The unit is, in principle, reliable and often does not require intervention from the car owner for a very long time. But if the gears are switched with effort and spontaneously knocked out, then you still have to disassemble the box. The laboriousness of the gearbox disassembly process is a serious argument for a thorough diagnosis. before deciding on disassembly. We recommend putting special emphasis on the clutch since its functioning is directly related to the normal operation of the Dymos UAZ Patriot gearbox. But do not forget about the UAZ Patroit driveshaft, the elements of which are produced and affect the power load of the same box.
What you need to check first so as not to disassemble the Daimos checkpoint on the UAZ Patriot in vain:
- Oil level
- Fasteners on the bolted connections of the box itself
- Clutch Actuator Condition
- To disassemble the box first you need to dismantle it... First of all, the gearbox protection cover is removed.
- As for the cream of butter, opinions are divided here, some manage to remove the gearbox along with the oil, draining only from the distributor, while others are completely drained. If you disassemble the dymos uaz patriot gearbox completely, then you need to drain the entire volume of oil.
- It is necessary to dismantle the bearing fork and the bearing itself.
- Remove the cover of the shift mechanism together with the lever.
- Use a wrench to unscrew the reverse light sensor.
- Carefully knock out the stem head pin with a hammer.
- Unscrew the bolt, which functions as the idler reverse gear axle.
- When you have mastered all the flange connections, you can magnetically fish out the plungers and springs.
- Now we dismantle the circlip and finally remove the bearing from the input shaft.
- The front case of the Daimos UAZ Patriot gearbox is removed from the bolted connections.
- To get to the secondary shaft without losing important components, do not forget to remove the retaining rings from the shaft.
- To dismantle the axle, you need to unscrew the idler gear bolt.
- It is convenient to knock out locking pins with a thin punch, as neatly as possible, but they still have to be replaced with new ones in the process of reversing the assembly.
- We remove the gear shift rods of the Dymos UAZ Patriot gearbox.
- The procedure for separating the crankcase and output shaft will require suspension by the shaft... This will open access to the crankcase. To remove the crankcase, you need to warm up its rear wall. Classic gas burners are increasingly replacing UV lamps with a power of 5-6 kW, because they are safer and have uniform heating without an open flame. After warming up, the shafts are disconnected by a hammer breakdown.
So, you disassembled the box, now we are carefully studying the condition of the gears and inspecting each component, checking for integrity. Dismantling the Daimos UAZ Patriot gearbox is a real, but not such an easy task, it can be seen even by the disassembly algorithm itself. So if you are not confident in your abilities, it is better to drive Patrick away in service center and entrust in the hands of professionals... Indeed, after disassembly, you will first have to rinse everything in kerosene or diesel fuel, so that clogging does not interfere with the normal operation of the unit, and only then put the "puzzles" of the checkpoint in the reverse order.
The UAZ Patriot manual gearbox is designed to transmit torque and change the vehicle speed. An additional transfer case with a reduction gear is installed in the transmission design, which distributes the power flow between the drive axles. Depending on the year of manufacture of the car, a dispensing unit of domestic production or a unit developed by the Korean company Dymos is used.
The Patriot uses a 5-speed gearbox equipped with synchronizers for forward gears. The unit is connected to the engine using a clutch housing; a 1-disc dry friction clutch with hydraulic drive... The choice of speeds is carried out by a lever installed on the transmission case cover, the handle is brought out through a hole in the floor of the body into the passenger compartment. At the end of the lever there is a plastic tip with a speed selection diagram.
On machines assembled before 2005, there are 2 types of boxes:
- the unit assembled in Ulyanovsk (gear ratio of the overspeed 0.82);
- ArKPP unit developed by the Arzamas Machine-Building Plant (article 31606-1700010, gear ratio of the overdrive stage 0.86).
The Ulyanovsk boxes were used on the machines of the first batches, then the plant began to use the Arzamas unit, which was distinguished by an original step switching scheme. To engage the reverse gear, it is necessary to move the lever to the position opposite to the 1st forward speed, and the 4th gear for forward movement is moved to the place of the standard location of the reverse speed.
Such an arrangement provides accelerated switching of the direction of travel when overcoming off-road by the swing method. The safety lock has been removed from the reverse speed engagement circuit, which reduces the time to select the direction of travel. The transmission was not distinguished by high reliability and precision of work, which is why, since 2005, it was supplanted by the Korean checkpoint Daimos.

A brief sequence of disassembly of the ARKPP unit from the UAZ Patriot:
- Dismantle the box from the car, and then rinse or wipe the crankcase from dust and oil drips.
- Remove the gear selection mechanism from the side of the housing, and then unscrew the plug with the overdrive spring lock.
- Remove the rings retaining the secondary shaft rear bearing from the seat. Remove the 5th speed crankcase mounting bolts to remove the axle support.
- Remove the left-hand threaded bolt holding the rear intermediate shaft support, and then remove the overdrive gear along with the needle bearing.
- Unscrew the overspeed fork fixing screw to remove the drive rod and clutch.
- Using a puller, remove the secondary shaft bearing together with the driven gear of the 5th stage. The puller is also used to remove the overspeed synchronizer hub from the intermediate axle.
- Remove the front cover and remove the circlip holding the input shaft bearing.
- Remove the intermediate shaft bearing caps, then pull out the axle and remove the reverse gear. To dismantle the gear, a bolt is used, inserted into a threaded hole drilled in the end plane of the shaft.
- Using a screw puller, pull off the bearings installed on the input and intermediate shafts.
- Slide the intermediate shaft forward to remove the front rolling bearing.
- Remove the input and output shafts as an assembly from the crankcase. Then remove the circlip to allow the intermediate axle to be removed.

Used since 2005, the Dymos gearbox is equipped with 3 gear shafts, some of which slide along the splines to provide gear shifting. In the lower part of the body there is an oil bath, the lubricant is supplied to the rubbing parts due to rotation gear wheels scattering liquid over the crankcase. The box has an increasing 5th speed with gear ratio 0.88 to reduce engine speed and fuel consumption when driving on the highway.
The box is distinguished by the use of the classic step selection scheme. Disconnect the fuse to engage reverse gear. The unit has an increased clarity of switching, but does not tolerate loads poorly (for example, when driving for a long time in conditions heavy off-road). An additional advantage of the gearbox is the reduced noise during operation, the improvement was achieved due to additional machining of the surfaces of the teeth.
The disadvantages of the unit include the destruction during operation of the rear oil seal, due to which the tightness of the crankcase is disrupted. Transmission oil begins to go into the cavity of the distributing gearbox. Gears and rolling bearings in the main box, working in conditions of lack of lubrication, begin to wear out. The resulting metal dust gets onto the contact surfaces, accelerating the wear of the elements.
Damaged parts begin to make noise during operation, there are problems with the inclusion of steps, possibly spontaneous disengagement of gears.

Reasons for breakdown of the transfer case
The main causes of gear breakage transfer case on Patriot:
- Normal wear and tear of parts, leading to destruction of gears or bearings. To restore the normal operating conditions, it is necessary to remove the unit and check the condition of the parts, damaged components must be replaced. When installing gears, parts should be selected according to the gap, which allows to reduce the noise of work.
- The use of tires of different diameters on the machine on the front and rear axles leads to difficult step switching. The cause of the defect may be damage to the gears, jamming of the spline connection or parts of the gear selection mechanism.
- Worn gears and bearings lead to spontaneous shutdown of speeds. The defect occurs due to breakdowns of the retainer of the selected gear or when the parts of the shift mechanism are bent.
- Worn gaskets or mechanical damage to the crankcase or covers lead to grease leakage from the housing. Oil can ooze through the rubber shaft seals, which eventually lose their elasticity and dry out.
Dymos transfer gearboxes use a chain drive and electric shift drive. With prolonged movement with increased load, the chain stretches and collapses, which leads to the appearance of extraneous noise. In the event of a problem with electronic components, an error notification is displayed on the display in the instrument cluster.
To clarify the reason for the appearance of the message, computer diagnostics are carried out.
During operation, the box does not require adjustment, but the driver must periodically check the oil level in the crankcase. Do not operate the unit if foam or water is found in the lubricating fluid. The contaminated oil is drained through a standard hole, and then fresh grease is poured into the crankcase (in accordance with the manufacturer's requirements). If oil leaks are found, it is necessary to disassemble the unit with replacement of gaskets or damaged covers or mounting screws.

Difficulty turning on the speeds indicates wear of the synchronizers or damage to the shift forks. Spontaneous knocking out of speed during movement occurs due to a broken clutch or due to wear on bearings or gears. To reduce the effect of wear products, it is necessary to carry out a routine oil change every 60 thousand km.
The drained fluid is checked for metal impurities entering the lubricant as a result of the destruction of gearbox parts.
To remove the Dymos unit with your own hands, you will need to follow the steps:
- Drain the oil from the crankcases of the main box and the transfer gearbox, and then disconnect the flange connection cardan shaft front axle drive.
- Remove the bolts securing the intermediate support for the rear propeller shaft. The drives are not disconnected from the axles, the pipes are retracted to the side of the box and are attached with a wire to the frame or suspension elements.
- Disconnect the speed sensor plug and then remove the catalytic converter together with the protective shield.
- After dismantling the clutch drive and intermediate drive parking brake it is necessary to remove the front exhaust pipe mount. Then a jack with a board is placed under the engine crankcase, which allows you to remove rear mount boxes.
- Remove the cross member located under the box. Then the unit should be lowered down, which makes it possible to separate the control levers of the main box and the transfer gearbox.
- Remove the reverse gear indicator plug and then remove the bolts connecting the box to the crankcase. The transmission assembly must be pulled back and moved down.
Dymos box disassembly algorithm
The transfer gearbox is attached to the gearbox housing with 2 nuts and 2 bolts. Then the gear selection mechanism is removed, which is additionally fixed on the sealant. There is a bolt inside the niche that can be unscrewed with a spanner wrench. To remove the rear cover, you need to unscrew the screws located around the perimeter of the crankcase. On the side of the box there is a bolt that holds the intermediate shaft with the reverse gear, which must be unscrewed. The second shaft securing bolt is partially unscrewed.
There is a plug on the left side of the box crankcase, under which there is a spring with a ball. After removing the plug, it is necessary to unscrew the screws securing the main shaft journal (located on the side of the clutch mechanism installation site). Remove the retaining ring and pull out the ball bearing using a puller, which will divide the case crankcase into 2 halves. Then the previously loosened bolt of the reverse gear axle is unscrewed, which allows you to remove the part.
Using a thin screwdriver or awl, the pins are knocked out holding the shift rods in place. Hang the crankcase cover with gears by the output shaft, and then heat the bearing seat with a burner. After heating the local area of the body to 400 ° C, the metal crankcase is knocked off the supports. Then the shafts are disassembled one by one, which makes it possible to determine the degree of wear of the parts. After the installation of new elements, the assembly is carried out in the reverse order, during installation, the position of the parts is taken into account and the tightening torque is observed.
Naturally, it does not pretend to be true, but it can be used as a visual guide to the repair of the Daimos gearbox.
So the checkpoint at the workbench. Where to begin? Now, I would start by screwing this gearbox back on and would never contact it. Joke type. However, in every joke ...
All the same, we must start by studying the only manual for repairing daimos that exists at the moment: tynts (third-party resource).
After studying this crooked manual, and it is really crooked, you will begin to have a vague sensation that you cannot yet characterize in any way. Later, yes. But not now. Now everything is rosy ...
So.
We unscrew the cover of the gear shift shaft. Please note that all joints are lined with a sufficiently high-quality sealant, and the screws sit on the thread sealant. Therefore, the process of separating cramps from cramps is difficult in most cases.
Along the way we inspect rubber boot switch rod.
Then, with a spanner key for 24, we unscrew the reverse gear engagement sensor.
Please note that it is sealed to the body with a copper washer. According to science, they are disposable and when the sensor is installed in place, the shayolbox changes to a new one. Otherwise, oil leakage is possible.
We return to the gearshift stem box. We unscrew this bolt that closes the technological hole. It is used to unstitch the stock.
To my shame, I must admit that until that moment I did not have a normal set of drifts. And instead of drifts, I used old, unnecessary, not beautiful and for whatever reason, only I know, guilty drills, of a suitable size.
We also pay attention to the thread sealant and the copper washer.
Now, unscrew the three cover bolts from the wells of the speed switch rods retainer. There is also a thread sealant.
We stock up on a small magnet and use it to pull out the springs and locking balls. How Alternative option, rolls to turn the gearbox housing with the holes down and lightly tap ...
With the rear of the checkpoint, that's all for now. We pass to the bell.
We unscrew the front cover. I entrusted this business to the younger generation 😉
When the cover is unscrewed, it does not mean that it can be removed easily. Because the sealant glued it well enough. It is extremely convenient to pick up the edge of the cover with a long flat screwdriver, through the starter hole in the bell and use a lever to pry off the cover. Along the way, we evaluate the condition of the oil seal in the cover.
Now a small Kama Sutra with the removal of the retaining rings. I don’t know how to whom, but they were given to me in a very dreary way ... And this is in the presence of a normal tool for removing them ...
In general, after the retaining ring is removed from the input shaft in the area of the front support bearing, the manual reads this phrase: "Remove the bearing from the shaft."
This is the first place where the breaking of the namba wan pattern begins. For the bearing:
- flush and stsuko flush
- closed type
- sits not just tight, but VERY tight ...
In general, in fact, you do not need to perform the "Remove the bearing" step at this stage. Take my word for it. Although ... If you have a tendency towards masochism, then by all means try. I guarantee the result!
I came to the conclusion that it is necessary to halve the gearbox housings without removing the bearing.
We unscrew dofig of bolts around the perimeter of the joint. Please note that there is one more screw in the gearshift stem box, above the stem!
I must also say that the halves sit very tightly on the guide bushings. There are only two of them, but you still won't be able to easily separate the halves. Plus, there's a strong sealant in there, be it wrong. In general, when you have a gap, we carefully increase it with improvised means until you rest against it. And you will resist! The gap will be about a centimeter and a half in size.
From this moment on, breaking the namba tu pattern.
The bottom line is that the front thrust bearing sits VERY firmly on the input shaft. And, of course, it interferes with halving the gearbox housing.
The essence of the process is clear from the photo. We post as much as possible in our own conditions. Take a piece of soft material such as copper / luminescent / duralumin. This piece will be a spacer between the end of the input shaft and the popularly loved universal wrench, "Earth-to-Earth" class, "Sledgehammer" type ...
We put a soft gasket on the end of the input shaft. With the help of the mantra “How great is my love for Ipany Chinese engineers”, the memories of a certain mother and the reciprocating movements of a special key “Sledgehammer” type, we separate the bell with a support bearing from the input shaft.
It is after this stage that the bearing can be easily removed by hand from the seat in the bell, which will be on the floor 😉
Back to the fillet ...
To remove the rear gearbox housing, it is necessary to remove the pusher rod of the gearshift switches. For this, it must be pinned. Attention! There are two short pins, not one long one like on the shift forks.
Remove the second reverse gear axle bolt.
And remove the retaining rings from the output shaft end. Pull out the retaining crescents and remove the retaining ring from the pinion shaft tandem support bearing.
At this point, you will be awaited by a break in the template number sri ...
Because the manual says that it is necessary to unpin the gearshift forks and shift pushers. How this is supposed to be done when a good half of the pins are in the depths of the crankcase is not clear. But, if we remember that Chinese electricity has not yet been studied at all, then it’s even scary to think about Chinese mechanics ... Qigong there, Shao-lin and all that ...
In general, we tie all the giblets as they are and hang them again. We try to adjust the suspension so that the belts do not press on the 3-4 gear shift clutch and the axis of the shafts is as perpendicular to the plane of the mother earth as possible. If you slide the clutch more than usual, an amazing adventure is guaranteed to find the three ejected synchronizer balls. Again, for masochists, the next stage in delivering themselves unforgettable pleasure ...
Then we need to heat the crankcase housing around the tandem bearing. I used an industrial hairdryer for this. The temperature is 500 degrees, within five to ten minutes. So that the crankcase would warm up thoroughly. Then, by reciprocating movements of a rubber mallet of the class "Narcosis", we present the crankcase body. The duration of the execution does not depend on anything and is purely random. Checked for three times assembly / disassembly of the unit (later I will tell you why) ...
Attention! In the case of the gearbox housing in the area of the partitions of the wells of the rods, there are two plungers. Do not lose them when turning the crankcase body over. Then you will not find such!
If your synchron balls have not ejected, you are lucky. At this stage, you can pour yourself 100 grams of good cognac and postpone further work for "Morning, evenings are wiser" ...
Take my word for it 😉
UPD1:
My dear readers!
Do not ask me questions about the repair of your gearbox, please! Firstly, I cannot and have no right to give advice without seeing the unit with my own eyes and without holding it with my own hands. Secondly, this is roughly how to make a diagnosis over the phone. No tests ...
This blog post is for informational purposes only. Its purpose is to show you visually the giblets and general methods work with this checkpoint. No more.
UAZ Patriot 3163 and UAZ Hunter are equipped with a five-speed manual South Korean gearbox Daimos (DYMOS). The gearbox is highly reliable and has a long service life. The service life of the Daimos checkpoint with proper maintenance is about 300,000 km. The gearbox case is "sharpened" for fastening to engines ZMZ-405, ZMZ-406, ZMZ-409 and ZMZ-514 diesel. As for the gearbox repair, it is quite difficult to make it due to the lack of spare parts. The positive aspects of operating the DYMOS gearbox include a clear stroke of the gear shift knob, a classic algorithm, minimal physical effort to shift gears and high selectivity.
The gear ratios are reasonably well balanced. The first gear of the gearbox is the most "traction". With its main direct tasks DYMOS copes with "excellent". The noise of the gearbox is significantly reduced compared to the Arzamasovskaya one. Due to the presence of 5th gear, comfort when driving on the highway has increased. Different oils are used in the transmission and transfer case. Do not use oils in the gearbox that are not recommended by the manufacturer.
Gear ratios gearbox Dymos
| I Transfer | II Transfer | III Transfer | VI Transfer | V Transfer | R Transfer |
|---|---|---|---|---|---|
| 4,155 | 2,265 | 1,428 | 1,00 | 0,88 | 3,827 |
Gearbox device Daimos
1 - front gearbox housing; 2 - primary shaft bearing cover; 3 -primary shaft; 4 -mounting bolt; 5 - the rear bearing of the input shaft; 6 - toothed crown; 7 - double cone synchronizer for 3rd and 4th gears; 8 - hub and synchronizer clutch for 3rd and 4th gears; 9 - clamp; 10 - ball bearing; 11 - gear wheel 3 transfers; 12 - neutral position indicator switch; 13 - the bolt of the head of the control mechanism; 14 - the head of the rod of the control mechanism; 15 - control lever assembly; 16 - control shaft assembly; 17 - reversing switch fuse bracket, assy; 18 - gear wheel of a reverse gear of a secondary shaft; 19 - double cone reverse synchronizer; 20 - sealing cover; 21 - 5th gear synchronizer ring; 22 - clutch and hub of 5th gear and reverse synchronizer; 23 - gear 5 of the secondary shaft transfer; 24 - rear gearbox housing; 25 - retaining ring of the secondary shaft rear bearing; 26 - adjusting ring of the primary shaft bearing cover; 27 - adjusting ring of the intermediate shaft bearing; 28 - front tapered roller bearing of the intermediate shaft; 29 - pinion gear 2 of the output shaft; 30 - triple cone synchronizer for 1st and 2nd gears; 31 - hub and synchronizer clutch for 1st and 2nd gears; 32 - pinion gear 1 of the secondary shaft transfer; 33 - intermediate reverse gear shaft; 34 - intermediate reverse gear; 35 - flange bolt for fastening the intermediate gear axle of reverse gear; 36 - intermediate shaft; 37 - rear tapered roller bearing of the intermediate shaft; 38 - double angular contact ball bearing of the secondary shaft; 39 - bearing oil seal; 40 - protective ring; 41 - retaining half ring; 42 - retaining ring; 43 - secondary shaft

1 - primary shaft; 2 - toothed rim of the input shaft; 3 - the front needle bearing of the output shaft; 4 - the inner ring of the 4th gear synchronizer; 5 - blocking ring of the double-cone synchronizer of the 4th gear; 6 - retaining ring of the synchronizer hub for 3rd and 4th gears; 7 - external synchronizer ring 4 transfers; 8 - clutch for switching 3 and 4 gears; 9 - hub of synchronizer for 3rd and 4th gears; 10 - dry synchronizer; 11 - synchronizer spring; 12 - ball of the synchronizer rusks; 13 - outer ring of the 3rd gear synchronizer; 14 - double cone blocking ring of the 3rd gear synchronizer; 15 - the inner ring of the 3rd gear synchronizer; 16 - toothed rim of gear wheel 3 transfers; 17 - gear wheel 3 transfers; 18-needle bearing of gear wheel 3 transfers; 19 - bearing bushing of a gear wheel of 3 transfers; 20 - needle bearing of gear wheel of 2nd gear; 21 - gear 2 transfers; 22 - gear ring 2 transfers; 23 - 2nd gear synchronizer inner ring; 24 - locking ring of a three-cone synchronizer 2nd gear; 25 - outer ring of synchronizer 2 transfers; 26 - retaining ring of the synchronizer hub for 1st and 2nd gears; 27 - clutch for switching 1st and 2nd gears; 28 - hub of synchronizer for 1st and 2nd gears; 29 - outer ring of the 1st gear synchronizer; 30 - blocking ring of a three-cone synchronizer of the 1st gear; 31 - the inner ring of the 1st gear synchronizer; 32 - gear wheel of 1 transfer; 33 - needle bearing of gear wheel of 1st gear; 34 - secondary shaft; 35-needle bearing of reverse gear; 36 - reverse gear; 37 - the inner ring of the reverse synchronizer; 38 - double cone blocking ring of the reverse synchronizer; 39 - outer ring of the reverse synchronizer; 40 - hub of reverse gear and 5th gear; 41 - dry synchronizer (5 gears / reverse); 42 - a ball of crackers; 43 - reverse gear synchronizer clutch and 5th gear; 44 - retaining ring of the reverse gear and 5th gear synchronizer hub; 45 - 5th gear synchronizer outer ring; 46 - toothed rim of the gear wheel of the 5th transfer; 47 - gear wheel of 5 transfers; 48-needle bearing of gear wheel of 5th transfer; 49 - persistent washer; 50 - rear double ball bearing; 51 - retaining ring; 52 - retaining half-ring; 53 - protective ring; 54 - retaining ring
READ ALSO ON THE WEBSITEWeak valve springs in an engine can cause a variety of reliability and performance problems. Each valve in the cylinder head has at least one spring. The valve spring applies pressure to the valve holder to stop the valve. If some devices on a VAZ 2112 car stopped working for you, fuses or relays may be to blame. At least, first of all, you need to check them, and then draw some conclusions regarding the malfunctions. Correct diagnosis ... Tramblerless ignition systems have been around for almost a decade and have eliminated much of the Maintenance, which was previously associated with the ignition system. The absence of a distributor means that there is no cover or rotor to replace, and also no ... |