A vacuum brake booster is required to make it easier to press the brake pedal. It can only work when the car engine is running. This is due to the fact that when the engine is running, the filter housing begins to suck in air that enters. At the same time, air is taken into the combustion chamber and goes to the vacuum cleaner, which is why it starts to work.
Vacuum Booster Replacement Tools
Replacement will require:
- A set of keys.
- Screwdrivers.
- Heads with a crank.
Replacement process
Stages of work:
Similar work will need to be done on the right side of the car. There you will have to remove the windscreen washer reservoir.
- After that, disconnect the wires from the brake reservoir cover.
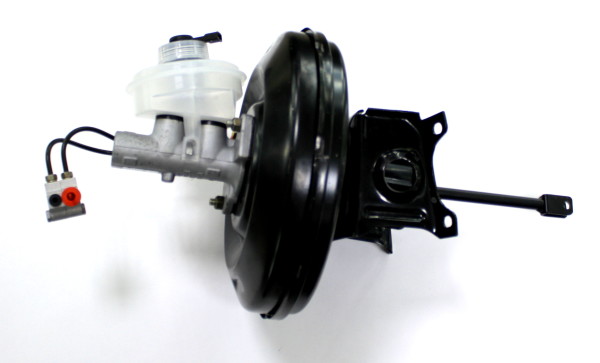
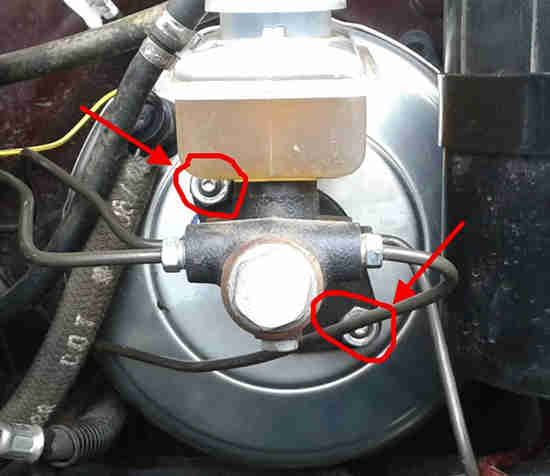
- Disconnect the vacuum cleaner check valve and unscrew the two nuts that secure the master brake cylinder. After that, the cylinder should be taken to the side, so as not to damage the pipes on it. brake system.

Two nuts securing the main brake cylinder to VUT
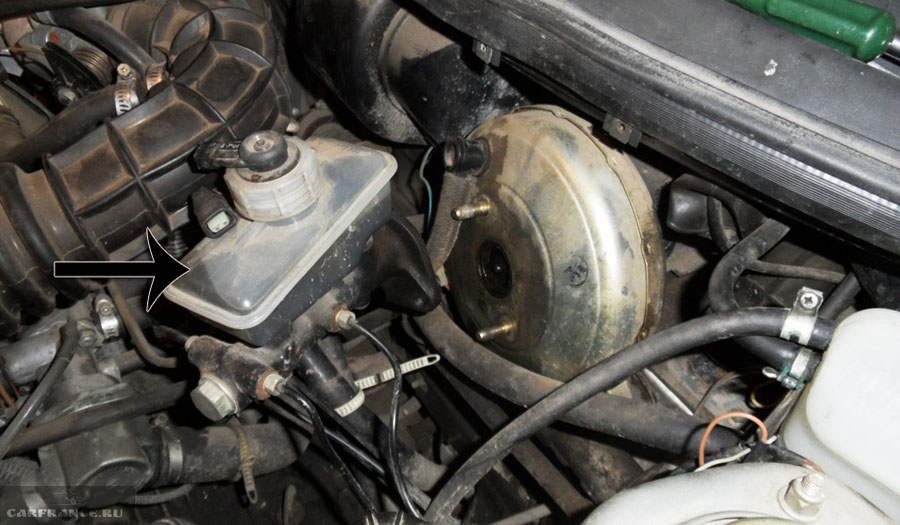
Move aside the reservoir of the master brake cylinder
- Then you should move to the salon and unscrew the four nuts there that secure the bracket on which the amplifier is located.
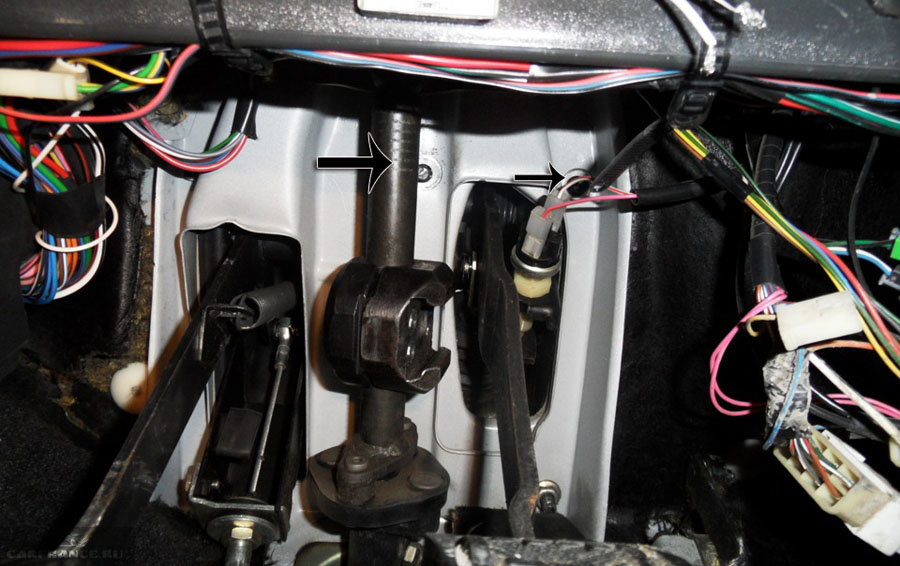
The bolts are marked with arrows. Can be removed together with the pedal, then disconnect the brake pedal as well.

Unscrew the stem from the brake pedal if you want to remove only the amplifier
- Then again you need to go to the engine compartment and remove the intake manifold hose.

Dismantling the VUT intake manifold hose
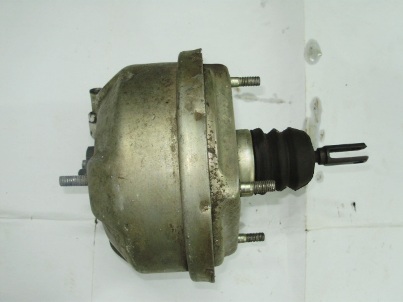
- And pull out the vacuum amplifier itself.
- Having secured the vacuum cleaner in a vice, you need to remove the corkscrew, and then knock out the stem itself.
- Unscrew the two nuts that secure the vacuum cleaner to the bracket.
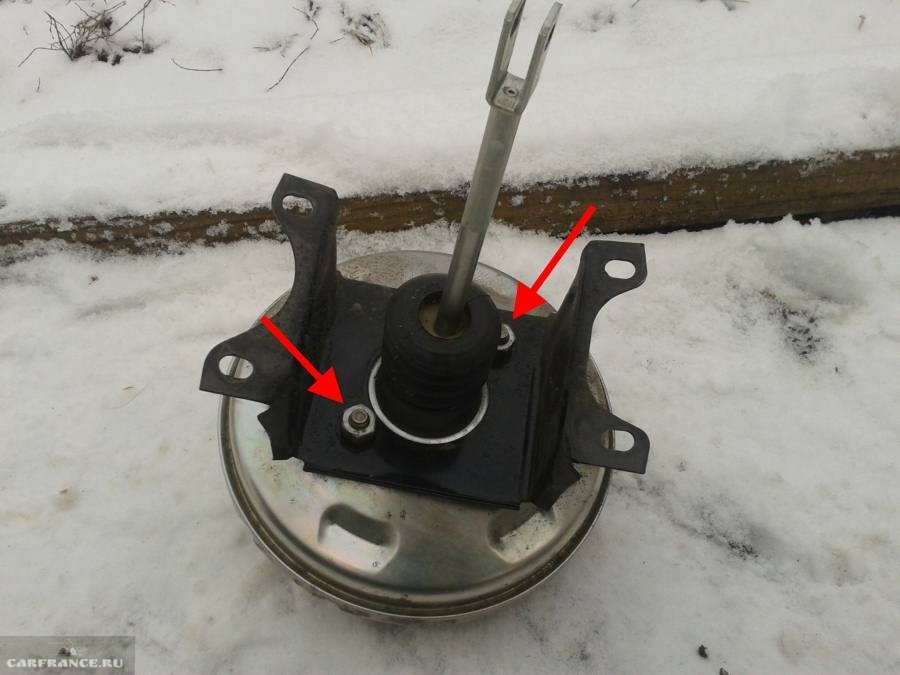
The location of the nuts that attach the bracket to the stem vacuum booster
Installation

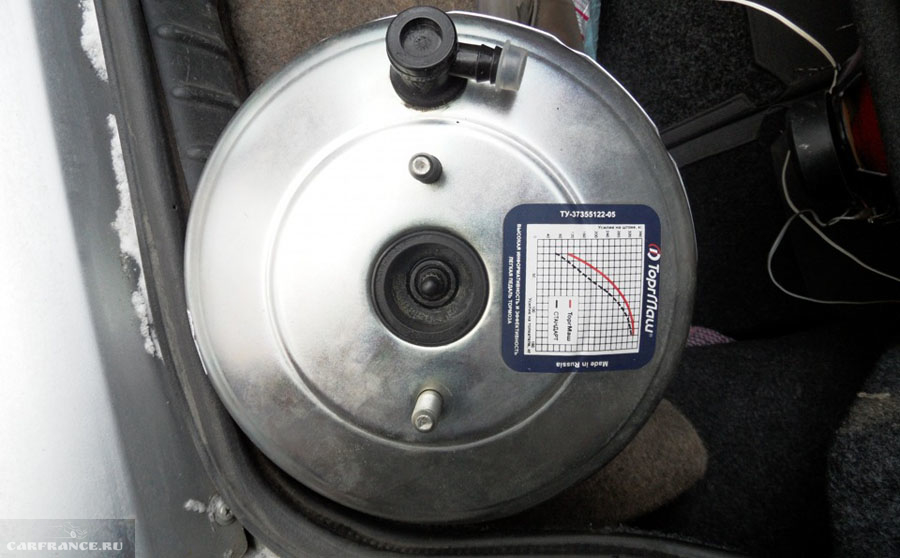
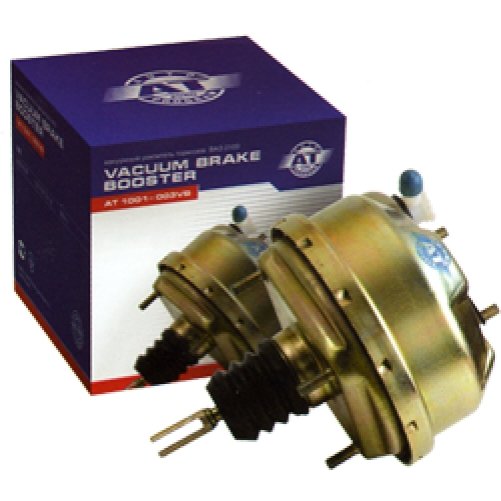
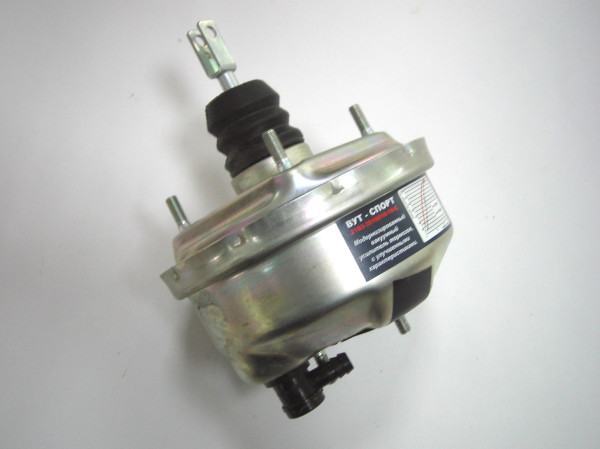
New vacuum cleaner installed and ready to go
Install a new spare part in the same manner. After completing the work, you need to check how it functions. If everything is fine, then you should continue assembling the car.
Video with the replacement of the vacuum brake booster on the VAZ-2112
Difficult choice: original or analogue?
All these symptoms indicate that the brake booster must be replaced. They may not always appear all together.
You can also check the amplifier as follows: on a muffled car, press the brake pedal 3-4 times. With the pedal depressed, start the engine. If at the same time the pedal fails a little, then this will be evidence that the amplifier is in good working order.
conclusions
As you can see, this work is not difficult to cope with on your own. For clarity, you can watch the video. Also, if you have any difficulties in the work, you can always turn to the master for help.
The braking system, as an important component of car safety and driving, requires constant diagnostics and maintenance.
Each element of the system is responsible for a specific function, and only the vacuum amplifier performs several important actions at once.
Functions
- At first, the amplifier makes it easier to control the braking and accordingly increase the driving comfort for the driver.
This function is carried out by significantly reducing the load on the brake pedal (a fairly modern unit is used on the VAZ 2114 car, which still meets stringent safety requirements).
Reducing the force allows the driver to control braking more comfortably and to optimally distribute the force to the brake pedals.
- Secondly, helps to reduce the stopping distance of the vehicle. This reduction critically depends on the model, year of manufacture and the wear of the brake system as a whole. The average reduction using an amplifier is in the order of 35-45%.
On the video vacuum brake booster VAZ 2114:
Malfunctions and diagnostic methods
Brake booster malfunctions entail several fatal negative consequences:
- Significantly reduced vehicle control during braking cycles. In the absence of the action of the amplifier, the load on the gas pedal increases proportionally - the pedal goes tight, and the effect of braking is significantly reduced. For an untrained driver, this behavior of the car can come as a shock and lead to a traffic accident due to the increased braking distance;
When the brakes fail, the car loses significant braking potential and becomes practically uncontrollable;
The vacuum amplifier hisses on the video:
The main symptoms of a malfunction of the vacuum amplifier on this model include:
- Gas pedal tight... In motion, the pedal is very difficult to push through. This is a clear sign of a malfunction of the atmospheric chamber of the diaphragm of the amplifier housing. In this case, it is necessary to operate the machine with great care, since it has lost a certain efficiency of the braking system;
- On dashboard the brake system malfunction sign lights up at short intervals... This symptom may also apply to other malfunctions of the brakes, however, in combination with tight pedal the brake clearly indicates a malfunction of the amplifier. The electronic unit of the car constantly monitors all systems for operability (and although on the VAZ 2114 model this unit is no longer considered modern with its functions, it copes at a good functional level and with high efficiency despite the small number of sensors);
On the video, how to check the VAZ 2114 vacuum brake booster:
Deterioration braking qualities system, along with other signs, indicates the direct involvement of the brake booster malfunction in the risk of an accident.
This sign is the main one among all the others, no matter how it is to operate a car with a very weak braking system is very dangerous - the contours in this case do not receive additional force and cannot effectively brake.
Elimination of the malfunction most often consists in replacing the faulty element with a new unit - this will save repair time, since the resuscitation of the old product will require no less time and a slightly lower cost of parts. That is why motorists most often resort to a complete replacement of a failed part.
The cost for the VAZ 2114 model is about 1,500 rubles.
The main symptom that tells the car enthusiast about the failure of the vacuum brake booster is the difficult stroke of the brake pedal. This is fraught with poor braking, which can emergency lead to a road traffic accident.
On a VAZ 2109, the replacement of the vacuum brake booster must be carried out. Replacing the vacuum brake booster with a VAZ 2109 can be safely carried out on your own.
Examination
The repair of the vacuum amplifier is carried out in specialized auto repair shops using the equipment designed for this. In the context of garage repairs on a VAZ-2109, the replacement of the vacuum brake booster is carried out with the installation of a new one.
Before deciding on a replacement, it is necessary to check the operation of it itself, as well as the check valve.
Checking the operation of the vacuum booster
To check the operation of the amplifier, you need to:
- Press the pedal with your foot, thus increasing the pressure in the brake system. In this case, the pedal remains in the depressed state.
- Keeping your foot on the pedal, start the engine.
- When the engine is started, the foot with the pedal begins to move to the floor, which means that the vacuum amplifier is working and the entire system is in good working order.
Note.
In another case, the leg with the pedal remains motionless, that is, in the upper depressed state, which means that there is a malfunction somewhere. First you need to check the vacuum hose at the connection points. Also check the non-return valve for leaks.
Check valve check
To check the operation of the check valve, you need to:
- inspect the joints of the pipes;
- feel these places with your hands;
- tighten the clamps at the joints of the branch pipes;
- on the inlet pipe fitting;
- at the fitting of the non-return valve, in vacuum.
Then check the valve itself. To do this, remove the rubber tube from the vacuum, if necessary use a flat screwdriver.
Since the tube is removed very tightly.
Take a pre-prepared rubber pear-shaped syringe with a suitable diameter for the fitting:
- Insert it;
- Squeeze the syringe;
- Squeeze air out of it.
Release the hand, if it remains clenched, then the valve check is complete. That is, the valve fulfills its constructive purpose. If the syringe is filled with air, then the valve will have to be changed.
You can also check the operation of the valve with your mouth:
- Blow out the air from your mouth, it should calmly pass into a vacuum;
- Then suction, no air should be felt.
This completes the check of the brake booster, check valve. If no defects are found in the parts to be connected and the check valve is working properly, the vacuum is replaced.
Replacement
This requires a simple set of keys:
- open-end wrench No. 17;
- head # 13;
- Phillips and flathead screwdrivers.
The repairs are carried out in the garage, where the hood should be raised and the stanchion installed.
Removing vacuum
Work order:
- remove the negative terminal from the battery;
- disconnect from brake vacuum rubber tube, first unscrew the clamp;
- disconnect the power supply terminal of the level sensor from the cover;

- then, in the passenger compartment, move the driver's seat to the extreme far position, as far as the runners allow;
- sink under steering column to the brake pedal.
Note: if necessary, due to lack of lighting, use a portable lamp with a protective torch.
- using pliers, remove the retaining ring from the bushing that connects the pedal itself to the vacuum rod connector;
- remove the rod, lower it to the floor of the body.
Note: The rod connector is a U-shaped plate with holes for attaching to the pedal bar.
- return to the set vacuum;
- now you have to carefully remove the brake master cylinder;

- it must be removed together with suitable brake pipes.
Note. This should be done in order not to add additional fill work. brake fluid, bleeding the entire brake system across all four calipers.
- clear threaded connection on the bushings of the master cylinder and use a metal brush to carry out this work.
Note. Carefully unscrew the nuts, turning back and forth several times so as not to break the threads on the screws. Remove the nuts from the screws, and also remove the washers that are in a compressed state.
To facilitate the work, use a flat screwdriver to go over the cylinder body and slightly, as carefully as possible, free them from sticking.
Note: if the nuts cannot be loosened, you need to drop a few drops of acetic acid 70% on them, wait 30 minutes, clean the thread with a wire brush and repeat unscrewing.

After removing the washers, it is necessary to proceed with the removal of the brake master cylinder. It will be difficult to remove.
Therefore, it is necessary to be careful not to break, not to bend too much brake pipes, sharply, but not hard to make an effort. You need to shoot forward, without deviations to the side.
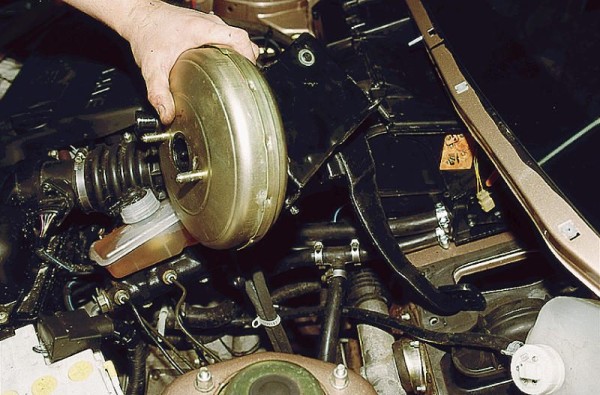
The last final step is the removal of the vacuum. It is attached to the bulkhead with a bracket.
- The bracket is mounted on two studs, clean the threads as described above.
- Unscrew the nuts, remove the vacuum together with the bracket.
Then, after removal, unscrew the two blind bolts from the vacuum. Move it aside.
Carefully screw the new vacuum onto the bracket. Reassemble in reverse order.
The price of a vacuum brake booster is 2500 rubles. When choosing it, you should pay attention to the packaging.
The packaging of the guaranteed manufacturer must be made of corrugated cardboard.
There should be a factory label on the box, which clearly reads:
- manufacturer's name;
- batch number;
- Release date;
- the article must also be indicated: 2108-3510010ТМ.
Since there is a fake on the market. Therefore, you need to buy from trusted sellers, in stores that have been able to establish themselves on the positive side.
When doing work with your own hands, you need to carefully watch the video. The most important thing will be to remember the order of the repair work.
For a better perception, take a photo at the place of repair. In advance, at home, number them in order. Performing work in turn, shift the photo down.
Do not be lazy to do this, since during assembly you can check the sequence of the correct execution of the process. It also does not hurt to read the instructions for performing car repairs in order to avoid unexpected situations.
The vacuum booster on cars of the VAZ family plays an important role not only in the functioning of the brake system, but also in the operation of the engine. So, for example, if the vacuum booster does not seal air tightly, then most likely the engine will triple and keep revs poorly.
In this article, we will consider the scheme for replacing the VAZ 2114 vacuum amplifier, it is also worth noting that the replacement is carried out in the same way in VAZ cars: 2108, 2109, 21099, 2113, 2114, 2115.
- keys for 13, 17;
- pliers;
- screwdrivers.
How to check a vacuum booster
There are various ways to test the operability of a VUT. Let's give 2 different ways, namely, checking with the brake system, as well as checking the previously removed VUT.
Of course, the first check is to inspect all brake hoses and pipes for leaks and leaks. We advise you to do this regularly, along with checking the brake fluid level, since your safety depends on the brakes.
1 way to check is as follows:
- turn off the engine;
- press the brake pedal several times, it should become tighter;
- then press the pedal again and hold it in the middle position;
- then, without changing the effort on the pedal, start the engine. If the pedal fails, then everything is fine with the vacuum cleaner, and if not, then most likely it needs to be replaced.
Method 2 can be used if you have already dismantled the VUT in advance. Add any cleaner (foaming) to the connection of the 2 circles of the amplifier and blow air into the hole where the hose is from the intake manifold. It is not necessary to do this sealed, you can simply direct the air stream from the compressor or pump. The place where VUT bleeds air will bubble. You can clearly see this method in the video below.
Vacuum booster replacement process
In order to change the VUT, it is not necessary to unscrew the brake pipes suitable for the brake fluid reservoir. Everything can be made much easier.
After dismantling, you can start installing a new amplifier. If you unscrewed the old VUT together with the bracket, then move the bracket from the old to the new one and reinstall everything in the reverse order.