The constant velocity joint (CV joint), or, as it is called in the common people, a grenade, appeared at a time when front-wheel drive cars began to enter the market, and its main task is to transfer the command from the gearbox to the drive wheel. If you remember, then in rear-wheel drive cars this function is performed by cardan transmission... For a front-wheel drive car, such a mechanism will lead to an increase in its size, and, accordingly, the price will also increase.
As for the VAZ-2109, this model has two CV joints: external and internal.
And today we will talk about how to replace an external boot for this car, since it is he who most often deforms and breaks.
Reasons for the failure of the CV joint
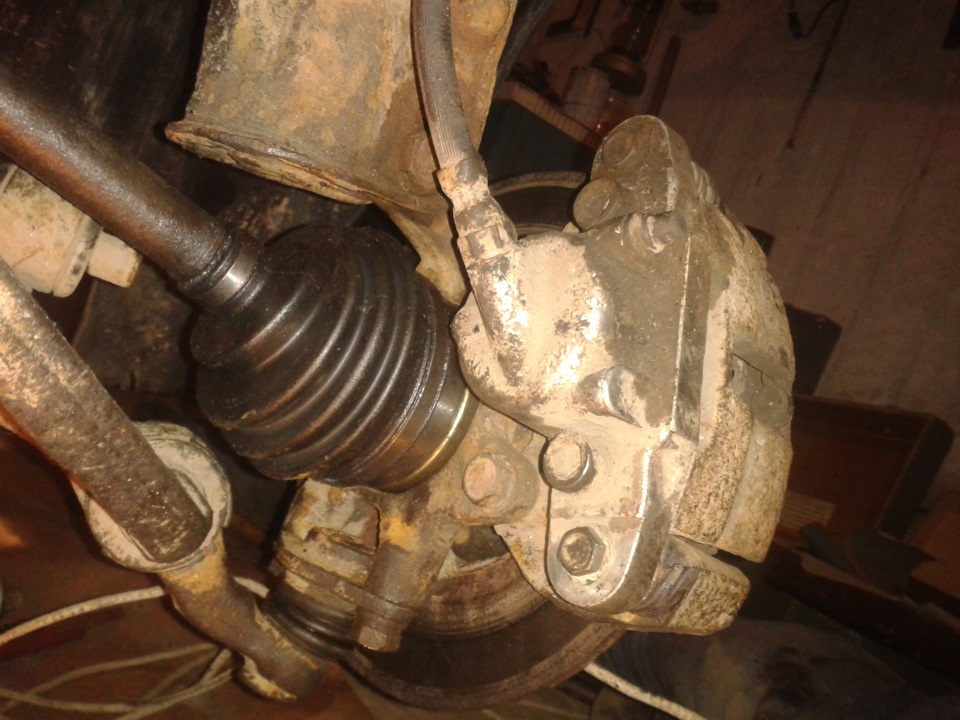
Unlike other cars, it is especially difficult for the VAZ-2109 to keep the grenade boot for a long period in working order. The main reasons for its failure, first of all, can serve as unfavorable climatic and external factors. As a result, cracks form on the parts, and its further operation will be impossible. Through the torn mechanism, dust and dirt enters the hinge, and because of this, the parts of the grenade wear out. It is not difficult to identify this: when the car is moving and when cornering, the car emits a "crisp" sound, and this is already the first signal.
If, after you heard a suspicious crunch in your VAZ-2109, you arrived at the garage and found traces of grease on the hinge, then you must immediately perform a complete replacement of the CV joint along with the boot, since the parts of this mechanism cannot be interchanged.
Instructions
Before proceeding with any type of repair, it is necessary to prepare everything that will be useful in the process of work. So, in order to remove a grenade from a VAZ-2109, we need a head of 30 (required to remove the hub nut) and 13 (to remove the ball nut), as well as a hammer and a screwdriver for clamps.
Let's get started?
Attention! The hub nut does not need to be tightened with great force. After installing the wheels, tighten the bolts without applying great physical force.
- We remove the car from the jack, and put the brick under front wheel and tighten the nuts tightly.
- Well, now pour oil into the gearbox.
The VAZ 2109 car, unlike its predecessors, has front-wheel drive... In its design, to transfer torque from the gearbox to the wheels, instead of a gearbox rear axle, serves, the so-called SHRUS (in the common people "Pomegranate"). Insofar as this mechanism is constantly in motion, its components quickly heat up. Therefore, to remove the temperature in the "grenade", use a special lubricant. And in order to prevent dust from getting on the part, and the grease does not quickly get clogged, they use special anthers - covers that protect the "grenade" from contamination.
By design, the car has two CV joints and two anthers - external and internal. The outer ones are installed on the hub, and the inner ones are installed in the gearbox mechanism. In general, this part is designed for a fairly long-term operation, but, like all parts and mechanisms of a car, it may require repair or replacement. How to make a DIY replacement, read on.
Symptoms and causes of breakage
In order to determine without diagnostics whether the "grenade" is broken or not, it is enough just to listen to the car. If in the process of driving, especially when cornering, a characteristic noise or knocking is heard from the front wheel, then your "grenade" needs to be replaced. And it must be carried out as soon as possible, otherwise the consequences can be catastrophic.
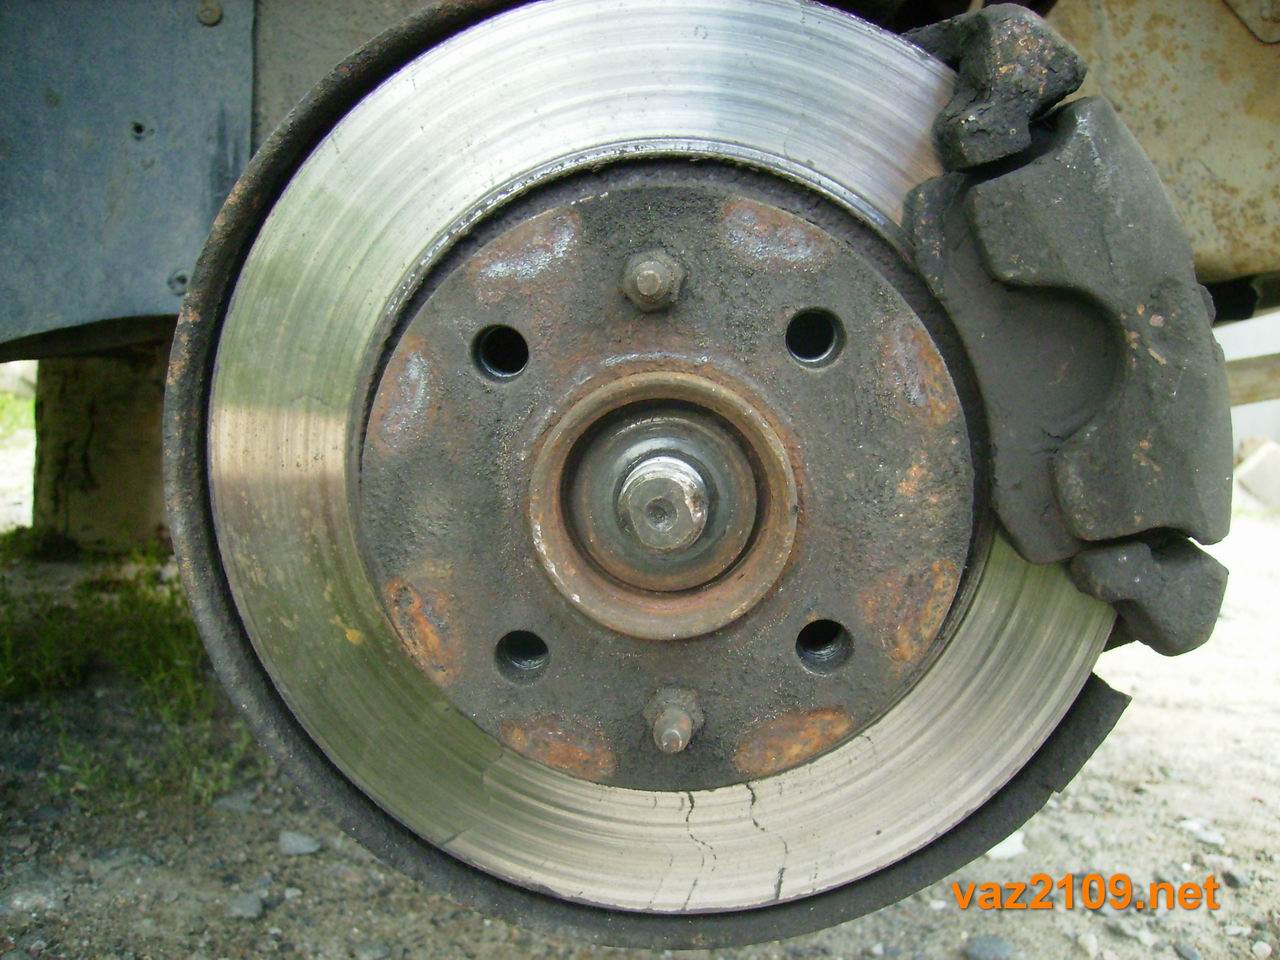
In order to make sure that the "diagnosis" is correct, you can check the backlash on the drive shaft. Try to shake it a little by hand, and the backlash will be immediately noticeable. With the check of the anther, the whole situation is much simpler. Turn the front wheel in any direction, until it stops, and inspect it for cracks or streaks. If they are, then both anthers must be replaced.
Interior
Replacing the inner CV joint of the VAZ 2109 is carried out in the presence of the following parts and tools:
- Vice;
- A set of keys;
- Hammer;
- Jack.
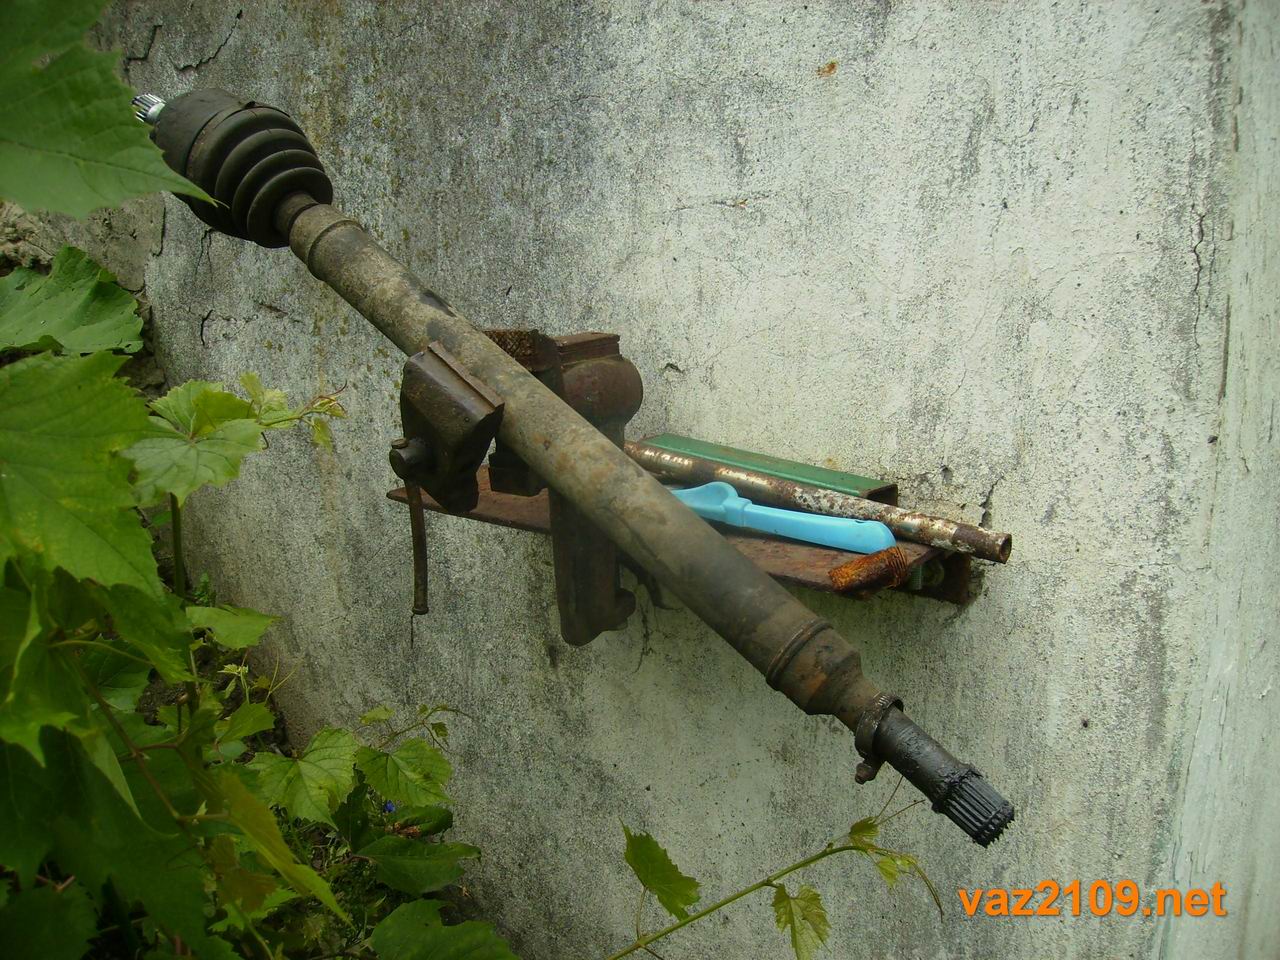
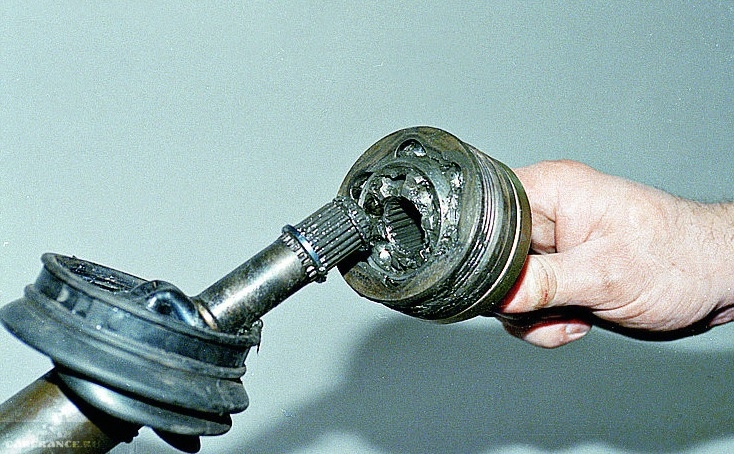
First of all, remove the complete drive from the car, and secure it in a vice. To remove the boot, you will need to dismantle the cv joint clamps. After this procedure is done, you can start removing the part itself. Using a hammer, apply a few hard blows to the part so that it comes out of the mount. At the end of this part, there is a plastic tip. It must be carefully removed for subsequent installation on a new "grenade".
Before replacing, all fasteners, and the CV joint itself, must be lubricated with a special grease. Next, carefully put on new part back to the drive. To do this, use a hammer and a piece of wood so as not to damage the part.
External
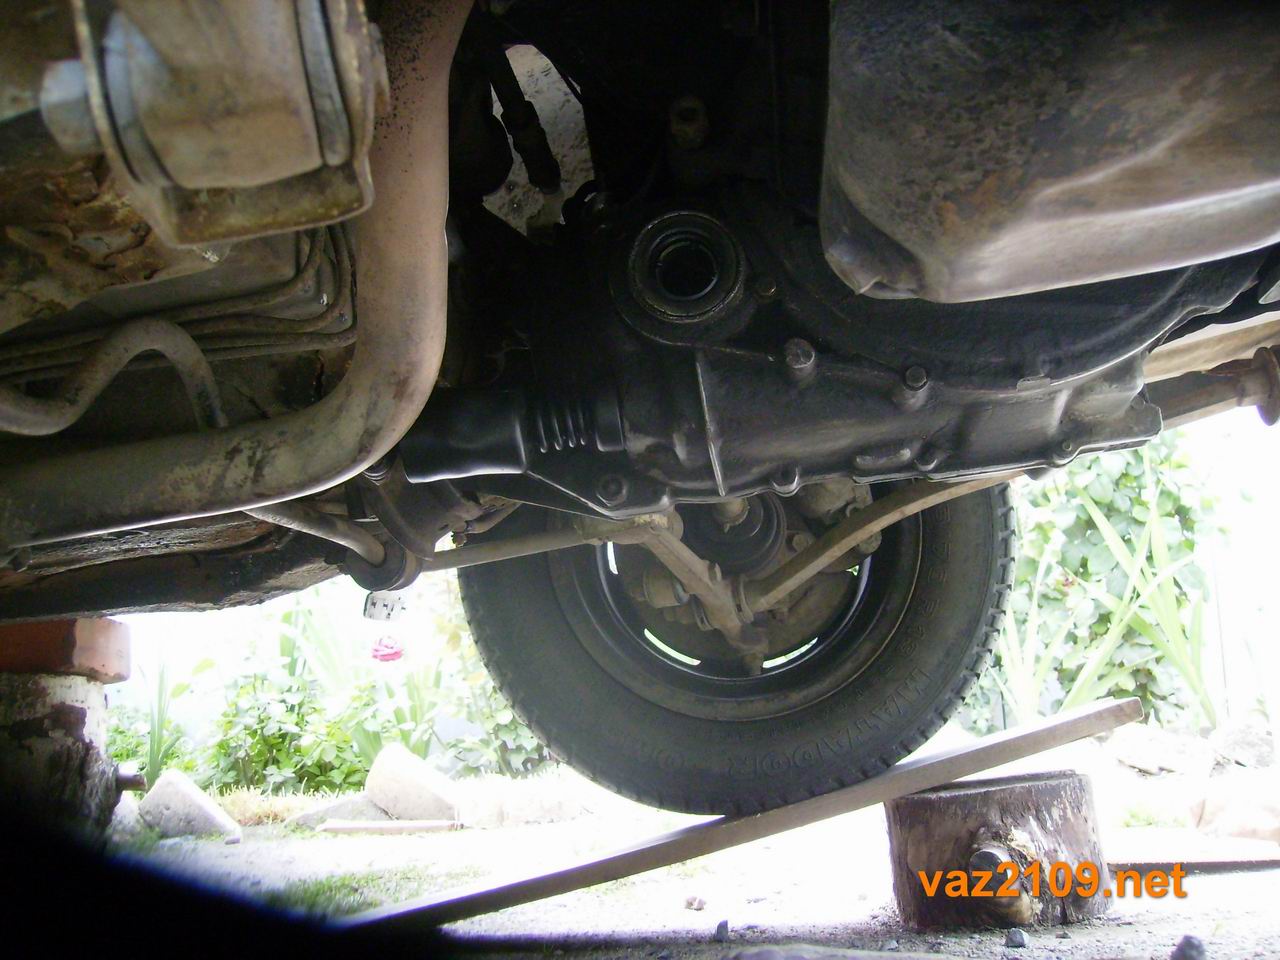
Replacing the outer CV joint of the VAZ 2109 is carried out mainly without removing the drive. To do this, the front wheels must be jacked up and the front of the car must be installed on special supports. The wheels must be suspended so that the drive can rotate freely.
Next, unscrew the screws securing the wheel, and remove it, and wheel turn all the way to either side. Disconnect the pivot pin from the spline end of the "grenade". Unscrew the boot nuts and remove it. Carefully knock out the inner cv joint from the gearbox, followed by the outer cv joint. The actuator must remain in place and secured.
Now, the CV joint can be replaced, or preventive maintenance can be done by washing it with gasoline. If damage is visible on it, then replacement is simply necessary. When replacing the inner grenade, insert a temporary plug into the hole in the gearbox, but do not secure it. After the replacement is completed, take out the inner "grenade" and replace the outer one in its place. Assemble completely and insert the cv joint back.
After everything is in place, put the wheel back, and check the operation of the steering wheel before driving. If the steering wheel turns normally, all the way, and is not accompanied by a crunch, then you did everything right.
During the operation of the car, it is periodically necessary to monitor the condition of the CV joints anthers. SHRUS is a constant velocity joint that provides torque transmission from the VAZ 2108 2109 21099 gearbox to the front wheels.
Very often you come across the fact that under the concept of CV joints, people understand slightly different things. Some people call the CV joint the entire transmission mechanism, some divide these concepts into inner and outer CV joints. If you think a little, it is clear that the common people call the CV joint the entire mechanism completely. However, the operating manuals divide the CV joint into internal and external, as well as the drive shaft. The inner CV joint is inserted into the gearbox, the outer CV joint is inserted into the hub, the drive shaft connects both CV joints.
Now let's get back to the anthers. The boot prevents dirt and moisture from getting inside the CV joint. Therefore, if the torn boot is not changed, then its grease will be washed out, dust will get in. The CV joint will start to crunch when cornering and eventually can jam and fall apart. A torn boot can be easily identified by the type of grease on its surface, or it often happens that it breaks in half.
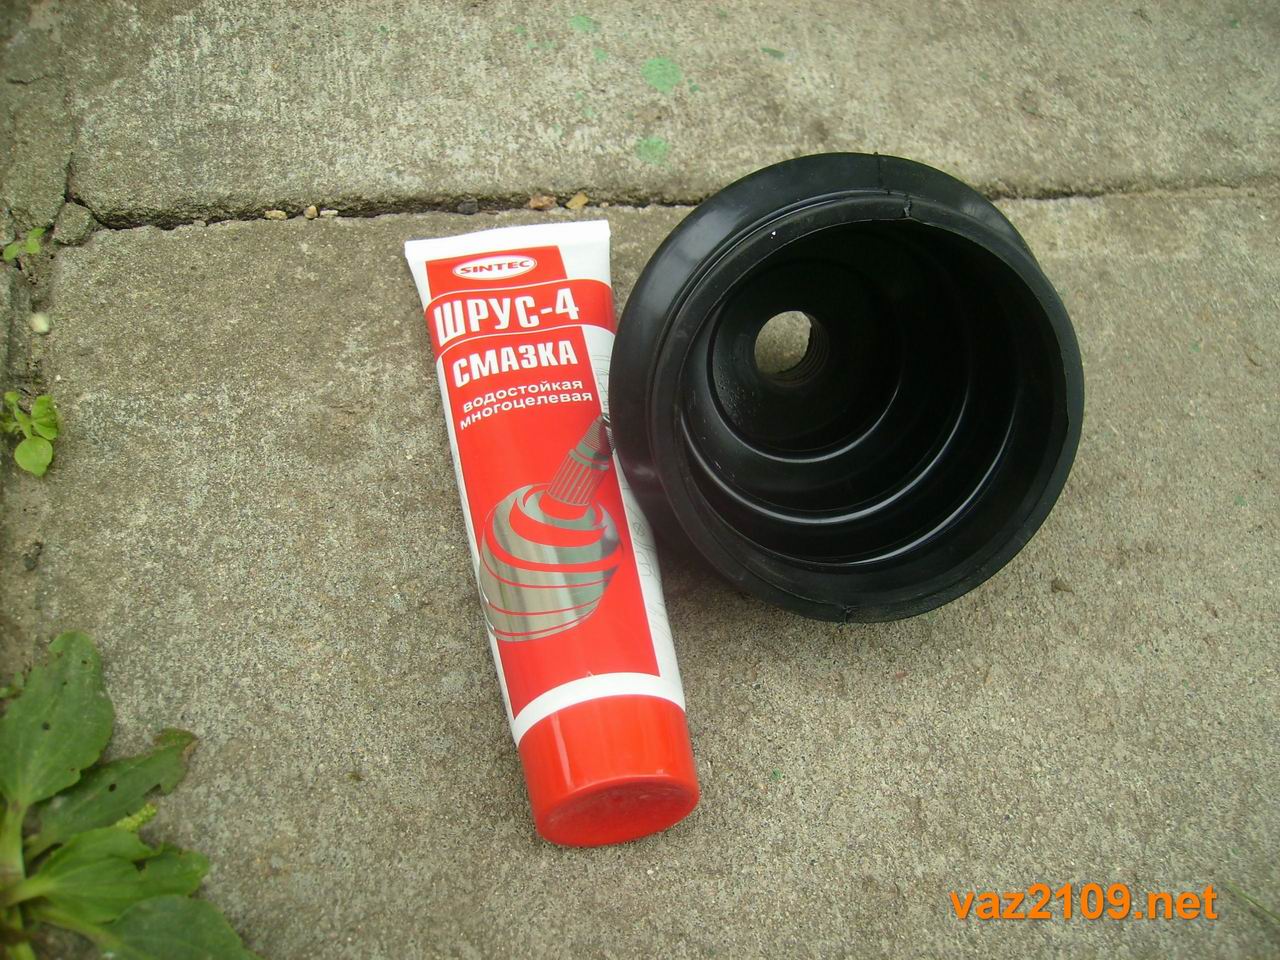
Before replacing, you need to go to a car shop and purchase a new CV joint boot, price $ 3. Also, grease for CV joints will be needed, the price is about $ 1. It is also necessary to pay attention to what clamps the torn boot will be pulled together, if necessary, buy new crimping clamps.
Replacing the boot of the outer CV joint VAZ 2108 2109 21099:
The outer boot breaks more often than the inner CV joint. This is because it deforms more strongly and more often during operation. From the tool you need to prepare:
- Head 30 to unscrew the hub nut.
- Head 13 to unscrew the ball.
-Hammer.
- Pry bar and pieces of thin pipes.
- Screwdriver for clamps.
1) The very first thing to do before replacing the CV joint boot VAZ 2108 2109 21099 is to drain from the gearbox. How to do this is described in detail in. The oil is drained because the entire CV joint will have to be removed, including its inner part inserted into the gearbox. Accordingly, if the oil is not drained, then after removing the CV joint it will spill onto the ground.
2) Loosen the hub nut before jacking up the machine.
We adjust the brick under rear wheels, countertrack the hub nut, then put the head on 30 on it and try to unscrew it. The hub nut is tightened with great effort, so good leverage is needed to unscrew it. Usually a piece of pipe, about half a meter long, helps in this. Do not under any circumstances try to loosen the hub nut on the gear and on the jacked-up machine - you can damage the differential of the gearbox.
3) After you have ripped off and slightly loosened the hub nut, you need to lift the machine. And only then unscrew the hub nut and remove its washer. Remove the wheel from the hub.
4) Then, with a 13 head, unscrew the two bolts securing the ball to the hub.

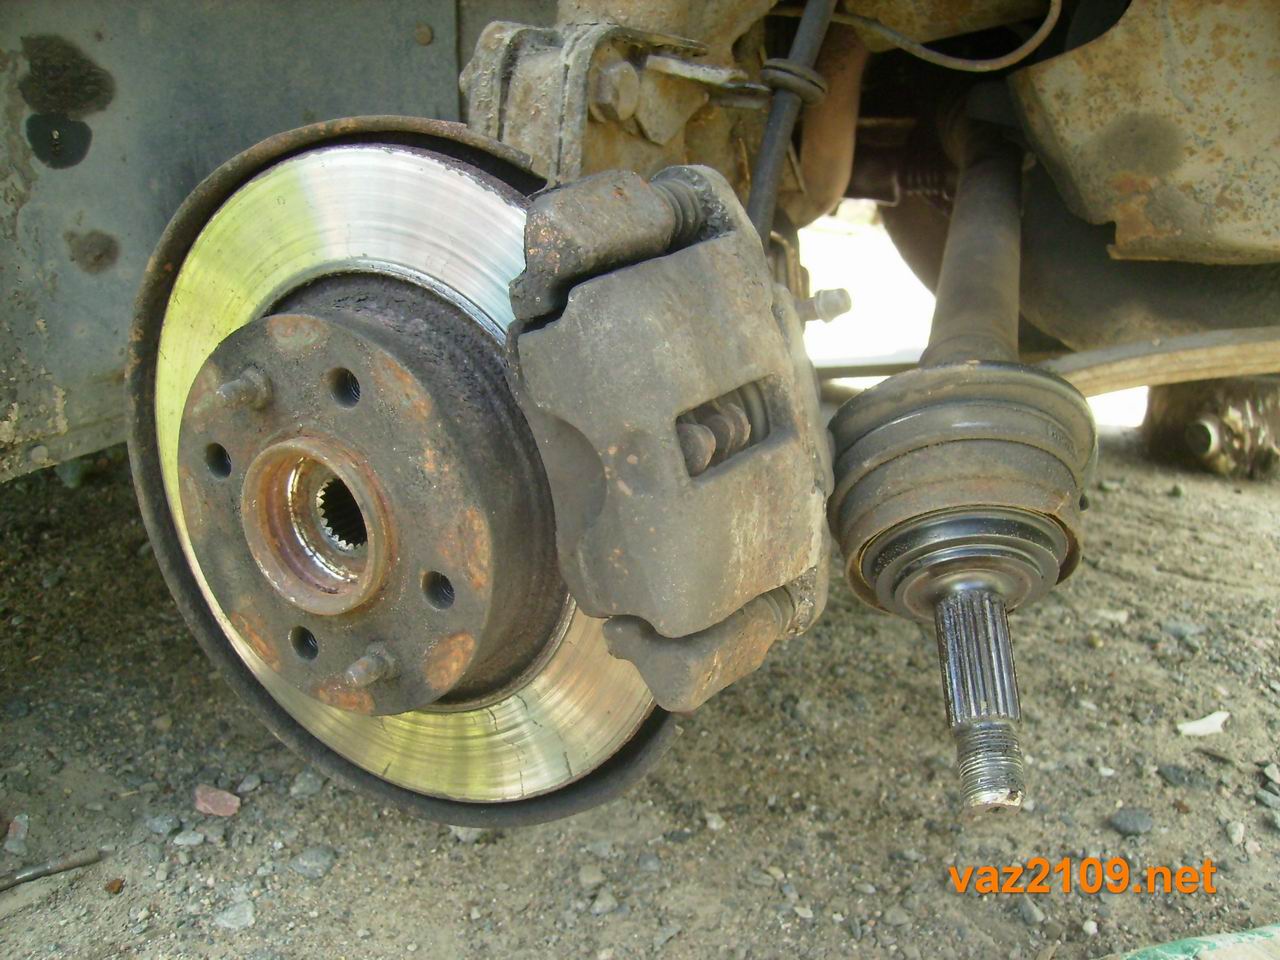
After that, it becomes possible to move the hub together with the front strut. Moving the hub, we take out the outer CV joint VAZ 2108 2109 21099 from the hub.
5) Now you need to knock out the inner CV joint from the gearbox. This is done by hitting the mount attached to the inner CV joint with a hammer.
If you don't have a pry bar, you can use a piece of pipe.
6) We take out the CV joint from the gearbox and carry it to the vice, in which we clamp its shaft.
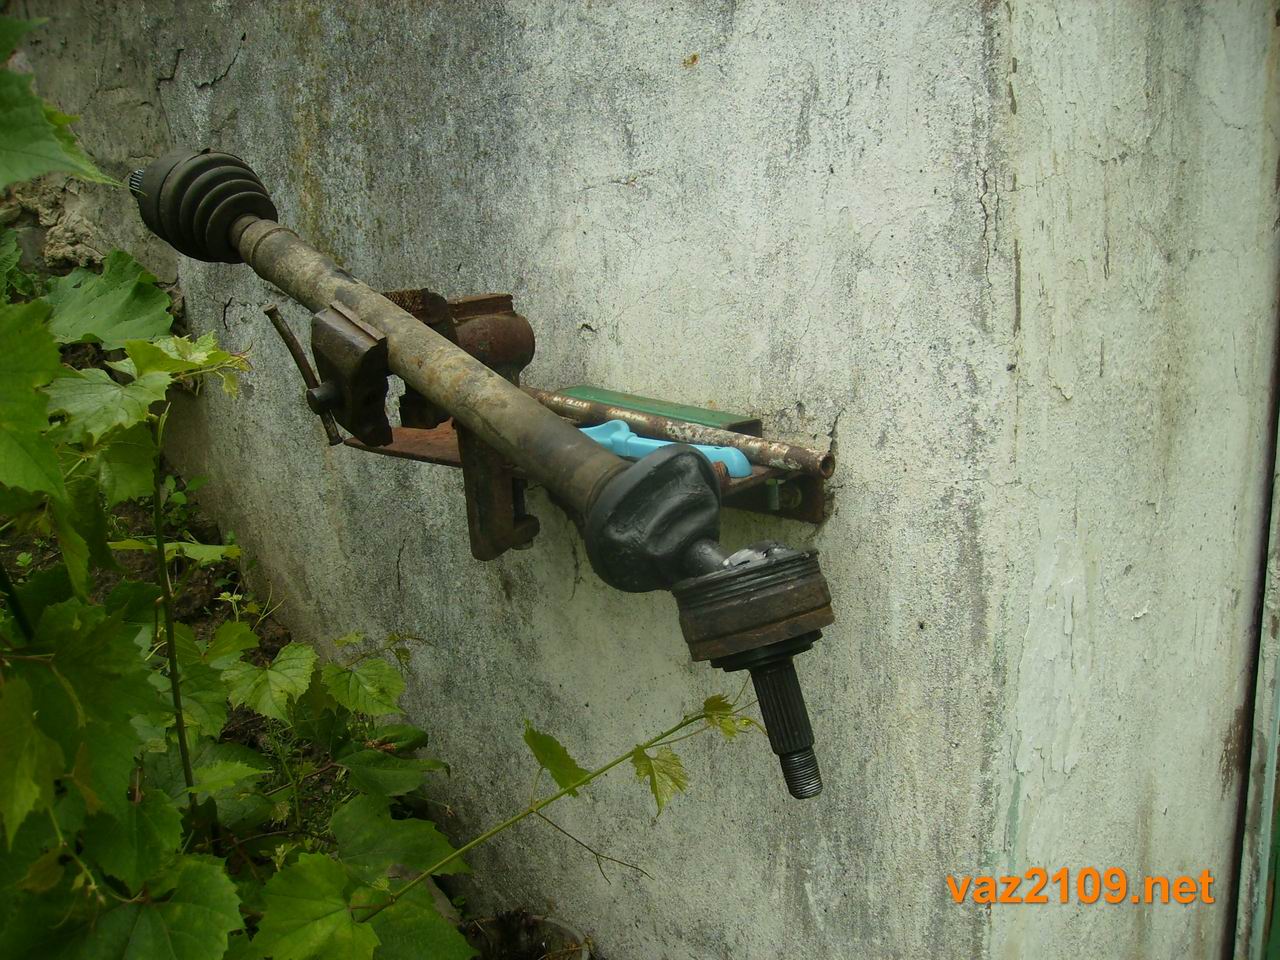
7) Now you need to remove the clamps from the torn boot. Then we bend the boot back to the shaft, or simply cut it with a knife and remove it.
By the way, the inner and outer CV joints are often called grenades. Well this is because when they are not on the shaft they look like grenades. On the Internet you can find articles "Replacing the external grenade Vaz 2109", or something similar.
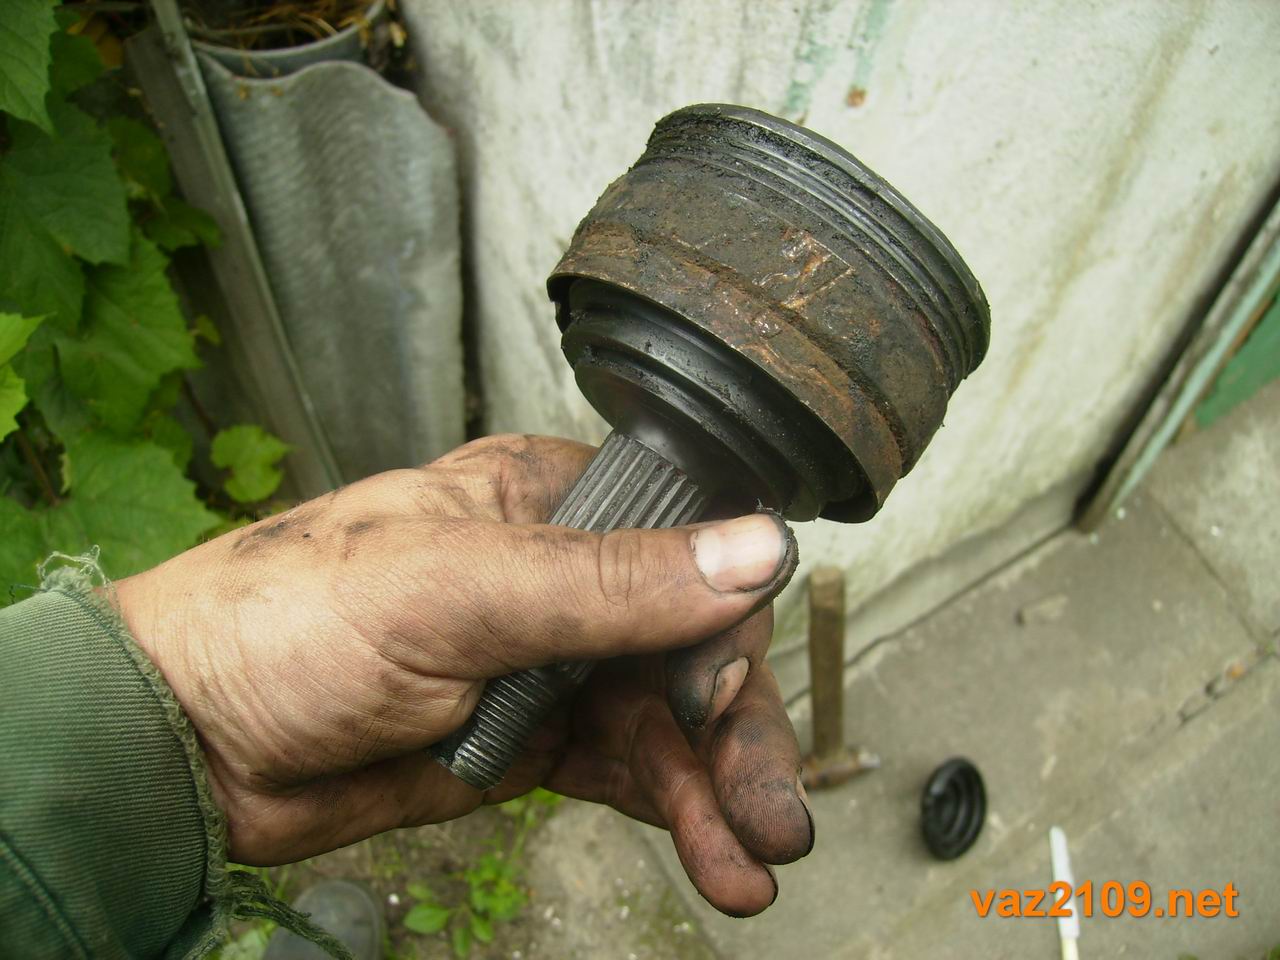
8) After removing the boot, we knock down an external grenade with a hammer.
It is necessary to beat on the very edge so as not to damage it. It is necessary to remove the old grease from the downed VAZ 2108 2109 21099 grenade, since it is already in the sand and dust.
Then you need to bathe the grenade in gasoline or kerosene and rub it thoroughly again, removing the old grease.
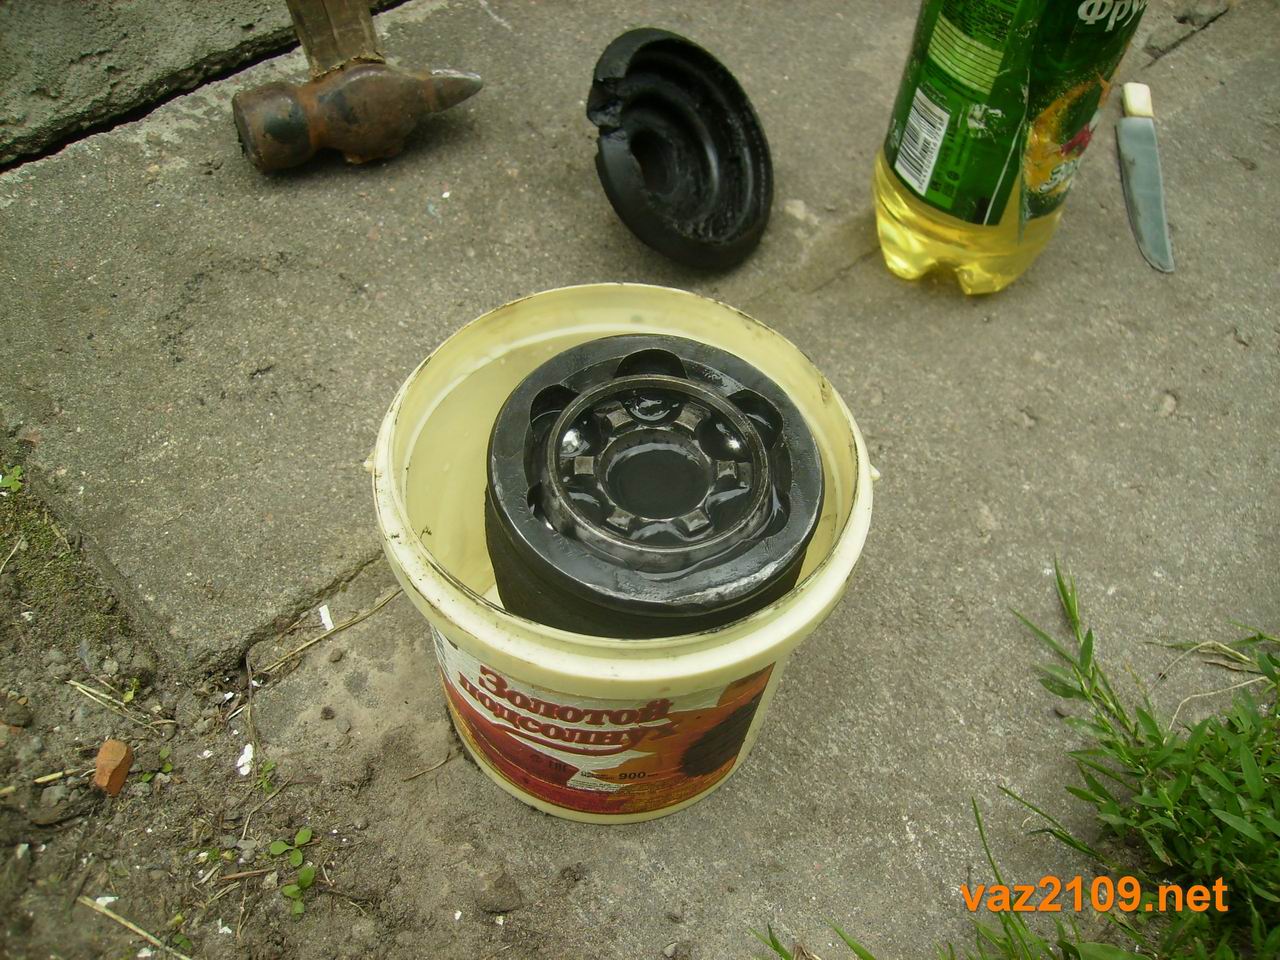
9) We put on a new boot on the drive shaft and bend it back. Using a hammer, we hammer the outer grenade into place. And now, carefully lubricate the insides of the grenade, each ball, clips, the insides of the boot with grease for CV joints.
Then we put the boot on the grenade and tighten it with a large clamp.

10) Now you just need to install the entire CV joint assembly back to the VAZ 2108 2109 21099. First, of course, we put it into the gearbox. Before that, do not forget to wipe the oil seal from dust. And we hammer the CV joint into the gearbox again with a hammer.
11) We put on the CV joint in the hub and screw the ball into place. We tighten the hub nut, not forgetting about the washer, but do not tighten it with great effort.
12) Reinstall the wheel and slightly tighten the bolts.

We lower the car from the jack, put a brick under the front wheel and tighten the hub nut with effort. The bead on the nut should be in the same place where you initially unscrewed the wheel.

We screw on the nut, excluding its spontaneous loosening.
13) It remains to pour oil into the gearbox and that's it, the replacement of the boot of the outer CV joint VAZ 2108 2109 21099 has been successfully completed.
Of course, if your gearbox is maintenance-free, then you will have to suffer a little with the filling of oil into the gearbox. I always pour oil through the hole, it is much easier to get to.
If you are doing this work for the first time, then pay attention to the following points:
- Remember to drain the transmission oil.
- Loosen the hub nut on the ground (not on the jack).
- Have a piece of pipe ready, as hub nut twists and turns with great effort.
- There is no need to be afraid to knock out the CV joint, when you do it for the first time, it seems that you will break it with a hammer. After you change your anthers a couple of times, you will remember your first experience with a laugh.
Replacing the boot of the outer CV joint of the VAZ 2109 is carried out quite simply, you do not even need to have a mechanic's discharge. Even complete replacement external grenades are not difficult if the car is cared for. The problem can be created only by unscrewing the hub nut. And that is, the small subtleties of this procedure, which will be discussed below. It is necessary to monitor the condition of the anthers when operating the car, otherwise the grenades will be destroyed as a result of dust, dirt, water getting inside.
 Insane grinding and knocking from the side of the wheels, especially when starting with the steering wheel turned to the side. This is the first sign that the grenades are out of order. The service life of CV joints is quite long, but many factors affect it:
- Driving style of a motorist. The sharper the starts, the shorter the life of the hinge. Likewise with braking.
- Anther care. If there is even a small crack, it is necessary to completely disassemble the drive, rinse the grenade in solvent or kerosene, dry, lubricate and install a new boot.
- The quality of the product at the time of purchase. Some manufacturers make hinges from low-grade steel, and this is unacceptable, since the mechanical effect is very large in magnitude.
Pay attention to the condition of the anther of the steering rack of the VAZ 2109. The convenience of driving a car also depends on it. But the replacement is much more difficult. The price of one set of external CV joint is at least 950 rubles. Moreover, the cost may differ, it all depends on the region and the greed of the sellers. Consists of a set of:
- Directly hinge.
- Two clamps.
- Anther.
- Pack with grease.
- Retaining rings.
But the price of the anther ranges from 150-200 rubles, plus new clamps - no more than 50 rubles. The difference is tangible, so it is cheaper to replace the boot than to repair the drive.
Removing the outer CV joint VAZ 2109

All work can be carried out without a viewing hole or overpass, it is enough to have a good jack and support. The disassembly procedure is as follows:
- Place stops under the rear wheels.
- Remove the front wheel cap.
- Unlock the nut using a sharp chisel and hammer.
- Using the “30” head and a long lever, break off the nut.
- Rip off the four wheel-to-hub bolts.
- Place a jack under the side to be repaired and lift it.
- Take off the wheel. It is advisable to install a support under the body.
- Pull the cotter pin out of the tie rod end pin and unscrew the nut.
- With a puller, pull your finger out of the steering knuckle.
- Unscrew the two bolts securing the ball joint. This will be easier than knocking the finger out of the hub with a puller.
- On the rack, the hub now "walks" freely. Personally, I knock out the inner CV joint with a small chisel and hammer. Literally 2-3 sharp and precise strokes as the drive comes out of the box. But be sure to drain 2/3 of the oil from the gearbox, otherwise you will lose it.
- You knock out an external grenade from the hub.
It is possible not to remove the drive completely, but this is not very convenient. It is much more pleasant to work with grenades, if they are available and they can be clamped in a vice, rather than bending into three deaths under the car. Before replacing the boot of an external grenade, assess the condition of the entire drive, whether there are any damages or defects. After all, it may turn out that it will not be required partial renovation, but full.
Replacing the boot with your own hands
Replacement procedure:
- Remove the two clamps.
- If you do not plan to use the old boot anywhere, you can cut it with a knife.
- Using a hammer and a wooden spacer, knock down the outer CV joint. Try not to damage it, it is advisable to fix the drive shaft in a vice.
- It is advisable to replace the boot and the inner grenade, so that if something happens, do not do the work again.
- You wash off old grease and dirt with a grenade.
- Install new anthers and put on the inner CV JOINT VAZ 2109.
- Fill the grease under the boot. It is better if you put more grease in there than in the bag that came with the kit.
- Fix with clamps.
- Install the drive in reverse order.
The repairs on the left and right sides are the same, although the drive shafts are different. Inspect all components carefully to make timely replacement. In particular, pay attention to the condition of the steering tips, rack anthers, shock absorbers, ball joints.
Video about replacing the CV joint boot on a VAZ 2109 car:
You will be interested in:
With the development and introduction of front-wheel drive vehicles into production, the question arose of creating a constant velocity joint - CV joint, which would transmit torque from the gearbox to the drive wheel. In rear-wheel drive cars, such a moment is transmitted by a cardan transmission, which has a cross-piece and four needle bearings in the design.
The use of a similar unit in a front-wheel drive car leads to an increase in its dimensions, which means that the price of the product becomes higher. In addition, the transmission of torque is accompanied by vibration, the greater the angle between the shafts - driving and driven, the stronger the vibration.
Two types of CV joints are installed on a VAZ 2109 car:
- Outer CV joint - engages with the wheel hub.
- - transfers torque to the shaft from the transmission.
This article will consider the question of how to replace the external boot of the CV joint VAZ 2109.
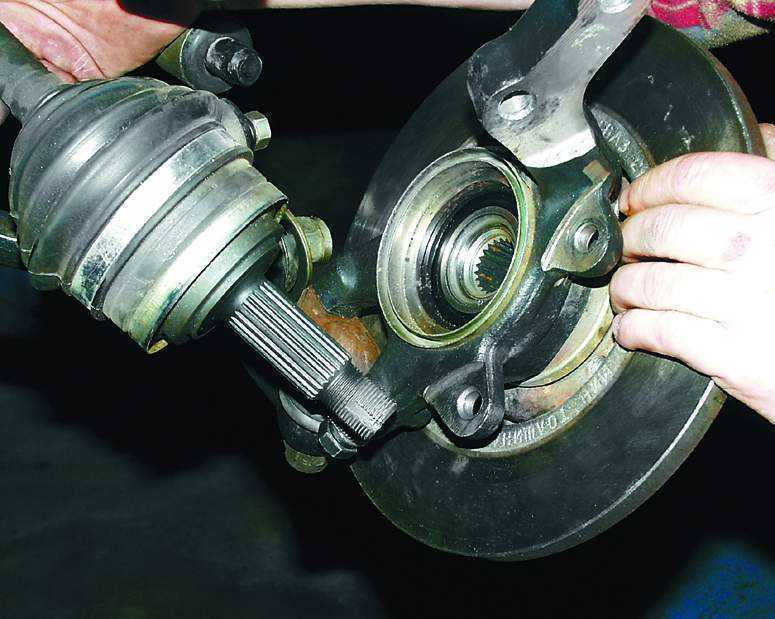
The design of the outer hinge VAZ 2109
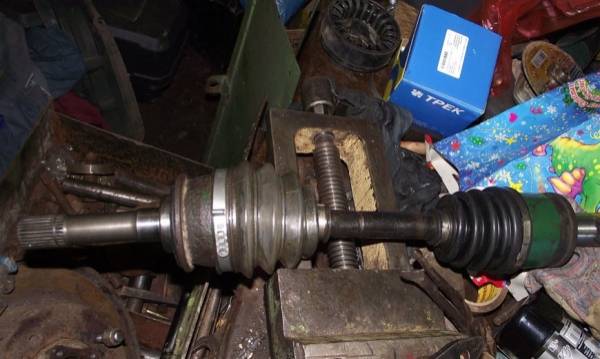
The photo shows the main elements of the node:
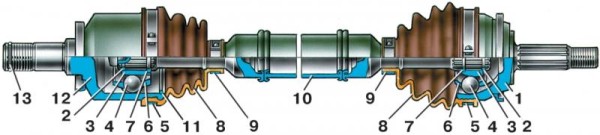
Here the positions: 1 - grenade body, 2 - separator, 3 - clip, 4 - balls, 5 and 9 - clamps, 8 - boot.
When developing CV joints, it was assumed that their resource would be similar to the resource of the entire car, but deviations were identified during operation. It is especially difficult to preserve for a long period of use in a VAZ 2109 car.
The use of flexible moisture- and frost-resistant material for its manufacture made it possible to somewhat increase the resistance of the product. But, under the influence of unfavorable external factors: moisture, abrasive particles, element deformations, cracks may appear on the parts, which are unacceptable for its further operation.
This is due to the fact that dust and dirt enters the hinge through the torn boot, which leads to wear of the internal parts of the CV joint. As a rule, this can be detected by the appearance of a crunch when the car moves around corners.
Therefore, you need to constantly monitor that the boot of the outer CV joint of the VAZ 2109 is replaced in a timely manner.
How to replace the boot of the outer CV joint of a VAZ 2109 car
Damage to the integrity of the boot can be identified by traces of grease on the hinge. All parts of the CV joints are not interchangeable.
Therefore, the best option for reliable operation of the unit will be complete with the boot. But, if, nevertheless, it became necessary to change only the boot, it is necessary to remove the CV joint along with the axle shafts.
The instruction indicates that for this you need:
- Install the handbrake on the vehicle.
- Secure the rear wheels by placing stops under them.
- Loosen the nut securing the CV joint in the wheel hub.
- Place the front of the machine on the stands.
- Then the wheel is removed.
- The steering rod is disconnected.
- The ball pin is pressed out.
- The lower ball joint is disconnected from the steering knuckle.
- The steering knuckle, simultaneously with the rack, is pulled back and the outer CV joint is released from the hub.
- An inner CV joint is pulled out of the box.
- The drive shaft is fixed in a vice.
- The clamps that hold the boot are removed.
- If it is necessary to revise all parts of the unit, then even if the clamps and anthers are intact, it is better to replace them with new ones.
- The hinges are knocked off by a drift made of bronze.
- The anthers are removable.
- All parts are washed in gasoline.
- Do-it-yourself assembly is performed in the reverse order.
- A boot is installed on the shaft.
- The inner CV joint is put on.
- A new retaining ring is installed.
- The outer CV joint is assembled.
- The inner and outer SHRUS are joined.
- An anther is put on the grenade, grease is preliminarily put in it.
- The clamps are tightened on the shaft, then on the grenade.
Advice: Before tightening the bolts, you need to release the "excess" air from the cover. To do this, the seat belt of the cover is pulled from the drive shaft with a screwdriver.
- In the area of tightening and fixing the clamps, it is necessary to check for cracks, deformations, traces of contact with the road surface of the clamps. Otherwise, they need to be replaced.
- Before filling the drive shaft into the gearbox, a plastic plug is installed on its end.
Tip: To ensure a full fit in the differential of the drive shaft, you need to knock on it lightly.
- The splines of the differential gear and the shaft are joined.
- The outer hinge shank is inserted into the hub. For this, the rack is pulled back and rounded fist, and then the splines are refueled.
- A new fixing nut is installed and tightened.
Tip: The final tightening of the nut should be done after the wheel has been mounted and when the jack has been removed.
How the replacement of the outer anthers of the CV joint VAZ 2109 is carried out is clearly visible in the video.