In this article, we'll look at how to improve appearance the instrument panel, changing at our discretion the brightness and color of the illumination of the instrument scales and buttons, since according to these parameters, the standard VAZ 2109 instrument panel does not suit all owners of these cars. To do this, we will install LEDs instead of the usual incandescent bulbs used in the instrument panel illumination. They have a brighter glow and come in a variety of colors to choose from. Standard colors are white, red, green, blue, purple is also found. Please note that LEDs with a conventional base like a light bulb are used to illuminate the buttons, and to illuminate the instrument cluster, you need to install such an LED in a special holder, you will need soldering. But you can also purchase a ready-made LED already mounted in a cartridge.
In addition, there are commercially available LEDs having a dotted glow, when the light of the diode is narrowly directed in only one direction (forward), and LEDs having a diffuse glow, which is achieved by a special shape of the LED lens. Which one is preferable to you, choose for yourself. So let's get started.
Illumination of the heater control console (stove).
We remove the plastic handles of the stove dampers control levers. We remove the glass of the stove control unit by picking it up with a knife. We make a reflector out of foil and fix it under the glass of the VAZ 2109 stove control unit. If it is not made, the console illumination will be concentrated only at the place where the backlight LED is installed next to the stove fan speed control knob, and will decrease towards the opposite area, which does not look too much attractive.
Then we unscrew the lower part of the center console (beard), remove the cartridge with the backlight lamp of the stove control unit and change the lamp to an LED. Putting everything together in reverse order.
It should be noted that with a simple replacement of the backlight lamp with an LED one, despite all the tricks, it will not be possible to obtain a completely uniform illumination of the heater control panel. Although this is all better than the stock backlight.
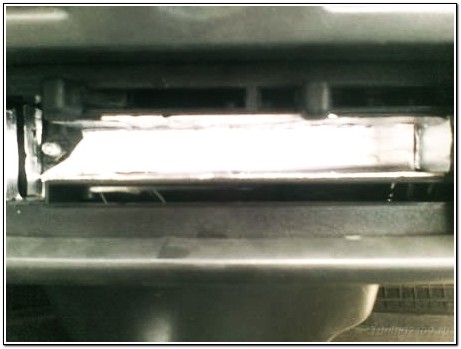
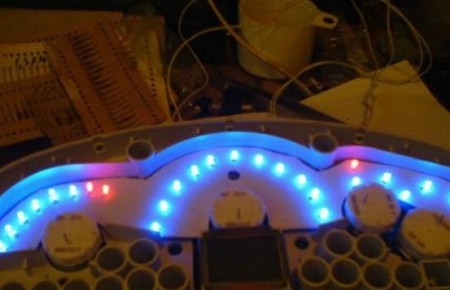
For the final finishing of the backlight of this node, it is best to stick to the bottom led strip 10 cm long, solder 2 wires (plus and minus) to its contacts, and connect the wires to the backlight lamp holder of this unit. Just proceed carefully, do not leave bare sections of wires to avoid short circuits!
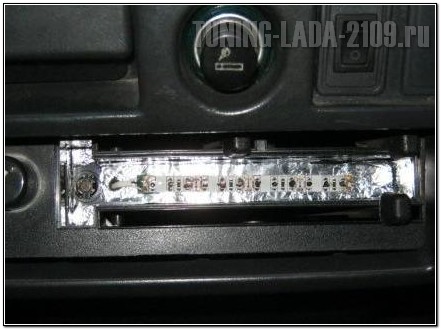
Heater control panel LED strip
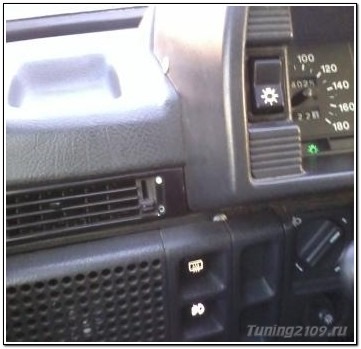
The heater control panel illumination now shines brightly and evenly over the entire area. Moreover, this backlight is noticeable both day and night.


This is what the backlight looks like during the day
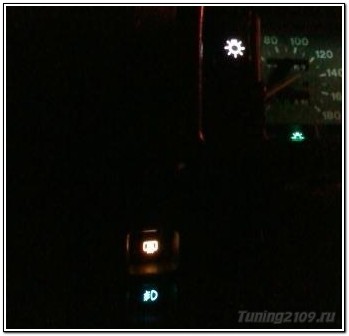
However, if in the daytime everything is fine with the backlight, then when it gets dark, I realized that the brightness of such a backlight is excessive for me, and it would be nice to make it a little less bright. You can, of course, adjust the brightness of the entire instrument panel illumination using the appropriate regulator to the left of the steering wheel, but the brightness of the other instrument panel illumination lamps suited me, so I did it differently. We take a black marker and paint over the coating over the LEDs (I have an isolated LED strip) to the desired level of light transmission - and the problem of excessive brightness is solved. The photo above shows the illumination version already modified in this way. You can also cover the LED strip with a piece of tint film, the effect will be the same.
Illumination of buttons on the instrument panel.
The procedure is extremely simple: we remove the button from the panel, pry it with a screwdriver (carefully), disassemble it, take out the light bulb installed in it, install the LED of the color you like in it, remove the light filter and put everything back together. This is what the revision looks like: the buttons and the instrument cluster glow bright white.

And this is what the white backlight looks like during the day:
It is possible not to remove the light filter from the button, but on the contrary, by selecting a light filter, create a suitable brightness and color of the button glow. On my car, the illumination of the heating button rear window orange, fog lights turn on buttons in turquoise color. The turquoise color is obtained as a result of the glow of a white LED through a green filter.
The illumination of the alarm button in a foreign style is made red.

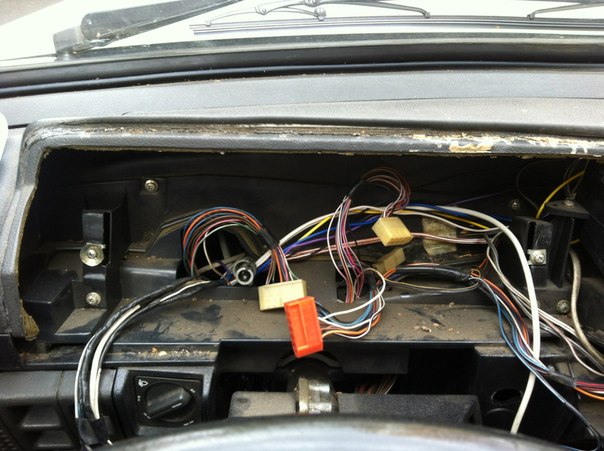
For the last year and a half, for some unknown reason, I drove without the illumination of the instrument cluster, and replacing the bulbs did not help. After suffering all this time, throwing a glance at the devices only when driving past the pillars, I decided to tackle this issue.
1.Firstly, we remove the instrument cluster 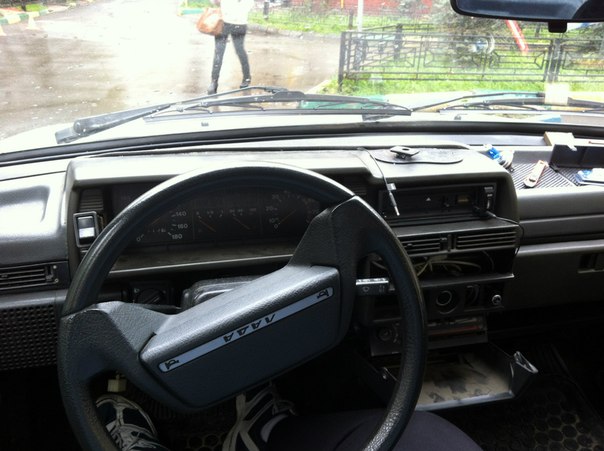
2.
3.
4. PROFIT !! 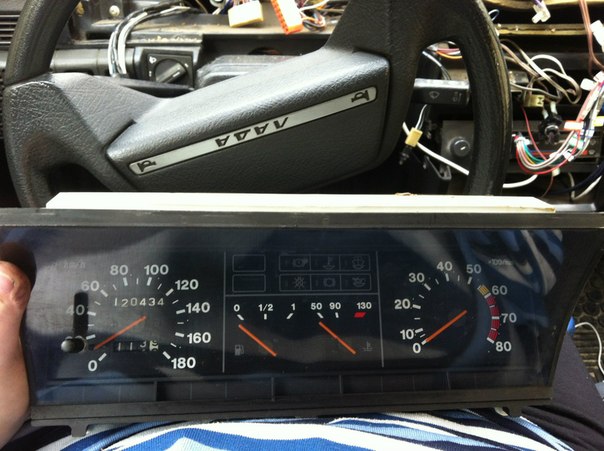
5. We disassemble it 
6. To do this, unscrew the five screws at the back and pull off the twist at the front 
7. Remove the loop of the old backlight by unscrewing two screws from the back side 
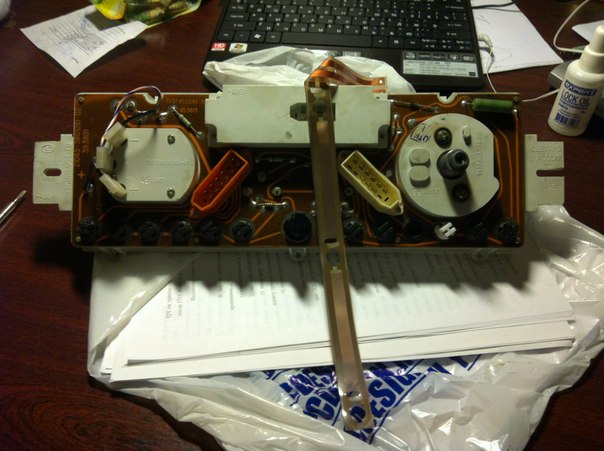
8. The UV lamp did not fit inside the combination itself, I considered it dangerous to disassemble it, so I decided to tear off the backlight fixture and put a lamp instead. 

We also take out the light filter. 
9. We fix the lamp - I decided not to soar my brains and stuck it on liquid nails 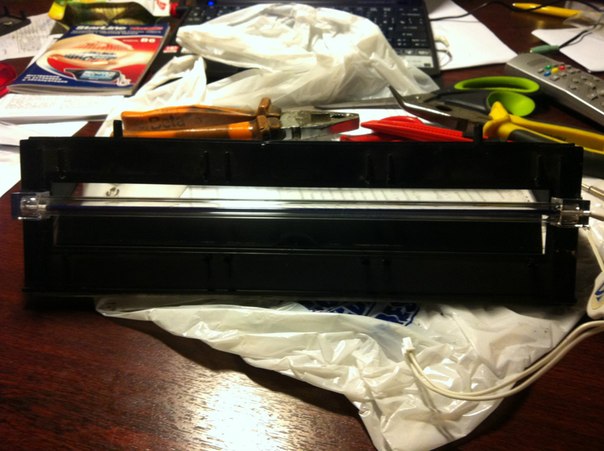
10. Let's move on to the numbers. I painted them with toothpicks, a microbrush from the children's kit and a brush from nail polish. The most convenient was a children's brush, and, in the end, I began to paint only with it) 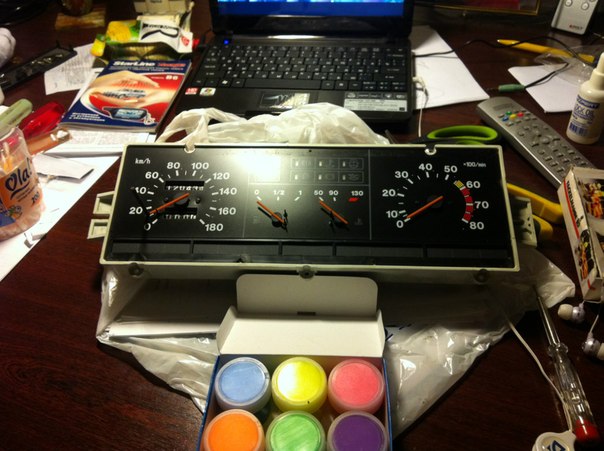
This was the end of the first part of my attempts, the next day I drove like this 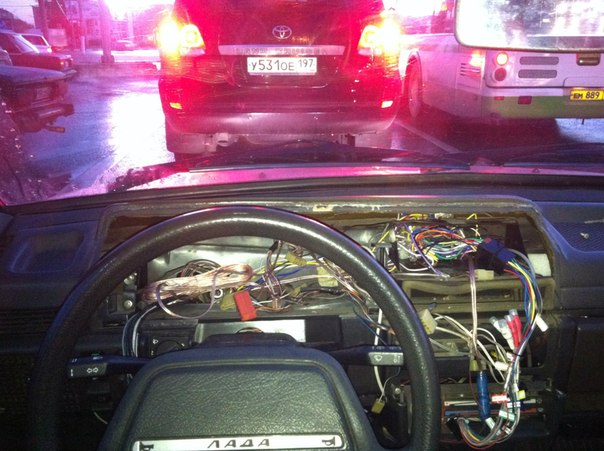
In the evening I went to the dacha and continued there.
11. Intermediate state of the combination 

12. The next day, I began to put everything together. There was a switch with the lamp, I decided to reduce the number of construction details, so I tore it off, and connected the lamp to a block that fits the combination. The wire responsible for the backlight is located in the red block: the third from the left in the top row, color - white. 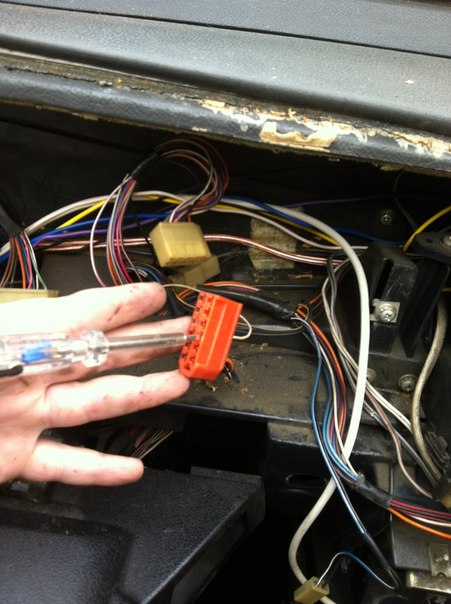
12V appears on it when the dimensions are turned on and the tension on it is regulated by a standard rheostat, so everything is nishtyak.
13.In assembled form, everything looks like this 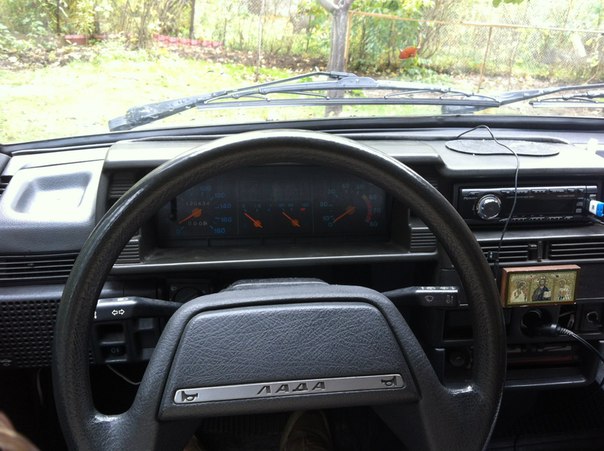
14.Result 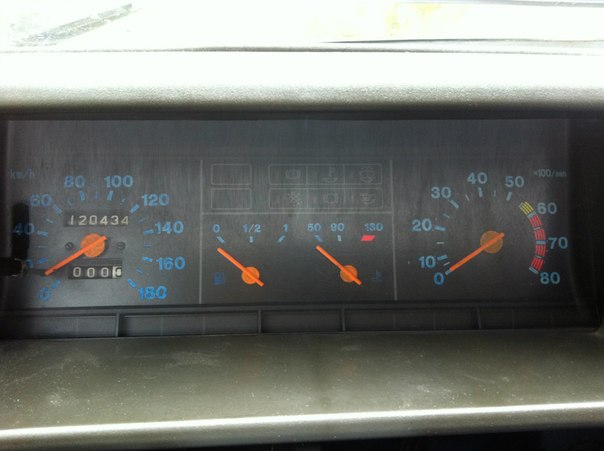

15. Outcomes
All over Moscow I was looking for a UV lamp and fluorescent paints: I traveled around Savel, Gorbushka, a couple of lighting stores - as a result I found it in a pc-design store. First I wanted to use LED strip, but they are sold only from 5m, and rivet it from LEDs and resistors myself It took me about 7 hours, taking into account interruptions, distractions, laziness, and the like)) If you do it purposefully, then you can keep within 4-5 hours. About a week has passed since the installation, and I still delighted with the result))
The instrument panel illumination of the VAZ 2109 often does not suit drivers. You can change the color and its brightness on your own without contacting the salon for help.
To improve the lighting, you need to install LEDs instead of conventional incandescent bulbs. Their glow is much brighter, in addition, you can choose the backlight color of your choice: blue, green, red or white. These are the primary colors, but if you search, you can also find purple LEDs.
Replacing bulbs or caps must be done carefully and carefully. If the car owner decided to use LEDs to illuminate the buttons, then it is necessary to purchase a light bulb with a conventional base. Soldering and a special cartridge are needed if there is a desire to replace the instrument cluster illumination. Among the many LEDs, there are those that have a diffuse or, conversely, a point glow.
These effects are achieved using a focusing lens configuration. A more uniform illumination is suitable for illuminating the scale on the dashboard, and a brighter light for the button icon. Each driver should take into account the peculiarities of changing the design when improving his car.
Illumination of the instrument control panel
Carrying out tuning inside the cabin, some drivers purchase the necessary parts in specialized stores or make them with their own hands. When redesigning lamps, you need to maintain the original dimensions so that you can easily put them in place of your relatives. Usually they put the backlight on the control panel of the stove and devices. Some designers use backlight for voltmeter, watch, oil pressure indicator.
To illuminate the stove, you first need to carefully remove the plastic levers that control the dampers and remove the glass. The stove itself is located under it. To do this, take any sharp object (knife or scissors) and gently pry the glass. Prepare foil according to its size. It will be an additional source of illumination.
Attached to the inside of the glass, it will give a very attractive look to the stove, and the console lighting will not focus only on the place where the LED is installed next to the handle.
The next step is to remove the lamp holder from the backlight of the stove control unit. The lamp needs to be replaced with a purchased LED. In order for the light to spread around the entire perimeter of the stove, an LED strip is used, which is glued to the bottom. Two wires are usually soldered to the contacts, which are connected to the cartridge.
All connections are carefully insulated. The assembly is carried out in the reverse order. If one of the parts does not work, check all contacts and connections again. The illumination of the control panel of the stove will become much better and more modern, the light from it will spread around the entire perimeter both during the day and at night.
Backlight replacement features
 How can I change the panel, making it a designer one? You need to be extremely careful and accurate when removing and disassembling the dashboard, so as not to subsequently violate the correctness of its readings. Often, when disassembling, the chrome plating of parts suffers. So be patient and get to work.
First, remove the dashboard shield. You can read about how to change it in the repair manual for your car brand. Then remove the instrument cluster, disconnect the plugs, bend the speedometer cable and replace the bulbs. Remove the filters gradually from the buttons. It is better to leave the green-blue light gamut on the panel unchanged, but replace the green light filters completely.
You can make the rear window heating button backlight orange, and the fog light button turquoise. This can be achieved by passing the white color of the LED through a green filter. Foil fixed with double-sided tape can serve as a reflector. The backlight of the hazard warning lights should be red (like in foreign cars). In this case, the polarity is of particular importance.
In a ring filter, using a file, you can make triangular cuts through which light will be scattered. The overall illumination pattern will become more uniform. It's time to check if the LEDs are working properly. Only after this check can a constant voltage of 12 V be applied.
Instrument arrows are often changed to special ones with backlight. This effect is achieved by a lamp located near the axis. Every driver who has basic knowledge of auto mechanics and who has made a little effort can boast of a beautiful dashboard. Improve the design of the VAZ 2109 and enjoy it!
Probably every car enthusiast who is the happy owner of some nine wants to do something with his dashboard. The illumination of the VAZ 2114 looks somewhat better and the scales and instruments look more fun, but there is still something to change there.
On foreign cars, the instrument dial is illuminated from the inside. It looks as if the instrument dial itself and the numbers are glowing. The instrument panel of the VAZ 2108, VAZ 2109 is illuminated by lamps emitting light on the dials from the outside, from the arrows. The brightness is not high, and the detail of such backlighting leaves much to be desired.
Tuned backlight vaz 2109
You can try to make your own panel illumination from the inside, like on foreign cars. For example, let's take a high panel VAZ 2109. It is worth noting that panels in a specialized company are not cheap.To work, you will need a standard light-transmitting trim for the instrument panel. We remove and disassemble the dashboard from the car, the instrument arrows and the old trim are also removed. For better illumination of the illumination light on the cover from the inside, we will make cutouts on the surface under the cover. This can be easily done with a soldering iron or a heated knife.
Electrical part
Now let's move on to the highlight itself. It will be organized using LED strip. Choose a tape that can be cut into pieces of three diodes. The uniformity of the glow using a reflector made of ordinary foil.For the tachometer and speedometer, take 3 pieces of tape each, for the coolant temperature and fuel level indicators, one piece is enough.
The standard illumination of the vases should be preserved, since it will highlight the arrows on the instrument scale. It, if desired, can be upgraded by gluing an LED strip in place of the standard lamps. You can tint it a little so that the backlighting is not too bright. Tinting is carried out using a black marker or tint film. It is advisable to leave the standard light filter, then the backlight light will become uniform and soft with a bluish tint.

Everything is connected to the contacts on the plate of the standard illumination lamps. Do not forget to determine their polarity beforehand. In order to stabilize the current, it is better to use a driver to power the LEDs.
Then we check how it works. To do this, we supply 12 V power to it. direct current... If everything is fine, you just need to correctly calibrate the arrows on the instruments, and the work is finished.
Illumination of the instrument panel VAZ 2113, VAZ 2114, VAZ 2115, Lada Samara 2
The panels of the new, comparatively, models are somewhat different, but they also require some improvement in lighting. Of course, there will be such a desire.
To do this, you will need to remove the VAZ 2113 instrument cluster and completely disassemble it.
You also need:
- 28 LEDs with a diameter of 3 mm (red 5; blue -23);
- resistance 1.5Kohm (for red LEDs) and 1.1Kohm (for blue). That is, for each LED, there are 28 pieces in total;
- a piece of plastic measuring 30 x 10, about 1 mm thick, not very hard, of any color.
Disassembling the panel
We remove the main backlight lamps along with the cartridges. Then we remove the arrows, you need to tighten it carefully, prying it with something thin. You can also just crank around the limits and gradually pull off the axis. There are too many types of panels today. On some of them, the arrow drive is fixed on the main board, and on others on the basis of plexiglass.Then carefully remove (tear off) the plexiglass insert. We pry it off the edge and just tear it off. The sticky layer does not need to be washed or stained. Turn the insert over and place it on a clean surface. The green dusting, which is visible in the area of the numbers, must be erased with a blade. Just don't overdo it. After that, the numbers and dashes turn white to light. Then we collect plexiglass and insert.
We take scissors (you can use a knife, nippers, etc.) and a piece of plastic. Let's cut out the outlines so that the plastic fits into the main part. We will also cut out the places for the arrow drives.
It is necessary to mark the LEDs. You can try on by eye, substituting the top of the panel. For temperature, 4 LEDs are required, for fuel 3. Set by the numbers on the dashboard for each scale.
Then at the base with markings we make holes for resistances and LEDs. You can do this with a small drill or a hot awl. The crown of the LED must be ground off, since there is a lens for focusing the beam in it, and the light element itself cannot be damaged.
We solder the LEDs with resistance in series, and with each other in parallel, observing the polarity. For reds, we take a resistance of 1.5 KOhm and 1.1 KOhm for blue ones. After soldering the resistances and LEDs, we output the main power supply and check the correctness of all soldering, for which we apply a voltage of 12 V or slightly less. If something does not light up, it means that the LED is bad or the polarity is confused.
Illumination of devices vases of a liquid crystal screen
To change the backlight, you need to remove the individual light bulb together with the plastic base and install the LED with resistance. You can simply solder an LED with a resistance to the power point of the light bulb and direct it to the LCD window.
In the same way, you can replace the illumination of any of the indicators on the dashboard. Remember that the LEDs only work if the polarity is correct.
Build and install
First, insert the base of the LEDs into the case and bring out the wires for connecting to the board. Then we make up the plexiglass insert with the body. It is necessary that the plexiglass is inserted tightly. Fasten on the back with four screws. Next, we install the board. Be careful not to bend the pins of the arrow drives. Fasten with screws or self-tapping screws. We solder the power supply of the LEDs to the power wires of any standard illumination lamp. Put on the arrows and set them to zero.If desired, he can adjust the readings using trip computer... Then we put on a transparent visor. That's it, the panel is assembled, and now you can put it in place.
In this way, the illumination of devices for vases, PRIORA or KALINA can be made.
Unique tuning for VAZ 99
For tuning you will need:- soldering iron;
- insert into dashboard the desired model;
- ultraviolet light bulb;
- some wires, not power ones;
- moment glue or super glue;
- fluorescent marker.
We glue the neon lamp to the panel from above, replace the standard illumination and glue the plastic protection on top and attach the control unit with a neon lamp at the top. We connect the lamp to the place of the standard illumination, observing the polarity.
Then we install two bulbs on the device, that is, we put two bulbs on the speedometer on the sides. We connect all the wires and stretch them inside the partitions. We connect the neon lamp to the power point and put on the bulbs. Let's check if everything works by connecting the main power supply. You can correct the position of the bulbs and attach them with glue. Make sure that the wires do not interfere with the various moving parts of the sensors. We carefully attach the wires to the plastic.
Install the overlay on top and glue it with a small amount of glue in the corners. Install the arrows and paint them with a marker several times, letting them dry out a little.

We collect the dashboard and put it in place. We will definitely check her work again.
Hand-made production of the illumination of the VAZ 2114 and other models is not a big deal. All you need is the ability to work with a soldering iron and some basic knowledge of electronics. But the car looks individual and soft light does not irritate the eyes when driving.
When the instrument panel on the VAZ 2109 does not light up, this is one of the common malfunctions of this unit. To fix the problem, you first have to find the cause of its occurrence.
Panel types
Instrument panels on the VAZ 2109 are of at least three types:
- Low panel;
- High panel;
- Electronic shield on nines with europanel.

At shields with high panel There is no econometer, but the speedometer is also based on a mechanical cable drive.
Why does not it burn
If suddenly electrical appliances and control lamps on the dashboard stopped working, certain actions must be taken.
- First, remove the cover mounting block and make sure the fuse is intact. The fuse markings are located on the inside of the cover. You should look for fuse F16 or F5, depending on the year of manufacture of your VAZ 2109.
- If the fuse is intact, be sure to check if the contacts of the desired fuse are oxidized. Not infrequently, due to broken contact, shields fail.
- Check if there is power to the dashboard. To do this, you need a test lamp and the ignition on. Disconnect connector X4 in the mounting block and check for voltage on track 3. The disadvantage of the VAZ 2109 design is that when it rains, the mounting block immediately becomes wet. From here, oxidation of the contacts in the pads occurs, due to which the electrician stops working. Sometimes not only the contact is oxidized, but also the board of the mounting block of the nine.
If none of the above actions worked, you will have to upset you. After all, now you have to remove the dashboard and check the condition of the wiring, contacts, negative connections. Here it is better to trust a professional electrician or set aside a whole day for troubleshooting yourself. There is no need to rush here.

Popular faults
If we talk about the dashboard of VAZ 2109 cars, then they are characterized by certain problems. We will tell you about them, as well as show you how to act correctly in a given situation.
|
Fault type |
Your actions |
|
The gauge of gasoline level and temperature does not work |
In most percent of cases, this situation occurs due to a breakdown of devices, sensors of these devices, or an open circuit of the power supply. Therefore, first check the circuit for continuity, make sure that the fuses are not blown. If this is not the case, check if the gasoline level and temperature sensors are working. Only if none of the actions allowed you to get rid of the breakdown, you can start replacing the devices themselves. No options, the problem lies in them |
|
With full fuel tank the arrow points to zero |
If you have worked with the fuel level sensor, the fault most likely lies with you. When manipulating this device, the float limiter is often knocked down. Or it is incorrectly installed, the limiter is adjusted, due to which the resistor winding ends. To deal with the problem, remove the sensor and then re-adjust the stopper. |
|
The arrow of the fuel level indicator jumps regularly, turns out to be at zero |
Here, most likely, the resistor has weak contact with the current collector. Another possible variant- there is an open circuit in the resistor. To resolve this situation, we recommend replacing the hot level sensor with a new measuring device |
|
Fuel level lamp is constantly on |
If this lamp is on continuously, the fuel level sensor supply wiring may have a short to ground. Another option is the closed flexible sensor bus with the fuel intake pipe. You will have to disassemble the device in order to align the bus and get rid of the short circuit that has arisen. |
|
Control lamps do not work on the dashboard |
There is a high probability that the bulbs are simply burned out, or they are weakly holding in their seats due to weakened contact. Replace the bulbs, but first try to tighten the contacts. Possible detection of traces of oxidation. When stripped, the bulbs can work normally again. Also, do not exclude the possibility of a break in the wiring, oxidation of the tips of the supply wiring. Try walking along the wires with a tester, strip the contacts if necessary |
|
Speedometer does not work, flexible shaft makes noise |
In such a situation, you will have to change the speedometer drive cable or replace the entire speedometer assembly. But before you bother so much, check whether the fastening nuts of the tips are correctly and properly tightened. The flexible shaft can make noise during operation due to deformation or violation of the permissible bending of the shell less than 10 centimeters during installation |

The dashboard of the VAZ 2109 is not so complicated as not to be able to figure it out on your own. But in the absence of experience, it is better to entrust repairs to specialists, or enlist the support of a partner who understands this matter.