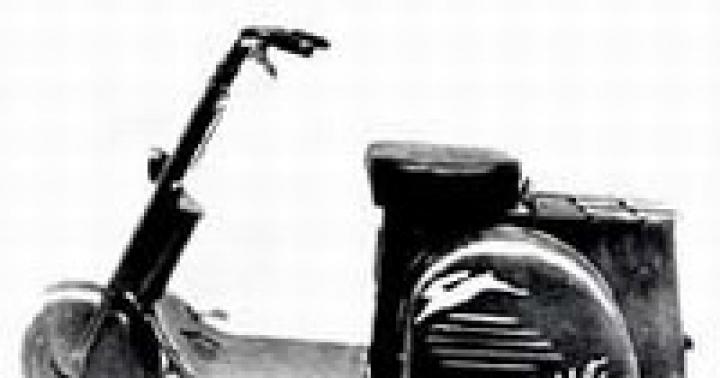
Dear visitors of the site "" today we will consider one of the options for assembling a snowmobile from a scooter with our own hands. Mainly that drastic changes not included in the design and the scooter can be easily converted from a snowmobile into an all-terrain vehicle) an excellent and moderately economical means of transportation, both in the city and in the countryside. This type of transport is especially popular among teenagers, because it is an intermediate link between a bicycle and a real motorcycle) With the onset of cold weather, motor vehicles are put in the garage and stand there until spring, but not in our case, because an excellent snowmobile is made of a scooter for fishing trips)
To make a full-fledged scooter, you will need a rubber track, in this case it is borrowed from the Buran snowmobile and is cut in half. Also, a rubber track can be made from a tire from passenger car, of course, you will have to work hard to punch square holes for the step of the star, make metal heels, but for free) As a leading star, the author adapted a wheel from a map, the fact is that such a wheel is slightly smaller than that of the scooter itself, which reduces the speed and increases traction characteristics cars. A metal band is screwed onto the wheel with teeth fixed with flat head furniture bolts. The driven star is made from the original Buranovskaya with the addition of wheels from the cart on the sides, the road wheels are wheels from a children's scooter. The frame and track attachment are welded from a professional pipe and a corner.
The ski is borrowed from a children's snow scooter, a metal guide is installed in the lower part, so that the snowmobile feels stable on the road. The ski also has a floating position, that is, when sloping, it remains flat on the snow.
 A map wheel is used as a leading star.
 The wheel is equipped with a metal bandage with teeth made of PVC pipe and bolted with furniture bolts.

 Driving star from the Buran snowmobile, wheels from the cart are added on the sides.
  Wheels from a children's scooter are used as road wheels.
  Track assembly and scooter installation.


 The track protector is made of fiberglass.

 Ski carrier and cladding.
 Ski from a children's snowmobile.
  Snowmobile tests on loose snow.
In regions with heavy snowfalls in winter, it is impractical to use two-wheeled vehicles. But a car is not always needed. In such cases, a snowmobile comes to the rescue, but this type of transport is expensive. If you wish, you can make a snowmobile with your own hands, and there are many ways to do this.
How to make a snowmobile
You can make a snowmobile from different vehicles that are in the garage.
From a motorcycle
You can make a snowmobile out of a motorcycle using different models... The most popular are IZH and Ural. The advantages of this rework are that you do not need to make any special changes. If the funds are well preserved, you can even leave your own frame.
The rework technology is as follows:
- Make a rectangular frame from metal pipes or corresponding corners. Its optimal dimensions are 150 * 43.5 cm.
- In addition to the IZH motorcycle, it is necessary to make a steering beam. It is made from metal corners. Optimal dimensions- 50 * 50 * 5 mm. Additionally, the beam is sheathed with metal plates.
- Then it can be mounted horizontally on the drill press. Process the junction. Proceed in the same way with the frame. In these places, you need to make special grooves for secure fixation. In addition to the front frame, attach a corner.
- The motorcycle seat can now be secured.
- You need to make holes in the side members.
- Between the front and middle part frame, it is necessary to position the channel to strengthen the structure.
- Regardless of whether the snowmobile is made from "Ural" or another motorcycle model, it is necessary to select a track sprocket and a rubber band in advance. The optimal dimensions are 220 * 30 cm with a thickness of no more than 1 cm.
- Before installation, it is recommended to sheathe the caterpillar with nylon, which will allow the material not to delaminate during operation.
- Now you can go to the transmission. It has two parts. The first one is front axle, is the host. Manufactured from tubular shaft, track sprocket and roller. The second is rear axle... It is made from a caterpillar drum and tubular shaft.
- Finish the snowmobile manufacturing process by welding sheet metal skis.

When converting a motorcycle to a snowmobile, it is important not to alter the steering system. In the final product, this part must fulfill its original function.
The rework principles are the same, they do not depend on the transport model. But a snowmobile from a Ural motorcycle will be heavier.
From Zhiguli
The car structure is characterized by simplicity, ease of operation and high maneuverability. For manufacturing, you need to follow the instructions:
- Assembling the frame. Better to make it out of pipes. The frame consists of a front and center beams (steel pipes with a diameter of 5 cm), two lower diagonal elements (bent pipes with a diameter of 3 cm) and a rear brace. Welding is used to fix the elements.
- Installation of steering columns. To do this, place two bushings on the front beam.
- Semiaxis fixing. It is located on the rear frame, you first need to weld the body under it. It is made from a metal pipe with a diameter of 6 cm. Fix the axle shafts with bushings and electric rivets.
- Installing the engine from the car. First, you need to make front and rear fasteners on the central beam of the frame. First they need to be positioned on the engine itself, and only then welded to the frame.
- V homemade snowmobile you can install large diameter wheels or skis made of sheet metal. In the first case, the rear and front wheels must be connected in pairs with a metal pipe. In this case, make grooves for bearings in the hub, which are subsequently fixed with spring rings. Additionally, install a spacer sleeve between the bearings.
- Install a sprocket on each wheel depending on the intended maximum speed... This snowmobile can be used at any time of the year. For a snowy winter, a design in which the front wheels are replaced by skis is suitable.
- Installation of the steering system. It is taken whole from a car, for example, from a Zaporozhets, or a motorcycle. The choice depends on personal preference. In the first case, the gas, clutch and brake pedals are additionally installed. The gearbox is controlled by a lever and a rigid rod.
- Installation of the snowmobile cabin, the role of which is played by the car body.
This summer 2016, it's time to refit your chinese scooter() something more suitable for my long-distance fishing trips to the Chusovaya River area. The trip in early June () spoiled my nerves a little and prompted me to accelerate the development of a more suitable vehicle for driving on any roads and even in places where they do not exist at all ...
Within a month I assembled my all-terrain vehicle, although so far it is impossible to call it in the full sense an all-terrain vehicle due to the drive only to the rear wheel.
But there is still a lot of time ahead and perhaps the drive to front wheel will appear too. Initially, such a possibility was included in the design.


The scooter frame is taken as a basis, the engine is moved forward. Added homemade rear swingarm, front fork half converted to fit a wide and large wheel. The rubber was used from the UAZ car, the disks were also converted from the UAZ ones. Homemade hubs with 203 bearings. Wheels without rubber look like this:


Sprockets and a chain from the IZH motorcycle.
Further design improvements are in progress. Variants of lightening the mass of the resulting ATV are being worked out and, for a start, made a regrover (). I cut the tread on the tires, which at the same time lightened the ATV by more than 3 kilograms. Now we need to cut the rubber on the sidewalls of the tire.
The real first test for MOMM-7215 was a fishing trip to the Chusovaya River, which was successful, apart from a couple of small overlays. More details about this trip can be found on the page -
The trip revealed the following:
Pros:
1. Usage large wheels at low pressure, they increased the permeability by an order of magnitude, and also significantly smooth out the unevenness of the road.
Minuses:
1. Again, the wheels have reduced ATV handling, which seems to be affected by a lever-type front fork and reduced tire pressure. This is especially evident on hard large irregularities such as broken ruts, large stones (on a flat road, there are no control problems). In the future, it may be necessary to try to replace it with a telescopic fork. Refusal of shock absorbers (as is used on many two-wheeled ATVs) is strongly discouraged.
2. The significant weight of the wheel assembly requires at least balancing, because at a speed of about 50 km / h, an unbalanced wheel begins to be reflected on the ATV. We also need to continue looking for ways to lighten the weight of the wheel assembly. There are options ...
January 5, 2018. The winter turned out to be with little snow and I decided to check again the capabilities of my ATV on a knurled track. What came of this can be seen in the following video:
To be continued…
The snowmobiles sold in the store are quite expensive and often do not fit into the budget. But you still need to move in the snow. Fishing, hunting and just outdoor activities in the wild require cross-country ability. Therefore, we will consider ways how to make a snowmobile with your own hands.
Snowmobile from motorcycle
The first model was assembled at the service station from improvised parts, plus a little welding. The engine from the motorcycle sunrise 1, the sled is welded from metal pipes.

Snowmobile from scooter

The engine from the Honda scooter 50 cubes.
The frame is welded from a metal profile with a section of 50x50mm.
The drive of the caterpillar from the extended wheel and the sutpitsa from the fret nine (vaz 2109).
Shock absorber from am. Oka.
The track slides are made from a water pipe.
The track was taken from an unknown model of a snowmobile. The suspension is made for this track.
Snowmobile video in action
Homemade snowmobile
Serious construction made according to all the canons of motorcycle construction.
The frame is welded from a shaped tube according to homemade drawings.

The following spare parts were purchased in the store:
Were purchased:
- Lifan 188FD 13hp engine with electric starter
- caterpillar 500mm wide from the Ryde motor dog
- rollers from the Buran snowmobile
- driven and driven shafts with sprockets
- Safari leading variator and driven.
- Tiksi snowmobile slides
- Windshield from the Tiksi snowmobile
- headlight from the Atlant scooter
- the hood is made of VAZ2110 hood
- Taiga snowmobile skis
Assembly photo:


The modern pace of life has contributed to the fact that moto scooters have gained wide popularity. Thanks to the 49 cm3 engine, lightness of design and ease of control, they are used by both young people, moving around the city, and adults, going on business, to a store or to a summer cottage. The downside is that with the arrival of winter, it becomes inconvenient and dangerous to ride a scooter, since the small diameter of the wheels, even on winter tires, does not allow you to confidently drive such a vehicle on icy and snow-covered roads.
To solve this problem, on the motorcycle to the place rear wheel install the track unit. This will transform the vehicle into a snowmobile that can ride in shallow snow.
DIY snowmobile tracks
As a propeller, you can use the parts of the caterpillar from the snowmobile "Buran" (photo 1), but if you can't find one, you can purchase a new one. From one such caterpillar, you will make 4 blanks. If you have like-minded friends, team up with them and jointly buy the necessary part. In this case, the cost of the caterpillar for each participant will be noticeably lower.I contacted a company that supplies propulsion kits and got them as spare parts a plastic ski without attachment to the fork and a narrow rubber track.
DIY children's snowmobile from a scooter
The scooter design does not need to be changed significantly. This will allow you to return to the place with minimal effort and time. standard equipment the vehicle at the end of winter and use it again during the warmer months.If you do not have turning and milling machines for the manufacture of the necessary parts, you can buy ready-made ones, or use those that can be found in your garage and at car dismantling. Also, some elements can be made independently with the help of simple tools and a welding machine.


In a shop selling spare parts for snowmobiles, I bought a driven sprocket for a Buran snowmobile caterpillar. I got two more wheels from a standard Chinese scooter for kids and two small rubber wheels with roller bearings from a trolley. The gear ratio in the transmission of the scooter is designed for the operation of this transport on good roads at speeds up to 40-60 km / h. When driving on snowy roads, the load on the engine will increase, and its power may not be enough, and the speed of 40-60 km / h on snowy and slippery roads is generally dangerous. Therefore, I changed the gear ratio, replacing the drive wheel of the scooter with a wheel of a smaller diameter from a sports car-kart. To do this, I had to cut out a brake drum with splines for the drive shaft from the old dented disk of the moped drive wheel and drill holes in it for fastening wheel rim smaller diameter (photo 2).
To prevent the caterpillar from slipping or sliding off the wheel while driving, I made special hooks (photo 3) from plastic water pipes that fit into the holes in the track. It is almost impossible to select a rubber tire so that its circumference is a multiple of an integer number of hole pitches on the caterpillar. I made a bandage of the required diameter from a strip of roofing metal, on which, using furniture bolts-wood grouses MB with a large head, at an equal distance from each other, with a step corresponding to the location of the holes on the caterpillar, I fixed the hooks (photo 4)... The bandage was put on the wheel and attached to the tire using the same bolts (photo 5).
I made an improvised soft sprocket for the caterpillar from a regular wheel.
I made the driven sprocket by connecting the finished plastic drive sprocket of the Buran snowmobile with two rubber wheels from a bogie with roller bearings with M8 bolts. For the axle, a stud with M10 thread came up (photo 6).

The frame of the caterpillar propeller was made using metal corners and square pipes (photo 7)... I do not give the dimensions of the frame and its various parts, since those wishing to repeat the design will be guided by the brand of their scooter and the size of the caterpillar they have chosen.
For my moped, I purchased a special ski from a motorcycle kit, but an ordinary wide home-made wooden ski or a plastic one from the children's Argamak snow scooter is quite suitable, only a metal skate (undercut) must be attached to it from below, so that slippery road the scooter did not lose control. The ski is attached to the front fork of the scooter through a special stand and has two degrees of freedom of movement, so that when the scooter is tilted to the left or right, the ski remains flat on the snow.


The plastic body kit of the scooter is very fragile in the cold and, moreover, has pockets. Snow falling into them melts in the garage, and then freezes, thereby increasing the mass of the scooter. I decided to make a minimal cover over the track, a wide footrest and a decorative shield for the front fork, and for long trips in cold and windy weather I install a windshield.
It is not difficult to independently make a casing for a caterpillar from fiberglass, but before gluing the casing, you need to make a matrix. From a piece of plexiglass, polycarbonate or any other plastic of a suitable size, we cut out the side of the future casing (photo 19).


We put it on a sheet bigger size, which will serve as the other wall of the matrix, and with the help of hot melt glue along the perimeter of the sidewall we fix the plastic corners.
Now we cut off a strip of thin and flexible plastic, equal in width to the future casing. We assemble the matrix, with glue attaching the previously cut sidewall, bottom and a large panel at the corners. We coat the joints of the parts with plasticine. Thus, we got a matrix for pasting the casing of the caterpillar.
Then we cut the fiberglass into pieces of the desired size and, coating with epoxy resin, place them tightly in the matrix. After a day, we disassemble the matrix and remove the resulting casing. It remains to cut off the excess fiberglass along the contour and paint the product.
The platform for the legs was made using a similar technology, only I added silver powder to the epoxy resin to give it viscosity and color.