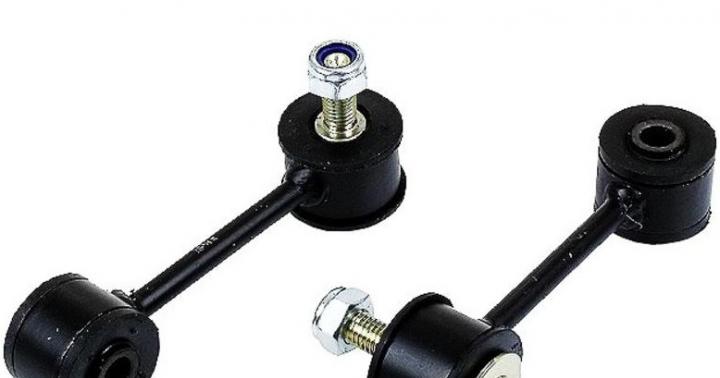
Such a move will help solve the problem on all thermostats, with the exception of Luzar products.
Refinement of the reversing lamp
 Standard lamps reverse do not meet the needs of many owners of Lada Grant. They are especially hard to see in bad weather conditions, for example, in a powerful blizzard or in fog. Therefore, it is also necessary to look for a solution here. The best way out of the situation is to install a xenon lamp. Lighting devices of this kind are not a novelty for foreign cars, even in the "standard" configuration, but AvtoVAZ has not yet come to this. Therefore, you will have to modify the car on your own. Let's analyze the installation and connection for xenon H1 5000 K with an ignition unit. Installation is carried out as follows:
- We dismantle the old lighting fixture.
- Installing a new lamp.
- We connect the standard wires to the ignition unit, from which the xenon lamp is powered.
That, in fact, is all. A small investment of time and an elementary knowledge of the electrical circuit of the Lada Granta will help you achieve a bright cold light that will be noticeable in any light. Now you can safely back up both at night and in fog or storm.
Tuning Grants with your own hands is a rather controversial topic both among specialists and among amateurs. On the one hand, a car is great for everyday use, and trying to improve something in it means "catching" other elements as well. On the other hand, everyone wants to modernize their car, despite the possible difficulties and costs.
1
Tuning Lada Granta Sport, as a rule, implies an increase in power and an increase in the torque of a car engine. In this case, the owner of the domestic model should grind the receiver channels. Why do this? The internal structure of the intake manifold of VAZ cars has several defects. In addition, there are "steps" at the junction of the collector and the receiver, as well as at the junction of the cylinder head and the manifold. Plus, the inner surface of the receiver channels itself is far from ideal - it is rough and not entirely even. Together, these defects prevent the cylinders from filling completely, which, in turn, reduces the power of the machine.
Self-service channel grinding
With a comprehensive tuning of the top of the Grant Sport engine, both the intake and exhaust ports need to be modified. With the release channels, the situation is a little simpler - the cylinder head refinement, which we will talk about below, is quite enough. To modernize the intake channels, you will need to do - buy and install a direct-flow system with an increased diameter. But since such a design is quite expensive, this part of the tuning is usually skipped. There are many methods for finalizing the cylinder head. We will consider the most popular one, which is easy to make yourself. First of all, you need to modify the channels - to increase their diameter and grind. For this you will need:
- sandpaper;
- drill;
- a set of cutters;
- flat screwdriver;
- set of keys.
First, we disassemble the cylinder head. To do this, we separate the collectors, disconnect the receiver from the inlet element and disassemble it into parts. After that, we begin the long process of grinding the channels. The easiest method is to insert a small piece of tube into the drill chuck, glue a piece of sandpaper to the tube and grind. In the course of work, the paper must be replaced with a fine-grained product. Tuning the top of the Lada Grant engine also requires combining the cylinder head and the manifold. To do this, it is necessary to lubricate the butt part of the collector with a thick layer of solid oil and attach the cylinder head to it.
After that, remove the element and examine the print. Ideally, the place where the channels overlap should be without "steps", and they will naturally appear on the print. Then we put marks in the places of overlap and continue grinding until we get the maximum match. After that, we apply a new gasket to the sanded surface. You will see that the edges of the channels also serve as a kind of "steps", that is, interference. They need to be sanded so that they fit perfectly into the holes in the cylinder head. After that, remove the gasket and connect the cylinder head to the manifold.
2
After we increased the amount of air entering the cylinders, it was time to take care of the quality of the latter. Many drivers think about installing protection only after installing a zero filter. However, with the help of protection, you can also tune cars with factory filters. Filter protection not only prevents dust from entering the car engine. The product also protects the filter from overheating. To make a "screen" you will need:
- a small piece of tin;
- screwdriver or drill;
- bolts and nuts;
- scissors for metal.

Filters on Lada
First you need to cut out the template of the future "screen". To do this, we put a piece of tin to the filter and cut the sheet so that on one side it protects the filter from dirt, and on the other - from the heat of the motor. Then you need to cut out the mount for protection, 3 strips of the appropriate length will do. After that, we start assembling. We drill 6 holes in the "screen". We put the mounts on top, fixing them with nuts or bolts. We bend the ends of the fastening strips so that they crawl under the filter clamp.
A filter tuned in this way will require less maintenance. In addition, the service life of the part will increase significantly, because it will not overheat under the influence of the motor.
3
Tuning Lada Granta sedan often implies changes in the interior of the car. To do this, you can go in several ways. The first method is to invest a lot of money and time and completely redesign the cab. The second way is to install several auxiliary devices in the panel and improve its lighting. The third method is to do it by investing in it to a minimum. As a rule, with this method, those details are finalized that most of all "catch the eye" of the driver and his passengers. One of these elements is the upper part dashboard, that is, its visor.

Salon tuning
Among lovers of tuning VAZ, it is generally accepted that the hauling of the visor is not an easy matter. The element has a rather complex shape, which makes it almost impossible to make a "mask" for it without seams. Let's find out if this is really so. At the beginning of work, you need to dismantle the instrument panel visor by unscrewing the 3 upper and 3 lower bolts for this. Then attach the trim material to the visor and remove the pattern. To do this, the product must be installed as evenly as possible on the visor, take into account all the bending lines and mark the places where the matter will be cut. In the process of taking measurements, in no case should you forget about the buttons on the sides of the visor. In these places, neat holes need to be made in the material.
Next, we cut the material according to measurements and begin to glue it to the visor. It is very important to use the adhesive carefully. Make sure that it does not drip onto the material or leak out from under it. Once you are done with pasting, you need to leave the visor for a day so that the material grabs the part. After that, we install the element in place in the cabin. If desired, you can pay attention to the instrument panel illumination. Over time, it becomes dimmer, so you will need to replace the standard backlight bulbs. For this, white, blue or red LEDs are best suited. To work, you need 6 bulbs, a resistor, 1 m. Wiring and superglue.
Before replacing bulbs, carefully remove all arrows and scales. After that, we disconnect the backlight power terminal from the car battery and unscrew the factory bulbs. We remove the standard light guide and clean the place behind it, prepare new lighting. We solder to the diodes along the wiring. We twist the free ends of the wiring into one bundle and connect to a resistor. After that, we connect the backlight to the battery terminal and check the operation. If one of the lamps does not light up or blinks, then its wire must be stripped and connected again. If this does not help, then the light bulb is most likely defective.
With the correct operation of the manufactured backlight, its wires must be pushed inside the dashboard. We connect to the battery and fix the bulbs with superglue. We wait for about 2 hours, after which we put on a light diffuser made of a piece of polystyrene. On top of it, we install the factory scales and auto arrows. Be sure to check the serviceability of the arrows. Once installed, they should not be below or above the "0" mark. By replacing the standard backlight bulbs, you will get rid of the need to regularly change fixtures for a long time. The service life of diodes is several times longer than factory lamps. Plus, they're much brighter.
Lada Granta is one of latest novelties on the market domestic auto industry... Despite its "youth" the car is already very popular and in demand among motorists, offering them an excellent combination of quality, comfort, reliability and affordability. Despite this, many owners of this car dream of tuning and technical refinement. That is why today we will talk about what tuning Grants with our own hands should be and what it includes.
Exterior tuning
It is worth noting that compared to their predecessors new vaz the liftback looks quite presentable and very often the owners prefer to leave appearance without significant changes, focusing on other aspects of tuning. Those who do not accept everything standard make a number of changes to the exterior with their own hands, including:
- Mounting front bumper with an improved air intake - such tuning updates the design of the VAZ liftback, while contributing to better airflow to the front brakes and power plant... The perfect solution for those who love sports and high speeds;
- Installation of new plastic fenders and other body elements - in addition to purely decorative benefits, the owner also gains material benefits, because such a body kit is not subject to corrosion and is able to last incomparably longer;
- Installation of a compact rear spoiler - it is located on the lid of the cargo compartment, not only protecting the glass from dirt, but also improving the aerodynamics of the rear of the car;
- Optics tuning - standard headlights do not suit many owners, so they tend to replace them with improved models. Alternatively, you can use a ready-made set of lighting equipment or select the headlights yourself;
- Installation of roof rails - their use is important for those who like to travel, and the installation is so simple that even the most inexperienced driver can handle it without any problems.
Internal alterations
Continuing the tuning of Lada Granta, you should pay attention to the interior decoration of the cabin. There are also a number of aspects here that can be changed by hand, namely:

Technical tuning
It is not entirely advisable to carry out significant tuning of the VAZ engine, which requires serious intervention in its design, especially on a new model. And in this case, you will most likely have to forget about the guarantee. That is why today we will analyze those upgrade options that do not require drastic changes:

Conclusion
Tuning vehicle- the process is quite time consuming, lengthy and financially costly. If you nevertheless decide to update your Lada Granta, remember that in order to obtain the highest quality and balanced result, the car upgrade should be carried out in a comprehensive manner, evenly distributing efforts over all the most significant components and assemblies. This is the only way you can give it not only a unique design, but also improved technical parameters.
The message about the recall of "LAD" caused a mixed reaction. Some shook their heads meaningfully: they say, this was to be expected, while others, on the contrary, regarded the news as a change for the better. After all, this is the first time the Volzhsky Automobile Plant is conducting such a global and noisy troubleshooting campaign.
Our opinion did not coincide with either one or the other. First of all, let's reassure the owners: it's okay, you don't need to grab your head and rush to the dealer. Even in the recommendations of the plant, sent to all technical centers for the completion of these models, the words "possible" and "if necessary" appear repeatedly. As confirmation: nothing discouraging on the machine on which these flaws were fixed. Therefore, we are ready to assert with confidence: the action is mostly of an advertising nature. It is intended to draw attention to a product rather than address major design flaws.
Dealers are already sending written invitations to unscheduled free maintenance to all owners of cars that are on the recall list (by identification number - VIN). It is up to the car owner to decide whether to conduct it or not. If you have not decided, we offer you together with specialists dealership"Tekhinkom-Avto" go through all the operations and look at specific examples to see how appropriate it is. We will supplement the factory instructions with our comments. Important note: The recall campaign was deployed primarily for Grants, only a defense operation fuel pipes carry out for both models.
IF WE WOULD HAVE A REVIEW CAMPAIGN
Back in the February issue (p. 112-114) , when we were first able to examine "Grant", as they say, under a magnifying glass, we talked about much more significant shortcomings. For example, a plastic casing hangs at the entrance to the engine compartment - protection of pipes fuel line and an adsorber. The lower radiator hose, rubbing against adjacent parts, clearly lacks fasteners. Mediocre clamps on the engine ventilation pipes do not provide tight connections: after a year of operation, the engine will be covered with oil. And this is only part of the disadvantages. We will definitely tell you about the rest in the near future - wait for regular reports on the editorial "Grant".
Returning to the recall campaign: it is a pity that forces and means were used ineffectively. It is possible that the elimination of the shortcomings indicated by us would have cost the manufacturer more, but in the future it will pay off faster. After all, it is precisely serious investments in reliability that AVTOVAZ is now lacking in order to build a solid car.
IN PICTURES
Eliminate possible contact of the tubes of the power supply system with the clutch cable.
How to fix.
Corrugated liners must be installed on the fuel and vapor pipes (factory part part number 2190–1104286).
Note.
It is better to fix the wiring corrugations with plastic clamping clamps. However, the corrugations in contact with the cable will also quickly fray. To ensure that this flaw is eliminated, you need to install additional mounting brackets for the fuel line. It is more costly, so the manufacturer limited himself to the budget option.
Modify the body in the place where the washer reservoir is installed.
How to fix.
Glue tapes in the indicated places so that the tank does not rub against the metal.
Note.
The alteration is useful: after several years of operation on many cars, you have to change the tank wiped from vibrations. We have one more important note: it would be necessary to paste over the tide on the reservoir, which also serves for attachment to the body. Any soft (preferably self-adhesive) material with a thickness of a couple of millimeters is suitable for gaskets.
Check the position of the harness at the brake fluid level sensor.
How to fix.
Unscrew the tank cap slightly and unfold the sensor so that it does not touch either the battery or the engine board.
Note.
Check the location of the harness after changing the fluid. But you can not do this: the mentioned parts do not move relative to each other and are unlikely to ever wear out.
Check the tightness of the wiring harness 2190-3724026 (no water should get into the passenger compartment along the inner walls of the corrugation).
How to fix.
We wrap the section of the harness from the branch to the crankshaft sensor to the entrance to the body with electrical tape, as well as the areas on the engine shield located next to the wire entrance to the salon.
Note. It's worth doing it. It happened that water penetrated in this way and harmed the electrics.
Check the position of the diagnostic (second) oxygen sensor harness.
How to fix.
Pull the harness out of the body a little, thus relieving the tension on the wires.
Note.
Correct in theory, but in practice ... The force is not strong enough to pull the wire out of the sensor. It is much more likely that the latter will fall victim to low-quality gasoline.
Check if they touch brake pipes battery pad.
How to fix.
Take a thicker screwdriver and carefully remove the tubes.
Note.
It is worth paying attention to the pipes, although, again, only because of them there is no need to run as fast to the dealer: upon contact, the main line (we do not even stutter about the site) will leak through more than one thousand kilometers.
Seal the floor access holes in the front of the body.
How to fix.
Pull out the 30 mm plugs (2108-5112090), apply Avto-7-94 mastic on them and replace them.
Note.
Instead of rare mastic, any sealant will do. Or leave the plugs alone. After all, even if moisture, dirt or reagents penetrate through them into the interior, their amount cannot be compared with what is splashed onto the carpet from the rugs.
Change the location of the harness of the control (first) oxygen concentration sensor.
We can bet that you have noticed more than once the abundance of lights and instruments on the dashboard of foreign cars. Sometimes they cause the envy of many owners. domestic cars... However, do not be upset, because each of us can transform your Lada. It's enough just to want it. Well, we will help - read the step-by-step description of the mobile with your own hands. We show on the example of a new model of the VAZ automobile concern - Lada Grants.
Do-it-yourself Lada Granta salon tuning: dashboard
As practice shows, the overwhelming majority of owners are not satisfied with such an element of the car's interior as the instrument panel. Namely, the color and intensity of its illumination. Many car owners turn to specialized auto repair shops for help, but it is quite possible to improve this part yourself. The main thing that is required for this is experience in working with a soldering iron and a desoldering pump. Let's consider this tuning in more detail.
It is worth remembering that this element of the Granta cabin is equipped with LEDs. This significantly distinguishes Grant from her predecessor - Lada Kalina.
Based on this, the tuning of the Grants instrument panel will differ from the improvement of the previous VAZ models.
Before tuning this part in Lada with your own hands, you need to disassemble it. To do this, unbend the plastic clips located around the entire perimeter of the instrument panel. Next, remove the back cover. The latter is easy to reach by pulling up on the special arrows. After dismantling the cover, we will see the Grants instrument panel board. We take it out and proceed to the display. It can be soldered to the panel and you need to use a desoldering pump to pull it out. After soldering, the display antennae should move freely in the landing areas. After dismantling the display, we get access to all the LEDs of the Lada panel.
Next, you need to insert your LEDs instead of the factory ones, and then immediately check the health of the entire instrument panel. If all the lights are working, then you can start reassembling. When assembling the dashboard, special attention should be paid to the location of the display antennae. They should fit into their seats as accurately as possible. Otherwise, the system will stop working. At the end of the assembly, it is worth treating the shield cover Grants with cream Antiskrip.
Lighting of difflectors in the salon Grants

Tuning the dashboard in Lada Granta is far from the only way to make the car interior brighter. And if you are tired of the monotony and dullness, then the illumination of the stove air ducts in the cab of the Lada car will be an excellent solution to this problem.
The main task of the Grants round difflectors is to supply air to the driver and passengers. Highlighting this part will be a great way to distinguish a car from among thousands of the same... This is easy to do with your own hands, but for this we need a flat screwdriver, LED strip and wires.
Having all this, we can perform interior tuning. First, we take out the air ducts. To do this, take a round screwdriver and snap off the fasteners. Then, using double-sided tape, attach led strip around the difflector. We stretch the wires to the place where the Grants are connected.
If you plan to connect to the car's lighting shade, then we stretch the wires along the right and left pillars of the side windows. Next, we proceed to the installation of the already tuned air ducts. Before the holes should be treated with cream Antiskrip... Next, carefully wrap the deflector wires with tape, push it into the hole, and install the deflector itself behind it.
Rear headrests for Grant

When tuning lighting and other elements of the car, do not forget about comfort. Therefore, it will not be superfluous to customize the Grants seats. It is about improving this part of the salon in Lada Granta that is worth talking in more detail.
Some configurations of the Grant are equipped with head restraints at the factory. Other cars are deprived of this privilege. If you are the owner of just such a car, do not be upset. On the contrary, this will become a reason for installing these parts with your own hands, and at the same time an opportunity to get to know your car better.
Before tuning the car interior with your own hands, you need to purchase a set of headrests for Grants. They are available in almost all car dealerships in the country.
We also need the following tools:
- drill with drill number 6;
- key # 10;
- marker (not black);
- screwdriver;
- sharp knife.
The first thing to do is to dismantle the seat backs. To do this, you need to carefully remove the upholstery and open the zipper. Next, unscrew with a screwdriver and take out all the plastic components and locking buttons that are located in the seat backs. After that, you need to find the centers of the colored inserts on the upholstery and mark them with a marker.
Then we attach the headrests with brackets to the seat backs, mark the places where the headrests will be installed. After that, we drill holes in the pipes of the latter, attach the brackets to the seats, tighten the fasteners with a wrench. Next, with a sharp knife we make small cuts, in place of which we install the headrest fungi. At the final stage, carefully assemble the seats in the reverse order.
It is worth noting that the headrests will not only add comfort to your Grant. Thanks to such tuning of the car interior, you can store things on the rear shelf of the car and not worry that they will fall on the heads of passengers.
All these improvements for Lada Granta are designed to make the operation of the car more comfortable. Driving will become much more pleasant with them.