Not a single shaft in a car can work by itself, it needs elements that transmit torque to other nodes of a complex mechanism, and crankshaft pulley is one of such links in a number of many programs. As with many other parts, this one also needs to be handled, removed in time, and replaced if necessary.
Where is the crankshaft pulley and how to get to it?
When you lift the bonnet and glance at the engine, the crankshaft damper pulley (as well as the normal one) is almost invisible. It is hidden by the generator, however, looking down, where the belt stretches, you can see a disk tightly fixed on the shaft by a hub. This is the desired detail. Pulleys are of two types, conventional and with a damper, and the latter option is distinguished by the presence of an external massive ring, separated from the main part by a rubber gasket, to reduce vibration of the part. The teeth are cut along the outer edge of the damper, which are necessary for operation.
To remove the pulley, you must first release the locking bolt on the generator, then loosen the tensioning bolt in order to slightly release the belt and be able to remove it. We also disconnect the antifreeze tank. The power steering belt can also interfere, therefore, aside from the pulley, we find and unscrew the bolt by 14, which creates tension in the power steering transmission, and then remove the latter. There remains the final step that separates us from success, and the most difficult is to unscrew one more single bolt that fixes the pulley. You can find the fastener only by looking under the car under the right front wheel, and if you have a pneumatic wrench, the operation will be done without difficulty.


Why is it difficult to remove the crankshaft toothed pulley?
In the absence of a special tool, it is very problematic to remove the bolt holding the crankshaft toothed pulley, since the threads are cut so that the direction of unscrewing coincides with the torque of the shaft when the engine is running. However, this is precisely the way out of the situation. All you need is a long wrench with a 19-inch head (can be extended with a piece of pipe), which rests against the ground against the rotation of the shaft. We carry out small preparatory work- we put wedges under the front wheels, and disconnect the connector on the ignition coil. What for? For using the starter as the mechanical force applied to the bolt.
So, we have done everything so that the car does not accidentally start up and does not move from its place, now we ask all those present to move away, and we ourselves climb into the cab (do not leave our legs sticking out) and abruptly, but briefly, turn the key to the start. In case of an unsuccessful attempt, do not despair and repeat. Usually, the second time, less often from the 5-6th approach, the bolt turns. Now you can proceed to the next event - removing the pulley hub from the shaft, given that it sits tightly and is held by a key. When you need to tighten the bolt back, you either need to put a lot of effort into tightening it, or still find an air wrench by then.


Even if the crankshaft pulley bolt is removed, there is a lot of work ahead
So, you finally managed to remove the stubborn crankshaft pulley bolt using a starter or a pneumatic tool. However, this does not mean that in a second the desired part will be in your hands. The fact is that the hub sits very tightly on the shaft, in addition, a key keeps it from accidentally slipping. Perfect option- use a special puller, you can even the cheapest one, made in China, the paws of this tool will save you unnecessary effort and wasted time. Alternatively, an aerosol lubricant, for example, WD-40, is injected, after which the crankshaft pulley hub gently swings towards itself.
It is necessary to remove the pulley carefully so as not to damage the keyway, otherwise the part will sit loosely, which will lead to quick wear of the hub.
Another way most often used by drivers is to remove the pulley by prying it around the circumference with a mounting. If an ordinary car is too large, use motorcycle hardened tools, L-shaped. In any case, the operation will require a lot of effort, so it is advisable that you have an assistant. It is better to put on a new pulley by smearing something viscous, such as grease, on the seat of the key (we slightly tilt it towards the sliding hub), then tap the pulley with a hammer through a soft gasket made of thin rubber.
TO Category:
Locksmith and mechanical assembly works
Flexible gears and pulley assembly
Belt transmissions are divided into two main groups: flat belt transmissions and V-belt transmissions. Flat belt transmissions are also divided into two groups: conventional transmissions and transmissions with a tensioner.
Ordinary gears are divided into three types: open, crossover, and semi-crossover. Open gear is used with parallel shafts. The parallel arrangement of the shafts is the simplest and most convenient for the belt drive and favorable for the belt operation. A pulley is put on each of the shafts, through which the belt is thrown. In this case, both pulleys rotate in the same direction.
If the direction of rotation of the pulley coincides with the direction of movement of the clockwise, then they say that the pulley rotates clockwise, if it does not coincide, then the pulley rotates counterclockwise.
In each pair of pulleys connected by a belt drive, a distinction is made between driving and driven pulleys. A pulley that receives movement from its shaft and transmits it to the belt is called the driving one, and the pulley receiving movement from the belt and transmitting it to the shaft is called the driven pulley.
In fig. 1, a shows an open belt drive. Pulley Oh is driving. The arrow in the illustration indicates that it rotates clockwise. The driven pulley 02 will also rotate clockwise.
If you need to get the rotation of the driven pulley in the direction opposite to the rotation of the driving pulley, then use a cross gear (Fig. 1, b). In this case, the drive pulley 01 rotates clockwise, and the driven 02 will rotate counterclockwise. The shafts are parallel to each other.
If the shafts are located perpendicular to each other, then use a semi-crossed transmission (Fig. 1, c).

Rice. 1. Types of belt drives: a - open, b - cross, c - semi-cross, d - cross-section of a V-belt, d - rotation transmission scheme, c - cross-section of a poly-V-belt
Flat belts are used in machine drives - leather, solid-woven cotton, sewn cotton, woven and rubberized and wedge-shaped belts. The machines used mainly leather, rubberized and wedge-shaped. In fig. 1d shows a cross-section of a V-shaped belt: it consists of several rows of rubberized fabric, several rows of cord (thick twisted cotton threads), a layer of rubber and a wrapper made of rubberized fabric.
In fig. 1, e shows a V-belt transmission. Each of the belts is placed in its "own" groove on the pulley rim. In this case, the belt is recessed in the groove so that it does not touch its bottom with its lower surface.
Poly-V-belts in fig. 1, e. These are endless flat belts, on the inner surface of which there are V-ribs made in the form of V-belts (their number is from 2 to 36). These protrusions enter the corresponding grooves of the pulleys.
The main disadvantage of a belt drive is belt slippage, which depends on the belt tension and the amount of arc on which the belt covers the pulleys. With different pulley diameters, the worst position is the smaller pulley, which has a small belt coverage.
To increase the belt tension and the amount of coverage for smaller pulleys, tension rollers are used (Fig. 2, a). The diameter of the tension roller is taken equal to 0.8 - 1.0 of the diameter of the small pulley. It is located on the driven branch at the small pulley. Due to the weight of the roller, and, if necessary, an additional load or spring, the belt is constantly tensioned. This provides a large angle of coverage of the pulley by the belt, improves the operating conditions of the transmission, and allows to reduce the center distance.
In all types of belt drives, a tension shaft is used. The belt is tensioned periodically by moving one of the shafts (Fig. 2, b, c).
Belt tensioning methods:
- an electric motor with a small pulley is installed on a slide and can be moved along them. Tensioning is done with a screw; using a swinging plate. The plate is hinged, its position is fixed with a screw. The tension is carried out by gravity of the engine and plate; with the help of cargo. The weight pulls one of the shafts and provides automatic tension control.

Rice. 2. Methods of tensioning belt drives: a - tension roller, b - slide with installed engine, in - the force of gravity of the electric motor installed on the swinging plate
The first two methods are used in all types of technological equipment for any belt drives. After drawing, flat belts are shortened with subsequent stitching and gluing.
Assembly of pulleys. Pulleys are usually made of cast iron or steel. They are made either with spokes or with a solid disc, in which holes can be made to reduce the mass of the pulley. Pulleys can be solid and split. When the pulley is located at the end of the shaft, one-piece pulleys are used, and when located between the bearings, split pulleys.
Pulleys are available in single-stage and multi-stage. The multi-stage pulley has several stages of different diameters.
Pulleys for V-belt transmission by design, they differ from smooth pulleys only by the presence of prismatic grooves on the rim.
One-piece working pulleys are mounted on the shaft with a tight or tight fit. If the pulley is installed on a shaft journal protruding from the bearing, then it can be tapered (Fig. 3, a) or cylindrical (Fig. 3, b) with a parallel or wedge key. A collar is made on a cylindrical shaft with a parallel key (Fig. 3, c) to fix the position of the pulley, and so that the pulley does not move during operation, it is additionally secured with a nut (Fig. 3, d). If the pulley is fastened with a wedge key (Fig. 3, c), then additional fastening is not required.
The installation of a pulley on a taper key is used only in low-speed and irresponsible gears, when an accurate fit is not required, since the taper key displaces the hub axis, and with a short length of it, a skew appears, which is unacceptable in high-speed, heavily loaded gears. When using a parallel key, the displacement of the pulley hub axis is much less and such connections are more accurate.
If a very high accuracy is required, spline joints are used - (Fig. 3, d). With this type of connection, the pulleys are centered better than on the keys, the strength is increased and the seating site is less worn.

Rice. 3. Diagrams for assembling pulleys on shafts: a - at the tapered end of the shaft, b - at the cylindrical end of the shaft with a key, c - installation of a pulley with a wedge key, d - seating the pulley on the spline shaft; 1 - shaft, 2 - key, 3 - locking screw
To fit the pulley on the shaft, screw devices are used, for example, clamping brackets. The split collar (Fig. 4) is put on the shaft and abuts against its shoulder. Then, thrust is passed between the spokes of the pulley, and a bar is placed against the end of the pulley hub, against which the screw rests. Turning the screw and lightly hitting through the lining in different places on the outer surface of the hub, gradually push the pulley onto the shaft. Impacts eliminate the seizure of the pulley on the shaft due to possible misalignments.
Split pulleys can be installed anywhere along the length of the shaft. The assembly of the pulley consists in connecting its two halves with pins. Checking the correct fit of the pulleys on the shaft is reduced to checking for runout.
The beating of the pulleys causes rapid wear of the bearings, and in the gears of precision high-speed metal-cutting machines it contributes to increased vibrations, which increase the surface roughness of the workpieces. The reasons for the pulley runout are: shaft bending, improper machining of the pulleys and improper fit on the shaft during assembly.

Rice. 4. Scheme of the pulley landing using the clamping bracket a - for beating, b - mutual parallelism of the shafts using a cord with weights, c - with a metal ruler, d - with a cord; I - arrows, 2 - weight, 3 - pulleys

Rice. 5. Schemes for checking the assembled pulley:
The beating of the pulleys is checked with a scribe or indicator. When checking the runout by the indicator, the readout is carried out on the dial of the indicator (Fig. 5, a), and when checking with a scribe, the runout value is determined with a probe.
Check two parallel shafts using arrows and a plumb line (Fig.5.6). At the ends of the shafts, arrows are fixed, the ends of which are in contact with the cord. When the shafts are turned 180 °, the arrows should come into contact with the cord again. The check is also carried out using a ruler - fig. 5, c, using a cord - Fig. 5, d (when pulling the cord between the pulley rims and the cord, there must be an equal gap).
After checking for runout, put on the belt. To do this, the pulleys are rotated manually. First, the belt is put on the drive pulley, then on the driven one. For putting on use hooks or tips.
Someday every motorist who is used to doing everything with his own hands is faced with the need to dismantle the crankshaft pulley. Most often this is due to the replacement of sealing glands, which over time age, crack and begin to leak oil. It is not particularly difficult for an experienced minder to remove the crankshaft pulley, however, as the forums on the Internet show, ordinary motorists who decide to save money often encounter great difficulties here.
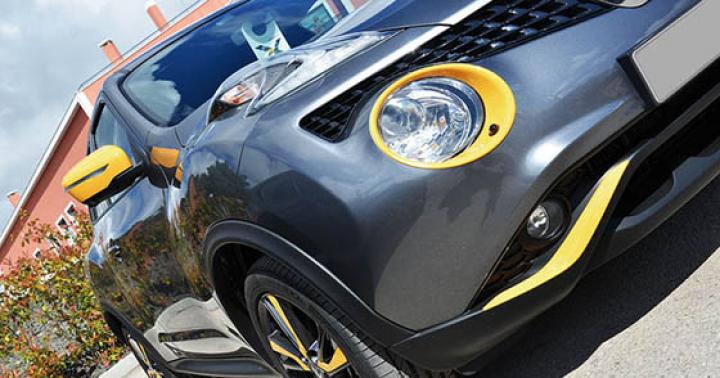
It looks like a crankshaft pulley
What prevents you from removing the crankshaft pulley?
The car manual and repair manuals describe the procedure for removing the crankshaft, including removing the pulley, beautifully and concisely, and it seems that it is easy to perform. But in reality, everything turns out to be not so simple. There are several reasons for this:
- The location of the pulley in the engine compartment is inconvenient for work. It is hidden behind the generator and the approach to it is limited to the body structure. Pulleys are available in conventional and damping types, which have an additional outer ring with a rubber seal to absorb vibration. To get to the pulley mounting elements, you need to loosen the tension bolts and remove the alternator and power steering belts. Even then, when carrying out dismantling work, special care should be taken in the application of forces so as not to accidentally damage the surrounding nearby parts and the body paint.
- When installed at the factory, the crankshaft pulley is clamped with a bolt or nut with a high compression force to ensure a secure fit. While the engine is running, the right-hand mounting thread further strengthens the clamp. High temperatures and environmental influences over time exacerbate this process through oil coking and metal corrosion. As a result, the fastening nut or bolt firmly adheres to the pulley housing, and it is not easy to break this adhesion of metals without knowledge of special methods.
- When the crankshaft turns freely with any wrench. Therefore, before unscrewing the crankshaft pulley, the issue of reliable fixing of its position should be resolved in order to exclude rotation when unscrewing the nut. In the workshops, special devices are used for this, which are bolted to the pulley in the technological holes and create a reliable stop against rotation. In the absence of such devices, this problem can be solved by installing reliable stops under the wheels and setting the 4th speed mechanical box gear. You can also fix the crankshaft flywheel by pushing a mount against its teeth or holes.
How to unscrew the crankshaft pulley?

Removing the pulley. Unscrew the nut
The pulley can be secured to the end of the crankshaft by means of a power bolt or nut. The nut is found on most rear wheel drive cars. It may have special protrusions for engaging with the handle of the "crooked starter", the so-called "ratchet". To break the nut, the master at the service station uses a 36 or 38 socket wrench with a welded long handle and a fixing device put on the pulley. How to unscrew the crankshaft pulley , fastened with a nut, at home? To do this, you can proceed as follows:
- put the car on a pit or overpass;
- engage 4th gear to prevent the crankshaft from turning when unscrewing the nut;
- raise the handle parking brake up all the way to prevent turning the wheels and advancing the car;
- tap the edges of the fastening nut with a wooden hammer;
- using a socket wrench to the size of the nut and an extension of the handle in the form of a metal pipe, try to move the nut from the stuck position with a sharp counterclockwise motion.
Video: How to unscrew the nut on the wheel pulley and replace the oil seal
If successful, you can, by changing the position of the key head, gradually unscrew the nut to the end. If this attempt was unsuccessful, then the following method can be applied:
- put the gear knob in neutral;
- remove the caps from the spark plugs to prevent sparking and starting the engine;
- put the head of the wrench on the nut and rest the end of the lever on the ground or a spar so that the pulley cannot turn to the right;
- by briefly switching on the ignition, give the crankshaft a rotation impulse. Usually, one or two starting attempts help the nut get out of place, and then it can be easily unscrewed with a wrench.
On most front wheel drive cars, the pulley is bolted. Before removing the crankshaft pulley , tightened with a bolt, proceed as follows:
- raise the right side of the machine from the front and install it on a tragus or stump, dismantle the wheel;
- remove the air filter unit, protective cover, loosen and remove drive belt electric generator, remove all parts that impede free access to the pulley;
- to lock the crankshaft, you need to remove the plug in the clutch housing and insert a pry bar into the hole, resting it on the flywheel teeth;
- Throwing the head of the key over the bolt, use a lever extension to apply several sharp forces in the direction of left rotation to disengage the bolt from its initial position. Most of the attempts are successful. If unsuccessful, you can try the method above for unscrewing the nut, briefly starting the starter.
It should also be borne in mind the experience of ordinary people, which allows you to reduce the adhesion of the nut and bolt to the pulley. If you pre-grease a bolt or nut with vinegar essence, brake fluid or WD grease, they will loosen more easily. there is information about where and how to check the crankshaft sensor.
How to remove the crankshaft pulley
After unscrewing the fastener, you need to remove the pulley. It sits tightly on the hub and is fixed with a key, so it will not be possible to simply pull it off the shaft by hand. It is best to use a special puller for this, which has two lugs gripping the edges of the pulley and a central twisting screw stop resting on the shaft axis. In the absence of a puller, you can use pry bars for this, with which you need to evenly pry the pulley from opposite sides, applying forces in the direction from the shaft.
The point of application of the force should be tried to be chosen as close as possible to the shaft. Before removing the crankshaft pulley, you can gently tap it with a wooden hammer to eliminate possible misalignment. Be very careful not to deform the retaining key and groove. Re-installation of the pulley on the shaft should be done after processing the mounting places with grease, so as not to apply large forces leading to misalignment.
Short way http://bibt.ru
Assembly of pulleys.
Depending on the design of the transmission, the pulleys can be located anywhere on the shaft or mounted on its seating end. Split pulleys are installed anywhere on the shaft and are assembled without any difficulty. When tightening the two halves of the pulley with the bolts, make sure that the planes of the pulley part are aligned without distortions, displacements and slots. The pre-assembled pulley with a keyway is pushed onto the key laid in the shaft groove, then the nuts are tightened first at the hub, and then at the rim.
One-piece pulleys are more often located at the end of the shaft protruding from the bearings. This end is made conical (Fig. 109, a) or cylindrical (Fig. 109, b), with a prismatic or wedge key. The keyed cylindrical shaft has a collar to fix the position of the pulley. A washer is placed on the free end of the shaft end, which is fastened with screws screwed into the shaft end. In exact joints, the pulley groove and key are fitted by sewing. The key must be installed with light blows with a copper hammer or with a clamp.


Rice. 109. Techniques for assembling pulleys and checking the mutual parallelism of shafts:
a - at the tapered end of the shaft, b - at the cylindrical end of the shaft with a key:
1 - shaft, 2 - key, 3 - locking screw; c - seating the pulley on the splined shaft, d - checking the mutual parallelism of the shafts with weights, e - checking with a metal ruler, e - checking with a cord: 1 - arrow, 2 - pulley, 3 - weight
Centering the pulleys on the taper(see Fig. 109, a) gives a better fit of the hub bore to the shaft journal.
Fitting pulleys on splined shafts(Fig. 109, c) has a great advantage over the above-described method: better alignment, greater strength and less wear of the mating points are obtained.
After installing the pulleys on the shaft, check the correct fit, which is reduced to a runout check. Runout is the vibration of the outer surface of a part as it rotates around its axis. The value of the runout of any point on the surface of the part is the largest swing of the oscillation of this point in one revolution of the part.
The beating of the pulleys causes rapid wear of the bearings, and in the gears of precision high-speed metal-cutting machines, it increases vibrations, which deteriorates the surface finish of the workpieces.
For normal operation of the belt drive, it is necessary that the middle planes of both pulleys are aligned, which is possible only with the mutual parallelism of the axes of the driving and driven pulleys (Fig. 109, d, e, f).
Assembling and inspecting V-belt pulleys is no different from flat belt pulleys.
Why are special technological holes made in the pulleys? In car repair shops, there is a special device for fixing the shaft, which must be screwed to the pulley with bolts and the shaft must be locked.
If there is no special device for fixing the shaft, which is screwed to the pulley, then you need to put good anti-recoil devices under the wheels of the car and put 4th gear on the checkpoint.
Or, the third option is to rest the pry bar on the flywheel teeth and fix the crankshaft from turning while unscrewing the pulley nut.
Another option is to insert a pin into the hole of the pulley, and install a mount on the pin and the second stop, as in this figure. 
How to unscrew the crankshaft pulley
Depending on the design of the crankshaft, the pulley is attached to it either with a nut or bolt. On cars with rear wheel drive Basically, the pulley is secured with a nut.  The engines of some rear-wheel drive vehicles can be started with a special handle, for which special protrusions are made for engaging the handle. This handle is also called a "curved wrench", and the engagement for this wrench is called a ratchet.
The pulley fastening nut is installed with a size of 36 or 38 mm for a wrench. Use a socket wrench. The key is strengthened by welding a long handle or a tube is put on to increase the "shoulder".
How to unscrew the pulley nut:
- Put the car on a pit or overpass.
- Raise the hand parking brake.
- Turn on the 4th speed at the checkpoint, place stops under the wheels.
- Do not knock hard on the edges of the nut.
- Throw in a socket wrench, lengthen it with a pipe and rip off the stuck nut.
If the pulley nut does not loosen:
- Move the handle of the box to neutral.
- Remove the spark plug wires from the spark plugs to prevent the engine from starting.
- Place a socket wrench on the nut and lengthen it with a pipe. Throw the key in such a way that the pipe rests against the ground or the side member of the machine on the right side to prevent the pulley from turning clockwise.
- We make a couple of short sharp turns of the ignition key to turn on the starter. The starter motor will rotate the flywheel, the flywheel will rotate the crankshaft, and the pulley is locked with a key. In this case, the usually stuck nut quickly "comes off".
The crankshaft pulley for front wheel drive vehicles is mainly bolted. To remove the crankshaft pulley of a front-wheel drive car, you must proceed in this order:
- Raise the front right side of the car with a jack. Place a tragus, tree stump or a pair of wheels with discs.
- Remove the wheel.
- Dismantle and remove air filter with body.
- Remove the protective cover.
- Loosen the belt tensioner and remove the alternator belt.
- To fix the crankshaft, remove the plug in the clutch housing, then insert a pry bar into the hole and rest it between the flywheel teeth.
- Now you need to put on a socket wrench, lengthen it with a pipe and sharply try to turn it counterclockwise. The main thing is to rip off the stuck pulley bolt.
If it is not possible to rip off the bolt, then we use the method of unscrewing it with a starter. This method is shown above.
Useful advice from locksmiths who have seen a lot: use a solvent or VD-40, or a similar anti-rust agent. After sprinkling on the thread (if the pulley is attached with a nut), wait 15 minutes, then try to turn it off. If a bolt, then it is not easy to apply this agent to the thread, although it is possible to spray around the bolt, it is possible that the liquid will pass through the micro-crevices and decoke the connection.
Removing the pulley
Unscrewing a bolt or fastening nut is only half the battle. Next, you need to pull the pulley off the shaft. The pulley cannot be easily removed by hand, if its seat is not broken. In addition, the pulley fits snugly on the shaft, then it is also fixed against turning with a key.
There are special pullers for removing the pulley from the shaft. There are mechanical and hydraulic pullers.
The construction of the mechanical puller is simple. It usually has three legs, with which it is necessary to hook the pulley itself, and rest the central rod against the shaft. After that, you need to rotate the rod, the legs will straighten and pull the pulley towards themselves.  There are even simpler pullers that you can do yourself.
  If there is no pulley removable device, pry bars can be used. If one person shoots, then in turn, pushing slightly on each side so that there is no bias. If there are two, then simultaneously from different sides, a pulley is pressed out of the crankshaft with a sharp movement.
It also happens that when using a puller, the walls of the pulley grooves do not withstand and break off. Therefore, when using pry bars, they should be hooked as close to the shaft as possible.
Installing the pulley on the crankshaft
In order to re-install the pulley on the engine crankshaft, you need to check the seats. If there are burrs, scuffs, remove them with an emery stone. If the old pulley fits easily onto the shaft, then the pulley is not suitable. He should sit tight, fit with a certain effort. Before installing the pulley, to reduce friction, it is necessary to lubricate with oil or lithol.
Video
In this video useful tips how to unscrew the nut securing the pulley to crankshaft car motor.
Option for unscrewing the crankshaft pulley bolt with a poly V-belt.
How to remove a crankshaft pulley on a VAZ (2108, 2109, 21099, 2110, 2111, 2112, 2113, 2114, 2115).
How to remove the crankshaft pulley bolt. Bolted connection.
How to tighten the crankshaft pulley very quickly.
Removes the crankshaft pulley on Honda car(Honda) without a special key.