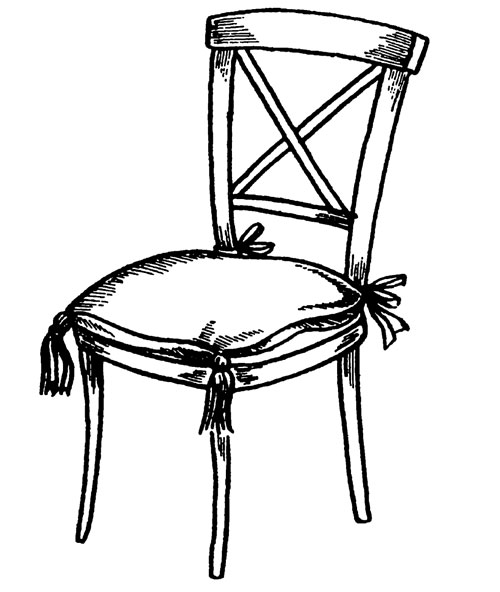
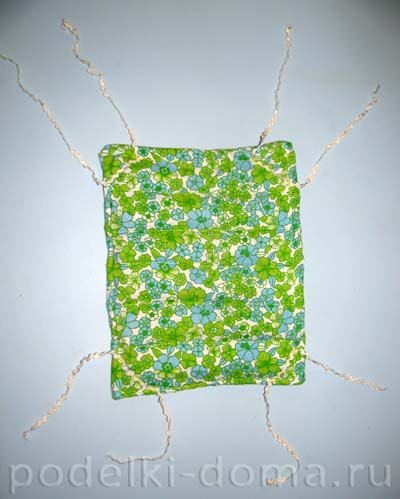
One more accessory can be made of fabric and foam rubber, which will not only decorate your home, but also make your life more comfortable. It is a chair seat cushion. This pillow would be appropriate for a Viennese chair, stool or any other hard-seated chair.
To prevent the pillow from sliding out, there are ties made of the same fabric, and brushes reinforced at the corners will give it additional charm.
You will need:
- velor or mutton with a width of 80 cm and a length of 90 cm;
- thick foam rubber measuring 40 x 40 cm;
- four silk brushes;
- silk braid to match the tassels;
- sewing threads.
Features of a cut. How to sew a chair pillow:
- Since the pillow is designed for a specific chair, it is impossible to give a universal pattern. When cutting, it is best to do this: turn the chair over, attach its seat to the paper spread out on the table and circle it with a pencil. If for some reason it is impossible to do this (for example, the back of a chair interferes), then do the opposite: attach a sheet of paper to the seat and mark the outlines with a pencil.
All that remains is to cut the pattern and it is ready to use. In our case, the fabric was calculated for the seat of a chair with a square
forms 40 x 40 centimes.
Fold the fabric in half with the right side inward, attach a paper pattern on top, pin it to the fabric with pins, circle it with chalk, and then cut out two parts from the fabric at once, retreating from the chalked line by 2-3 cm.This large seam allowance is necessary for free placement in foam rubber cover - the thicker the foam rubber, the more seam allowance is required.
From the remnants of the fabric, cut a 6 cm wide bias tape to make the ties. The length of these strings can be different and is determined empirically. Consider how long the ties should be for the design of your particular chair so that the pillow is securely attached to the seat and does not slide out.
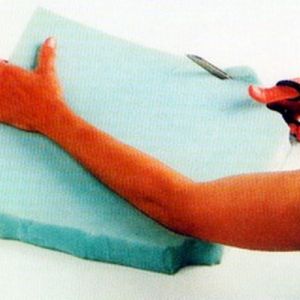
Cut one piece out of foam rubber along a paper pattern. No seam allowances are required here.
1 ... Sew the strings first. To do this, fold the cut ribbons in half along their length with the right side inward. Align the cuts, machine stitch 1 centimeters from the trimmed edges. Using scissors or a long knitting needle, turn the strings out front side.
2. Fold the two pillow pieces together with the right sides facing inward, align the cuts and pin them together. In the right places, pin the ties between the two parts, making sure that the ties are located inside between the two parts, and the cuts of their end sides are aligned with the cuts of the main parts. Stitch in a circle, 1 cm back from the cut edges. Leave the 20 cm seam section unstitched. Fold the seam allowances of the unstitched section to the wrong side and press iron on.
3. Turn the cover onto the front through the unstitched seam. Insert the foam into it and carefully sew the hole with small stitches by hand.
4.
Apply a silk tape around the contour of the pillow, pin it with pins, and then sew it by hand. Sew brushes on the corners of the product. Tie the ends of the strings untreated with tight knots.
So we made a chair cushion. Place the finished cushion against the seat of the chair and tie the strings tight so that it is securely attached.
What does a person need to feel happy? Of course, the warmth of those close and dear to him, as well as the comfort of his home. Although often you have to live in not very pleasant conditions of bare walls and cold furniture. Modern designers have found a solution to this: pillows cannot be made such a product during the day. This is just the case when you can say that it is cheap, but cheerful.
First steps in history
This invention of mankind has a very long history, the beginning of which is quite problematic to find. But it is known that initially it was just a matter that was covered on the seat. After some time, she acquired a lining of warm fibers, ties, a bright pattern on the front. As a result, it completely began to resemble a real chair pillow.
Over time, such an element of decor was modified, receiving more and more new details. Ruffles, ribbons, lace and beads folded into real patterns on the pillow, making it a real work of art. Yes, perhaps now these decorations will seem superfluous and you would rather choose some practical fabric with a simple pattern. But all the same, this detail will remain a decoration of our home.
Home workshop
Why are various handicrafts valued? For the fact that you can do everything at home using various junk things, including old sweaters, pillowcases and blankets. Such materials will be just perfect for making pillows for chairs with your own hands.
Necessary materials
Sewing a pillow on a chair with your own hands will not be difficult even for novice seamstresses who work with uncertainty on a sewing machine. For this you will need:
- Pillow fabric. It is very important to consider where the chair for which the pillow is being made is located. If it is located in a cold room, then the best material will become wear-resistant felt. If most of the time the chair is on a light balcony, then the non-fading mat will perfectly fit into such a set. The length of the fabric is selected individually. This figure only depends on the size of your chair.
- Filler. Since the pillow performs not only a softening, but also a heating function, a good layer of foam rubber or some kind of cotton wool will be a great addition to the product. But it should be borne in mind that over time, a poor-quality filler can be felled.
- It can be either a machine or a set of needles and threads.
- Buttons. If you want to make your pillow more original, then various buttons will help you to fulfill your idea.
- Ties for the pillow. Their role can be played by any ribbons, laces, ropes, homemade strips of fabric and chains. The main thing is that they do their job and keep the product in the right place.
- Pattern. Without it, it will be difficult to make a pillow for a chair with your own hands.
When everything is ready, you can get to work.
Making patterns for pillows on chairs with your own hands

First you need to make a pattern. To do this, decide on the type of product. If you want a round pillow, then you can take a regular circle as your pattern. If you do decide to make a product that matches the shape of the seat, then you will have to work a little.
To do this, you need to attach a piece of tissue paper or tracing paper to the surface of the chair. Since this material is thin, you can easily see the outlines through it. They will be the pattern. Cut along the contour and get the desired workpiece.
Since most people prefer to make pillows for chairs with their own hands, photo patterns in various variations can be found on the Internet or in various magazines.
Sewing stage
Do not be intimidated by the name of this stage, as it does not imply any difficulties. This whole process can be decomposed into small stages:

- To get started, take a paper pattern and attach it to the selected fabric, folded in half. Circling the pattern with a piece of soap or a marker, carefully cut out the blanks, not forgetting to leave a couple of centimeters for allowances and, if necessary, cleaving the layers of fabric with pins.
- Now we sew three of the four sides of our pillow. You should gently hold the fabric or simply sweep the workpiece along the contour in advance to avoid wrinkles. It is worth clarifying that the entire sewing process takes place from the seamy side of the material.
- Having turned the pillow to the front side, we fill it with padding material.
- We sew the fourth side of the pillow, carefully hiding the inner lining and seams.
- Now we sew the strings to the pillow. This can be done from both the top and the bottom of the product. It is most convenient to do this manually, since sewing machine is unlikely to be able to sew a thick lining complete with two layers of fabric. Small bows can be formed from ribbons, which will perfectly decorate the finished interior element.
It should also be remembered that the length of the tape should be sufficient to reach the chair leg, make a turn there and tie a bow. This method is considered very convenient, since its mobility allows the pillow to be quickly removed at any time.
![]()
Finishing touches
Now that our pillow is ready, you can safely put it on the chair and use it as intended. To do this, you just need to put the product on the seat, fix it in the desired position and tie the ribbons.
This is undoubtedly a thing to spend time on. In addition, it should be noted that do-it-yourself chair pillows are a great option for a housewarming gift or just for some holiday. And most importantly, the soul and all the warmth that it will give to the owner for many years of faithful service is invested in such a thing.
Master Class, how to sew a pillow on a chair, prepared by Elena Muravyova.
There are plastic chairs from IKEA in almost every second family where children grow up. The chairs are great, just harsh for toddlers. I solved this problem by stitching a soft pad, "podpnik". The sewing process for such a pillow is very simple.
How to sew a chair pillow
1. Select the fabric, measure the seat of the chair and cut out rectangles of the appropriate size from the fabric, adding 1 cm to the seams on all sides. It is good if the fabric is natural and soft to the touch so that it is pleasant to sit on. I took a simple chintz. 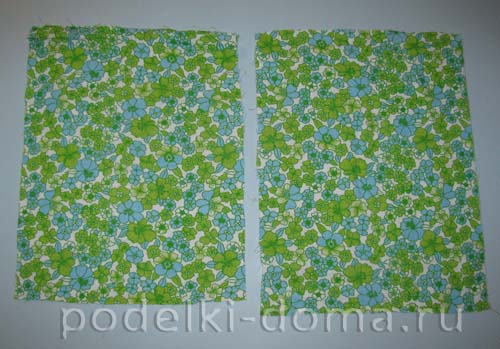
2. Then we take the fabric more tightly, fold it in several layers. You can lay a pad of padding polyester for more softness, but this is not necessary. For the inner layers, unnecessary trimmings, old towels and other rags that are a pity to throw away are well suited. 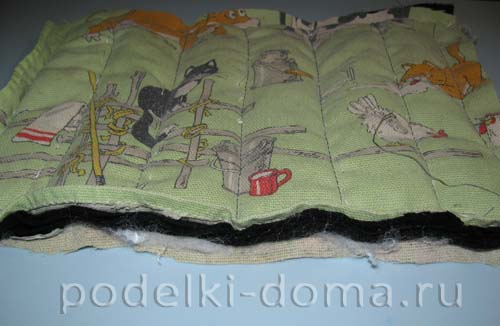
3. Fold all layers neatly and sew by hand with a large stitch so that all layers of fabric are securely fixed. 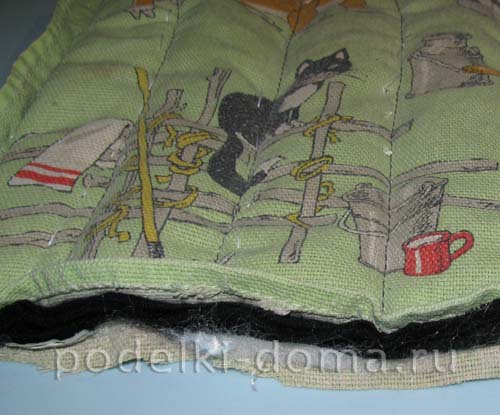
4. Now we take the first blank and sew it on three sides from the wrong side. This is a pillow cover. 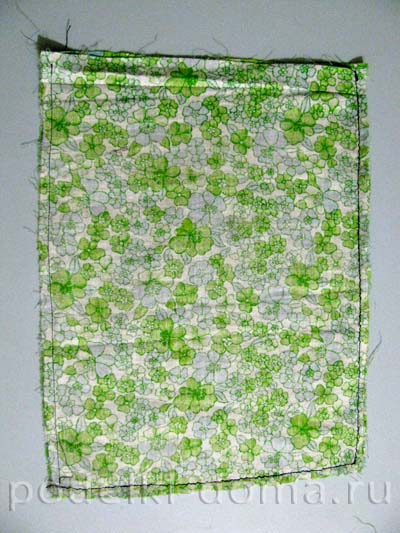
5. We turn it over to the front side. We push the resulting stuffing from the layers of fabric into the cover. We do this in the same way as we put a pillowcase on a pillow. And we sew up the rest of the side.
6. Then you can make a small decor. I sewed parallel lines on the pillow. You can sew circles or other shapes with a decorative stitch. This is a matter of taste.

7. Next, sew on the ribbons to secure the cushion to the chair seat. Sew the ribbons on all four corners of the pillow.

8. Finally, tie strings around the chair legs and invite the child to sit on the soft chair! 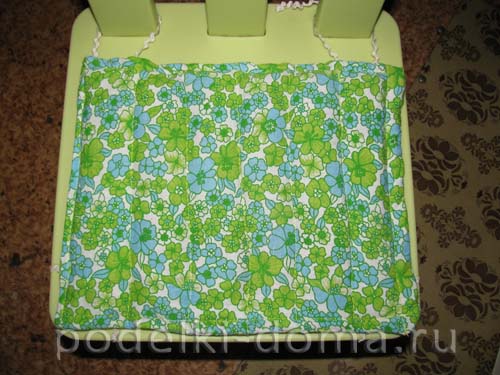
If you find an error, please select a piece of text and press the keys Ctrl + Enter... Thank you for helping to make our portal better!
Diary decoupage
Decoupage of the diary Another option for a gift for a man on February 23: a diary decorated in ...
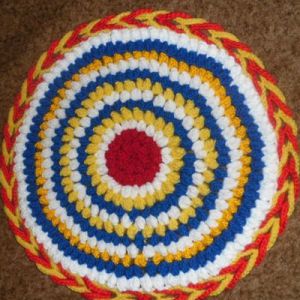
Hot coasters "Sunflowers"
A new master class from Lyubasha (her other works are a Handbag for a girl and a Box of postcards). On this...
Step-by-step master class on creating a felt photo frame
Another master class by our beloved author Antonina Mazur - photo frames made of felt. From felt we can ...
Vase "Victory Parade"
Ilyina Elena Sergeevna, 5 years old, the city of Volgodonsk. Teacher Elena Vladimirovna Nedbaeva. MBDOU de ...
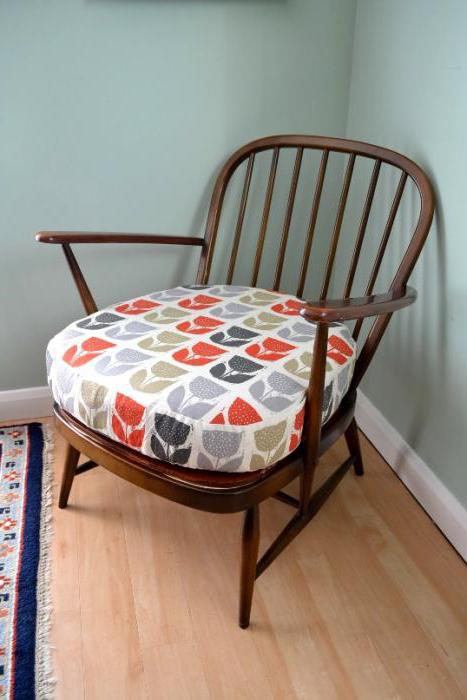
They simultaneously perform several functions: firstly, they make sitting on a chair more comfortable, secondly, they are a decorative element of the interior, and thirdly, in such a simple way, you can extend the life of old chairs, which have worn out the upholstery, but have retained their functionality, so throw it away their hand does not rise.
We sew pillows for chairs
The most in a simple way how to make a pillow for a chair with your own hands - to sew according to a simple scheme. The lightest pillow shape is rectangular. To do this, you need to take measurements from the seat of the chair (length, width), and the easiest way is to trace the contours of the chair on a transparent tracing paper.
After cutting a pattern out of the tracing paper, try it on the seat to make sure it is the correct size. Pay particular attention to the back edge near the backrest.
We cut out 2 parts on the fabric for the future pillow, not forgetting about the seam allowances. We also apply the pattern to the soft foam rubber, which will act as a filler for the pillow, circle and cut out the plate of the desired shape.
On a typewriter, we sew 2 pillow parts on three sides, turn out the cover, place the foam rubber inside and carefully sew the fourth side by hand.
It remains to attach strings at the 2 corners of the pillow, if you wish, you can decorate it with buttons. In this simple way, you can quickly sew an excellent chair cushion.
.Knitted chair pillows
Alternatively, the chair cushion can be knitted and is easiest to crochet. For example, you can knit a beautiful volumetric chair pillow like this:
If you are new to crocheting, you can start with simpler patterns. For example, with this pad:
This chair cushion looks great on round chairs, although it can be used on square seats as well. She is very bright and cheerful, so she will definitely find her place in your home.
Decorative pillows for chairs
If you want to create a very bright and colorful little thing, you can make such a beautiful chair pillow.

For her, we need multi-colored scraps of fabric, preferably very bright, with interesting and varied patterns. We spread the cut out details of the future pillow in a circle and gradually sew them together. For the bottom of the pillow, just cut out a round piece. We use foam rubber or any soft synthetic filler such as padding polyester or padding polyester as an inner padding.
Sew the two halves of the pillow cover, sew on the ribbons, fill the pillow with filler and carefully sew the last hole. In the center of the pillow we sew a regular round button, previously trimmed with fabric. Our decorative seat pillow is ready!
Orthopedic chair pillow
Sometimes people use special orthopedic pillows for therapeutic purposes. They are attached to the back of a chair or placed on its seat, they have the correct anatomical shape and serve to unload the tailbone, maintain the back and spine in the desired position during a long working day.
In addition, such pillows help to normalize blood flow in the pelvic organs, which is very important in conditions of constant sedentary work. Often such pillows are used after injuries to the ischial tubercles, during rehabilitation periods after various damages pelvis, as well as the postpartum period.
Typically, the seat is shaped like a ring. Even if the pillow is square or rectangular, there is the same ring inside as a base.
Such pillows are often filled with expanded polyurethane foam or, more simply, foam rubber. By the way, the predecessors of such foam cushions are the usual inflatable seat cushions, which were in great demand as "hemorrhoid" cushions.
For my husband's birthday, I decided to sew a pillow for him on a chair. As it turned out, sewing it is pretty easy, and I did it in a few days. In the middle of the pillow I inserted an embroidery, which took me a week to make.
I'll make a reservation right away that I sewed mostly only when my little daughter was asleep. This process can take much less time for you than for me.
Embroidery on the pillow
On the Internet, I found an embroidery pattern with oak branches and acorns. They are a symbol of masculinity, masculine strength. This embroidery is considered a protective embroidery.
You can do without it or embroider something else, or insert a bright fabric into the middle of the pillow.
Below is the embroidery pattern I used.
That's what I did. 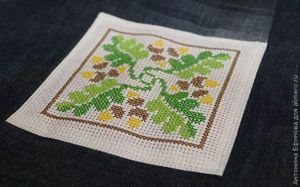
How to sew a pillow?
I needed:
Denim shreds for the pillow;
- terry stuffing;
- oblique yellow tape;
- embroidery;
- a needle and thread to match the fabrics used;
- sewing machine.
Manufacturing process
First, I measured the length and width of the chair for which I decided to sew a pillow. 
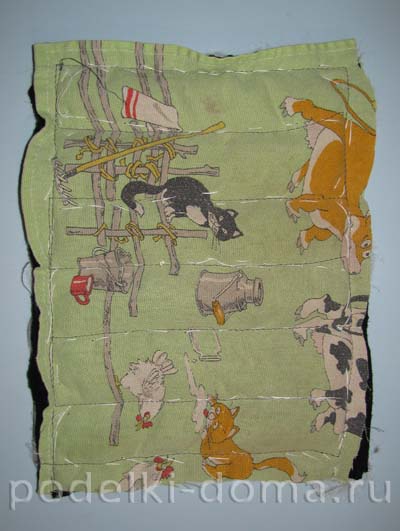
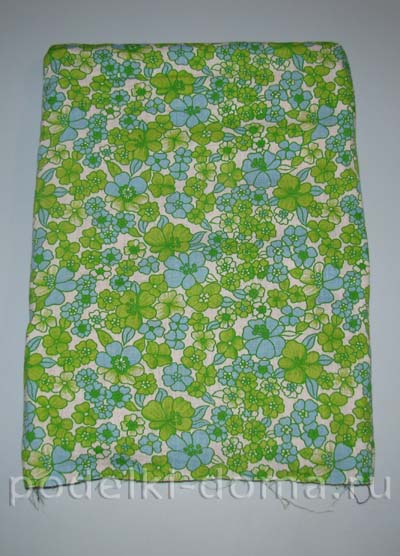
From scraps of fabric, I sewed two identical squares for the top and bottom of the pillow to fit the chair, taking into account the seam allowances. 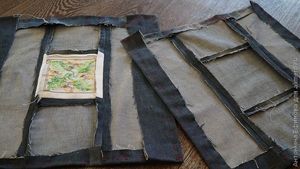
As a fabric, I used old jeans, which I was sorry to throw away. Each square is sewn from 5 pieces. I sewed an embroidered canvas into the middle of the top square. 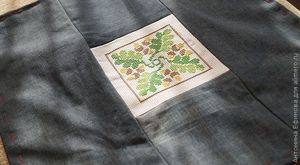
Then I sewed a yellow bias tape to the edge of one square so that the seam is on the wrong side. Then I put the padding inside it, and on top - another square. 
For padding, I used fabric from an old terry cloth robe. I needed 2 layers of terry cloth. You can use synthetic winterizer, cotton wool, foam rubber, old tights or something else. 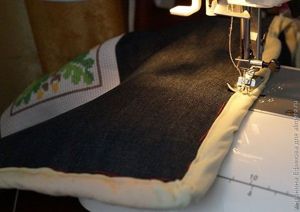
Next, I sewed a bias tape on the other side on a typewriter, and inserted strings into the corners of the pillow, with which you can tie it to the back or legs of the chair. I sewed 2 strings into one corner. 
That's all - the chair cushion is ready! 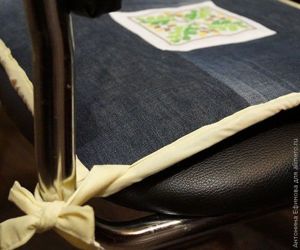
My husband was very pleased with the gift. He is happy to sit on the pillow and says that it turned out to be very comfortable and soft. And I'm glad that I pleased him :)
I hope this MK is useful to you! I wish you inspiration and realization of your creative ideas! Go for it, you will succeed!


