Mazda has taken root well on domestic and European roads, this car is very popular with drivers. Therefore, it is quite logical that in our market you can find a lot of accessories designed for this machine, or universal, suitable for a wide range of models. Including the car radio.
However, when the question arises of choosing a device for a particular brand and model, it is best to purchase Mazda head units. There are several good reasons for this.
The best choice is a regular device
For starters, you can note the visual component. In other words, design. Of course, many salons have a standard interior design. At the same time, any device that is not adapted to the interior of the cabin will stand out too much against the general background. Therefore, universal radio models are made in a neutral style. In a budget car or a domestic one, this can still be somehow overlooked, but in a stylish Mazda salon, such a device will look gray and faded. As for regular radio tape recorders, they are made taking into account all the nuances of the factory interior, and are maximally adapted to it. The device harmoniously fits into the overall interior and merges beautifully with the dashboard.
Next is to talk about the characteristics and functionality. They may differ depending on the radio itself and the price of it. The simplest device allows you to play music in popular formats, is equipped with a disk drive, recently it often has a USB port for a flash drive and an FM tuner. Much depends on the manufacturer of the radio, but usually the sound in such devices is much better than in what comes in the basic configuration of the car. This was the reason that motorists began to replace factory radios with more advanced ones.
Devices from the middle and high price category can already please the driver with additional functions. This is a TV tuner, and a GPS navigator with all modern maps of Europe and the CIS, and a Wi-Fi module that allows you to connect to the Internet and watch movies or music directly from the Web. Recently, there has been a demand for a 3G module, and manufacturers have immediately satisfied it. The number of playable formats has also increased - now these are not only the most popular, but almost all existing today. Mazda's premium head unit has a chic touchscreen display. Its dimensions may vary, of course, but in any case, the control here is more convenient and simple.
And, of course, one cannot fail to note such “chips” as parking sensors, a rear-view camera, a tire pressure check module, a video recording function, etc. Today's Mazda radios are almost full-fledged computers.
Read also:
- If you regularly travel in unfamiliar areas by car, then you clearly need a navigator. With this device...
- Any man driving a car will be pleased to receive a car accessory as a gift. In today's article, we will find out…
- In order for the interior of the car to look attractive after a long operating period, it is necessary to properly ...
- Look for good covers at an affordable cost, then you should contact our online store http://mirdopov.ru/katalog/dopolnitelnoe-oborudovanie/chexlyi/toyota/rav-4.html. We are a representative…
- Modern roads are just terrible, and it won't get any better. Therefore, you need to look under your own car more often, carry out a systematic…
Car radio for Mazda 3
The car radio for Mazda 3 will be presented in our article. We will try to bring all its positive and negative sides, make a full technical analysis and give valuable advice on choosing.
The Mazda 3 car radio is always a high-tech device with good build quality.
Incar CHR-4633 MZ3
Below is a description of this device:
- Incar is a high quality device. As it was said, we developed a radio tape recorder specifically for Mazda 3 (2009-2011 release years);
- The design of the device is completely identical to the regular device.
Note. Connecting the car radio is very simple: just do it through the standard connectors.
- All the experts who conducted the test agree in one opinion: this model is a multifunctional multimedia device, which has many useful functions for the motorist and his passengers;
- The radio tape recorder is equipped with a GPS-module, which will provide high-quality navigation during the trip. In addition, this module will allow you to download new maps of tracks and roads;
- It will also be useful that the device is able to read a large number of formats (audio / video / text);
- For those who like to listen to interesting radio programs, the manufacturer has provided FM and an analog tuner;
- Another useful function of the radio is the ability to simultaneously listen to music and study the navigator;
- The device will allow you to easily access the Internet, using the display of traffic jams on the roads of Russia and other countries.
Note. It is worth noting that loading traffic jams is a big advantage. The navigator himself will be able to pave the way, choosing the shortest and safest option. True, to access the Internet you need an Intro modem, which will have to be purchased separately. But, it's okay, because it costs only 3 thousand rubles.
- The manufacturer gives a one-year warranty for this radio, although the device functions without problems for quite a long time (subject to proper handling).
Equipment
Experts, giving advice when choosing a radio, recommend paying attention to the set of accessories. The eminent manufacturer always takes care to provide the user with everything necessary.
The manufacturer of this radio took care of its customers well too.
Here are the accessories included in the kit, except for the head unit itself:
- GPS antenna, which is based on a magnet;
- High-quality cords for connecting iphone (see);
- Wires intended for connection with the electrical wiring of a car;
- Wires for AV: input / output;
- Many necessary plugs for power, sound and steering interface;
- TV tuner analog;
- Convenient remote control;
- SD card with Navitel license code;
- Instruction;
- Stylus;
- Warranty papers.
Basically, it's very good.
Main characteristics of the device
Here are not all the technical capabilities of the radio. If you like it, you can see the full description in the instructions.
Having bought this radio, you can install it yourself. It is enough just to have photo materials on hand and watch a video review. The price of the radio was indicated above.
| 1–6. Buttons 1-6. Receiver presetting 7. Anti-theft indicator 8. ON button. Power on/off 9. Button “-”. Volume down, bass down, treble down, left/right and front/rear speaker balance 10. Button “+”. Volume boost, bass boost, treble boost, left/right and front/rear speaker balance 11. BAL/FAD button. Single press: left/right speaker balance. Press twice: front/rear speaker balance 12. BAS/TRE button. Press once: Select bass tone adjustment. Press twice: Treble control selection |
16. BND/AST button. Short press: FM1/ FM2/ AST/ MW/ LW band switching. Long press: Activate the FM autostore function (Autostore) 17. Button. Automatic or manual search for radio stations in the lower part of the range 18. Buttons. Partial press: reverse. Full press: cassette ejection 19. Button. Automatic or manual search for radio stations in the upper part of the range 20. Buttons. Fast Forward/Rewind 21. TA/AF button. Short press: traffic information priority. Long press: Turn on/off the AF function to automatically search for the broadcast frequency of the selected RDS station that provides the best signal reception |
Digital display indication
Steering column remote control
Specifications
Theft protection: encoded device with a 4-digit code.
Steering column remote control: lever with controls mounted on the steering column to the right of the steering wheel.
Radio receiver: output power: 4x12 W (4x3.5 W with a coefficient of non-linear distortion up to 1%). RDS Radio Data System.
Radio frequency bands:
– FM: 87.5-108 MHz;
– MW: 531-1629 kHz;
– LW: 144-288 kHz.
Number of fixed settings:
– FM (automatic storage in AST mode): 6;
– FM (manual storage): 12 (2 sub-bands FM1 and FM2, 6 stations each);
– MW (manual storage): 6;
– LW (manual storage): 6.
Coded anti-theft device
The device is based on a microprocessor. After disconnecting the car radio from the car's electrical network (removing the battery, dismantling the radio or installing it for the first time), you must enter the security code. The radio can only be switched on after entering the correct code.
Code entry
| PROCEDURE | |||
|
Wrong code case
If a mistake was made while entering the code, a short low tone will sound. The message “ERR CODE” will appear on the display. Repeating an attempt to enter the code is possible only after a pause of 1 minute. The duration of the waiting period is doubled after another failed attempt. This period is limited to approximately 32 minutes. Turning off the radio does not affect the duration of the mandatory pause. The pause time countdown will start again when the radio is turned on. When the pause ends, the message “CODE” will appear on the display. Now you can enter the code.
The red indicator 7 flashes when the ignition is switched on, indicating that the anti-theft protection device is activated. The indicator goes out when the ignition or radio is turned on.
When the battery is disconnected or reconnected, the message “CODE” appears on the radio display. Enter a code.
Audio system
Switching on and off is done by the ON button. If the ignition is off, the radio will automatically turn off after 1 hour.
Radio
Buttons 1–6 (see fig. Front panel and controls). Short press: Activation of fixed tuning to a pre-selected radio station. Long press: remembering the current setting in manual mode.
16. Short press: FM1/ FM2/ AST/ MW/ LW band switching. Long press: Activate the automatic FM station storage function.
17. Search button (automatic or manual) for radio stations in the lower part of the range.
19. Search button (automatic or manual) for radio stations in the upper part of the range.
21. Short press: turn on/off the TA mode. Long press: Turn on/off the AF function.
Features of receiving radio signals
The radio receiver can receive Radio Data System (RDS) signals. If the selected FM radio station has an RDS signal, the receiver will automatically tune in to the frequency that provides the best reception.
Selecting a radio station (auto seek)
Press button 17 or 19 (see fig. Front panel and controls) to start auto searching and tuning into a radio station. When searching, the selected range is scanned, which is reflected on the display. After tuning to the nearest radio station in terms of signal frequency, the broadcast frequency of this station is fixed on the display. When the TA mode is on, the automatic search is limited to RDS stations that broadcast traffic announcements. The TA mode is one of the functions provided by the RDS system.
Auto search can also be activated using the remote control lever on the steering column.
When searching for radio stations manually, press and hold buttons 17 or 19. Warning
If, after scanning the entire range, no broadcasting radio stations are found, the radio goes into the search mode for remote stations with a weaker signal.
Storing radio station settingsUsing the six buttons 1-6, you can preset the receiver to 30 stations: 6 stations in the FM1 subband, 6 stations in the FM2 subband, 6 stations in the AST band, 6 stations in the MW band, 6 stations in the LW band. The frequencies of the six stations in the AST band are stored automatically. Memorization of fixed settings for selected radio stations operating in other bands is done manually.
Manual memorization of tuning to the selected station
Select the desired range (except AST). Tune the receiver to any station. Press one of the six buttons 1-6 and hold it for at least 2 seconds. Wait for a short beep, which confirms that the current receiver setting has been memorized. The new memorized preset replaces the previous radio station corresponding to that preset button in that band.
Automatic storage of radio stations in the FM band
The AST function provides automatic search and memorization of the receiver's tuning to the 6 most powerful stations operating in the FM band. This function can only be used on the FM band. When you try to turn on the AST function in the MW or LW band, you will hear a short low tone and the message “NO AST” will appear on the display. Press the AST 16 button for at least 2 seconds. At the same time, you will hear a short low tone signal. The message “FM AST” will appear on the display. The receiver will automatically memorize the frequencies of the six most powerful radio stations in the preset range. After memorizing the 6-station tuning, the receiver will emit a short beep and tune in to the frequency corresponding to preset button 1. When you turn on the AST function again, the new frequencies of the six most powerful radios will replace the old frequencies stored in memory. If the receiver cannot find 6 active stations in the FM band, the code “0000 AST” is stored in the remaining free memory cells (which is displayed when the corresponding preset selection buttons are pressed). When the AST function is turned on, when the receiver is in TA mode, memory priority is given to those stations that can transmit traffic messages.
Memorizing radio stations when the AF function is off
If the memorization of stations operating in the FM band in the RDS system standard was carried out with the AF function turned off, then turning on the receiver preset does not automatically turn on the AF function (the AF function selects one of the broadcast frequencies of the station at which signal reception is best) .
Radio Data System (RDS)
The receiver decodes the information transmitted simultaneously with the main FM radio signal and uses it to optimize reception quality and display the name of the selected station.
Basic functions of the RDS system
Optimizing radio reception (AF function). If the radio station is simultaneously broadcasting on several frequencies, the receiver automatically selects the frequency that provides the best reception conditions.
The name of the radio station. If the station broadcasts in the RDS standard, instead of the frequency of the signal and the band, the name of the received station is displayed on the radio display.
Receiving traffic announcements (TA mode). The RDS system allows you to receive live traffic information even when the cassette player is turned on. TA mode has priority over cassette. The RDS system also receives traffic announcements from other radio stations in the EON network.
Optimizing radio reception
When the AF function is on, it becomes active when the quality of radio reception deteriorates. The AF function is activated automatically when the receiver setting (frequency or range) is changed. An exception is the case of tuning to a pre-selected station if the tuning was memorized with the AF function turned off.
The AF function indicator works as follows:
– the indicator lights up constantly if several transmitters of the radio station are working;
– the indicator flashes if:
The radio station is not broadcasting in the RDS standard. The indicator automatically stops flashing 2 minutes after the start of reception of the signal of this station;
the radio station broadcasts in the RDS standard, but only on one frequency;
the car is on the border of the zone of reliable reception of the signal of the radio station transmitter (or the antenna is in the zone of radio shadow). In this case, the last tuning frequency of the receiver remains unchanged.
Search for the frequency of the radio signal at the border of the zone of reliable reception
If the car has left or is on the border of the zone of reliable reception of the radio signal of the transmitter, the receiver searches for another frequency of the same radio station. The search may take several seconds. While searching for another station frequency, the radio will display the message “SEEK+[station name]”. If no other frequency providing better reception is found, the previous receiver setting is retained. When you change the tuning frequency of the receiver, there may be a short break in the sound. While searching for a new station frequency, the AF indicator continues to flash.
Turning off the AF function
Press and hold the TA/AF button 21 for at least two seconds to turn on the AF function. The AF indicator will turn off and the search for the frequency with the best reception will stop. Regardless of the change in the reception quality of the radio signal, the tuning of the receiver will remain at the same frequency as when the AF function was turned off.
Traffic information (TA mode)
When the TA mode is activated, priority is given to traffic reports that are transmitted by RDS stations. During such a message, listening to the current program or tape playback is automatically paused. During the transmission of traffic information, the cassette is paused, the display shows alternating messages “TRAFFIC” and “[radio station name]”, all receiver control buttons are disabled, and the ability to adjust the sound remains. After the end of the traffic report, the volume automatically returns to the original level. At the same time, the cassette is turned on.
Some features of the receiver in TA mode
When the TA mode is on, automatic search is carried out only among stations capable of transmitting traffic reports. Similarly, when automatically storing (AST function) stations with the strongest signals, priority is given to those that operate in the RDS standard and are capable of transmitting traffic information.
Turn on TA mode
Turn on the receiver to the FM band. Briefly press the TA/AF button 21. The TA indicator lights up on the display. The operation of the receiver in TA mode is possible only when tuned to a station capable of transmitting traffic messages. A sign that the receiver is tuned to such a station is the on indicator TP on the display. If the receiver is tuned to a station that cannot transmit traffic announcements, a warning tone will sound.
Interrupting the traffic announcement
To interrupt the message, briefly press the TA/AF button 21. At the same time, the TA mode remains on and the TA indicator continues to light on the display. Also, the message is interrupted automatically if the signal becomes too weak.
Turning off the TA mode
Between messages, briefly press the TA/AF button 21. The TA indicator will turn off.
Traffic information (EON mode)
The EON mode of the RDS system expands the capabilities of the receiver operating in the TA mode. If the receiver is tuned to a station that is not capable of transmitting traffic information, the EON mode allows you to automatically monitor other stations that can transmit this information. Then, when such a message is transmitted, listening to the station to which the receiver is tuned will be temporarily interrupted to receive traffic information. When the receiver is tuned in to any station in the EON network, the “EON” indicator lights up on the display. EON mode can only be used when TA mode is on. While listening to a message broadcast by an EON station, the name of that station is shown on the display.
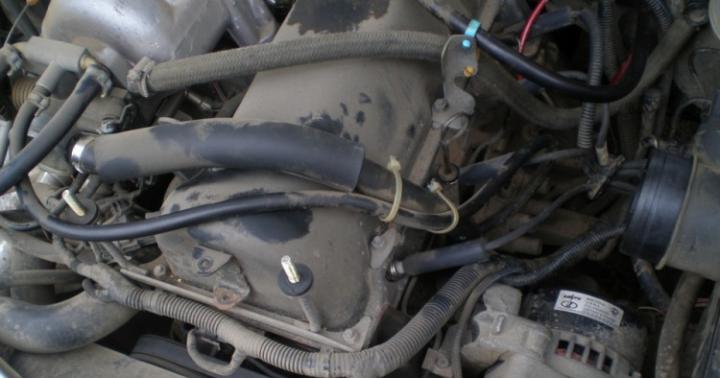
After a 3-week trip to all the well-known places for the sale of head units, I accidentally stumbled upon a staff in which DVD, GPS, Bluetooth, Radio, USB, MP3 and a lot of stuff. And what I liked most was the preservation of the function of the additional regular display, steering wheel control. The radio tape recorder is China, but the workmanship is at the level of pioneers, Sony, etc. Even the sound was amazing.
we pull out the stock

stock rear view

the red one is the Can module because of which the addon works. display and steering wheel controls

connected all the chips (the wrong ones, you can’t stick them in the wrong place) turned the key and voila everything worked, In the bluetooth mode, add. the original display showed PHONE, and all other modes are also displayed.

everything fell into place!

And finally, joy!


www.drive2.ru
The operation of the Mazda 3 head unit and carputer through the Car2PC adapter - REPORT - logbook Mazda 3 The Yolk =) 2004 on DRIVE2
Hello everyone!
Bukaf will not be much)))
Today ended my two day struggle with the Car2PC adapter! Everything is connected and functioning. In the last post, I spoke very briefly about this adapter, I'll try to fix it.

The principle of operation of this adapter is a bit similar to the USB-link for the head unit. But the link plays files from flash drives or AUX, and the adapter only plays from the aux, while it transmits commands from the radio buttons to the computer, such as track forward, backward, rewind. This adapter does not work with all applications. But I mainly use the Centrafuse car shell, the adapter works with it without problems. In additions to this shell there is a Plugin Car2PC.
And so what we have in the end. Regular buttons work - track forward and backward, track rewind - forward and backward, sequential playback of tracks and in discord. When you switch the radio to radio or CD, the player on the computer pauses. The track number in the folder, as well as the track playing time, is transmitted to the radio display.
Simply put, it turns out that this adapter is a kind of remote control for a computer, where the head unit acts as buttons.)
The only thing I was afraid of was how the whole system would behave after the ignition was turned off! But I was afraid in vain, everything is fine after turning it off and on, everything works.
A bit of work from a bunch of CarPC + Car2PC + head unit is presented in the video, sorry for the quality, the camera ran out at the wrong time (((
This is the work done in the last days of the New Year holidays))) I hope you liked it.
this project is not finished yet!
To be continued!
P.S. Now I am actively selecting a TV antenna for the tuner.
www.drive2.ru
Replacing the radio on the Mazda 3 with the preservation of the on-board computer - Car audio studio Elektrosila, Kyiv
Mazda 3 of the first generation (2003-2008) is a very popular car in our latitudes. At one time they were sold a lot and most of them are still in quite good condition. The car was equipped with a regular head unit with a remote display, which displayed both information from the radio about the frequency of the radio station or the number of the track being played, and the readings of the on-board computer about fuel consumption. Moreover, the same display shows climate control modes:

On-board computer modes, clock settings are switched by a button on the head unit. Moreover, all information on the computer display disappears from the screen when the head unit is removed, since the display receives all information from the head unit via the CAN bus.
The prospect of losing the on-board computer and climate control display stops many Mazda 3 owners from replacing an outdated or faulty head unit. Most often, the question is like this - either install a Chinese “standard” radio tape recorder that supports the on-board computer function or put another one through the transition frame but lose the computer. Common steering wheel button adapters allow you to connect resistive steering wheel buttons but do not retain the on-board computer.
What to do? If you have a car after 2006 release (after restyling), then everything is not as bad as it might seem, you just need to choose the right adapter.
Connects2 CTSMZ009.2 and CTSMZ011.2 adapters support the first generation Mazda 3 on-board computer and allow you to set the clock, switch computer modes and display climate control modes.
The only thing that needs to be clarified is that all this works on cars after restyling, on which the standard display is not connected directly to the radio.

The only thing that will not be displayed on the display of the on-board computer is information about the tracks, the frequency of the radio station from the radio. This information went from the head unit to the display, since the native radio did not have its own display. The universal radio, on the contrary, has its own display, but there is no output to external displays, so there is simply nowhere to get this information on an external display. We think it won't be a big problem.
Switching modes "on-board", setting the clock will now be carried out with the buttons on the steering wheel. With simple manipulations of the "mode" buttons and the track buttons on the steering wheel, you can control all this.
So, what will be needed to replace the head unit with a Mazda 3 (after restyling) while maintaining the on-board computer?
Happy installations!
electrosila.info
put the second radio tape recorder - logbook Mazda 3 #black katana 2005 on DRIVE2

in the previous entry, I collected all possible information about installing a 1din device in a nesting doll so that the head unit remains working and thanks to the help of fellow Mazda drivers on the drive, I managed to do everything. Connecting the radio is not at all difficult: we connect them to the new one 2. we take the control from the same plug 3. I threw the plus and minus directly from the battery, but the radio tape recorder works through the ignition (I did it on purpose, for this there was point 2) 4. to listen to the head unit we hook it to the contacts of the front plug I forgot the 3.5 plug of the speakers, which I later inserted into the 1din radio tape recorder, I connected the plus from the battery not to the plus of the radio, but to the control, because when I connected everything all over again, when the ignition was turned off, all the settings were lost, that is, the memory did not work when I swapped everything became normal. The most difficult thing was to cut all this plastic, but metal nailing came to the rescue and everything went off. Initially I wanted to put the radio in the ashtray, but then I changed my mind and had to cut many times more, if you start doing this, then don’t be afraid sawing everything that interferes. The heating of the legs of the rear passengers was also temporarily removed, and the hole was closed with heat-insulating material, but even after that the tulips did not allow the radio to stand up to the end. The exit is simple, we disassemble the radio and solder new tulips and everything fits perfectly and sings.
After installation, I note that the speakers began to play MUCH better and louder, with the subwoofer the same story. The converter that used to give out a little more than half of its power.


Issue price: 3 000 ₽ Mileage: 147700 km
MAZDA6. KEY BUZZER.
If you do not like the confirmation sound of pressing a key (buzzer) on the console panel or steering wheel, then you can turn it off:
1. turn off the radio
2. press and hold the "seek" button down
3. press and hold the "5" button until a confirmation signal
Note: this cheat does not work on cars with a Bose sound system!What are hidden button combinations?
On your stereo, bose and non-bose, you can, by pressing different combinations of two buttons, turn various features on or off, or test certain aspects of your stereo system.Why would you bother with some hidden features?
Aren't you tired of the fact that every time you press the button, it beeps? It infuriates me that when I switch between stations or tunes on a CD to find a good song, I always hear this - "beep beep beep beep beep beep beep beep beep beep".Is this a complete list of hidden features?
No, and you can be sure that someday someone bored in their Mac for a couple of hours and pushing buttons will find them. (or steal the engineer and torture him until he tells us all the secrets)Do these features work for both bose and non-bose systems?
Yes and no. You can check the hidden key combinations on both systems and you can see the text on the display, which will suggest that it works for you, but there are certain functions that will work as it is shown on the display, "only" on a certain system (see combinations below, if it works on both systems then I'll mark it as "both")What can you do to help?
Well, if you're as bored as I am today, then go get in your car and start pushing some buttons. If you find some combination or feature that is not listed here, post it here anyway.How to exit the function change mode.
Some feature messages do not disappear from the screen. If so, just press the stereo power off button, and then turn the power back on, but remember which options you changed, because the option will remain changed until you change it with the same button combination.Display test:
Turn on stereo - Hold Power button + Seek Up button
Both: Diagnosis of backlighting all icons on the display to check for non-functional or dim areasChecking audio channels:
Turn on stereo - Hold Power button + Auto M Down button
Both: Diagnostics the health of the audio channels in order to determine the speaker status and pairing between the head unit and each speaker.
1. Left door speaker and tweeter
2. Right door speaker and tweeter
3. Right rear door speaker and subwoofer
4. Left rear door speaker and subwooferReset stereo settings:
Turn stereo on - Hold down Tune/Settings + (any other button except stereo power button)
Both: This will reset all bass/treble/mid/fade... system sound settings to factory settings. (but will not reset station memory)Checking the strength of the radio signal:
Turn on the stereo - Hold the power button + "2" button
Both: The combination allows you to display the signal strength of the radio wave or the status of the antenna, or the radio and antenna mount
(displays S-METER and numbers from 0 (worst) to 9 (best))Antenna off/on:
Turn on the stereo - Hold the power button + "AM" button
Non-BOSE: no effect
BOSE: ???
(I think this is just a status display. When the system is playing a CD - off, when the radio is on. Any other information is welcome)Amplifier off/on:
Turn on the stereo - Hold the power button + "Scan Up" button
Both: Diagnostics of the health of the amplifier audio output channel to determine the status of the amplifier and pairing between the head unit and the amplifier.Button test:
Turn on stereo - Hold power button + "MD/Tape" button
Both: This option verifies that all system buttons are in working order. All buttons will beep when pressed, even the buttons on the steering wheel.Self Diagnosis - (lost wiring still need to check this function again):
Turn on stereo - Hold power button + AM button + "MD/Tape" button
Both: Step-by-step verification of the correct operation of the audio system. The first message displayed is who made your head unit and number. To stop diagnostics, turn the ignition key to the LOCK positionIf someone has cheats for Mazda - write to me.
I will definitely post them on this page with a link to the sender!