The stator is characterized by a fixed winding, which is supplied with direct current when the engine is started. It creates a magnetic field in the stator, which in turn acts on the rotor (the moving part of the winding). When the engine is running, the rotor is driven by the crankshaft. The transmission of rotational force is carried out by a belt drive. Thus, during the rotation of the rotor, a current arises in it, which is transmitted to the stator through brushes. The current in the stator winding induces an electromotive force, which is converted into an alternating voltage. To convert the variable power components of the generator, a rectifier-diode bridge is used.
The generator is designed to charge the battery. If it is faulty, then it is possible to drive a car, but only the battery will “sit down” all the electronics, which will ultimately lead to the unsuitability of the battery. The result of the failure of the generator will be deplorable, since you will have to pay a considerable amount of money to buy a battery.
The exact cause of the malfunction can only be determined using special equipment. Determining this at home is more difficult. But you can find out the malfunction by the following signs:
- On the instrument panel, after starting the engine, the signal lamp in the form of a red battery should go out. If the lamp does not go out, then this indicates that the battery is not receiving a charge.
- With the engine running, the headlights were not so bright. This is evidence that the headlights are draining a battery that does not receive recharging.
- Noises in the motor. When, with all of the above, extraneous noises in the form of a clatter or whistle are also heard, then the device should obviously be removed and checked.
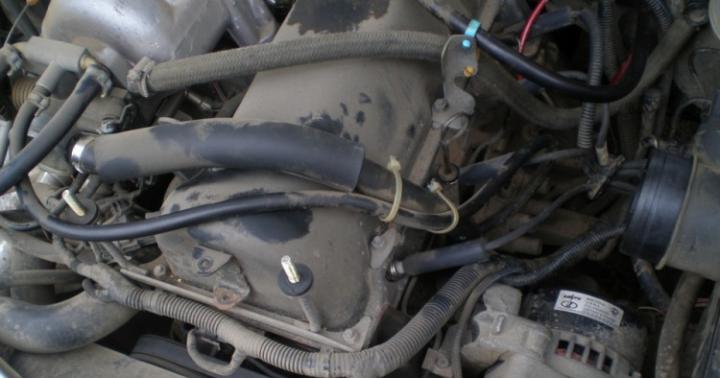
Chevrolet Niva is equipped with electronics that consume a lot of power. In addition, to start such a powerful engine, it is necessary to use a battery with a capacity of at least 60Ah. Which puts a lot of strain on the battery. Therefore, it is important to control its charging from the generator.
What are the causes of breakdowns of the Chevrolet Niva generator
The most common cause of failure is a broken belt. The belt has the shortest service life compared to other structural elements. You can visually detect a broken belt by opening the hood and looking at the belt pulley. If the belt is intact, but extraneous noise is heard in the form of a metallic ring, then most likely the bearings need to be replaced. It can only be detected after removing the device.
The reason why it is easier to buy a new generator than to repair the old one is damage to the windings. If this happens, then you need to rewind it or buy a new one. It’s cheaper, of course, to hand it over for repair, but there are no guarantees that the rewind will be of high quality and give the “correct” current to the battery. Therefore, the decision which is better is up to you. Brushes periodically fail due to constant friction on the rotor.
Brushes can be replaced at home.
Belt replacement
Belt replacement is carried out not only when it breaks. In order to prevent its breakage along the way, it is necessary to periodically conduct inspections. If the following damage is found, the belt must be replaced immediately:
- When traces of cuts or wear are found, cracks;
- If the belt began to peel off and threads are visible from it;
- The presence of oil and disheveledness testify to its worthlessness.

To replace the belt, it is important to arm yourself with the following tools:
- mount;
- screwdriver;
- jack;
- a set of keys.
Having bought a new belt, you can proceed to install it:
- Disconnect the car from the battery power supply.
- Unplug the connector from the crankshaft sensor. To do this, the fixing bolt is unscrewed with a Phillips screwdriver. The sensor must be removed.
- The nut that secures the device must be slightly unscrewed and the device moved to the block.
- Remove worn belt. Since the device is weakened, this is not difficult to do. To do this, you need to use a jack.
- The right side is jacked up, having previously placed stops under the wheels. The right wheel will need to be rotated, so you need to put the car in fourth gear.
- Pulling the belt, remove it from the pump pulley. Next, the wheel spins, gradually pulling the belt off the pulley.
The removed belt cannot be repaired, so we immediately proceed to install a new one:
- First, the belt is thrown onto the crankshaft pulley, and then sequentially onto all the others.
- It is better to finish with a generator pulley. The wheel rotates until the belt is put on.
- The device is placed on the seat and fastened with a bolt.
The sequence of putting the belt on the pulleys.It is important to adjust the tension. A weak tension will not provide the necessary charge to the battery.
- The sensor is being installed in its place.
Belt selection. It is better to use a LUZAR brand belt. It is ideal for Chevrolet Niva pulleys.
Withdrawal process
Replacing the belt is the only "easy" repair of the generator, all other problems need to be fixed only when it is removed. So, the withdrawal is carried out in the following sequence:

Installation in place
After repair or a new generator is put in place in the following order. For ease of readability, the installation order is listed in the table:
Alternator Bearing Replacement
A worn bearing can be completely freely replaced at home. In addition, it is completely irrational to buy a new generator if you can get by with replacing the bearing. The process of replacing the bearing includes disassembling the structural elements of the generator. To do this, you need to remove the device and proceed with disassembly:

It is important to prevent the generator from getting wet, otherwise it threatens to short circuit it.
The process of repairing and replacing the generator is simple, but quite capacious, especially if a bearing needs to be replaced. Winding repair is carried out by specialists, so rewinding the rotor is not easy and almost impossible at home. The winding often fails after a long operation of the generator, when the speedometer of the car has more than 100,000 km of run.
The real favorite among SUVs in the modern automobile market of the country is the Niva Chevrolet car. It combines the excellent qualities of both a touring SUV and a car for family trips. Due to its light weight and short overhangs, the Chevrolet Niva can drive off-road and fords. He easily overcomes steep slopes.
But the electronics system is one of the most vulnerable places in a car. With regular inspection of electrical components, with the timely removal of dirt and moisture from them, repairs will not be required even throughout the entire operation of the car.
Generator operation
The Chevrolet Niva generator is responsible for the reliable and high-quality operation of the electronics system. The owner should identify possible malfunctions in time and carry out high-quality repairs, since the functioning of all lighting fixtures depends on its good condition. It also affects battery life. Continuous current supply is provided by the generator.
Although it has small dimensions, the generator has great strength. In order not to cause a breakdown and the car regulator does not fail, the owner must follow the rules for operating the car.
Particular attention should be paid to the Chevrolet Niva. Malfunctions that led to a failure in its operation can be determined on automotive diagnostics. And the repair depends entirely on the degree of complexity of the breakdown.
Malfunctions that happen in the operation of the generator
The Niva Chevrolet generator, the photo of which is provided in our article, may have the following malfunctions:
- the pulley is damaged or completely worn out;
- current-collecting brushes are worn out;
- rectifier failure;
- failure of the voltage regulator;
- worn collector;
- worn or completely destroyed bearing;
- Charging wires are damaged.

The owner of the car needs to be familiar with the main causes that occur. In addition, you need to know how to eliminate these breakdowns, as well as preventive measures to prevent them.
Generator "Niva Chevrolet"
Depending on the type of current, generators are either direct or alternating current. The owners of the named car sometimes do not know, but what generators are used for this model? "Chevrolet Niva" was provided with an electromechanical alternating current device. A diode bridge is built in here - a rectifier. To provide work to electrical consumers, it converts alternating current into direct current. The diode bridge with the generator is one mechanism, they can be located both in the case and in the cover of the generator.
The operation of the latter is affected by the speed of the car and the speed of its engine, since the generator is connected by a belt to its crankshaft. In order to adjust the output current, it is installed. In addition, integrated voltage regulators are built into modern generators.

The Chevrolet Niva generator may be prone to the following malfunctions:
- electric;
- mechanical.
If the malfunction is mechanical, then it includes a breakdown of the mount, housing, faulty condition of the clamping springs, bearings, belt drive, or other breakdowns that are not related to the electrician.
With the first type of malfunction, winding breaks, burnout or wear of the brush are possible, the rotor can pierce, and a short circuit occurs between the turns. The diode bridge and the relay-regulator may be out of order.
Sometimes there are signs indicating that the Chevrolet Niva generator is out of order, but completely different breakdowns can cause this problem.
Signs of a malfunctioning generator
As a rule, there are several signs of a generator malfunction:
- When the engine is running, the battery discharge indicator lamp flashes or is constantly on without interruption.
- Car headlights are dim in color, and when the engine is running, the horn rattles or is completely quiet.
- The battery loses its charge quickly.
- With an increase in the number of revolutions, the brightness of the headlights changes significantly.
Alternator belt "Chevrolet Niva"
In order not to get into an unpleasant situation, it is necessary to ensure that the Chevrolet Niva generator belt is in working condition. So, the presence of mechanical damage to the pulley can lead to damage to the belt, as a result, it can break.

Alternator Belt Replacement
To change the Chevrolet Niva, you need to use the following tools:
- screwdriver;
- jack;
- a set of keys.
In a Chevrolet Niva car, the alternator belt is replaced as follows:
- Remove the connector from the crankshaft position sensor.
- Unscrew and remove the bolt that secures the sensor.
- The nut attaching the generator needs to be slightly loosened and moved to the block. With the alternator displaced, its belt will loosen and be removed without problems.
- Using a jack installed on the side where the generator is located, raise the machine by engaging first gear.
- Pull on the belt so that it moves away from the pump pulley. Turn the wheel so that the pulley passes over the pulley.
- Then remove the belt from the other pulleys.
- The new one must first be put on the alternator pulley and the crankshaft pulley, and only then put on the pump pulley.
- Turn the wheel until the belt is on the pulley.
- Put the generator in place, and pulling the belt, attach it with a nut to the bracket.
- Install the crankshaft position sensor.
The process of replacing the alternator belt is completed.
generator roller
Belt tension affects the operation of the generator. And the Chevrolet Niva generator roller regulates it. During the operation of the car, it is necessary to ensure that the roller is in good condition. If there is the slightest suspicion of a breakdown, the Niva Chevrolet must be repaired.

How to replace the tension roller
The generator roller device is quite simple. The bearing is its main part. When loosening or slowing down the belt, it is necessary to check the bearing itself by turning it by hand. A working roller has a quiet rotation, there are no jerks and biting. If the roller is in a faulty condition, it is necessary to replace it, which is possible even in the garage, with a minimum set of tools.
Install a pry bar or other tool that can prevent the movement of the crankshaft so that the clutch disc is locked. By loosening the bolt that secures the roller, relieve the tension on the belt. Having completely unscrewed the axial bolt, the tension roller is removed. Then a new roller is installed and the belt tension is adjusted.
After replacing the roller, you need to re-inspect and check its operation. The user manual has detailed instructions regarding the problem described.
Generator brushes
Worn-out brushes of the Chevrolet Niva generator can lead to a voltage drop in the electrical system of the car. This is considered one of the main and frequent causes of this type of malfunction. But since the generator has a simple design and is easy to get to, even an inexperienced motorist can replace its brushes.

The main signs of a bad brush are:
- drawdowns occur in tension;
- weak headlights at night, blinking;
- the radio is turned off, etc.
Usually, when passing technical inspection, small elements of the generator are rarely checked. Therefore, worn brushes can remind you of themselves unexpectedly. But before deciding that the replacement of the Chevrolet Niva generator brushes is necessary, you need to find out if there are any other malfunctions that can cause such symptoms. And only after making sure, you can disassemble the generator housing.
Alternator brush replacement
When replacing the brushes, the voltage regulator is removed together with them as an assembly. In this case, the negative is removed and the wires that come from the generator casing are disconnected.
Then the wiring harness is disconnected. From their tips with a positive terminal, it is necessary to remove the rubber cap that performs protective functions. Then, from these wires, you need to unscrew the nut with which they were attached to the generator unit, and remove them.
After disconnecting the spring clips of the generator, you should remove its black casing, made of plastic. Using a Phillips screwdriver, unscrew the fasteners of the voltage regulator. Get it complete with brushes. Then disconnect the block of wires from it.
Replace alternator brushes and reinstall in reverse order.
If the length of the brush rods is less than 0.5 mm, they must be replaced. But if the brushes are in working condition, and the Niva Chevrolet generator does not supply a charge, it is necessary to check the operation of the voltage regulator and the circuit from the regulator to the brushes.
Reasons to replace the generator
One of the reasons when replacing a generator on a Chevrolet Niva is simply necessary is damage to the windings. If this happens, then either a rewind is needed, or you will have to purchase a new generator. Maybe the repair will cost a little cheaper, but no one will give you guarantees about the quality of the rewind and the uninterrupted supply of current to the battery.

Removing the generator
For this process, you need to take a Phillips screwdriver. In addition, you must resort to using a car tester or ohmmeter, a 10 key and a test lamp.
To change the generator, it must be removed from the engine compartment. First, disconnect the wire and negative battery terminal. Next, disconnect the block with wires and the output of the generator, and take out the protective cover from there. Then, unscrewing the nut, disconnect the wires on the generator contact bolt. Then unscrew the bolt that secures the generator to the tension bar, and pull it out. It is also necessary to unscrew the bolt-shaped mount at the bottom of the generator.
Then you should remove the belt. After removing all the bolts, the generator must be removed from the bracket using a mounting spatula. To install a new one, you need to go through the whole process in reverse order.
Having replaced the described electromechanical device, it is necessary to inspect its drive belt and adjust its degree of tension. But before changing the old Chevrolet Niva generator to a new one, you need to make sure that the replacement is really necessary. There are times when repairs can be done by yourself, without resorting to the help of specialists.
In order to avoid confusion, it should be noted how the generator covers are correctly positioned. Next, you need to remove the plastic protective cover by unfastening the three latches on it. The voltage regulator and brush holder are removed together. In order to release the rectifier unit and the capacitor, it is necessary to disconnect the wires from the regulator terminal. The stator winding has three terminals. And in order to perform an operation to remove the rectifier unit and capacitor, you need to bend these conclusions a little. Prying with a flat screwdriver from the side where the slip rings are located, remove the cover from the generator.
Clamping the generator rotor in a vice, unscrew the mount from the pulley. Then take out the spring washer, pulley and thrust washer. Then the rotor and the distance ring are carefully pulled out and their condition is checked. If there are traces of damage, scratches and a noticeably worn condition on the ring, it must be sanded with a regular sandpaper. If the result is poor, the ring is ground on a lathe with the removal of a small layer of metal.
Having connected the rotor with slip rings, the resistance of its winding is checked with a tester. If the wiring is broken, the meter will show an infinite reading. For this reason, the rotor must be replaced.
To check whether the rotor winding closes or not, you need to turn on the test lamp in the network through which 220 V alternating current flows. One lamp wire is connected to the rotor, each ring is connected to the second one in turn. If the lamp lights up, the rotor needs to be replaced.
To replace the generator on a Chevrolet Niva, you must first pull it out of the engine compartment. First of all, disconnect the wire from the negative terminal of the battery. Next, we disconnect the block with wires from the generator output and pull out the protective cover from there.
The generator has a contact bolt on which the wires are connected, you need to unscrew the nut and disconnect. We unscrew the fasteners of the generator, first we unscrew the bolt that secures it with the tension bar, then we pull out the bolt itself. At the bottom of the generator there is also a fastening in the form of a bolt, we also turn it off.
We remove the alternator belt and inspect its condition, if necessary, change it to a new one. Remove the alternator drive belt. After all the bolts are removed, you need to pull the generator out of the bracket. This cannot be done with bare hands, you will have to use a mounting spatula. The new alternator is installed in the reverse order.
After installation, we adjust the degree of tension of the generator drive belt. However, before replacing the old generator with a new one, make sure that it really needs to be replaced; in some cases, repairs can be done by yourself. In the process of work, we need a Phillips screwdriver, a car tester or an ohmmeter, a 10 key and a control lamp.
We first note the correct location of the generator covers so that there is no confusion during the installation process. We unfasten three latches and remove the plastic casing. Next come the voltage regulator mounts, you need to remove it together with the brush holder. We disconnect the wiring from the terminal of the regulator and remove the fasteners of the rectifier unit and capacitor.
There are three winding leads in the stator, they need to be bent so that the rectifier unit and capacitor can be easily removed. If the capacitor needs to be replaced, unscrew the nut of the contact bolt, remove the washer and spacer. We take out the tip of the capacitor wire from the contact bolt, unscrew 4 coupling screws, under them there are spring and flat washers. We remove the cover of the generator from the side of the slip rings, this is done by prying a flat screwdriver.
We clamp the generator rotor in a vice, but do not overdo it, otherwise you can ruin it, you just need it to not turn. Then we unscrew the pulley mount, take out the spring washer, pulley and thrust washer. Carefully pull the rotor out of the cover on the side closest to the drive. There is a distance ring on the rotor shaft, we also pull it out and check the integrity.
If there are signs of damage, scratches, signs of wear on it, the ring must be sanded. If the usual skin does not cope, then we resort to the help of a lathe, thereby removing a small layer of metal. Using a tester, we check the resistance of the rotor winding, having previously connected it to slip rings. Did the instrument register an infinite reading?
This indicates that the winding is broken and the rotor needs to be replaced. We take a test lamp and check the rotor housing for a winding short circuit. We turn on the lamp in an alternating current network for 220 V, one wire goes to the rotor housing, and the second one is connected in turn to each ring. In any case, the lamp should not light up, if it does, we fix the circuit, which in turn indicates that the rotor needs to be replaced.
Complexity
Without toolsNot marked
Alternator type 9402.3701-01 (installed on a Chevrolet Niva manufactured after the fall of 2003), three-phase, with a built-in rectifier unit and an electronic voltage regulator, right-hand rotation (on the drive side).
NOTE
Chevrolet Niva, produced before the fall of 2003, was equipped with a generator type 9412.3701, which was also installed on the injection VAZ 21214, VAZ 2131, VAZ 2123 until the fall of 2003.
NOTE
The alternator mounted on the vehicle used for the photography is driven by a V-belt. Repair work is shown on the example of a multi-ribbed pulley generator. All elements of both generators, except for the pulleys, are absolutely identical.
The alternator armature is driven from the crankshaft pulley by a V-belt or (depending on the version) a V-ribbed belt.
Rice. 9.3. Generator 9402.3701-01: 1 - rectifier block; 2 - bearing sleeve; 3 - rear bearing of the rotor shaft; 4 - contact rings; 5 - protective sleeve; 6 - terminal "B +" of the generator; 7 - gasket; 8 - casing; 9 - voltage regulator with brush holder; 10 - coupling screw; 11 - back cover; 12 - stator; 13 - front cover; 14 - remote ring; 15 - front bearing; 16 - pulley; 17 - washer; 18 - rotor.
Stator 12 (Fig. 9.3) and covers 11 and 13 are tightened with four screws. The rotor shaft 18 rotates in bearings 3 and 15, which are installed in the covers. Power is supplied to the rotor winding (field winding) through brushes and slip rings 4.
The three-phase alternating current induced in the stator winding is converted into a direct current by a rectifier unit 1 attached to the cover 11. The electronic voltage regulator 9 is combined into one unit with a brush holder and is also attached to the cover 11.

Rice. 9.4. Generator system wiring diagram: 1 - battery; 2 - generator; 3 - control lamp of the battery charge, located in the instrument cluster; 4 - mounting block; 5 - ignition switch.
The generator connection diagram is shown in fig. 9.4. The voltage for excitation of the generator when the ignition is switched on is supplied to the output “D +” of the regulator (output “D” of the generator) through the control lamp 3 located in the instrument cluster. After starting the engine, the excitation winding is powered by three additional diodes installed on the rectifier unit of the generator.
The output "W" of the generator on cars of the BA3-2123 family is not used. The operation of the generator is controlled by a warning lamp in the instrument cluster. When the ignition is turned on, the lamp should be on, and after starting the engine, it should go out if the generator is working. The bright burning of the lamp or its glow half-heartedly indicates malfunctions.
Technical characteristics of the generator
HELPFUL ADVICE
If the alternator belt broke on the way, and you forgot the spare at home, a 20 mm wide ring cut from an old car chamber can temporarily replace it. To reduce current consumption when driving a vehicle with a faulty alternator, if possible, turn off the radio, unnecessary lights, heater fan, glass heating, etc.
WARNING
The "minus" of the battery must always be connected to ground, and the "plus" must be connected to the "B +" terminal of the generator. An erroneous reverse connection of the battery will immediately cause increased current through the rectifier block of the generator.
The generator must not be operated with the battery disconnected. This will cause transient voltage surges at the B+ terminal of the alternator, which can damage the alternator voltage regulator and electronic devices in the vehicle's electrical system.
It is forbidden to test the generator’s performance “for a spark”, even by briefly connecting the “B +” terminal of the generator to ground. In this case, a significant current flows through the rectifier unit of the generator and it can fail. You can only check the generator with an ammeter and a voltmeter.
The rectifier unit of the generator is not allowed to be checked with a voltage of more than 12 V or with a megohmmeter, since it has a voltage that is too high for the diodes and they will be broken during the test (a short circuit will occur).
It is forbidden to check the car's electrical wiring with a megohmmeter or a lamp powered by a voltage of more than 12 V. If such a check is necessary, then first disconnect the wires from the generator.
It is necessary to check the insulation resistance of the generator stator winding with increased voltage only at the stand and always with the phase winding leads disconnected from the generator rectifier unit.
When welding components and parts of the car body, disconnect the wires from all terminals of the generator and the battery.
Removing the generator from the Chevrolet Niva (top location)
On my favorite shnivy in the winter, the battery began to discharge quickly. I had to recharge it every 2 weeks. There may be several reasons for this behavior of the battery, but since the alternator bearing has already begun to whistle, I decided to start with its revision.
On my car, the generator is installed 80A 2123-3701010-01 (9402.3701-01). The location of the generator on the engine is top. This greatly simplifies the task of removing it from the car.
To remove the generator, I needed:
- Key for 10, 8, 13
- Desirable ratchet with a head for 8, 10, 13
First, you need to loosen the tension of the auxiliary drive belt (some habitually call it the cornfield generator belt, but this is wrong because this belt also turns the pump and the power steering pump), otherwise it will not be possible to reset it. To do this, it is necessary to loosen the nuts securing the tension roller bracket (two nuts for 8, one nut for 10) and unscrew the adjusting bolt by 10. It is problematic to reach the far nut by 8 with an open-end wrench, I used a ratchet with an 8 head.

First, we loosen 3 nuts, and then we begin to unscrew the adjusting bolt until there is slack in the belt and it can not be thrown off the generator pulley.

Now you can start removing the generator. I always, if I have to work with electrical components or devices, disconnect the negative terminal from the battery. Next, you need to disconnect the wires suitable for it from the generator. One wire is connected by a block to the output of the generator "D". This is the output of the excitation winding of the generator. It is also necessary to unscrew the nut by 10 and disconnect the wires from the contact bolt "B". On top of the dirt, the bolt covers a rubber protective cap, which must first be removed from the bolt and moved up along the wires.


The photo below shows the installation site of the generator with the mounting bolts installed in place (so as not to get lost).

The generator has been removed from the car and now you can start disassembling and checking it.
Dismantling the generator Chevrolet Niva 80A 2123-3701010-01 (9402.3701-01)
Since it was winter, he brought the generator home. After reading various articles on disassembling generators, at first I doubted a little that I would be able to disassemble it at home, “on my knee”, without pullers or the simplest vise. However, I succeeded.
I started by removing the alternator pulley. Here the first problem awaited me. The pulley nut didn't want to loosen. It was impossible to hold the pulley with my hands, and I don’t have a vise at home. After several unsuccessful attempts, I still managed to fix the pulley quite well with the help of an old accessory drive belt.
I wrapped the pulley twice with an old belt, then tied a knot with a slight indent. Between the pulley and the knot he put a long cap key and turned it several times, tightening the belt on the pulley. I installed the key under the pulley in such a way that it fixed the pulley from turning when the nut was unscrewed, i.e. when moving a curved hexagon with a head down (pictured below).

Even with this fixation of the pulley, I did not immediately manage to unscrew the nut. A long heavy key helped me. I hit them with all my might at the very end of the hexagon. After the fifth or seventh blow, the nut gave way and then unscrewed by hand.

In the photo below, everything that was shot along with the pulley. The order (from right to left) corresponds to the order of removal from the generator.


Here is a photo of the insides of my generator, which were hidden under the cover.

To replace or check the technical condition of the brushes, as well as to disassemble the generator, it is necessary to remove the voltage regulator assembly with the brush holder from the generator. It is screwed with two screws to the generator housing. It is also necessary to disconnect the wire going to it.

We unscrew 4 coupling screws and disconnect the front cover of the generator and the housing.

The rotor can be knocked out of the bearing in the following way:
- We screw a nut onto the rotor axis, so that in which case it would be possible to “correct” the thread with it
- Carefully knock out the rotor through a wooden spacer with a hammer, holding the lid vertically with your hand and resting it on the floor


Since he originally planned to replace the front bearing of the generator (he began to creak and squeak when cold), he did not stand on ceremony with him, but simply knocked him out with a head that came to hand. However (I’ll say looking ahead) I shouldn’t have treated him like that. The new bearing I bought in the store had more backlash than the native French bearing, which had been on the car for almost 10 years. It would be necessary to simply open it, rinse it and fill it with grease again.

Checking and repairing a Chevrolet Niva generator
Since my generator was working and only needed revision, there will not be specific advice here yet. I will only describe what I did and what I paid attention to.

Chevrolet Niva 80A generator assembly 2123-3701010-01 (9402.3701-01)
As I wrote above, the new bearings from the store had more play than native French bearings that had been running for 10 years. So I advise everyone to carefully press them out so that they can be put back after cleaning and lubrication.

Removed from the generator native French bearing.

A store-bought replacement bearing already has significant play.
We install a new bearing in the front cover with very light hammer blows, only on the outer ring of the bearing, with blows in a circle. First, of course, it is necessary to clean and rinse the bearing seat in the cover.

We insert the rotor with the axis into the bearing. To loosen it, lightly tap with a hammer on the front cover of the generator in the direction of the arrows.

Then we twist everything and install in the reverse order. The pulley was tightened in the same way as it was unscrewed (see above), i.e. he kept it from turning with an old belt and knocked on the hexagon with a heavy open-end wrench.
Note
I want to make one point. Often, the generator produces a low voltage due to oxidation of the contacts. Therefore, when assembling the generator, it is imperative to clean and stretch all electrical connections. The sore point of the Chevrolet Niva generator is the contact bolt. As a result of its operation, the nut is loosened, which attracts it to the rectifier unit. The trapped moisture oxidizes the contact planes and increases its resistance. Therefore, I strongly recommend that you unscrew this bolt completely and clean all the elements of this connection. Also, during assembly, it is necessary to fix the contact bolt well on the rectifier unit.
In order for the current generated by the generator not to be lost on the connections, I advise you to strip and stretch the electrical connections of the generator - battery, battery - ground, engine - ground.