Sooner or later, most motorists are faced with the problem of fogging headlights. It is annoying that it is impossible to simply take and wipe them, besides, wiping does not protect against repeated fogging. Misted headlights significantly reduce the efficiency of the lighting equipment, in addition, high humidity (and if the headlights are fogged up, it is greatly increased) over time will disable the electrician. It is curious that the windows sweat on any car, but the headlights do not. Of course, this problem must be fought. Moreover, it is necessary not only to get rid of fogging, it is necessary to figure out what its cause is, and eliminate it if possible.
In addition to fogging, the headlights of some cars have another unpleasant feature - they become cloudy over time. Clouded headlights cause a lot of problems, since the light beam, passing through the scratched glass, refracts along a random trajectory, such headlights blind oncoming drivers and poorly illuminate the road, but this can be dealt with.
Why do the headlights fog up
In order to understand this issue, you need to understand. Regardless of the type of headlight, there are several important points that apply to everything lighting equipment... Firstly, the headlight housing cannot be completely sealed, since there is a heat source inside it - a lamp. For a closed volume, one physical phenomenon is characteristic - with increasing temperature, the pressure increases, since when the molecules are heated, they expand. It follows that the headlamp housing cannot be made sealed, otherwise it will burst. To reduce the pressure in the housing, there are special valves, which are designed in such a way as to prevent the penetration of dirt and water, while reducing the pressure inside the headlamp.

However, moisture can still get into the headlamp along with the air. A similar phenomenon occurs when, in humid conditions, such as in autumn, air enters the inside of the headlamp, where the temperature is higher than outside. By the time the headlamp cools down, condensation forms on the inside of its housing. There is nothing to worry about if it disappears after a while, after turning on the headlights again. But there are situations when the fogging persists. For example, if the valve responsible for reducing the pressure is damaged or the protective cap has fallen off. Or in the case when the housing of the headlight itself was damaged, which led to the formation of cracks.
In the case of a valve, increasing its diameter causes too much air, water and dirt to enter the headlamp housing. If a crack has formed on the headlight housing, then the pressure inside it will decrease, which will lead to excess moisture.
What to do if the headlights fog up
In order to solve the problem of fogging headlights, it is necessary to get rid of excess moisture. Of course, an external inspection of the headlight is unlikely to give anything, it will have to be dismantled.
If a crack has passed through the body, then it must be repaired. You won't be able to do this with glue or tape; the best tool for restoring the headlight housing is a special soldering iron, which is used for plastic. If there is no such tool in the arsenal, you can turn to specialists.
In the case of the valve, things are a little more complicated. It will not work to buy a valve separately from the headlight housing, so you will have to restore the old one. To restore it, you need to dismantle the headlight, find the valve (it is usually located on the back of the body), clean it from dirt and pick up a rubber plug. The main thing is to secure it securely. The main function of the plug is to allow air to circulate while protecting the headlamp from dirt and water. It is also necessary to check how tightly all the elements of the case are joined. If gaps are found, you can use silicone sealant to close them.

Often, in order to get rid of excess moisture in the headlight housing, a special composition is used - silica gel. Silica gel bags are placed in shoe boxes for the same purpose. But this method also has a downside: over time, the silica gel swells, therefore, its mass increases, which can lead to damage to the headlight from the inside. Therefore, silica gel is only suitable as a temporary measure, but it is not worth delaying the repair.
Why do the headlights go cloudy
Over time, any headlight becomes cloudy, be it plastic or glass. Only the time interval after which this happens depends on the quality of the material of the headlamp housing.
The operating conditions of any car are such that you have to wash it regularly. the headlights are splashed with mud, and sometimes you have to wipe them hastily to continue driving. The dirt that remains on the headlights is composed of water, fine gravel, earth and other almost invisible, but fairly hard elements. Of course, if you just wipe the headlights, and not rinse off the dirt with water, these small particles leave a network of scratches. The damage is so small that it is not even visible on a wet headlamp, but over time the "web" will grow so much that the headlamp will look dull, although it would be more correct to say - scratched. The consequences are obvious - the light beam will scatter uncontrollably, the quality of illumination will deteriorate significantly.
What to do if the headlights are dim
The only way to deal with headlamp clouding is to restore it. It is necessary to carefully remove the damaged plastic layer by layer, and then polish it to return the headlights to their previous appearance. You can eliminate the turbidity yourself or by contacting the service. This service is not very expensive, while experienced craftsmen will do everything faster and better.
Use sandpaper and polishing pastes and gels as tools for polishing your headlights. Before polishing, the headlights must be thoroughly rinsed to get rid of any dirt. After the damaged plastic is removed with sandpaper, the gel is applied and the surface is polished, microfiber can be used.
In most cases, in order to keep the optics intact, it is necessary to monitor the cleanliness of the car periodically. It is very easy to do this: in dark time day you need to drive up to the wall and turn on the headlights. The light should be moderately bright and with a clear glow path. However, even if the trouble happened, following the instructions, the restoration work can be carried out independently, without serious costs.
During the operation of the car, its headlights gradually lose their original transparency and brightness. This spoils its presentability and reduces the power of lighting, which can affect traffic safety .. A natural question arises how to get rid of this and restore the original appearance of your pet's car. The budget does not always allow for a car service, so here we will consider whether it is possible to polish the headlights with our own hands. We will show you how to do this with toothpaste and what mistakes to avoid when working at home.
Clouding reasons
The main factors that negatively affect the quality of plastic glass of cars are sand and microparticles that constantly “bombard” lighting devices while driving. And the more intensively the car is used, the higher the speed the driver uses, the faster the glasses of conventional and fog lights become cloudy. Microcracks form on their surface, which reduce transparency and light transmission. Using the car in dirty conditions leads to the ingress of micro-particles of dirt into the cracks, which further leads to clouding of the glass.
In addition, cheap plastic used in inexpensive cars as headlight glass turns yellow over time under the influence of the natural environment (sunlight, reagents used in the winter). More expensive models use a special ultraviolet coating for the plastic glass of the headlights, which is less susceptible to clouding in direct sunlight.
Remedies
There are several such methods. Polishing plastic headlights can be done in a variety of ways, even with toothpaste and at home. Here we will look at the most effective ways.
Method 1
In order to get rid of glass clouding, there are various means for polishing. With a special paste, you can restore the original transparency of the glasses. It is important to carefully study the instructions attached to the material. The grinding work itself, after the instructions have been read and carefully executed, will take a little time and you can do it in any garage or at home at the parking lot. The procedure is as follows:
- Remove headlight glasses, clean from dust and moisture, dry. The operation can be done without removal. Make sure that the body is covered with protective tape along the contour of the headlight.
- If the damage is severe, such as deep chips or cracks, consider replacing the entire outer glass.
- To remove microcracks and scratches, we use an abrasive, rubbing in a circular motion over the entire surface. Take precautions when handling active chemicals. Remember that you should not use abrasives to polish the lenses themselves, and the abrasive leaves a white coating on the black rubberized seals.
- To polish the headlights, use special wax and polishes, sanding with diamond paste. Be sure to get a good glass-to-headlamp sealant. Make sure that the product remains airtight at the end of the work.
It is necessary to constantly monitor the heating of the plastic, so as not to overheat it and not go to the store for a new one.
Method 2
The method consists in the fact that the polishing of plastic elements is carried out using sandpaper and paste. Paper required good quality... You will also need mounting tape and a soap solution.

Method 3
Restoration of plastic glasses of headlights with toothpaste. Since soda and silicon are present in the composition of various dental products, in the form of a dioxide compound, the use of toothpaste allows you to effectively polish the surface. In this case, the hygiene product acts as an abrasive and helps to restore the damaged glass surface. In addition to toothpaste, in the process of work we will use:

The process of restoring headlamp glasses is similar to the procedure described in method 2. Only instead of sanding paper, grinding is carried out with toothpaste and a sponge for washing dishes.
Using a sander

Lens polishing
Recently, it has become fashionable to install lenses under the headlights on cars. Such devices are much more expensive, but they shine almost like xenon. Most importantly, their light is much safer for oncoming traffic.
To grind the glass of the headlight under the lenses at home, you should use:
- a low-speed drill or grinder;
- grinding wheel attachment;
- with a damp sponge or cloth;
- sandpaper;
- special paste.
It is also necessary to prepare water in advance to cool the glass in case of overheating (be careful, as too cold water can cause cracking of the surface due to large temperature differences).
It is best to place a damp cloth under the glass, which will cool the plastic and absorb pressure.
 We start by processing the glass with a coarse-grained stone for the lens diameter. It is recommended to use only one side of the stone during work, which gradually takes the form of glass and polishes the surface more effectively.
After grinding with a coarse-grained stone, proceed to the processing with waterproof emery paper (grain 110-180).
The final step is to polish the plastic under the lens using a polishing attachment coated with diamond paste. It is essential to apply diamond paste both to the glass and to the felt of the nozzle.
Every car owner at least once during the entire time of using the car noticed that the headlights became dim, and because of this, the road was poorly lit. There can be only one reason - the headlights have lost their former transparency, and the light simply cannot be brighter. In this case, it is necessary to restore the transparency of the headlights by polishing. This can be done at any service station or with your own hands. It is clear how to restore the transparency of the headlights at the service station, but we will tell you how to polish the headlights yourself.
Why headlights lose transparency
Headlights lose their factory transparency for several reasons:
- the impact of the external environment. Dirt, sand and other road materials, when exposed to the plastic or glass of the headlight, wear off its layer, leaving a rough surface. As a result, the light becomes dim;
- plastic wear due to the age of the machine. If during use you have never polished the headlights, then, for obvious reasons, visibility in the dark will deteriorate significantly. Car lights must be looked after as carefully as the entire car as a whole;
- poor quality material. Plastic can also tarnish because low-quality raw materials were used in its manufacture. The polish will not help here, you will have to change the lantern completely.
Headlight restoration
Headlight restoration is the process of cleaning the outer plastic lens using a special restoration and resurfacing kit. To restore transparency yourself, you do not need special training and training courses. Just watch the video and carefully read the instructions that come with the headlight polishing kit.
Polishing methods
There are usually two ways to polish headlights:
- polishing using chemicals;
- polishing by wet grinding.
Both methods do an excellent job of the task. Their difference is only in the materials used. Thus, chemical recovery is easier to use and does not require additional equipment, while wet sanding is not possible without a special sanding tool. Which way to choose is up to you.
Important! Only those headlights with protective plastic caps can be polished. It is better not to polish other types of headlights yourself!
What equipment is needed
To restore the transparency of the headlights yourself, you need to have a sander, abrasive material with a grain size in the range of 600-4000, as well as a circle with foam rubber, an eyeliner for polish, polishing varnish and paint tape.
Important!! If you are afraid to polish the headlights yourself, it is better to drive the car to a service station and ask the specialists to restore transparency!
How to polish your headlights with your own hands
So, you have decided on the method of polishing, made sure that your headlights can be polished on your own, now you can get to work. The process of restoring transparency, using polishing, takes place in several stages and is somewhat similar to the process of polishing the body. We will dwell on each of them in detail:
- First step. Before starting work, make sure you have everything you need at hand. This is very important, because if you are distracted during work, there is a high probability that the transparency of the headlights is poorly restored or you make a mistake.
- Second phase. At this stage it is necessary to wash and degrease the plastic headlight caps. This is to ensure that the products you are using do not react with the remains of sand and dirt on the caps. Then cover the area around the work surface with paint tape.

- Stage three. The next thing to do is to remove all removable parts: turn signal, radiator grille and others.
- Stage four. Now we use grinding wheel coarse grit (600) and start sanding. The effect is achieved much faster if the circle is wet. As a rule, sanding time does not exceed 3 minutes. As soon as the surface has become matte evenly around the entire perimeter, then you can stop.
- Fifth stage. Wash the headlamp after sanding. Then replace the wheel with another one with a grit of 1000. Continue sanding also for 3 minutes.
- Sixth and seventh stages. After sanding with a fine grit disc, replace it with a different disc. And so on until you reach a wheel with a grit of 4000. This and subsequent stages of grinding should not exceed 3 minutes. During the last grinding, you will see that the surface of the headlight has changed - from cloudy to transparent.

- Eighth stage. At this stage, you need to rub the car lamp until it shines. To do this, use a foam circle. Allow 3 minutes for this step as well.
- The final stage. Rub the headlights with a soft cloth and cover with a special varnish for transparency. It will serve as a protective coating and limit the negative effects of sand and dirt, thereby prolonging the life of your polished headlights;
You can also restore the transparency of the headlights of your car using ordinary sandpaper. The scheme is the same: first we rub it with coarse paper, gradually moving to a finer one. This method is very convenient if you do not have grinder however, it takes longer. Before using sandpaper, be sure to immerse it in soapy water for 5-7 minutes. This is necessary so that no scratches remain during the restoration of transparency. When polishing with sandpaper, be sure to wipe the headlights with a special polish that removes oxidation. To do this, soak a sponge in this product, wait a little while it is absorbed, and wipe the plastic cap.
Important! When polishing the headlights, use only the specified grit size. Larger circles can further spoil the look by leaving deep scratches.
You can assemble the polishing kit yourself. It includes:
- the above wheels and grinder;
- antioxidant;
- polishing varnish;
- microfiber napkins;
- rubber gloves;
- respirator.
So that you can clearly see how plastic headlights are polished, we suggest you watch the video:
Is it possible to restore transparency without sanding
Many car owners want to polish their car headlights on their own, but they do not have the necessary tools, and using sandpaper is long and dangerous. There is another way to restore transparency - with the help of chemicals. Thanks to modern technologies, it became possible to restore transparency without polishing. Using chemical agents, you will not only protect the headlights from possible scratches obtained during grinding, but you can also polish the “eyes” of your swallow at any time convenient for you, without causing any damage. This type is very convenient and easy to implement, and its main advantage is its low time cost.
Important!! Always wear gloves and a respirator when restoring headlamps with chemicals.
What kits and varnishes to restore transparency are better to use
At the moment, car cosmetics manufacturers offer a huge range of different polishes, varnishes and sets to restore transparency. The choice in the car markets and in auto cosmetics stores is such that the eyes run up. How to do right choice? Very simple. There is a good and proven brand of cosmetics for cars by many car owners. This is the Delta kits brand. Polishes of this brand are of excellent quality, hold for a long time and the price is very reasonable. The great demand of car owners for the products of this brand speaks of high quality auto cosmetics.


So, to restore transparency, you need Delta kits two-phase varnish. It is necessary to mix its components and wipe the previously cleaned and degreased surface of the plastic cap. Here's what the headlights look like before and after cleaning with Delta kits varnish:
The result is, of course, obvious. What else is very pleasantly surprising in the line of Delta kits products is the price. The cost of such a two-phase varnish is only 200-400 rubles.
Important! Using Delta kits varnish, apply it in 1 layer! If there are more layers, the varnish will simply peel off from the restored surface. Do not touch the varnish until it is completely dry. This time is approximately 1.5-2 hours. To check if the varnish is dry or not, touch the headlight with your fingertip in the most inconspicuous place so that your fingerprint is not conspicuous.
We suggest you watch a video of how polishing is carried out without using a grinder:
The condition of the transparent plastic of the headlights is an important safety requirement. The restoration of damaged headlights is a demanded service in most car services. With insufficient lighting, the driver may not notice the obstacle that has arisen on the road and react in a timely manner to its appearance. The quality of work of lighting devices in cloudy weather and at night becomes especially important. Grinding and polishing are the main stages of this service. But is it possible to restore the glass of a car headlight without polishing?
The conditions in which the car is operated are far from ideal. Small stones, sand, reagents that are used on our roads in winter, all these factors gradually have a destructive effect on the outer layer of plastic. But, even if the headlight has a glass front, clouding cannot be avoided. It's just a matter of time. Over time, the shine disappears and the dimness of the surface of the headlights appears more, which you want to restore or clean them without polishing.
In addition to the obvious reasons, there is one more - car owners, by their actions, are gradually accelerating this process. This happens at the moment when, dissatisfied with the quality of the road lighting, the driver wipes the plastic surface with rags or other materials. The smallest particles of sand, dirt and other components transform this process into surface treatment with abrasives that destroy the protective layer. How to restore the cover of the headlight of a car and can it be done at home or in a small workshop?
To restore the clouded plastic of the headlight to its original shine, it is necessary to get rid of all defects that appeared on it during operation. Dull headlights can be repaired using the following tools and materials:
- grinding machine or drill;
- nozzles of various sizes;
- varnish to restore transparency (for example, two-component Delta Kits)
- cotton pads or non-woven wipes;
- technical alcohol;
- solutions of alcohol and soap (it is more convenient to use in a spray bottle).
To carry out the restoration of plastic headlights, you will need to work in several stages.
Any restoration work begins with cleaning and removing surface defects. Before restoring the headlamp from cloudiness, it is thoroughly rinsed with running water. After removing all dirt, you can start leveling. To restore the surface, processing of glass or plastic with nozzles or sandpaper with a different grain size is used. The most convenient in the work were the attachments of the 3M company. Mandatory requirement - materials must be moisture resistant. This is due to the need for constant cooling of the headlamp surface with water.
If the temperature is not monitored, there is a danger of overheating of the material. This can cause it to melt or shrink. It will be almost impossible to eliminate such a defect. And, most likely, restoration of shine and transparency will fail and you will have to buy a new headlight.
The grinding process must be carried out sequentially, from using the wheel with the largest grain size, ending with the smallest particle size. At the end of the treatment, the surface is washed again with water. This is usually followed by a polishing process. But there are good reasons to exclude this stage of car headlight restoration.
Modern manufacturers use special varnishes and other coatings as a topcoat, the function of which is to preserve the transparency of plastic headlights. Many of them can be bought in stores and applied at home. Delta Kits two-component varnish is very popular for these purposes. Its use does not require special production conditions and allows you to keep the headlights shine for a long time.
One of the important conditions for good adhesion of the varnish to the plastic surface is the presence of microscopic irregularities on it. That is why it is better to restore the headlights without polishing. In this case, there is a high probability of the varnish peeling off. In some cases, to further protect the headlights from clouding, special anti-gravel films are used.
Of course, it is possible to restore the transparency of the headlights of the car, but for its greater safety, it is worth following certain rules for care.
During the operation of the car, reflectors on the headlights often fail. These elements are the most vulnerable of all optical parts. The reflector fades and fades over time. Wherever and by whatever manufacturer a reflector is made, it is equally exposed to heating, which is destructive for it, as a result of which it requires repair. Refurbishment of the headlamp reflector can be done in garage conditions do it yourself. Let's see how to do this.
When the reflector is in an unsatisfactory condition, this leads to a significant decrease in the efficiency of the headlamp due to the nature of its design. This circumstance cannot be ignored, because safety depends on it. Moreover, it is almost impossible to find a separate reflector for replacement on sale. And to purchase a new set of optics for the sake of one reflector is very expensive.
Types of reflectors for headlights
There are several types of reflectors:
- The first type - a parabolic reflector, forms a fairly clear and fairly strong luminous flux parallel to the axis of the optics. In this case, the strength of the luminous flux is unchanged. The losses are very small. This is the light that diverges in different directions. The main beam is directed along the axis. And with an increase in the distance from the axis, the brightness and strength of the flux decreases. A lamp with a special screen is used for the dipped beam. The beams of this headlamp are directed only to the upper sector of the parabolic reflector.
- Bifocal reflectors consist of two parts. Their focal lengths are different and sometimes very different. This allows the optics to perform the functions assigned to it. For example, lighting the nearest part of the road. Minus reflectors of this type it is considered that it can only be installed in optics with one filament. This means that the car must be equipped with four-element headlights.
- Focused reflectors are blocks that are additionally divided into sections. The main feature and working condition is the coincidence of the focal lengths of each element, which gives a particularly bright and strong luminous flux. At the same time, the focal length is small. Such reflectors are used together with lamps equipped with two filaments. High beam formed by the main section. Middle - due to additional parts. The design itself is quite compact.
- The polyellipsoidal reflector is a whole complex of elements with a protective shield. Due to its versatility, a powerful and directional luminous flux is formed, which is capable of taking different forms and has clear boundaries. To create such optics, computer programs are used. Working surface - no more than 30 sq. see This optics works together with lamps where there is only one filament.
Reasons for the failure of reflectors
In terms of operation and equipment, these devices are the same. They perform the same task - they direct the light flux from the rays that the lamp forms. To do this, the inside of the reflector should be as smooth as possible, and ideally mirrored.

During the operation of the car, this surface is destroyed. Often, the destruction is caused by physical impact, violation of the tightness of the headlight, sharp and large temperature changes.
What spoils the headlight?
It is not recommended to install lamps in the optics, the power of which exceeds the permitted capabilities. If you do not follow the manufacturer's requirements, then the mirror layer will burn out and the reflector will no longer be able to perform its functions. The light will not be directed and generate the required power.
In such a situation, it is much more profitable to replace the element. But as already mentioned above, it is extremely difficult to find it on sale. The best option- restoration of the headlight reflector, allowing to increase the life of the optics.
Self-recovery methods
You can restore the reflector with your own hands almost in a garage. Of course, if you use these methods, the reflector will not work as it did from the factory. But at least the headlight will "live".

Do-it-yourself restoration of the headlamp reflector is possible with the help of metallized tape, with the help of glue and foil or mirror film. A method of coloring the reflector with chromium is also being considered.
Dismantling and preparatory work
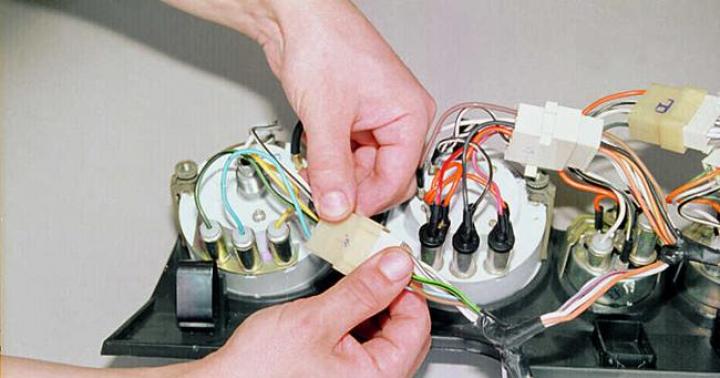
The first step is to gain access to the reflector. To do this, remove and disassemble the headlight. The work requires accuracy and precision, since the optics consists of a large number of small elements.

Consider dismantling using the example of the VAZ-2114. First, remove the cover over the radiator. Then the bolts are unscrewed near the bumper and radiator. Next, the electrical connectors, the optics themselves and the hydraulic corrector are disconnected. The corrector is also removed from its socket. Next, you need to unscrew the bolts at the back of the headlight, remove it and remove it from the mount.
After successful dismantling, the process of rebuilding the headlight reflector begins. There are many ways to do this. It is enough to choose the one that suits the most.
Method number 1 with metallized tape
Using this method, the reflectivity of the reflector can be easily restored. The method is inexpensive, but a huge number of motorists have experienced it. This regenerative technology is based on the use of metallized tape. The previously dismantled headlamp must be disassembled and thoroughly cleaned. When disassembling optics, it must be borne in mind that the factory sealant can hold the parts well. To neutralize the action of the sealant, you need to heat the headlight, and then everything will easily come unstuck. You can do this in the oven. A construction hairdryer is also suitable.

The reflector can be easily pulled out by poking it with a knife. Next, the headlamp is washed, cleaned and dried well. Then the necessary pieces of the previously prepared scotch tape are measured and cut off. Be sure to degrease the bottom of the headlight, otherwise the tape will not stick. The tape is carefully applied to the damaged reflector.
This method is really working. The restoration of the cover of the headlamp reflector using this technology has already been tested many times.
Method number 2 with glue and foil
Buy foil and glue. Before gluing, the headlamp is thoroughly cleaned and then degreased. Next, they make patterns, first from paper - at this stage, you should show all possible care and accuracy. The paper is applied to the inside of the headlamp and the blanks are marked. Then the elements are cut according to the template already from the foil. It remains now to coat the elements with glue, glue and smooth the pieces. When the glue is dry, the restoration of the headlight reflector is complete. You can test the result.
Method number 3 with film
This technology is similar to the first method. The difference between them is that different, more professional material is used here. In this case, a mirror film will be used, the choice of varieties of which is huge on the market. The product Oracal 351 or 352 is especially suitable for these purposes.

Restoration of the mirror coating of the headlamp reflector is carried out as follows. The headlamp is dismantled and cleaned. Degrease the reflector. With the help of construction tape, patterns are made. Then the parts are cut out from the film. It remains to stick the prepared elements onto the reflector. The surface is heated with a hairdryer.
If there are corrugated parts, then chrome paint is better for refurbishing headlamp reflectors. The elements are carefully painted from a spray can, and then allowed to dry.
Method number 4 - with paint
This is the latest reflector restoration technology available at home. The difference between this method is simplicity. All you need is a can of paint. You can buy chrome paint in any car store. Restoring the chrome of the headlight reflectors in this way is a simple spraying of paint onto a degreased reflector. Minus - low durability.

Acrylic and alkyd paints show themselves excellently. You can even find special products for headlights on the market. They are more expensive than chrome in a spray can, but the product will eliminate the problem for a long time.
Restoring the headlight reflector with paints has a significant drawback - the optics will not shine so brightly. This can be explained by the fact that the paint is not distinguished by high reflective methods. But this is the easiest recovery method.
Outcomes
So, we figured out how to repair optics at home. Naturally, you need to understand that all these methods are not vacuum restoration of headlight reflectors, which is done at the factory. These are ways to simply use the headlamp for its intended purpose. Therefore, miracles should not be expected.