The question is how to check the valve you can ask a specialist in service center... The designers made every effort to make the driver feel comfortable, comfortable and safe, and the repair and maintenance issues were shifted onto the shoulders of car services.
"Classic" - the car is not for the lazy
Repair and service own car requires a lot of time, effort and money from the owner, especially if the owner really cares about the condition of the car. Each detail has its own secrets and you need to know how to handle it correctly, how to adjust or repair it. The usual procedure for domestic cars is to adjust thermal gap valves, on which the performance of everything depends.
We all know from the school physics course that any solid body expands when heated. Considering that for ICE operation very precise contact of some parts is important, the design of mechanisms with their participation is done taking into account the fact that a running motor heats up to a very high temperature and, accordingly, their linear dimensions change.
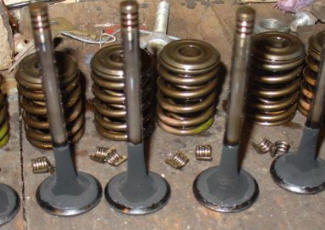
The valve disc must fit very tightly against the seat under all conditions. This is necessary to ensure sufficient. In order to prevent the valve stem from opening the gap during thermal expansion, an adjustable thermal gap is made between its end face and the element that exerts pressure. The size of the gap, depending on the motor model, can differ from 0.15 to 0.30 mm.
How to check valves by ear and in other ways?
Any driver who drives one car for some time gets used to its "habits", which can be used to determine the state of some systems. Checking the correctness of regulation of the thermal gap is carried out in three ways:
- By ear (a running engine emits a characteristic ringing, which can subside or disappear when the operating temperature is reached);
- having checked the degree (having approximately the same wear, each of the cylinders should show the same pressure values at the compression stroke. A significant difference may indicate the absence of a thermal valve clearance);
- using the adjusting dipstick.
Answering the question how to check the valve, it should be borne in mind that the most accurate method is to use a stylus or a bar with a micrometer. Using such diagnostics, you can immediately make adjustments.
How to properly adjust the valves and why shouldn't you be afraid?
The process of adjusting the thermal clearance of the valves should not cause fear among car owners. Of course, everything will not work out perfectly the first time, but after a little practice, the necessary skills will be acquired. The correctness of adjustments of thermal gaps directly depends on the availability and "consumables". In addition, you must have on hand a set of conventional auto tools in order to get to the gas distribution mechanism.
Depending on the type of timing motor, you must have:
- Probe (or a bar with a micrometer), two open-ended keys "13" and "17" (for cars VAZ 2101-07, GAS and the like);
- dipstick, valve recessing device, retainer, set of shims (for VAZ 2108-09 and the like).
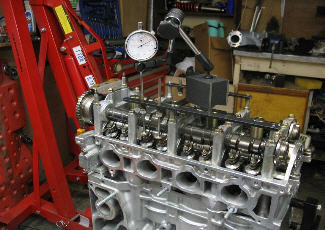
About, how to properly adjust the valve in each specific engine model, it is better to read the instruction manual for it. Compliance with the regulatory order is of paramount importance. Before proceeding with the process, it is necessary to unscrew the spark plugs, set the piston of the first cylinder at TDC according to the marks, and then follow the order of the valves according to the diagram for each motor, turning the crankshaft by the required amount.
Whatever the device of the engine block head - with the classical method of adjusting the clearances or using washers, the whole process boils down to ensuring that the clearance between the valve and the pusher is strictly specified. The adjustment itself is different in different types of motors. If in one case it is necessary to achieve the size of the gap by rotating the adjusting bolt, then in the other it is necessary to select the washer of the required thickness.
Why is correct adjustment of valves? How to independently adjust the valves on (classic)? These are the questions that will be touched upon in the proposed material on.
Why do you adjust the valves?
The gas distribution mechanism of the car is designed in such a way that there must be a thermal gap between the parts of the pusher and the valve. The manufacturer has set the value of the thermal gap, which should be 0.15 mm. This is the tolerance that is designed for the expansion of the metal when it heats up. In the absence of this gap, the gas distribution mechanism will not function correctly, which can lead to negative consequences and to the failure of the power unit.
Signs of improper valve alignment
If the thermal gap is less than it should be, then after the engine warms up, the valve is not completely closed, which leads to a decrease in compression in the cylinder and, accordingly, a drop in power.
If the thermal gap is larger, then the valve does not have sufficient clearance when opening, which leads to a decrease in the supply to the combustion chamber and an insufficient exit of exhaust gases from it.
Manual for adjusting valves VAZ (classic)
Before proceeding with the adjustment work, I would like to immediately note that valve adjustment VAZ produced only on a cold engine. From necessary tools you will need keys for "13" and "17" and an adjusting dipstick. To make the adjustment, it is necessary to loosen the lock nut of the adjusting bolt and turn it until the required clearance is achieved.
It is important to remember when making adjustments !!!
- If the probe passes into the gap with little effort, adjustment is not required.
- If the probe does not pass or, on the contrary, enters too freely, adjustment is necessary
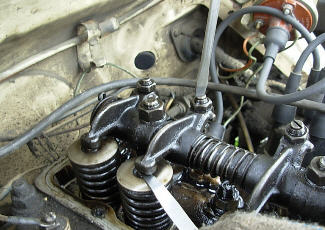
- Remove the valve cover
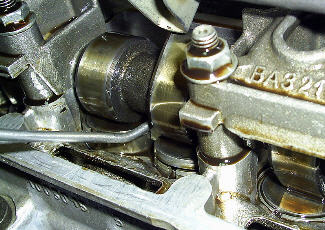
- We turn the crankshaft until the marks on the camshaft pulley and the housing of the bearing case match.
- First we adjust the 6th and 8th valves
- Then we turn the crankshaft clockwise 180 degrees and adjust the 4th and 7th valves.
- Next turn 180 degrees - adjust the 1st and 3rd valves
- And the last revolution of the crankshaft is the 5th and 2nd valve.
Video on adjusting valves VAZ (classic)
How often do you need to adjust the valve?
Valve adjustment VAZ should be carried out after engine repair, as well as after removing and installing the cylinder head. Also, do not forget that during the operation of the car, parts have natural wear and tear, which may entail the entrainment of the thermal gap. Therefore, the frequency of valve adjustment should be every 20-30 thousand kilometers.
Operation of each engine internal combustion not possible without inlet and outlet valves. When these mechanisms are closed, the fuel mixture is compressed, which in turn drives the piston. Now many passenger cars are equipped with 16-valve engines. Each of the 16 valves has a small gap left between the stem of the mechanism and the cam
This distance is necessary so that when heated, the expanded parts do not come into contact with each other, and thereby do not degrade the performance of the motor. The need to adjust them arises every year, after about 40-45 thousand kilometers.
How do you adjust the valves?
First, you should wait until the motor has cooled down. Experts recommend adjusting the valves only when the engine temperature is no higher than 38 degrees Celsius. To do this, it is enough to put the car in a garage with an air temperature of 20 degrees, and after 2 hours you can safely start working.
So, let's go directly to the question of how the valve is adjusted. After our motor has cooled down, remove the distributor cover and unscrew the mounting bolts air filter... Next, remove and take out the rubber washers. After that, we take the removed part to the side (it is advisable to wrap it with plastic wrap so that road dust does not stick to the walls) and put the car on hand brake... Now you need to engage 4th or 5th gear and place a jack under the front right wheel. If it is, we move the gearshift lever to the "P" position. After that, we jack up our wheel and spin it until the trembler slider approaches the position of the first cylinder in BMT. After our shaft is in the top dead center position, we proceed to adjust the gap. 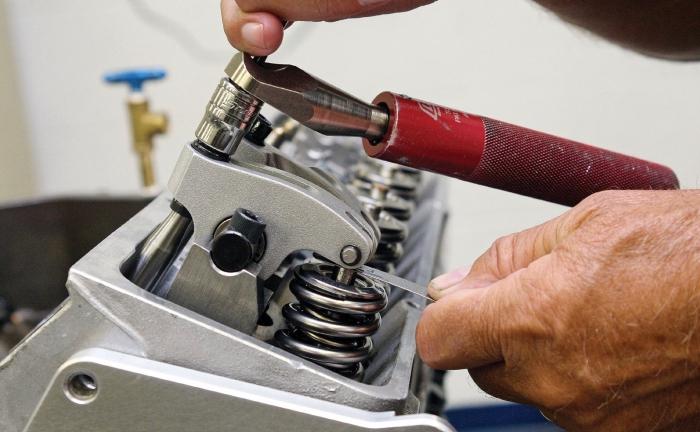
It is performed in the following sequence:
- First, the clearance of the mechanisms of the 1st cylinder is adjusted.
- After scrolling the distributor slider 90 degrees, the valve of the 3rd cylinder is adjusted.
- Next, we do the same with the 4th cylinder (at the same time, we rotate the distributor slider by another 90 degrees).
- The last is to set up the 2nd cylinder.
It should be noted that the adjustment of the valves itself, including), is performed as follows:
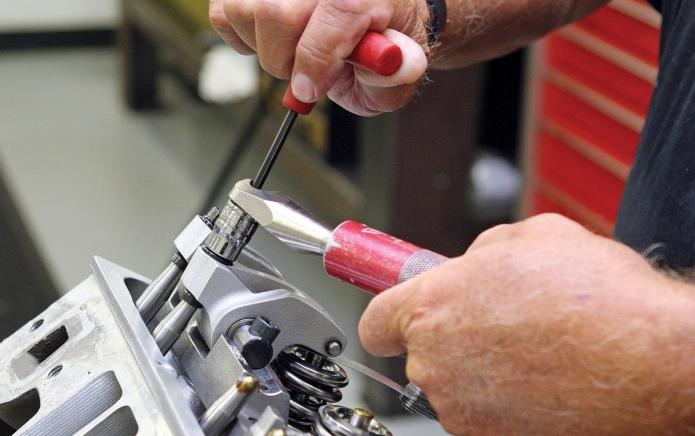
- Using an 11 mm open-end wrench, loosen the lock nut.
- Adjust the gap with a minus screwdriver and a probe (ideally, you should get 0.2 millimeters).
- Then we pick up a 0.2 mm dipstick and check the quality of the work. If done correctly, the dipstick will penetrate the gap with little force. Pay close attention to this. If the part will fly through the gap or, conversely, get stuck between the cam and the stem, be aware that the valve adjustment was made incorrectly.
- After setting the required clearance, put everything in place and start the motor. Adjusted parts should not emit extraneous sounds when the engine is running. If everything is fine, then the VAZ valves have been adjusted successfully.
Every car needs periodic valve adjustment. If this is not done on time, the car will begin to lose its traction, the drive will make noise and the load on the rest of the internal combustion engine parts will increase. To prevent this from happening, it is necessary in a timely manner How to do this, you will find out in today's article.
Diy valve clearance adjustment
First of all, you need to understand one nuance. Inspection and adjustment should be carried out only on a cold engine. The temperature recommended by experts for setting the gap is no more than 38 degrees.
After our motor has cooled down, you can start adjusting. First, we need to remove the cylinder head cover, then turn the engine until the first cylinder enters the BMT position. In this case, you should pay attention to the labels. It is important that they align with the pin on the oil pump pulley.
You should also pay attention to the intake and exhaust valve tappets. Devices on the first cylinder should have a small gap, and on the 4th, they should be tightly clamped. If this does not happen, turn the motor one more revolution. 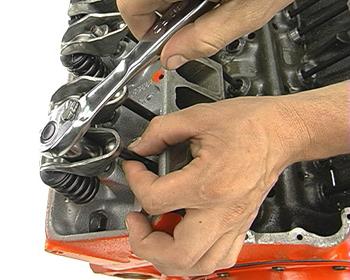
Now we take a special dipstick and measure the gap between the valves. Ideally, it shouldn't overshoot or get stuck. The stylus should travel the distance with little effort. If the device quietly flies through the gap or, conversely, is stuck halfway, then it is necessary to adjust the valves. In this case, take two open-end wrenches (usually 13 and 17 mm) and release the lock nut on the adjusting screw. Now you can safely set the required clearance.
What should be the gap?
It should be noted that absolutely on all cars given value is 0.15 millimeters. Moreover, this value does not depend on how the gas distribution mechanism of the car is arranged.
How often do you need to adjust the valves?
You need to set the gap immediately after obvious signs have been noticed. This is a loss of power, dynamics, characteristic "shots" from, and so on. If we talk about numbers, then the valves need to be adjusted every 20-30 thousand kilometers. If at the last mark you have neither exhaust nor loss of power, check the valve clearance anyway. So you can be sure that your iron friend is in good condition.
Also, after setting the required clearance, you can replace the shims on the upper side of the pushers. To do this, we turn and press the pusher inward using a special tool. After that we take out the washer. This can be done with a small screwdriver or magnet. But before pressing it back, we turn the device until it turns to the candles from the upper side. Ideally, two pushers should be pressed at once. 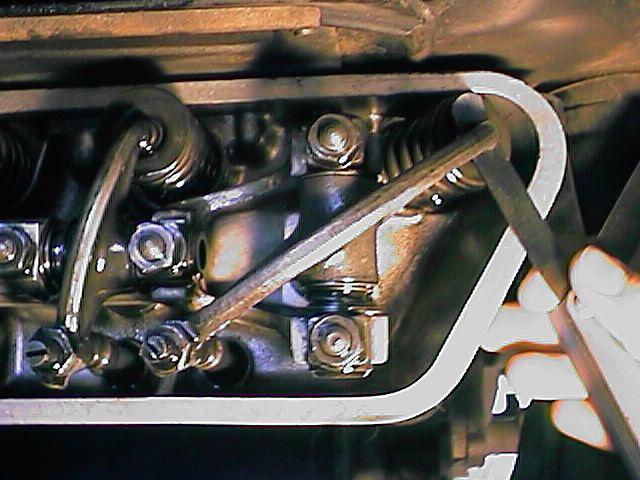
After the clearance has been set, we assemble everything in the reverse order and check the operation of the engine. It should not emit any clicks during operation and other characteristic sounds.