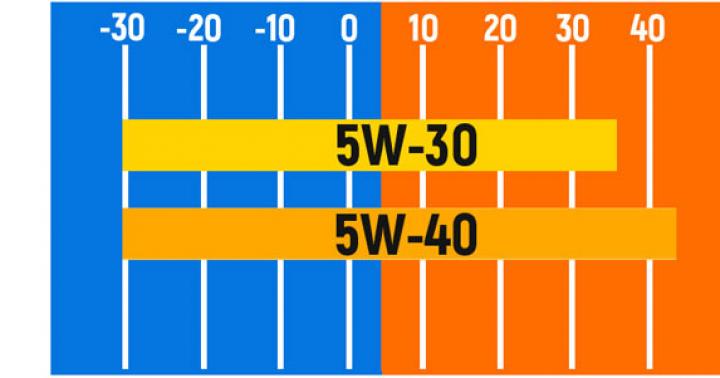
Our article will be completely devoted to the headlights of the Kia Sid car, a very popular hatchback in our country. From this publication you will learn how to adjust the headlights on the Kia Sid with your own hands.
To accurately determine the angle of adjustment of the light flux, independent adjustment work is always carried out in the evening or at night. In addition, we need a flat wall, along which we will adjust the angle of the headlights of our hatchback.
Before proceeding directly to the algorithm of the adjustment process, we present important information that every motorist should be familiar with.

What is this element made of?
The headlight is always arranged from the main components, regardless of its type. The main elements in any headlight are a lamp and a reflector, also called a reflector..
An ordinary lamp has a special tungsten filament with a melting point above 2700 degrees. If the lamps are xenon, then they generally do not imply a tungsten spiral in their design.
Reflector
The purpose of a reflector is to collect some of the lamp's light and direct it onto the road. In other words, the reflector reflects the light flux in the right direction. By itself, the reflector cannot fully illuminate the road, and therefore the following element was invented, called a diffuser.

Diffuser
Advice. Diffusers need to be periodically polished, as over time they scratch, become cloudy and, in a word, cannot provide a normal and correct flow of light.
The diffuser is glass with a special corrugated pattern. Headlights must be kept clean at all times, as dirt contributes to overheating, from which the lens often cracks or even melts.
Note!
Polycarbonate diffusers are known, which are not recommended to be wiped dry after washing.
Some modern headlights do not have a diffuser at all. They are made with a more complex shape, and the reflector, which is slightly flattened in its vertical cavity, takes over the desired distribution of light. Such a reflector is no longer a paraboloid, but rather an ellipsoid or even a combination of these two figures.
American and European systems
As you know, today there are two headlight systems, which, in fact, have different light distributions:
- The American one has its own special lighting principle: it is possible to shine better and further illuminate the road when switching from high beam to low beam. In the American system, there is no sharp boundary between light and shadow, and as for the edge of the light beam, it is blurred.
- The European headlight system, on the contrary, means to significantly reduce the power of the beam of light that enters the eyes of oncoming drivers. These types of headlights are characterized by a sharp cut-off line, which is created in the lamp under the filament of the low beam.
The difference in headlight adjustment American and European
- Adjusting American headlights involves adjusting both low beam and high beam.
- In European headlights, the high-beam beam is set by the manufacturer at the factory, by means of geometric adjustment of all structural elements.
Headlight adjustment algorithm
Let's start with the fact that the wall where the headlights are adjusted must be perfectly vertical, and its surface is not smooth, as many people think, but rough.
Starting the headlight adjustment process
The operating instructions will be as follows:
- We park our car in such a way that it stands on a perfectly flat horizontal area. This is extremely important and the longitudinal axis of the machine must be perpendicular to the wall.
Advice. When adjusting the Kia Sid headlights, it must be remembered that only if the above requirements are met, the process can be considered completed with high quality.
Do not forget that each headlight is checked separately.
- Turn on the light. We take a thick sheet of cardboard and close it with that headlight, which has not yet been checked. The light of the headlight should be bright and well illuminate the forward view. The headlight should shine well ahead.
- We open the hood of the car and carefully inspect the headlight mounting area. There are a couple of screws that are responsible for adjusting the lighting. Look at the photo below, where everything is shown.

Note!
Note that the adjustment is performed both vertically and horizontally.
- We are starting to adjust, but first we need to carry out preparatory work.
- We make sure that the pressure in the tires is correct.
- We check the bulbs in the headlights, their glass, etc.
- If malfunctions are found in any lighting element, then the headlights must be disassembled.
Preparatory work

Note!
You need to check all the elements, including light bulbs, glass, etc.
Removing the headlight

Advice. Again, some experts advise removing the bumper and fender liner to gain access to this area.
But this option is considered as the longest.
- The headlight latch can be easily removed by pressing on the headlight from the engine compartment. (See also the article.)
- Problems can arise when removing the left headlight, where there is little free space on the side of the engine compartment. In this case, you should try to move aside the air duct sleeve, which creates interference.
- Now let's move on to adjusting the headlights. Special markings should be made on the wall, which are two points that would exactly copy the distance between the headlights. They should be at the same distance from each other as from the floor.
- A line is drawn between the points, then another parallel line at a distance of 12 cm, and then a third one, which will be 22 cm lower than the first.
- Back to headlight adjustment.
Headlight adjustment on the wall

The upper border of the light spots on the wall from the main headlights should coincide with the second line drawn. The car must be at a distance of 13 meters from the wall. The upper limit of the fog lights must correspond to the third line.
As for the intersection points of the horizontal and inclined plane of the light spots, they should be at a distance of 12 and 22 cm from the points corresponding to the Kia Sid headlights.
- We adjust the headlights until the readings match the values \u200b\u200bgiven above. Only then can the work be considered completed.
Note!
If xenon lighting is installed on the Kia Sid, then its light is much brighter than the stream of ordinary light bulbs.
Adjustment in this case is required.

Once again, we note that safety on the road depends to a large extent on the adjustment of the headlights. If it is carried out correctly, as described above, according to the instructions, then it will be possible to better assess the situation on the road at night and the risks of losing control of the car are minimized.
In conclusion of the article, I would like to write about such a process as making stickers for headlights. This will help to some extent modify the appearance of the car. Again, this process is considered as tuning and finalizing the headlights, although, in principle, they look good on the Kia Sid.
One way to make stickers for Kia Sid headlights is cilia. For many motorists, this hobby is perceived only as pampering.
But there are still lovers of this process and cilia provide some advantages, which are listed below.
- The block headlight visually looks wider after that.
- The hood line of the car is visually aligned with the headlights.
- Headlights give the car a more austere look and are perceived visually directed forward.

Conclusion
It is easy to make adjustments yourself. It is enough to use the above information and be able to remove the headlights correctly if you need to check their operation.
In the process of carrying out the work, it is imperative to use visual materials that will help to consolidate all the information and give a practical understanding, and the video in this article will clearly tell you how to remove the headlights correctly.
Today, the price for services of this kind in service stations among professionals is quite high, so learning how to do everything on your own will be very helpful. We hope that this article helped you and gave you a lot of useful information.
If you notice that the quality of lighting in your car has begun to deteriorate, then you should immediately solve this problem, and it is worth noting that too bright light is just as undesirable as too dim. In the first case, you will blind oncoming drivers, and in the second case, it will be difficult to see the roadway. We will look at how to adjust the headlights on the Kia Sid with our own hands, this will save quite a lot of money.
Headlights and lighting systems used
Regardless of which modification of the car you have in use, the structure of the front lighting devices is always the same:
- A light bulb of a certain power that gives light. You should use those options that are recommended by the manufacturer, this will save you from the risk of damage to the structure due to too hot structures.
- The reflector allows you to collect the luminous flux into a beam and direct it to the right place on the road. But it is worth remembering that the reflector itself cannot provide the necessary quality of light; the third element is intended for this.
- The diffuser has a complex structure, which ensures the direction of light in the desired area. Modern models may not have a diffuser, but there the system is much more complicated, and we will not disassemble it.
Important! Remember that for proper and high-quality lighting, it is necessary to maintain the diffuser in perfect condition. If you notice scratches on the surface, then you need to polish them.
The importance of automotive optics cannot be denied. Thanks to the headlights, the road surface is illuminated at night, which is why optics largely affects the safety of movement. How to properly disassemble and adjust the headlights of Kia Cerato 2007, what nuances you need to take into account - read more about this below.
[ Hide ]
Optics device
In Kia Cerato, not only dipped and main beam headlights, but also fog lights can be used.
Regardless of the modification of the car and its year of manufacture, the headlight device will always be the same:
- The light source is a light bulb. Depending on the model, lamps of different powers and types can be used in optics. Therefore, if a low beam or high beam lamp is being replaced, you should always take into account the manufacturer's recommendations regarding the use of one or another type of device.
- Reflector. This element is used to collect the light flux into one beam and then direct it to the required place on the road.
- Diffuser. This component is characterized by a rather complex device, which ensures the direction of the light flux to the desired area. Unlike a reflector, a diffuser also allows you to provide the desired quality of light.
Photo gallery "Ideas for tuning"
Dismantling and disassembly of optics
To remove and disassemble the headlight, do the following:
- To begin with, everything superfluous should be removed from the optics, that is, light sources, plugs, if any, ignition blocks. There are also three small bolts on the headlight housing, you may not notice them at first - these bolts should be unscrewed.
- Further, along the contour of the lantern, you should walk with a clerical or other sharp knife, this will allow you to cut the sealant layer. You will also need to disconnect the latches on the case. Using a regular household hair dryer with a flat blade screwdriver, you need to detach the glass from the body. Please note that it is not necessary to warm up the case around the perimeter, because this will cause the sealant to stick together again, so you need to work in sections - each section of 5-10 cm is treated with a hairdryer, then the glass is disconnected.
- When the glass is dismantled, you will need to remove the so-called lantern mask, it is fixed with small screws, there can be about 10-15 of them in total. After unscrewing the screws, the headlight glass is dismantled.
- Now you will work with the flashlight device. If you plan to change the wiring, repair or replace the lens, then these components, as you might guess, should be dismantled. First, the high-beam reflector is removed, for this it must be dismantled from the hinges and unscrew the adjusting bolt.
- The lens is dismantled in the same way, to do this, disconnect the latches and unscrew the tilt angle adjustment bolt.
- Before removing the electrocorrector, disconnect the power cable from it. The dismantling of the element is carried out after disengaging the latches, it is also necessary to remove the section of the turning light, it is fixed with two bolts on the frame.
- To dismantle the lens, you need to unscrew the three bolts on the body of the reflective component. The reflector itself is fixed on the frame.
- The last step will be to remove the wiring - to do this, you need to unscrew the two bolts that fix the base of the rotary bulb. Having done this, the block with wires is rotated, after which the so-called braid is dismantled, for this, three clips should be disconnected (the author of the video is Eduar Davydov).
Optics Adjustment Features
Kia Sid or Cerato headlights are adjusted using a special corrector:
- First of all, you need to check the condition of the lights and make sure that the tire pressure is correct, and the pressure in all wheels should be the same. In addition, for proper adjustment, you will need a flat surface, there should be no slopes on it. Moreover, a fence or wall should be located on this flat surface, and its surface should also be flat.
- After that, two points should be marked on the fence or wall, while the distance between them, as well as from them to the ground surface, should correspond to the location of the optics in the car. A horizontal line should be drawn between the points, and under it, at a distance of about 12 cm, another one is drawn. Another line is drawn under the second line, while all three segments must be drawn in parallel.
- Having done this, the vehicle should be driven away from the wall by about 13 meters. It is at this distance that the adjustment will be most effective.
- When the driver turns on the dipped beam, the upper border of the light spots should be located on the second line. If so, then the lighting stream from the lamps will not blind other drivers. If the car is equipped with fog optics, then when turned on, the upper limit of the light beam should be located along the lower, third line. Despite the misconception of many motorists, fog lights can also blind drivers, so adjusting them is also important.
- As for the intersection points of the horizontal as well as the inclined planes of the lighting beams, they must be located in certain places. The best option would be if they are located at a distance of about 12 and 22 cm, respectively, from the marks that were applied to the fence or wall.
- The adjustment procedure is carried out until the main parameters correspond to the normalized ones described above. Separately, it must be said about xenon. As a result of the fact that xenon shines much brighter, adjusting such optics is an even more responsible and important procedure. Incorrectly adjusted xenon will not only bring inconvenience to other motorists, but can also cause conflict, since not all motorists like being blinded.
If you notice that the quality of lighting in your car has begun to deteriorate, then you should immediately solve this problem, and it is worth noting that too bright light is just as undesirable as too dim. In the first case, you will blind oncoming drivers, and in the second case, it will be difficult to see the roadway. We will look at how to adjust the headlights on the Kia Sid with our own hands, this will save quite a lot of money.
Headlights and lighting systems used
Regardless of which modification of the car you have in use, the structure of the front lighting devices is always the same:
- A light bulb of a certain power that gives light. You should use those options that are recommended by the manufacturer, this will save you from the risk of damage to the structure due to too hot structures.
- The reflector allows you to collect the luminous flux into a beam and direct it to the right place on the road. But it is worth remembering that the reflector itself cannot provide the necessary quality of light; the third element is intended for this.
- The diffuser has a complex structure, which ensures the direction of light in the desired area. Modern models may not have a diffuser, but there the system is much more complicated, and we will not disassemble it.
Important! Remember that for proper and high-quality lighting, it is necessary to maintain the diffuser in perfect condition. If you notice scratches on the surface, then you need to polish them.

Let's also consider the systems of functioning of light:
- The American version (see about articles and indices in the article) involves achieving the best quality of light, when switching from near to far, there is not a very big difference, the light border is blurred, the light beam is not very clear.
- The European version assumes a large difference between high and low beams, this is designed so as not to blind oncoming traffic. Such modifications have a sharp cut-off line.
In American designs, both low beam and high beam are adjustable, while in European designs only low beam is regulated, and the far beam is pre-installed at the factory. 
Features of adjustment and disassembly
Kia Ceed headlight adjustment can only be done with a complete check of the equipment: glasses, cases must be in perfect condition, all connections and fasteners must be intact and strong. If questions are found on any of the points, then the device should be removed for repair, this is what the next chapter will be devoted to.
Removing headlights
First of all, let's consider , how to remove headlight on kia sid
The work is very simple, therefore, having the simplest set of tools, you can handle this operation:
- First of all, you should disconnect the terminal from the battery, some experts even recommend removing the battery and the fuse box, but this is an extra waste of time, and these nodes do not interfere so much as to bother with them.
- Next, disconnect the wires from the structure. It is not difficult to do this, since all connections are made in the form of special blocks that are inserted and removed quickly and securely fixed. You just look at this node and you can easily figure out how to disconnect it.
- Despite the fact that the appearance of the optics is very complicated, the Kia Sid headlight device is very simple, the photo below shows a diagram that is placed in the official instruction manual. You should not be afraid that you will damage the structure - it is very reliable, and you are unlikely to break it if you act carefully.

- The removal instructions begin with unscrewing the first bolt located at the junction of the headlight and fender, for this you will need an open-end wrench for 10 or a head with a knob and ratchet if you like to work comfortably. Next, the overlay is removed that hides the fasteners of the front part, for this 11 clips need to be removed.

- After removing the lining, you will see the second bolt, which should also be unscrewed. Further work can be carried out in two ways: either remove the bumper and fender liner, which is very long and laborious, or do it much easier - lightly press on the headlight housing from the inside.
Important! In fact, removing the left headlight is much more difficult than the right one. This is due to the fact that an air duct passes there and the space is limited, which makes it difficult to get to the node from the inside. But the air duct is quite flexible, and therefore it can simply be pushed aside or even detached.
After removal, the required repair work is carried out, at the same time you can polish the glass on the Kia Sid headlight to improve the quality of light even more. The assembly is carried out in the reverse order, and it is important that all work is done carefully, the accuracy of subsequent settings depends on how well and securely fastened each node.
It is worth noting that such an interesting solution as making stickers for headlights will help protect the surface from scratches. This not only changes the appearance of your car, but also serves as a kind of barrier from small stones, which are the main cause of damage. 
Adjustment work
Almost all cars of the model we are considering have a headlight corrector installed, but for various reasons it may not work correctly or not work at all. In this case, the configuration must be done independently, it is within the power of any person.
The process goes like this:
- Adjusting the headlights on the Kia Sid begins with checking their condition, as well as monitoring the tire pressure, it must be the same and in line with the norm. It is also necessary to find a flat area without any slopes, this is important for the accuracy of the adjustment. There should be a wall or a solid fence in front of the site, the main thing is that the surface is more or less even.
- Next, two points are placed on the wall, the distance between which and the height from the ground must completely coincide with the location of the headlights on your car. A horizontal line is drawn between them, another one is drawn 12 cm below it. The third line goes through another 10 cm, that is, you will get three lines located absolutely parallel to each other.

- Now it is important to set the car exactly opposite the marked points and measure a distance of 13 meters, it is at this distance that the car should be in the process of adjusting.
- The upper border of the light spots when the dipped beam of the main headlights is turned on should be located on the second line, which means that light is ok, and you will not blind oncoming traffic. Next, you can check the fog lights, if any, the upper limit of their light should pass along the third line, this is important, since PTFs can work effectively in conditions of insufficient visibility only if they shine at the very bottom.

- The points of intersection of the horizontal and inclined plane of the light spots should also be located in certain places and be at a distance of 12 and 22 cm, respectively, from the points previously applied to the wall surface.
- Adjustment continues until all indicators are in line with the above recommendations. Only after this work can be considered completed.
Cars with xenon light deserve special attention, it is much brighter than usual, so adjustment is much more important here. Do not neglect this simple work, after spending an hour, you will secure your movement in conditions of insufficient visibility and will be able to easily pass the state technical inspection, because the light is checked quite carefully there. 
As you can see, any car owner can adjust the Kia Ceed headlights, and the price of this type of work in car services is very high, which actually does not correspond to the complexity of the operation.
Conclusion
The video in this article will help you understand the above work even better and allow you to make sure once again that such settings are possible even for those who do not have special equipment.