When winter comes, a person has a desire to go ice skating. This improves your health, lifts your spirits, and ensures a good time. The only trouble is that not everyone knows how to skate. Realizing that this must be learned, many end up going to the skating rinks, arguing that “I will never be able to skate in my life.” But why, after all, everyone once did not know how to stand, and when they learned, they were surprised at how it was possible not to love this sport.
You don't know how to learn to skate? by spending a little free time, you can very quickly master basic movements that will allow you to stand steadily on the ice.
Choosing skates
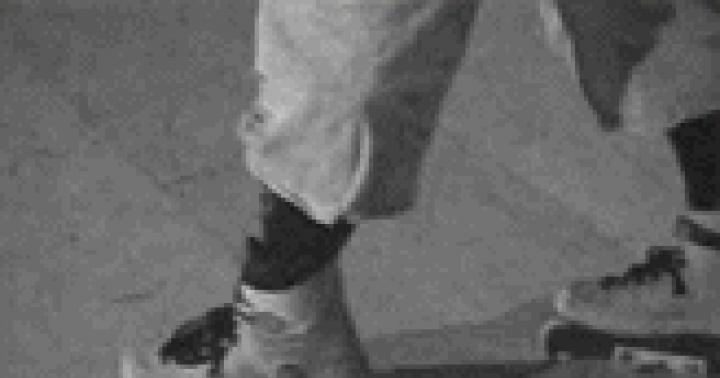
First, you have to get acquainted with how to choose skates. Since you are a beginner, you can first rent skates, but you can also buy them. In fact, any skates are suitable for skating, be it hockey, figure or free skating. True, the last option will be the most suitable for you, because you are not going to make complex movements and turns. Buy skates based on your foot size only. Many people believe that they should be one or two sizes larger, but this is a completely false statement. In such skates you will not only feel uncomfortable, but you will also not avoid the appearance of bloody blisters. The skates should fit snugly on your feet; to secure them, you need to tie the laces tightly.
Preparation
Since learning to skate is not a matter of a single day, you will have to visit the skating rink at least twice a week. Frequent training is the key to good success. For classes, choose skating rinks that are not crowded or at a time when the number of vacationers on them is small. If you have the opportunity, you can hire an instructor who can put you on the ice in a couple of lessons. You can ask for help from a friend who has been skating for a long time. But if both of these options are inappropriate in your case, you will have to study on your own.
Asking yourself the question: “How to learn to skate?” and having bought skates, you can safely go to the skating rink, where real tests await you. And only by gathering your will into a fist, you will be able to overcome them. Yes, it will be difficult, but you will have to be patient.
Learn to ride
Put on your skates and lace them tightly. Poorly tightened skates will hinder your movements. Now go to the skating rink, but don't go straight into battle. Limit yourself to a stand at the side. This is necessary so that your feet get used to the new “shoes” and also feel the ice.
Since you cannot stand in this position all the time, you will still have to tear yourself away from the side. Release your hands and bend your knees. Note that you can only learn to skate with bent knees. You won’t be able to ride, the only thing that awaits you is a fall. So, your legs are bent, what to do next? Try to make small movements, setting yourself the goal not to travel a long distance, but to stay on your feet and not fall. By the way, you will have more than one landing on the ice, since learning to skate without falling is simply impossible. By the way, you also need to be able to fall. Try to do this sideways, but not with your back.
Once you've gotten a little comfortable, start moving. Remember one more thing, you shouldn’t make movements with the teeth, but don’t forget to drive. Wait a little and then try again. Along the way, your body itself will tell you how and what to do. The main thing here is training. Having started skating once, do not give up everything, but continue to firmly move towards your goal.
And a few more words about braking. The easiest option is to drive up to the side. If you want to stop in the middle of the skating rink, try turning your skate toes slightly forward with your legs bent. Well, or wait until the skates stop on their own. This is quite enough for a beginner.
Don't doubt that you will succeed. True, don't demand too much from yourself. Still, you won’t be able to immediately learn how to properly sharpen your skates or make a complex turn. Everything will come with time, as well as faith in your abilities. And it doesn’t matter whether you are twenty years old or forty.
How to learn to snowboard without an instructor
This article is 8-9 years old. I shortened the original article so that it would fit within the blog - modern users do not like to read a lot of text.
He loves it when there are a lot of pictures, 5 lines of adapted text, and a “Like!” button below.
I wrote the article “How to learn to snowboard on your own” based on my feelings at that time, since I learned to snowboard on my own and everything below is written - this is the result of my trial and error.
I can’t say that I skate great and impeccably. No.
I skate like shit, but for my own pleasure
You bought beautiful snowboarding clothes, gloves, thermal underwear, a balaclava and a helmet to boot.
You may have bought a snowboard, bindings and boots.
Even if you haven’t bought something WHAT to ride, the main thing is that you have WHAT to ride.
1) First exercise:
Carried out on a flat surface. No need to climb the mountain!
Fasten the fasteners on the front leg.
The top strap is tightened first, then the bottom. Stand up and feel the discomfort.
All this is bullshit and will soon pass, but at first the board fastened to the leg causes a feeling of terrible inconvenience...
Chat with a board on your leg... just don’t kill anyone nearby!
The exercise is as follows:
1.1) you need to try to ride the board straight, like on a scooter or skateboard, pushing with your free leg.
To avoid falling often, try to make small but frequent pushes with your free leg.
My front leg is left. When I need to cover some distance on a flat surface, my right foot pushes off to the right of the board. When I get on the lift, my free right leg is to the right of the board. When I cling to the “mop,” my right foot is to the left of the board (behind it).
Feel what is more comfortable for you.
In short: the essence of the exercise is to feel the board, get used to the awkwardly twisted, fastened leg.
This will be useful to you when moving between lifts and when lifting on a “mop” (tow lift).
After you’ve had your fill of running and standing on one leg, let’s complicate the exercise:
1.2) now Having pushed, place your free leg next to the mount and try, while maintaining your balance, to ride in a straight line.
This is such a tormenting exercise and this is just the beginning...
Of course, there is no buzz yet. But you can’t pull the fish out of the pond without difficulty.
You need to spend at least half an hour on the exercises, after which it’s good to sit on a tree stump and drink a glass of schnapps
2) Second exercise:
We find a small rollout from the slope, almost flat, but no longer flat as in the first exercise. Let's make sure that there are no frostbitten individuals or grandmothers and grandchildren nearby. We repeat exercise 1.2, but we slide further away since we are going downhill and most importantly: try to stand on the board correctly - your weight should be distributed equally on two legs, and even more correctly, if 70% of your weight falls on the front, fastened leg.
In this case, the upper half of your body (from the navel to the top of the head) is turned in the direction of movement, and your legs stand as they stood - they are fastened.
After stopping, we return to the starting position, while performing exercise 1.1
We suffer like this for another half hour.
At the end of the workout, while in motion, try to transfer your weight to your toes (as if standing on tiptoes), and then to your heels (snowboarders should always have their knees bent and their body turned in the direction of movement).
You will notice that at the same time the board begins to change its straight-line movement and will begin to turn in the direction of transferring the body weight...
2.1) Correct stance:
Important. How do you drive? I hope you look forward and not to the side...
So, bend your legs slightly at the knees, cushion them - good! Now relax.
Now turn your whole body forward as you walk: your head, shoulders and torso always face forward!
Behind the body, the hip section also rotates slightly, so to speak.
But his fastened legs do not allow him to spin far...
Where to put your hands, you ask. They need to be balanced, keeping balance, let them be where it is more convenient for you.
The main thing is that they are not in your pockets. Let your hands hold an imaginary steering wheel in front of you.
3) Third exercise (There are two exercises left before you get the promised buzz):
How to get up from the ground with a board strapped to your feet? Simple, but first, recommendations on how to fasten your legs.
Climb up the slope. And standing with your back to the descent, you insure the board rolling down with your back foot, while attaching the boot of your front foot to the mount.
After this, turn 180 degrees to face the slope and sit down on the snow.
Now, pulling the board towards you, tighten your front leg, then fasten your back leg.
After this unpleasant procedure, you can sit on the slope and enjoy the views.
However, we must go.
Pull the board to your chest (bend your knees and grab the board with your right hand, bending at the same time), then jerk yourself up, pushing off the ground with your left hand. AND….
falling head first down a slope...
Although sometimes it happens that when you turn 90 degrees, you shout Yes! go down...
It can be simpler: raise your legs with the board up and roll as if in a low break from your back to your stomach.
You rise, first taking a “cancer” position, and then pushing off with your hands, the normal snowboarder’s position called backside (i.e., facing uphill).
The previous stand with a fall was called frontside, that is, with your back to the mountain and your face from the mountain.
Well, now the exercise itself.
We stand in a backside stance (this is more convenient - the ground is closer, in front of our nose), with the toes of our boots resting on the snow, and our heels raised above the slope (so we would be on tiptoes).
As soon as you lower your heels (and, accordingly, the rear edge of the board) down a little, the board begins to slide down like a bulldozer, shoveling snow with the front edge.
By lifting your heels, you control the speed of your slide until it stops completely.
Just don’t lower your heels (and therefore the rear edge) to the surface of the snow! – then you will feel the delight of flying backwards...
We do the same in the frontside stance, only now the heels press the snow, and the toes of the feet rise up.
Do this exercise several times until your leg muscles hurt.
This is out of habit and effort. It will be easier later!
Remember the rule: movement from a mountain on a snowboard is performed on one edge.
Which? – The one that is closer to the top of the mountain.
Unclear? And for everyone there is the same edge: you ride in an arc to the left on the left edge, you ride in an arc to the right on the right edge.
Anyone who does not follow this rule falls as if caught.
People call this “caught the edge.”
4) Fourth exercise (just a little left):
It's called a "falling pendulum"
We take a backside stance (“on tiptoes”). The body weight evenly loads the board, the front edge is pressed into the snow. Now we transfer the body weight to the left leg while remaining on tiptoes. The board begins to move to the left and down, gradually turning its nose towards the descent. To stop, we transfer our body weight to our right leg: the board stops for a moment and begins to move to the right and down. And so on until the end of the slope you draw a “spring” in the snow.
We fasten it a couple of times and take a frontside stance (“on the heels”). We do the same, looking at the queue for beer below.
Well, before we get to the buzz, let’s read the section below. It will be very useful to you now.)))
How to fall on a snowboard
You will fall often, less often...But you will always fall.
When a person does not fall, he does not develop, becomes covered in cobwebs and turns into a mountain beachgoer with a glass of cocoa in his hand.
Don’t be afraid to fall, if you fall correctly and have a helmet on your head and good gloves on your hands, then falling is kind of fun.
So: snowboarders have both legs on the same plane and, unlike skiers, dislocations, leg fractures, and tendon sprains are rare.
The sore spots in snowboarding are your head (that's why you need a helmet), your butt, your knees (knee pads are a must) and your arms because they don't have poles in them and they just flop around.
Falling face forward is riskier than falling backwards.
So let's look at this fall.
So, you fly face forward.
The first thing to do is to clench your fingers into a fist, otherwise your hand will be dislocated (if you try to portray the scene of “falling and doing push-ups”) or a knocked out joint (if at that time you were showing your fingers to your friends that everything is fine with you).
As you fall, try to group yourself and touch the snow sideways with your hand pressed against it.
Try to lift your legs up when you fall on your side, then by inertia you will roll over to the other side and, getting on your snowboard, ride as if nothing had happened...
It's called cool.
When falling backwards, the suffering part is the back, butt and head.
Try not to fall flat.
Bend your back like a wheel, turning into a rocking chair, perhaps you will be lucky and, having somersaulted, stand on the snowboard and roll on - this is called cool squared.
When you fall backwards, your backpack will soften the blow, just don't fill it with beer.
Better put a spare sweater and gloves in there
Consolidation and mastery of more complex
Completed turns. Without this, you will not eat and you will descend by traverse like a falling leaf or a pendulum.
- Movement from a backside stance (on tiptoes). Shift your weight to your front leg. The board turns nose down from the slope
- The heels are raised, the board is turned over with a face edge. Legs are bent at the knees. The face and torso are turned in the direction of movement
3. We give the snowboard freedom by slightly lowering the heels (but not all the way, so as not to catch the edge). The board turns nose down again
- Having picked up speed a little, we begin to prepare to turn in the opposite direction. We transfer the weight from 50-50 to the front leg again
5. We lean back slightly, pressing our heels, raising our toes and leaning over with our back edge. The knees are bent, don't forget about it. We look forward, not at our feet
- Relieve the pressure on the heels. The load on the board is 50-50. The nose of the board again tends to turn down the slope
- We load the front edge again by standing on tiptoes and lifting the heels. The board goes into another arc
- And so on. That is, they drive in arcs, reducing speed and maneuvering. There is no way without this. Next we’ll look at CUT TURNS and JUMPS
It is quite difficult to take photographs while on a gurney: everything happens in dynamics, the photographer needs to roll a little behind, and no one wants to do this. Therefore, in this article, I had the audacity to copy 6-8 photos from foreign photo sharing sites. And finally, about one thing, why do you go to the mountains and snowboard in the first place?
To dispel your possible uncertainty, I will say that you can learn to roller skate very quickly! To do this, you only need to load your legs to the maximum in the first two days of training, as a result of which the native walking habits will “soften” and the body will adapt to alternative movement (it is better if these are the next two days without a break). It is very important that in the first days of roller skating you wear protection. This will help you feel more confident and avoid unpleasant injuries such as abrasions, bruises, etc.
So, the actual TASK: on the first day of roller skating, constantly changing the exercises outlined below, you need to skate to the “state of non-standing”. On the second day, repeat all the exercises and focus on what you still can’t do. If you put a lot of stress on your legs in these first two days, then on the third day you will already feel like a roller skater and can easily move on to mastering complex elements or just skating for fun.
Where to learn to roller skate
You need to start mastering roller skating on a wide area with a smooth surface (so that there is not even a hint of a slide there). This could be an empty parking lot or asphalt areas in front of buildings. The main problem for beginners is braking, so it is best to immediately determine for yourself what will help you stop if necessary. The best option is when someone backs you up; in addition, to brake, you can grab onto trees, railings, high parapets or jump out onto the grass.
Be sure to set a goal for yourself: to skate a certain distance, be it the number of laps around the site or a route through the park. From time to time you can diversify the routes and set yourself more complex tasks. When riding on the roads, try to avoid all the obstacles that come along the way - pebbles, cracks, candy wrappers, oil stains, etc... Not because it can cause you to fall, but because it is an additional training for turns, balance and maneuvers! Plus it's just fun :-)
Let's start with something simple:
EXERCISE "roller walking".
It may not look very impressive, but it’s easier to start moving when you first stand on the rollers. Take a step and you will start moving, the rollers are already rolling. There is no need to accelerate quickly, the most important thing is to find balance. TASK: lift your legs off the ground one by one and rearrange them; At the same time, roll on each leg for as long as possible.
PLEASE NOTE: The most important difference between rollerblading and walking is that in the second case you push off with your toe, and in the first you push off with all four wheels. TYPICAL MISTAKES: Never push off with just the front wheel! DO NOT FORGET about the correct stance: constant bending forward and bending your knees.
EXERCISE "skiing"
|
This exercise is aimed solely at getting used to the rollers. The legs are shoulder-width apart and move strictly parallel to each other. The right one goes forward, the left one goes back, then vice versa. Unlike classic skiing, you don’t have to lift your heel off the asphalt; on the contrary, all the wheels of the roller should always touch the surface! The exercise does not involve pushing off and gaining speed, simply, having gained speed, roll your legs back and forth. After 10 minutes, you'll feel how much easier your roller skating will become and gain the confidence you need to master more difficult elements. OBJECTIVE: Gradually increase the distance between your legs, each time moving one leg further forward and the other further back. You also need to increase the speed of your legs. PLEASE NOTE: The center of gravity does not shift towards one of the legs, but is always located strictly in the middle. TYPICAL MISTAKES: Legs must move parallel! |
 |
EXERCISE "snake"
 Place small objects, such as Coca-Cola cans, in a line about one and a half meters apart. Take a little acceleration and start driving around them. The result will be a kind of slalom.
TASK: Starting with your feet shoulder-width apart, gradually bring them closer together and work your core. Once you get comfortable, increase your speed. To make it more difficult, you can place the jars at a distance of a meter from each other.
PLEASE NOTE: Without lifting the front wheels of the rollers from the asphalt, lightly transfer your body weight to the rear wheels of the rollers. Keep your feet together.
TYPICAL MISTAKES: Don't ride on straight legs! Bend your knees and lean your body forward - it will be easier to maneuver.
EXERCISE "labyrinth".
This is the same as the “snake”, just place the cans not on the same line, but across the entire site at a distance of 2-3 meters from each other. Ride, trying to constantly go around them.
TASK: Avoid driving in a straight line, try to maneuver and turn all the time.
PLEASE NOTE: Map out a specific route through the “labyrinth”.
Some more challenging, ADVANCED balance exercises:
Jogging (simulated running)
Jumping from one leg to another with the condition of temporarily lifting both legs off the surface. Remember to lean forward, and under no circumstances push off with the front wheels (pushing off with all four wheels of one roller). When landing, bend your supporting leg more.
Jumping with two legs
Pushing off with all eight wheels. It is very important to land on your feet in a position one half roller (or more) in front of the other, then you will not fall forward or backward.
Front wheels - rear wheels - front wheels again (turn around)
Stand sideways in the direction of movement, bend your legs and, lifting your heels and remaining on your toes, turn the rollers backwards in the direction of movement. Then, remaining on your heels, you tear off your toes and turn the rollers back over to the front in the direction of movement. The result is a kind of dance when you move to the side, constantly alternating turns on the front and rear wheels. In order to simplify this movement, do not turn the rollers when rearranging, i.e. do not make a 180 turn, but a smaller one... at least 90.
The sparkle in the eyes at the sight of a car and the inevitable desire to drive an iron friend are the main signs that a pedestrian has become a car enthusiast. From this moment on, it is necessary not only to acquire ownership of a functional, charming, dynamic, exceptionally controllable, comfortable, ultra-modern or classic car model, but also to master the basics of driving. The basic rule of the “teapot” is the well-known Ilyich's testament: “study, study...” as much as it will be necessary to navigate the vast expanses of roads.
Driving lessons. How to quickly learn to drive a car
Driving a car: talent or skill?
Availability driving talent as a prerequisite for driving a car - this is the most common misconception of a pedestrian who has decided to master driving skills. Talent will only be required if the car enthusiast decides to switch to “autopilot” status or become a participant in a rally. In other cases, it is enough to achieve automation in control and learn driving skills : perform the necessary actions without being distracted by “what to include” or “what to press.” Until automaticity is achieved, it is not recommended to drive onto highways or metropolitan streets, even in large cities in the province.
It is necessary to take into account that the transition from the number of exercises to the quality of control occurs in leaps and bounds, so constant progress in each subsequent lesson is not necessary. After just a few trips, you will gain confidence in your abilities and traveling by car will no longer be perceived as something unattainable. For “dummies” the recommended duration of one trip is 40 minutes.
Helpful advice: for first trips "instructor" could be a slow-moving truck or bus. It is necessary to maintain a safe distance and repeat all movements: turns, stops, and analyze the driver’s actions. In critical situations (confusion, panic, fear), it is enough to turn on the emergency lights and stop at the sidewalk.
Teaching a girl to drive / getting started
Driving for dummies: first steps to professional driving
Professional management – this is competent and confident driving, which is achieved through persistent training. An important factor in mastering the art of management is psychological stability. The first step of a pedestrian on the path to the auto world is an excellent knowledge of traffic rules, obtaining a driver’s license, mastering the theory and practice of driving:
- daily management is a prerequisite for consolidating the skills acquired in driving school and developing muscle memory. It is necessary to achieve automaticity when starting to move, emergency braking, changing gears, turning in a confined space, parking, and driving through bottlenecks. Along with the maneuvers, you need to learn to control the speed, get used to the car, feel the dimensions, automate acceleration and braking, get rid of the fear of driving and psychological pressures. Even circling around a deserted parking lot is better than looking at a car out the window;
- practice instant response to signs priority and prohibiting. It is equally important to quickly react to the markings, without making rash maneuvers: if you are confused, just drive up to the curb, turn on the emergency lights and think through the maneuver. To ensure that traffic rules are not lost in memory over time, it is enough to periodically refresh your knowledge on a computer program - solve tickets;
- first trips must be done in the evening or on weekends, as traffic intensity is reduced at this time. The best option is empty, quiet roads. Be sure to learn how to move in traffic: observe the speed of nearby vehicles. At first, you can drive in the right lane with an emergency signal;
The main condition for safe driving in urban conditions is psychological stability and control skills. In addition, it is necessary to prevent the creation of emergency situations and interference with other traffic participants. For this it is necessary eliminate behavior "on my own"(failure to comply with flow speed, cutting, incorrect traffic geometry), take into account other road users , model behavioral situations. It is recommended to pay special attention to minibus taxis, which “sin” by making unexpected stops in the wrong places.
- stable psychological state and adequacy are the key to successful driving. Uncontrolled panic, as well as excessive self-confidence, are an obstacle to good decisions and need to be dealt with before driving. If the fear of city traffic turns out to be stronger than the driver, then you should limit yourself to honing your skills on a half-empty night road or a country highway.
Professional control is not only automatic driving, but also the ability to make the right decision in a critical situation in a split second. Therefore, excessive emotionality is recognized as a bad travel companion, as is a sharp reaction to the actions of other road users. It is necessary to learn to predict, develop readiness for any maneuver and learn to change lanes correctly, since most minor accidents are caused by inattention when changing lanes.
The driver's procedure when changing lanes:
- estimate traffic situation(position of others, control motorcycles and cars changing lanes chaotically, take into account motorcyclists between the rows);
- estimate distance to car which follows in the desired lane, including the speed of movement (the best option for a “dummies” is the absence of cars);
- turn on "turn signal" and re-evaluate the traffic situation. If another participant begins a lane change maneuver, you need to wait. When changing lanes to the center lane, the driver from the right lane has priority;
- accelerate the car up to the flow speed (if there are cars), wait for the “window” in the lane and start maneuver. It is not recommended to reduce your speed when changing lanes, as other drivers will be forced to slow down.
Helpful advice : When changing lanes, it is necessary to control the traffic both in front and behind. At the time of maneuver, it is necessary to eliminate body roll, avoid skidding, while maintaining a moderate maneuver trajectory.
FULL Video Course Traffic Rules - TRAFFIC RULES
Quick learning conditions: how to learn to drive a car in 10 days?
If the task is to quickly master the art of driving, then it is necessary to combine 2 types of training:
1) classes with an instructor;
2) self-training.
At the same time, it is recommended to devote at least a month to the second part - independent preparation, and leave 10 “decisive” days for classes with an instructor. Since training with an instructor is an area of professional knowledge, the effectiveness of classes depends on the experience of the specialist. The main focus should be on finding the best driving school, and to speed up the learning process, focus on self-training.
Self-preparation: self-education
The advantages of self-study are obvious: no costs, free choice of training time, no restrictions on duration. To ensure that preparation does not turn into wasted time without acquiring useful skills, it is necessary to systematize the process:
- technical skills (coordination exercises);
- distribution of attention.
technical skills It is recommended to divide into groups:
Vehicle position
The main task at this stage is the development of the eye, since a car cannot resemble a pedestrian who moves in “zigzags.” It is necessary to maintain straightness: parallel to parked cars, curbs, in traffic. A useful exercise is to parallelly lay out any household items (notebooks, books, pens, etc.) and search for straight lines in the environment that will allow you to correct the position: baseboards, table lines, etc. A useful simulator is a car stimulator, especially one with a steering wheel and pedals.
Pedals
When choosing an iron friend with a manual transmission, you need to master 3 pedals: clutch (left), brake, gas (right). It is necessary to achieve automaticity in “distributing the load” on the legs when pressing the pedals: clutch - left, gas, brake - right.
In addition, pay special attention gear lever . Before each gear change, you must press the clutch, then move the lever to the desired position and release the clutch. 1-3 gears are considered low, 5 – high, so when reducing speed you need to engage lower gears, and when accelerating – higher gears. For self-training, it is enough to automate the control process within three gears.
Helpful advice: In order to achieve automaticity in synchronized gear shifting from 1st to 5th and pedal operation, it is recommended to perform the following exercises:
- press the gas, release the gas, press the clutch, engage 2nd gear, release the clutch and press the gas, continuing to drive;
- repeat the sequence of actions with 3-5 gears.
To change gears from 5th to 1st, an exercise is recommended: press the clutch and brake, engage 4th gear, release the clutch and brake, press the gas and continue driving. Repeat the sequence of actions with 3-1 gears. All exercises can be performed not only in the car, but you can also hone your skills at home by replacing the pedals with house shoes and the lever with a regular pencil. The duration of daily pedal training should be at least 10 minutes.
Mirrors
The main task is to control the movement of objects reflected in the mirror. The simplest option for mastering a skill is a regular mirror: learn to move around the room “in reverse”, focusing on the reflection in the mirror. A more difficult option: take objects alternately with your left/right hand, maintaining a straight movement. The duration of the exercises is 20 minutes daily.
If you have a car, you can park in a place where the traffic is quite intense, and, sitting in the driver’s seat, learn to quickly look at the cars that are moving behind you in the right, left, and center mirrors.
Steering wheel
A special feature of driving a car is learning to correctly perceive the direction of the wheels depending on the rotation of the steering wheel. Since, unlike a bicycle, the wheels are not visible, it is necessary to perform exercises “on the dial” by half a turn of the steering wheel: from “00.00” to “06.00”, the next turn – from “06.00” to “00.00”.
Helpful advice: one and a half turns in any direction - this is the state of the wheels, which are completely turned in the desired direction, 3 full turns is a transition from the extreme right to the extreme left and vice versa. As with pedals, a steering wheel is not necessary to perform the exercises; utensils (lids, plates, etc.) are sufficient. The recommended duration of exercise is 20 minutes daily.
Distribution of attention consists in the accumulation of “templates” for getting out of critical situations. It is necessary to learn to calculate situations taking into account sudden changes in the road situation, imagine a critical situation and draw up a ready-made “template” in the form of an action plan for any case. The more “templates” there are, the easier it will be for the driver to find a way out of a critical situation. In order to achieve the maximum range of ready-made solutions, you can use a training computer program to engage in “virtual” control.
When driving a car, you need to properly focus your attention, because in addition to the dashboard and monitoring the car in front, you need to notice signs, traffic lights, markings, pedestrians and even potholes on the road. Therefore, the practice of first driving in a company with friends and family is highly not recommended, especially if the passengers do not drive the car themselves.
Original advice: you can draw black teapot inside a red triangle on a white background and place it on the rear window. Such a sign will emphasize the creativity of a beginner and will make experienced drivers want to help the owner of the sign: “A “teapot” is behind the wheel!” The alternative in the form of a “U” and an exclamation mark mobilizes road users, but without much warmth or humor
Denis Frolov
Communications specialist and co-founder of the “PR Things” project, which helps IT companies and startups build productive relationships with the press, users, clients and partners.
I was 25 years old and didn't know how to ride a bike. I’ve been planning to learn since I was 18, and every year it became more and more difficult to decide. I imagined how scary I would look: a grown guy who rides worse than a child and constantly falls. Easier to score. Moreover, there are a lot of people in the world who don’t know how to ride.
There were a ton of articles on the Internet teaching adults how to ride a bike. But they did not help overcome fear and embarrassment, which means they did not solve my problem.
Now I'm 27 years old. I can easily ride my bike for a couple of hours.

I like to ride along the embankment on a Saturday morning, accelerating before the hill and slowing down at the slope. These skills come with practice. The following steps helped me cope with myself and get started.
Step 1. Determine your benefits
In theory, everything is easy. I got angry when my friends said, “Don’t be afraid, just get in and pedal.” I couldn’t do anything, I couldn’t even move. I was afraid to get on a bike: what if I lost my balance and fell?
And he really did fall. It was difficult to maintain balance even for a couple of meters.
But when I focused on the benefits of cycling, things got easier. I wrote down the benefits of cycling and ran them through my head on the way to each training session. This helped me fight fear and shame. I imagined myself riding around the city on a bicycle, parking at a cafe, and being on time everywhere. I thought how great it would be to keep myself in shape, learn new things and prove to myself that I could. It worked for me.
Desire turned out to be stronger than fear.
During practice, I tried to monitor my body and specific actions: put my foot on the pedal, hold the steering wheel, straighten my back, control the road. At the fourth training session, the fear receded: the brain had no time for it.
Step 2. Find a teacher
The hardest thing for me was getting on the bike and moving off. I was afraid that I wouldn’t have time to put my foot on the pedal and would crash into a tree.
I knew nothing about speed, brakes, pads, I didn’t understand how to cope alone. So I asked a friend who had been riding a bike for many years for help. He went to training with me and explained the basics. He patiently carried me on a bicycle, like a child, walked next to me, and advised me on what to do with my arms and legs. I was angry and swore, but in the third training session I was able to drive 50 meters without help. Thanks to a friend's advice, I remembered the basic movements.
Don’t invite reckless people and beginners to be your mentors.
The first will not have enough patience, and the second will not have enough experience. Choose a person who doesn’t mind trying himself as a trainer: such comrades are less likely to ride off into the horizon, leaving you alone with the bike, and are more inclined to tinker with you.
If you feel that the request is annoying your friend, it is better to look for another teacher. It was easy for me to find a coach: all my friends knew that I couldn’t ride a bike and offered to help. Therefore, when I decided, one conversation was enough.
Step 3. Choose a location
On the eve of training, I was tormented by thoughts about what people would think of me, how condescendingly they would look at me. I realized that I could go two ways: ignore the opinions of strangers or not come into their sight until I learn. I settled on the second one.
For training, I chose the most deserted place, where as few eyes as possible would see my shame, and I would not run into other cyclists and would not hit anyone.
The first three months I learned to ride in a forest park on the edge of the city: almost no one gets there, but there are bike paths.
 This is what my training bike base looked like for the first three months
 If you're just starting out, pay attention to parks and small forests with paths. They may be far from home, but most likely, at first you will train no more than twice a week - you can be patient for the sake of a new skill.
Step 4. Decide whether to rent or buy
I didn't have my own bike. Accordingly, there were two options: buy or rent. Assessed the benefits and risks of both.
| Behind | Against | |
| Purchase | It works like a voluntary commitment: once you’ve spent money on a bike, you’ll have to ride, and you’ll definitely learn. On Yandex. Market" model for a beginner costs from 10,000 rubles. It would really be a shame to throw that kind of money down the drain. | If you spend money on a bicycle, you will never learn to ride. |
| Rental | To start learning, 300 rubles or even less is enough. Depends on the rental service you contact. Most of these services operate near parks, embankments and other places where you can ride. | If something goes wrong, you are responsible for damage to the bike and others. According to the rules of bicycle rental companies, bicycles are usually not insured. In the event of an accident, the tenant bears full responsibility for damage caused to himself, the bicycle, surrounding people and objects. |
I chose a rental service: for me it turned out to be cheaper and more convenient. One of them was working near the forest where I learned to ride.
Step 5: Protect yourself
On a bicycle you can crash into a pole, knock over another beginner, or fall. That's why there are traffic rules for cyclists. It describes in detail how to avoid accidents, how to behave on the roads, warn about turns, and so on.
There are also many useful tips on how cyclists can protect themselves and what to wear.
- Wear brightly colored clothing with reflective stripes to be more visible on the road.
- Wear tight-fitting clothing to avoid getting caught in rotating bicycle parts or external obstacles.
- Choose shoes with hard soles and rough tread to prevent slipping on the pedals.
- Wear a helmet: it will protect your head in case of falls.
- Wear safety glasses: they will protect your eyes from dirt and insects. Better special cycling glasses. Ordinary glass ones can break and damage your eyes when hit by stones.
- Wear knee and elbow pads to protect your joints from injury.
But that’s why they are instructions, because no one takes them seriously.
During the first month of training, the steering wheel rubbed my hands to the point of calluses. They hurt and healed slowly - that’s even more fun when you type a lot at work. A couple of months later, I somehow flew over a bike, skinned my hands and sprained a tendon in my wrist. A friend said it could have been worse and I was lucky. I had to take a break from training: the tendon took three weeks to heal.
For the new workout, I bought regular fitness gloves for 300 rubles - I stopped chafing my palms, held the handlebars tighter, and there were fewer reasons to fall.
I haven’t gotten around to a helmet and knee pads, but I’ll definitely buy them this year: health is more important. I had enough sinew to think about it and give up on what the cool mountain bike racers would think.
Step 5: Practice Constantly
At first I drove poorly, no more than 100 meters without stopping. Because of this, I got angry and looked for a reason to skip training: either too lazy to go far, or other things to do. As a result, in the first month I spent only three hours with the bike.
I didn’t immediately realize that the principle at work here is common to the development of any skill: you can learn it if you constantly practice.
As soon as I forced myself to train at least two hours a week, I noticed progress. For the first two weeks I rode on a flat road to get used to the bike, understand the speed and brakes, and learn how to control the steering wheel. After that, the descents and ascents were much easier. A month later I was already bravely climbing a steep slope.
I continue to learn: with every training session I learn something new, strengthen my skills, ask questions to my friends and search for information on the Internet.
Check list
- Don't be afraid and think about the positives.
- Find a patient teacher.
- Choose a quiet, deserted place.
- Rent a bike nearby.
- Practice constantly.
- Wear a helmet, knee pads and remember to protect yourself.