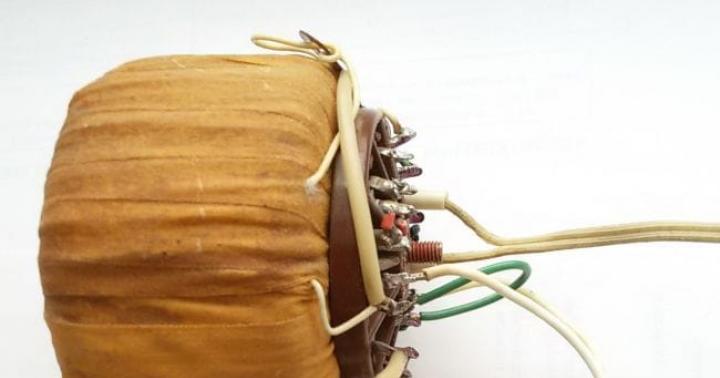
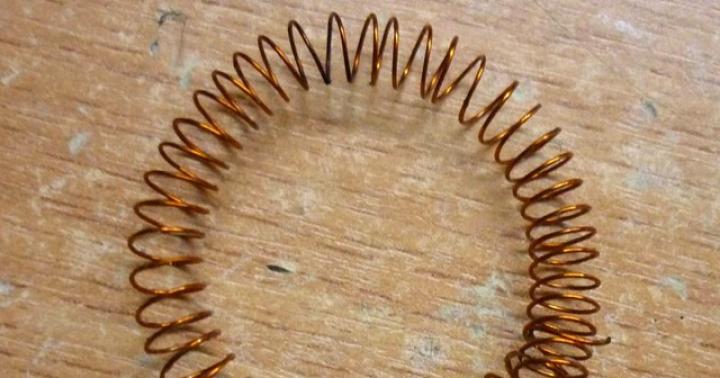
The communication and collector coils are wound with 0.5-0.8 mm wire. For a high-voltage coil we take any wire with a thickness of 0.15-0.3 mm and approximately 1000 turns. At the “hot” end of the high-voltage winding we place such a spiral - everything is like in a real Tesla. In my version, I took power from a 10V 1A transformer.

Of course, with a power supply of 24V and higher, the length of the corona discharge will increase significantly. After the secondary winding there is a rectifier and a 1000uF 25V capacitor. The transistor for the generator was used KT805IM. for the diagram in the archive.

And now a photo of the finished design and the discharge itself:
Sometimes it becomes necessary to obtain high voltage from scrap materials. The line scan of domestic televisions is a ready-made high-voltage generator; we will only slightly alter the generator.
You need to remove the voltage multiplier and horizontal transformer from the horizontal scan unit. For our purpose, the UN9-27 multiplier was used.
Literally any horizontal transformer will do.

The horizontal transformer is made with a huge margin; TVs use only 15-20% of the power.
The stitcher has a high-voltage winding, one end of which can be seen directly on the coil, the second end of the high-voltage winding is located on the stand, along with the main contacts at the bottom of the coil (13th pin). Finding the high-voltage terminals is very easy if you look at the circuit of the line transformer.

The multiplier used has several pins; the connection diagram is shown below.

Voltage multiplier circuit
After connecting the multiplier to the high-voltage winding of the line transformer, you need to think about the design of the generator that will power the entire circuit. I didn’t bother with the generator, I decided to take a ready-made one. An LDS control circuit with a power of 40 watts was used, in other words, simply LDS ballast.

Ballast is made in China, can be found in any store, the price is no more than $2-2.5. This ballast is convenient because it operates at high frequencies (17-5 kHz depending on the type and manufacturer). The only drawback is that the output voltage has a higher rating, so we cannot directly connect such a ballast to a line transformer. For connection, a capacitor with a voltage of 1000-5000 volts, a capacity of 1000 to 6800 pF, is used. The ballast can be replaced with another generator, it is not critical, only the acceleration of the line transformer is important here.
ATTENTION!!!
The output voltage from the multiplier is about 30,000 volts, this voltage can be fatal in some cases, so please be extremely careful. After turning off the circuit charge remains in the multiplier, short-circuit the high-voltage terminals to completely discharge it. Do all experiments with high voltage away from electronic devices.
In general, the entire circuit is under high voltage, so do not touch the components during operation.

The installation can be used as a demonstration high-voltage generator, with which a number of interesting experiments can be carried out.
The generator, depending on the voltage of the power source, produces high-voltage pulses with an amplitude of up to 25 kV. It can be powered by a 6V galvanic battery (four A-type cells), a 6...12V battery, a car's on-board power supply, or a laboratory power supply up to 15V. The range of applications is quite wide: electric fences on an animal farm, a gas lighter, an electroshock protective device, etc. In the manufacture of such devices, the greatest difficulties are caused by a high-voltage transformer.
Even if successfully manufactured, it is not reliable and often fails due to dampness or due to breakdown of the insulation between the coils. An attempt to make a high-voltage generator based on a diode voltage multiplier also does not always give a positive result.
The easiest way is to use a ready-made high-voltage transformer - a car ignition coil from a car with a classic ignition system. This transformer is highly reliable and can operate even in the most unfavorable field conditions. The ignition coil design is designed for tough operation in all weather conditions.
The schematic diagram of the generator is shown in the figure. An asymmetrical multivibrator is made on transistors VT1 and VT2; it produces pulses with a frequency of about 500 Hz. These pulses flow through the collector load of transistor VT2 - the primary winding of the ignition coil. As a result, an alternating pulsed high-voltage voltage is induced in its secondary winding, which has a significantly larger number of turns.
This voltage is supplied to the spark gap, if it is a self-defense device or a gas lighter, or to an electric fence. In this case, voltage is supplied to the fence from the central terminal of the ignition coil (from the terminal from which voltage is supplied to the distributor and spark plugs), and the common plus of the circuit must be grounded.
If the generator will be used as a means of self-defense, it is most convenient to make it in the form of a stick. Take a plastic or metal tube of such a diameter that the ignition coil with its metal body is tightly inserted into it. In the remaining space of the pipe, place batteries and transistors. S1 in this case is the instrument button. The upper part of the reel body will have to be redone.
It is most convenient to take an old-style plug for a 220V network, with screw-out contacts. The hole for the wire in it must be drilled so that the part of the ignition coil with a high-voltage contact fits tightly into it. Then you need to remove the mounting wires from this contact and from the general plus of the circuit and, along the very edges of the plug, bring them to the pin contacts of the plug.
Then this plug must be coated with epoxy glue in the drilled hole for the wire and pressed tightly onto the plastic body of the high-voltage contact of the coil. You need to screw discharge petals under the pin contacts of the plug, the distance between which should be about 15 mm.
The ignition coil can be anything from a contact ignition system (not suitable for electronic ignition), preferably imported - it is smaller in size and operating.
The setting consists of selecting the value of R1 so that there is a reliable electrical discharge between the discharge petals.
- Tutorial
Good afternoon, dear Khabrovsk residents.
This post will be a little unusual.
In it I will tell you how to make a simple and fairly powerful high-voltage generator (280,000 volts). I took the Marx Generator circuit as a basis. The peculiarity of my scheme is that I recalculated it for accessible and inexpensive parts. In addition, the circuit itself is easy to repeat (it took me 15 minutes to assemble it), does not require configuration and starts the first time. In my opinion, it is much simpler than a Tesla transformer or a Cockroft-Walton voltage multiplier.
Principle of operation
Immediately after switching on, the capacitors begin to charge. In my case, up to 35 kilovolts. As soon as the voltage reaches the breakdown threshold of one of the arresters, the capacitors through the arrester will be connected in series, which will lead to a doubling of the voltage on the capacitors connected to this arrester. Because of this, the remaining spark gaps are triggered almost instantly, and the voltage on the capacitors adds up. I used 12 steps, which means the voltage should be multiplied by 12 (12 x 35 = 420). 420 kilovolts are almost half-meter discharges. But in practice, taking into account all the losses, the resulting discharges were 28 cm long. The losses were due to corona discharges.
About details:
The circuit itself is simple, consisting of capacitors, resistors and arresters. You will also need a power source. Since all the parts are high-voltage, the question arises, where to get them? Now, first things first:1 - resistors
Resistors needed are 100 kOhm, 5 watt, 50,000 volt.I tried many factory resistors, but none could withstand such voltage - the arc would break through the top of the case and nothing would work. Careful googling yielded an unexpected answer: the craftsmen who assembled the Marx generator for voltages of more than 100,000 volts used complex liquid resistors, the Marx generator on liquid resistors, or used a lot of stages. I wanted something simpler and made resistors from wood.
I broke off two even branches of a damp tree on the street (dry ones do not conduct current) and turned on the first branch instead of a group of resistors to the right of the capacitors, the second branch instead of a group of resistors to the left of the capacitors. It turned out to be two branches with many conclusions at equal distances. I made conclusions by winding bare wire over branches. Experience shows that such resistors can withstand voltages of tens of megavolts (10,000,000 volts)
2 - capacitors
Everything is simpler here. I took capacitors that were the cheapest on the radio market - K15-4, 470 pF, 30 kV (aka greensheets). They were used in tube TVs, so now you can buy them at a disassembly site or ask for them for free. They withstand a voltage of 35 kilovolts well, not a single one has broken through.3 - power supply
I just couldn’t bring myself to assemble a separate circuit to power my Marx generator. Because the other day my neighbor gave me an old TV “Electron TC-451”. The anode of the kinescope in color televisions uses a constant voltage of about 27,000 volts. I disconnected the high-voltage wire (suction cup) from the anode of the kinescope and decided to check what kind of arc would be produced from this voltage.Having played enough with the arc, I came to the conclusion that the circuit in the TV is quite stable, can easily withstand overloads, and in the event of a short circuit, the protection is triggered and nothing burns out. The circuit in the TV has a power reserve and I managed to overclock it from 27 to 35 kilovolts. To do this, I twisted the R2 trimmer in the TV power module so that the horizontal power supply rose from 125 to 150 volts, which in turn led to an increase in the anode voltage to 35 kilovolts. When you try to increase the voltage even more, the KT838A transistor breaks through in the horizontal scan of the TV, so you need to not overdo it.
Build process
Using copper wire, I screwed the capacitors to tree branches. There must be a distance of 37 mm between the capacitors, otherwise an unwanted breakdown may occur. I bent the free ends of the wire so that there was 30 mm between them - these will be the arresters.It's better to see once than to hear 100 times. Watch the video where I showed in detail the assembly process and operation of the generator:
Safety precautions
Particular care must be taken, since the circuit operates at a constant voltage and a discharge from even one capacitor will most likely be fatal. When turning on the circuit, you need to be at a sufficient distance because electricity penetrates 20 cm or even more through the air. After each shutdown, you must always discharge all capacitors (even those in the TV) with a well-grounded wire.It is better to remove all electronics from the room where the experiments will be carried out. The discharges create powerful electromagnetic pulses. The phone, keyboard and monitor that are shown in my video are out of order and can no longer be repaired! Even in the next room my gas boiler turned off.
You need to protect your hearing. The noise from the discharges is similar to gunshots, then it makes your ears ring.
The first thing you feel when you turn it on is how the air in the room is electrified. The electric field intensity is so high that it is felt by every hair of the body.
The corona discharge is clearly visible. Beautiful bluish glow around parts and wires.
There is always a slight electric shock, sometimes you don’t even understand why: you touched the door - a spark jumped, you wanted to take the scissors - the scissors shot. In the dark, I noticed that sparks were jumping between various metal objects not connected with the generator: in a briefcase with a tool, sparks were jumping between screwdrivers, pliers, and a soldering iron.
The lights light up on their own, without wires.
The whole house smells like ozone, like after a thunderstorm.
Conclusion
All parts will cost about 50 UAH ($5), this is an old TV and capacitors. Now I am developing a fundamentally new scheme with the goal of obtaining meter discharges without special costs. You ask: what is the application of this scheme? I will answer that there are applications, but they need to be discussed in another topic.That's all for me, be careful when working with high voltage.
Hello. Today we will talk about a very powerful and cool homemade product. Today I will assemble a powerful high-voltage generator with a voltage of about 25 kV. This is not the first time I have assembled this circuit, so there are no difficulties. I will try to explain everything briefly and simply
I'll start with the circuit of a high-voltage generator. I found it when I was collecting it, and I kept it just in case. A circuit of only a dozen components
As I said, I assembled the circuit for the second oscillator, the circuit now works successfully in welding. The lower board is the high-voltage generator 
While assembling, I managed to play around with an arc sometimes reaching 3 centimeters, which was equal to approximately 30 kV. Even then I decided to build the same generator for myself, I just had to assemble the suitable components and now the time has come
I found a Soviet-made color TV and tore out the line scan board from it. 
Actually, from this board you only need a line transformer and a capacitor k73-17 at 400V 0.47 µF. I had a pair of them on my first generator.
I cleaned the board of old tracks with a grinder, installed a line transformer in the old place by winding two windings of 5 turns each. I made a choke from the same transformer, which I will remake a little later. 
I started assembling the control part of the circuit. The installation will be hinged, I don’t want to bother with the board. Installed field effect transistors 40N60 on the radiator, through insulating gaskets 
At the next stage of assembly, I soldered powerful three-amp Schottky diodes 
All you have to do is solder a capacitor between the drains of the transistors and solder 390 Ohm resistors into the gates. I didn’t install zener diodes, since I don’t have them, but the circuit works fine without them 
I soldered the transformer to the drains and rewound the inductor, since the inductance of the previous one was too small. New choke with inductance 50 μH.
It's time to try starting a high-voltage generator. I connect the board to . In the photo, the arc is about half a centimeter, which is equal to 5 kV. Power supply 20V 
I tried to expand the arc to 2.5 cm, the voltage rose to 25 kV. The arc became wide and powerful, lighting a cigarette in a split second :) But the wire began to melt and I had to interrupt the experiment 
To prevent the wires from burning, one terminal of the high-voltage winding was connected to a self-tapping screw screwed into the board, and a bolt was screwed onto the second.
Power supplied 20V, no-load current 0.6A


Now I’ll try to ignite the arc to 25 kV and take measurements. The voltage dropped to 13.2V, current consumption 6.25A. Power consumption is 82.5 W, the pencil lights up without any problems at all 

Unfortunately, my laboratory one cannot ignite the arc stronger and so the transformer is overloaded. We need to find something more powerful and see what else a high-voltage generator is capable of.
I made a short video of the generator in action, I hope you find it interesting.
And while I was loading this video, I found another interesting video of this generator working from 30V, guys, this is absolutely brutal