The front and rear suspension of the family of utility vehicles UAZ-3741, UAZ-3962, UAZ-3909, UAZ-2206, UAZ-3303 of the carriage layout - spring, two types, consists of four longitudinal semi-elliptical springs, working together with telescopic shock absorbers of double-acting action.
Front and rear suspension of utility vehicles UAZ-374195, 390945, 390995, 330395, 330365.
UAZ-374195 is a van with an all-metal closed wagon-type body, divided into a two-seater cabin and a cargo compartment. Uaz-390945 - cargo, with an increased base, a five-seat cabin and a metal platform. UAZ-390995 - a van divided into a two-seater cabin, a five-seater passenger compartment and a cargo hold. Uaz-330395 - cargo, with a double cabin and a wooden platform. Uaz-330365 - cargo, with an increased base, a two-seater cabin, a metal or wooden platform.
Forged spring cups increase the contact area of the sheet with the rubber pad and reduce wear. The rubber cushion has a larger upper and lower nubs connected by a bridge. With the help of these pillows, the ends of the springs are embedded in cast ductile iron brackets riveted to the frame side members.
Covers are bolted to the bottom of the spring brackets. Tightening the covers creates the necessary clamping of the rubber pads located between the bracket and the cover. Removable covers allow you to dismantle the springs and replace the rubber pads. Anchoring the ends in rubber pads ensures quiet operation and does not require lubrication.
To the lower part of the frame side member, a cast iron buffer clip is bolted. A rubber buffer located inside this cage softens the impacts received by the side members with small deflections of the springs. The deflection of the spring during the upward movement of the bridge is limited by the cage of the rubber buffer; when the buffer is fully compressed, the axle casing rests against it.
When installing the spring on a car, there is no need to distinguish the front end of the spring from the rear, since the stamped cups riveted to the main sheets are the same. The catalog number of the springs is 452-2902012-03 or 452-2902012-04.
- Test load Pk, daN: 588
- Spring assembly weight, kg: 21.6
- Full length of spring L, mm: 1245
- Estimated length of the spring L ’, mm: 1200
- Estimated length of the front end I, mm: 619.5
- Package height H, mm: 81.5
There is also a reinforced version of the spring for the passenger-and-freight UAZ, with sixteen sheets per package. Catalog number - 3883-2912012.
Test load Pk, daN: 750
Spring assembly weight, kg: 26.9
Full length of spring L, mm: 1245
Estimated length of the spring L ’, mm: 1200
Estimated length of the front end I, mm: 619.5
Package height H, mm: 101
Shock absorbers for utility vehicles UAZ-374195, 390945, 390995, 330395, 330365.
Front and rear shock absorbers are hydraulic, telescopic, double-acting, identical and interchangeable. The cars can be equipped with shock absorbers with cylinder diameters of 35 and 40 mm. Installation of shock absorbers of different dimensions in pairs along the axes is allowed. The maximum length of the shock absorbers in the extended state is 550 mm, the minimum in the compressed state is 350 mm. Catalog number - 3151-2905006.
UAZ-396255 is a van divided into a two-seater cabin and a cargo-passenger compartment. Uaz-396295 is an ambulance with a wagon-type body, divided into a two-seater cabin and a sanitary salon. Uaz-220695 is a bus with a wagon-type body, divided into a two-seater cabin and a passenger compartment, designed to carry passengers.
The front and rear longitudinal semi-ellipticals of these cars are three-leaf, tightened by a central bolt and two clamps that limit their lateral movement. Rear springs with springs, a stabilizer bar is installed in the front suspension. The catalog number of the front spring is 3962-2902010, the rear one is 3962-2912010.
- Test load Pk, daN: 539
- Spring assembly weight, kg: 16.4
- Full length of spring L, mm: 1335
- Package height H, mm: 39.5
- Test load Pk, daN: 640
- Spring assembly weight, kg: 16.0
- Full length of spring L, mm: 1326
- Estimated length of the spring L ’, mm: 1250
- Estimated length of the front end I, mm: 625
- Package height H, mm: 44.3
Front hydropneumatic and rear hydraulic shock absorbers - double-acting, telescopic. The maximum length of the shock absorbers in the extended state is 550 mm, the minimum in the compressed state is 350 mm. Catalog number - 3151-2905006.
Lifting options for UAZ Loafs
Loaf owners, starting to tune this car, first of all ask themselves the question: "How to raise a UAZ loaf?" We will try to answer this question in this article. So, first of all, we will consider the ways of the UAZ elevator. This could be:
- UAZ body lift
- Loaf suspension lift
Both options have advantages and disadvantages. So, the loaf body lift is easier to implement, and also stands out with a greater degree of safety. This is explained by the fact that this method of elevator only slightly shifts the center of gravity of the car, which contributes to ensuring the stable behavior of the Loaf on turns and other difficult sections of the track.
If we talk about the suspension lift, then there is some danger due to the increase in the center of gravity. But at the same time, this method significantly changes the cross-country performance for the better.
Choosing a kit for an UAZ loaf elevator
As we can see, there are several ways to raise the Loaf. Therefore, it is possible to determine which lift kit UAZ Loaf will be needed only by deciding on the choice of the lift method. If you plan on doing the lifting yourself, you can buy an elevator kit from the store. Such kits are different in the composition of the parts and elements included in them.
So, a Loaf elevator kit can contain:
- spacers "spring - frame";
- spring-to-frame spacers
- bolts;
- nuts, etc.

Changing wheels
As you know, the passability of the car directly depends on the wheels. Considering that the wheels of the UAZ are shod with rather hard and not too large rubber, before proceeding directly to the elevator, it is necessary to mention the wheels. In addition, the tread pattern on the Loaf's tires leaves much to be desired. All this suggests that it will not be superfluous to install suitable imported wheels on the legendary car.
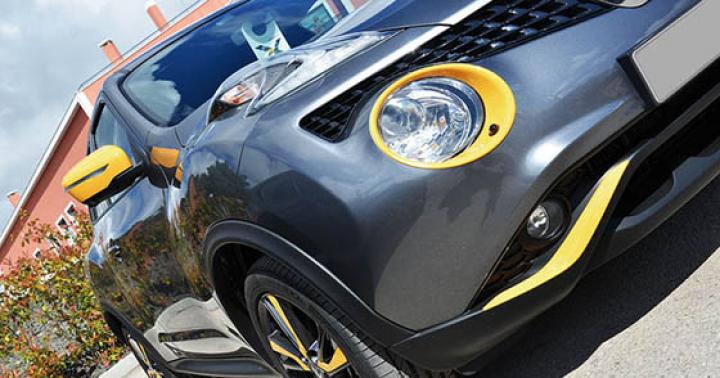
As an option, when choosing new wheels for the UAZ "Loaf" car, you can use BF Goodrich 33x10.5 R15 tires, and, accordingly, discs with a diameter of 15 centimeters. As for the choice of disks for them, it depends on the wishes of the owner. These can be light-alloy or light-alloy wheels. Or you can leave the usual regular discs.

However, it is not worth stopping at this stage, because such tuning makes it difficult to control, since at sharp turns the front wheels cling to the edges of the steering rods, and when the effect of crossing the axles appears, the wheels are located directly on the sides of the arches. This causes the tires to rub against the fender. Therefore, the UAZ Loaf body lift becomes an indispensable stage of tuning after the installation of the wheels.
As strange as it may seem, the UAZ Loaf's frame is attached to the body with ten furniture bolts, six of which are located in the area of the passenger seats, two behind the front wheel arches, and two more at the feet of the driver and passenger. At the bottom, the bolts are secured with second nuts.
Before proceeding with the dismantling of the bolts, it is necessary to disconnect the battery, disconnect the earth from the engine - behind the bonnet compartment and raise the car on a lift.
- Disconnect the wires from the starter;
- Disconnect the radiator mounts from below or from above;
- We detach the rods of the drive of the transmission lever and the rod of the brake booster;
- Drain all the coolant and remove the hoses that are connected to the UAZ Loaf stoves;
- Disconnect the brake pedal rod to the vacuum booster;
- Disconnect the tubing leading to the tank control valve.
The last point may not seem so important, but non-compliance with it can lead to the plate deflection under the mount, as a result of which it will have to be aligned.
When lifting the UAZ Loaf with your own hands, be careful and careful, since the fasteners on such a car are usually rusty and outdated. If the bolt turns in the body, then it cannot be held. This creates additional difficulties in welding a nut or bolt to it.
To do everything correctly, it is necessary to hold one nut with a wrench, while unscrewing the lock nut with the head, and after that the main nut.
Next, you should lower the car on the wheels, since there will be no more work to be done under it. We also detach the steering column and detach the boot on the floor. And you can start lifting the body above the frame. The rise must be started from the back of the Loaf. The lifting height should eventually be about 10 centimeters.
It would be a good idea to hedge by placing a wide wooden bar between the frame and the body.
We unscrew the standard bolts and increase the holes for them up to 12 mm by drilling. Next, you need to do some work with the spacers. An inexpensive and suitable option as spacers are ordinary hockey pucks. The next steps will be to insert the spacers, bolts and tighten the nuts gradually, starting at the rear, continuing in the middle and ending at the front.
As a result, the body will rise by 6.5 centimeters. It remains only to fix everything and you can put large wheels.

Pros and cons of suspension lift
Now let's consider the next way to carry out the UAZ Loaf lift - a suspension lift. As already mentioned, this method has both pros and cons. There are two main advantages of the suspension lift on the UAZ:
- improving the performance of the Loaf's passability, provided that the wheels remain in place, and the other part rises up;
- the ability to install large wheels that did not fit into the arches of the UAZ before the suspension lift.
Well, the main disadvantage of this method is the inevitable increase in the angles of the universal joints. In this case, cardans are included in the work for wear.
There are several options for a suspension lift. Let's take a look at some of them.
Installing longer spring earrings
The simplest and most affordable option is to install longer spring earrings. Carrying out a suspension lift in a similar way, you should not get too carried away with this, so as not to install too long. Spring shackles that are too long can adversely affect suspension performance and affect handling. To avoid problems in handling, it is recommended to pull the earrings with a tie in the center.

Axle-spring spacer
Without violating the design of the springs, it is possible to slightly raise the Loaf's suspension by installing a spacer between the axle and the spring. At the same time, there is no need to wait for a large elevator; here it is also recommended not to get carried away with the process.
Of course, when installing such a spacer, it is necessary to decide on its fixation in the installation place, and also to calculate that the length of the step-ladders of the springs is sufficient. It is also possible to restore old springs, or purchase new ones. There are also special items for such tuning on sale, but they are usually very expensive.

Springing the springs is not as difficult as it might seem at first glance. This process is useful not only for the suspension lift, but also for the purpose of making the hard UAZ suspension soft enough. However, despite the fact that there is an improvement in the quality of the suspension from this method, they are very insignificant.
If you decide to give it a try, you first need to cut, grind, or buy spacers, rubber, conveyor belt and metal. And most importantly, when lifting the suspension of the UAZ, longer-stroke shock absorbers will be required, since the rebound from the former will begin earlier.

In conclusion, I would like to note that the main thing is to know when to stop in everything. Taking up the tuning of the UAZ 452 with your own hands, remember about your safety. After all, you will not have a guarantee with your own hand execution of the Loaf elevator.
In detail: do-it-yourself repair of a running UAZ loaf from a real master for a site site.
Any motorist can repair the front axle of the UAZ Bukhanka and UAZ 469 with his own hands. This work is not difficult. Structurally, both of these models are similar. This is especially true for the suspension. The frame structure means easy dismantling of the front axle and high reliability of the vehicle. There are some differences in leaf spring and spring suspension. But these features do not greatly affect the complexity of the work.Almost no special tools are needed for repairs. All work is carried out with a minimum set of tools available to each driver.
Do-it-yourself repair of the front axle of UAZ Loaf and UAZ 469 uncomplicated. Most often, during operation, it is necessary to carry out various preventive work. As a rule, they do not require removal and disassembly of the bridge. The list of care actions includes:
- The pivots are checked for gaps;
- Threaded connections must be tightened periodically;
- Convergence is checked;
- The requirements of the parts lubrication tables are met.
It is imperative to visually inspect the main components. Particular attention is paid to the serviceability of the fastening bolts. All locking elements must also be securely reinforced. Check the angle of maximum rotation of the wheels. It should not exceed 28 degrees. If the indicators differ from those indicated, you need to make an adjustment. Also, always check that the king pins are properly tightened and functioning. Untimely elimination of minor faults can lead to the need for overhaul of the front axle.
Repair of this unit begins with the dismantling of the bridge. On a loaf and a "goat", these works are performed identically. There are only minor differences. When performing repair actions, you need to be extremely careful. Removing the bridge consists of a series of simple steps:
- You should start by ensuring that the vehicle is stationary. For this, anti-rollback brake pads are installed;
- Further on the "goat" the brake pipes are disconnected from the hoses. On the Loaf, the tubes have transition pipes. In this case, the hoses are disconnected from the nozzles;
- Remove the nuts securing the lower shock absorber cups. This element is the same on both machines.
- Next, unscrew the bolts connecting the drive gear flange and the front universal joint. Before that, you need to fill in the WD-40 threaded connection;
- Remove the thrust from the bipod. The nut on the ball pin is twisted;
- Unscrew the nuts that secure the spring ladders. Disassemble them with overlays;
- They will jack up the frame in front of the car, roll out the bridge.
Some UAZ 469 vehicles are equipped with springs. In this case, the penultimate item will look a little different. The penultimate action removes the anti-roll bar by disconnecting it from the longitudinal suspension arms. Levers and traverse rods are unscrewed from the bracket.
Repair... After disassembly, all parts are washed in gasoline and lubricated. Defective ones are replaced with new ones. The assembly takes place exactly the opposite, while it is necessary to clarify some of the nuances of the process.
When replacing the pivot bushings specifically in the ball bearing, after pressing, they must be tightened to 25 mm. Put grease inside. Do-it-yourself repair of the front axle of UAZ Loaf and UAZ 469 is not so difficult, but accuracy is needed. For example, when installing a ball seal, the ring for it must be impregnated with hot oil. After assembly, the functionality of the bridge is checked using a stand.
UAZ 452 "loaf" is a fairly reliable Soviet four-wheel drive SUV. The main breakdowns of this car are associated with leaks of lubricating fluids from the engine, gearbox (gearbox), front and rear axles, constant velocity joints (CV joints) and hubs. The main reason for the formation of such leaks is that the material from which the original seals and gaskets of the above units are made is partially corroded under the influence of modern lubricating fluids. Due to poor lubrication, moving metal parts wear out and must be replaced periodically. It is necessary to carry out preventive maintenance of the UAZ 452 at least once a year, change leaking oil seals and gaskets, and adjust the clutch.
The problem is that finding a factory manual for these SUVs is quite difficult. Therefore, we bring to your attention an instruction that will allow you to repair a car yourself.
As you know, the repair of a car engine begins with its dismantling. And only then disassembly, replacement of damaged parts and assembly is carried out. Overhaul of a power unit is not an easy task, therefore, it is not worth doing it yourself, without the help of experienced craftsmen. But you can change the oil seals yourself.
The factory repair manual for the UAZ 452 car states: to remove the power unit, you need to lift it up from the engine compartment. With this method of dismantling, you need 2 strong pipes (longer than the width of the cab) and the help of 2 people.
That's it, the power unit is removed.
It is easy to check whether an engine overhaul is necessary: you need to put your hand to the open oil filler neck of a running engine. If the palm pushes out, then disassembly is required.
Quite often, in UAZ 452 cars, the free travel of the clutch pedal is not adjusted. This leads to increased wear of the driven disc and the need to replace it early. Adjusting the clutch of a UAZ 452 car is quite simple.
Clutch drive design.
- Clutch pedal.
- Brake pedal.
- Springs.
- Oiler.
- Thrust bearing.
- Coupling.
- Clutch spring.
- Lever arm.
- Adjusting bolt.
- Fork.
- Pusher.
- Fork spring.
- Traction.
- Grease nipple.
Clutch Pedal Adjustment
The factory manual for the repair of UAZ wagon-type vehicles sets the following unit parameters:
- the gap between the pressure bearing and the heads of the levers screws - 2.5 mm;
- pedal free travel - 28-35 mm;
- full pedal travel - 145-155 mm.
Clutch adjustment is carried out as follows.
- We measure the free and full travel of the clutch pedal with a ruler.
- Remove the pedal springs and clutch fork.
- We loosen the pusher nut.
- Unscrew or twist the thrust end of the pusher until the recommended parameters are reached.
- Tighten the pusher nut.
- We put the springs back on.
After that, we check the combined and full pedal travel. If they correspond to the recommended parameters, we start the engine and check the operation of the clutch while driving. If it does not drive or skid, the clutch adjustment is complete. If something bothers you, we repeat the procedure until the desired result is obtained.
The car's suspension consists of four longitudinal semi-elliptical springs working in conjunction with hydraulic telescopic double-acting shock absorbers (Fig. 194, 195).
Fig. 194. Front suspension of cars of the UAZ-31512 family:
1-front bracket; 2-frame; 3-buffer; 4-pad; 5-shock absorber bracket; 6-shock absorber; 7-rear bracket; 8 rubber grommets; 9-outer cheek earring; 10-inner cheek earring; 11-step ladder; 12-lining; 13-spring; 14-washer; 15-spring sleeve; 16-axle leaf springs

Fig. 195. Front suspension of cars of the UAZ-3741 family:
1-front spring bracket; 2-frame; 3-spring; 4-pad; 5-buffer; 6-lining buffer; 7-shock absorber; 8-shock absorber bracket; 9-rear spring bracket; 10-rubber pad; 11-bracket cover; 12-finger shock absorber; 13 rubber grommets; 14-lining; 15-tie bolt; 16-step ladder; 17-clamps
The front springs of cars of the UA3-31512 family consist of 8 sheets, the rear springs - of 7 or 9 sheets, depending on the configuration.
Front and rear springs of cars of the UAZ-3741 family are the same and interchangeable, they consist of 13 sheets. The fastening of the front and rear springs is the same.
For individual cars of the UAZ-31512 family (including all UAZ-3153 cars), a front spring suspension is installed (Fig. 196) and a rear suspension with small leaf springs (Fig. 197).

Fig. 196. Front spring suspension:
1-trailing arm; 2-transverse thrust; 3, 9 rubber-metal hinges; 4, 5-trailing arm brackets; 6-rubber hinges; 7, 8-nuts; 10, 11-front linkage brackets; 12-spring; 13, 14-spring brackets "; 15-vibration-absorbing gasket; 16-stabilizer; 17-stabilizer bracket; 18, 19-rubber bushings; 20-step ladder; 21-buffer; 22-shock absorber

Fig. 197. Rear suspension with small leaf springs:
1-shock absorber bracket; 2-spring; 3-shock absorber; 4-frame; 5-pad; 6-step ladder; 7-lining; 8-earring bracket; 9-shock absorber bracket; 10-step-ladder nut; 11-axis; 12-rubber sleeve; 13-buffer; 14-inner cheek of the earring; 15-finger; 16-outer cheek of the earring; 17-finger nut
Small leaf spring consists of 3 sheets (for UAZ-3153 - 4 sheets).
Front and rear shock absorbers (Fig. 198) of all cars, except for cars with spring suspension, are the same and interchangeable.
Fig. 198. Shock absorber:
1-eyelet; 2-restrictor of the compression valve; 3-compression valve body; 4-valve compression; 5-inlet valve; 6-tank; 7-cylinder; 8-valve recoil; 9-piston; 10-overflow valve; 11-stock; 12-casing; 13-rod guide sleeve; 14-bottom o-ring; 15-gland; 16-top o-ring; 17- cage of oil seals; 18-tank nut; 19-washer; 20-protective ring; 21-stem oil seal; 22-rebound buffer (for spring suspension)
On vehicles with front spring suspension and rear with small leaf springs, the front shock absorbers are shorter (by 25 mm).
Shock absorbers with cylinder diameters of 35 mm and 40 mm can be installed on cars. It is allowed to install shock absorbers of different dimensions in a complete set along the axes.