Not every VAZ 2110 car is equipped with fog lights from the factory. How to install and connect fog lights on a VAZ 2110? Our simple instruction will help you!
What you need to have to connect
1) Complete set of fog lights ( GKPTF), the price of the set is about 120 hryvnia (if you don't take the heaped up ones).

Important: for an old-style torpedo, you need a GKPTF set for 2110, if you have a EURO torpedo, buy a GKPTF for 2115 (there is a difference in the buttons).
2) Control lamp (control).
3) Multimeter (special multi-tester).
4) Set of connectors "female" - "male" + 8 connectors "female".
5) Roll of electrical tape.
6) Heat shrink (packaging).
- Electronic wiring diagrams are included in the fog lamp kit.
Fog lights vaz 2110 wiring diagram

connection option 1
1) Open the fuse box, then unscrew the screw, take out and turn over the fuse box. The wires marked in green do not come from the factory and must be added.

2) Cut off two wires of 15 centimeters each from the bundle of wires included in the kit. We attach female connectors at the ends of both wires.
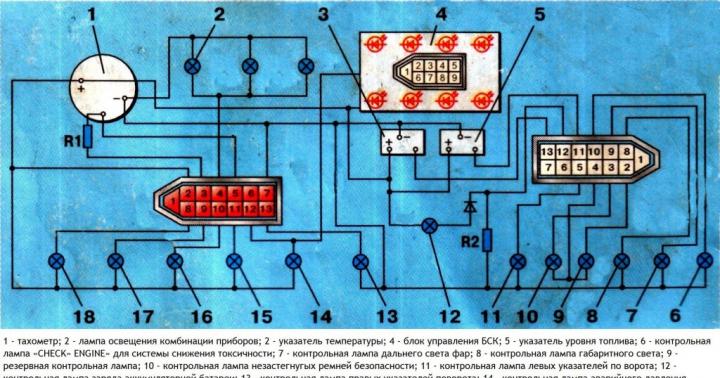
- The red wire, marked in figure 2 with the number 1, is positive, you can even check with a control lamp. We stretch it to the leg number thirty on the back of the relay.

3) The wire, indicated in the figure with number 4 with the number 2, is the pole going from the foot 87 back to the fuse box.

4) We bring red positive wires to the fuses in Figure 5 (they are intended for PTF), after which they diverge one by one to the right and left headlights.

5) We mount the wires, as shown in Figure 7. We attach thirty-centimeter wires with “mothers” at the ends to the connector with a double “mother”.

6) We insert the wires with single “mothers” into the white plug, in the places marked with circles on the fuse box.

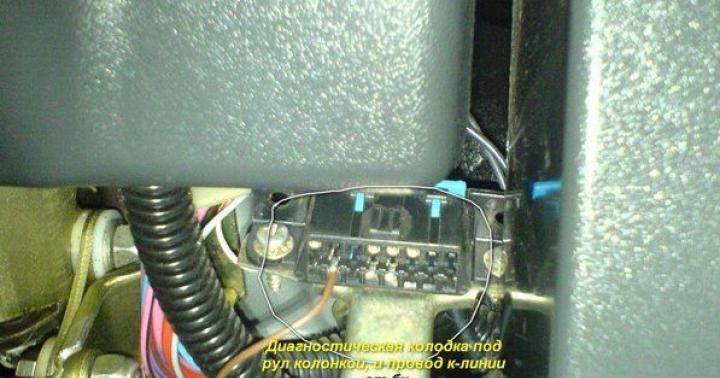
7) We remove the connector with a double mom from the fuse box and connect it to the double “male” connector, which is located behind the trunk release button.

8) The black wire under the number 3 goes from the foot 86 located on the relay and is a minus. It is best to draw the minus from the top of the fuse box. There are already factory black wires, wound under a nut for 10. The wire, indicated by the number 4, is responsible for turning the PTF on and off.

- Several options where to stretch the PTF control wire.
1) From the side lights directly, when the dimensions are turned on, we turn on the PTF.
2) From dimensions with an additional button. Then the inclusion of dimensions only supplies power to the button, and the button itself turns on the PTF.
3. We pass the wire from the ignition switch through the button, as in method 2. This is the most convenient option.
- In photo # 11, number 1 marks the PTF switch-on relay, and number 2 marks the place for the relay of electric lifts. We take two wires from it, lengthen it and display it on the headlights on button. One of them (pink thin in our case) when the ignition is turned on, a "plus" will appear, and the black wire will be "minus".
- For the correct connection of the PTF, it is important to know that the left outlet is located near the radiator, under the left headlight, and is easily fastened with a clamp to the car body. The right exit is located symmetrically under the right headlight.
fog lights vaz 2110 installation outside
1) Remove the plugs in the bumper to insert the headlights.

2) Install the fog lights.

3) We fasten the mounts with two self-tapping screws.

4) It remains to connect the foglights on the VAZ 2110 by connecting the connectors.

- If the PTF is with xenon, then you need a headlight range control to adjust the luminous flux.
connection option 2
1) choose a place for installation - usually a small compartment under the bumper. There are two types of PTF for vaz2110: corrugated (scattering light) and transparent (light comes in spots). Transparent is the more fashionable option, but the least useful.
2) it is necessary to purchase a button with a yellow indicator, wires, a relay, a terminal for ground, a narrow wide “male” type terminals and their corresponding “female” terminals, as well as blocks and frames for headlights.
3) Under the hood, disconnect the wires going to the liquid level sensor and the washer tank. To unscrew the washer reservoir nut and pull out the bundle of wires located under the left side member.
4) In the Sh-1 connector, we need three wires: two yellow-black and one yellow.
5) Then we cut off two pieces from the yellow wire and pull them into the interior of the car. We clean the wires, attach wide terminals of the "dad" type to them, then insert them into the block so that the marked wire connects to the yellow-black one. We connect the block and press two yellow wires to the harness, put the washer reservoir in place.
7) we stretch the fog lamp wire from the front spar, take out both wires where the headlight itself will be attached. We attach a wide ground terminal to each wire.
9) Insert the bulbs into the headlights.
Tip: insert the bulbs into the headlights without touching the bulbs themselves with your fingers. Otherwise, the bulbs will burst after heating. If you suddenly touch the light bulbs, degrease their surface.
10) We attach the yellow wire to the light bulb, and the black wire to the body.
- The entire procedure for installing the PTF takes about two hours.
connection option 3
2) We take the PTF block, and we stretch the red wire to the black box (CHA), we connect it to the relay block No. 85.

3) Contact No. 3 in the block Ш-1 is powered from terminal No. 30 located on the relay block.

4) Contact No. 5 from the block Ш-1 is connected to the terminal No. 87 in the relay block.

5) We connect the black wires using a connector, on the relay block No. 86 and on the contact No. 4 from the block Ш-2.
6) Then we connect the yellow wire to the contact No. 1 of the Sh-1 block, and lead it to the left headlight.

7) We connect the right headlight to contact No. 6 of the Sh-1 block using a yellow-black wire.

8) Insert the Sh-1 block into the connector.

9) Place the relay block on the back of the black box.
10) Let's go to the dashboard. We connect the green wire from the PTF block located on the contact No. 10 to the contact No. 58R (in the photo it is on top).
11) We connect two white wires. One from the PTF block, and the other from the light switch using a connector. Black wire with black, respectively. We return the connections of devices, buttons and visor to their places.
12) We return the button with the PTF wires back to the dashboard case.
13) The remaining two wires: the black one coming from the contact No. 7 and the pink one coming from the contact No. 9 is connected to the indicator of turning on the fog lights through the block.
14) Insert the button into the panel.
Attention: Be sure to check if the button illumination and the PTF turn-on indicator are working.
The connection of the foglights is completed, we additionally recommend watching the training video.
Do-it-yourself xenon installation in vaz 2110 fog lights
- First, we install the H1 bulbs into the plastic bottle cap. Then, using a sealant, into the headlight.
- Often there are cars with xenon installed in the headlights of the main light. If the beam of light at the same time has smooth boundaries, it is even possible to legitimize xenon when processing documents for a car.
- When there are no lenses in the headlights (there is only a reflector), your car exhibits light outside the acceptable limits and leads to blindness of other road users.
- All the advantages of xenon light come with a focusing lens that ensures the correct distribution of the light beam. PTF with xenon light - do not dazzle if they have a focusing lens, and make the fog function better.
In the next section, we will tell you how to install a zero resistance filter on a VAZ 2110.